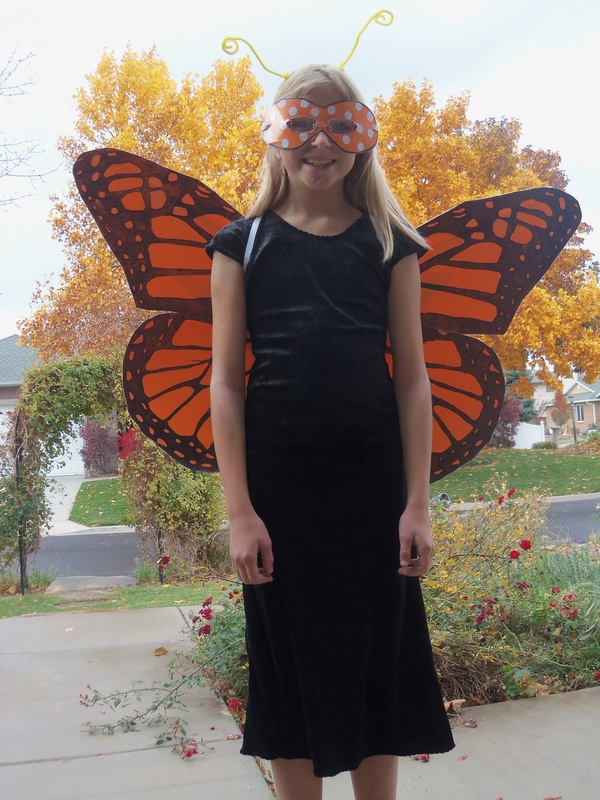
Here's what we used:
2 full-sized posterboard, orange ($1 each)
a realistic drawing of butterfly wings like this
a ruler
2 black Sharpie markers
scissors
Con-tact clear liner (optional)
1 wire hanger
3 hot glue sticks and a glue gun
2 18" wooden dowels (3/8" thick)
1 1/2 yards of 1/4- 1/2" elastic
and for the dress, 1 1/4 yards of black knit crushed panne velvet ($4) and a T-shirt that fit her well to use as a pattern,
but you could use black sweats or whatever else works.
__________________________________
This was really easy for me because she did all the tracing, coloring, and cutting for the wings. :)
And the dress took about 1 hour total, including her doing some of the sewing, from the time I spread the fabric out on my fancy cutting surface (the living room floor) until the time the dress was being slipped over her head.
Quick version of instructions:
1- draw a grid on the butterfly picture and on one posterboard. I used one posterboard for each side of the butterfly. Make a scale drawing on your posterboard using the scale method of drawing. Or if your computer can handle it, enlarge it to be big enough
2- color in the black using the markers.
3- Flip it face-down. Put the other posterboard on top, then put them both up on a window so you can see where to trace for the second set of wings.
4- Cut out, then cover with Con-tact liner if you want.
5- overlap each top wing slightly and glue or tape them on the back so they stay together.
6- using a hanger, hot glue gun, a piece of leftover posterboard, and wooden dowels or something else narrow and stiff, assemble the wings.
7- add two loops of elastic to the center, big enough to go around the child's shoulders. I used two 26" long pieces, then knotted them.
See the slide show to see what I did.
I didn't want to spend as much time on this tutorial as we did on the costume... but if you have questions, leave a comment! :)


 RSS Feed