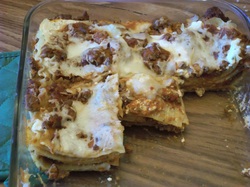
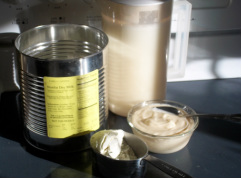
The first couple recipes are below and the next blog post will have the others. You can get all of them without waiting, plus some extra stuff, in a two-page printable format right here. For even more great powdered milk recipes, download the Bee Prepared Pantry Cookbook or the Wooden Spoon class booklet (see here for corrections & notes for the Wooden Spoon booklet.)

All cost estimates are based on paying $1.89/lb for powdered milk, which is the 2013 price at the LDS Church's 'Family Home Storage Center'.
Homemade Cottage Cheese- makes about 16 oz., $ 1.00/batch
4 c. hot water 6 Tbsp. white vinegar
1 ½ c. non-instant dry milk powder ½ tsp. salt, to taste
Stir together water and powdered milk in a saucepan, heat until it starts to steam, stirring. Drip vinegar around the edge of the pan and gently stir; it will immediately start to separate into curds and whey. If it doesn’t, heat it up some more. Let rest one minute. Pour into a cheesecloth-lined colander over a bowl. Save whey, then rinse with hot water, then with cold water and break apart into the size curds you want. Rinse for one minute or until all the whey is out. Add salt. To make it creamy, add 4-6 Tbsp. sour cream, yogurt, evaporated milk, or cream.
The whey may be used in place of liquid (milk or water) in baking. It has vitamins, minerals, some protein, no fat, and some milk sugar (lactose- very low on the glycemic scale.) Since it has the acidity of the vinegar in it, you can add a little baking soda to neutralize and get extra leavening power- use 1 tsp. baking soda per 2-3 cups of acid whey; reduce any baking powder by three times the amount: if using 1 tsp. baking soda, the baking powder is reduced by 3 tsp.

1 ¾ c. regular nonfat dry milk, or 3 c. instant 7 c. hot water (not over 120 degrees)
1/3 c. plain yogurt, with active cultures
Combine dry milk and 4 cups of the water. Whisk or mix in a blender. Add yogurt and whisk. Add remaining water or divide the remaining water evenly between your containers; stir well after adding the milk mixture! Pour into containers, cover, and incubate in a warm place for 4-8 hours or until set. Tip a container after 4 hours to see if it has set. If the yogurt is still liquid, wait 1-2 more hours. It will set up a little more when chilled. Store in fridge. The ideal temperature range for culturing yogurt is 105-120 degrees. The lower of these temperatures you begin culturing at, the sweeter the yogurt will be. The higher, the more tart. Above 120 degrees will kill the bacteria you’re trying to grow. Save 1/3 c. for culturing your next batch.
To flavor your yogurt after it’s made, add fruit, jam, juice concentrate, chocolate milk mix, etc., before eating.
To flavor it before culturing, use 6-8 Tbsp. of sugar per 2-qt batch, or 4-6 Tbsp. honey (dissolve this in your water first, or it will sink to the bottom), or a 3-oz. box of flavored gelatin, or 1/3-1/2 c. jam, or 1 c. chopped or mashed sweetened fruit. The syrup from canned fruit can be used in place of part of the water. If it’s not sweet enough, you can always add sugar when it’s done. 1-2 tsp. vanilla added to the batch is also a nice addition. Make your own combinations- chopped cherries with some vanilla and a little almond extract, blueberries with cream cheese added, toasted coconut with caramel sauce swirled in… let your imagination run wild!
To make firm yogurt that doesn’t become thin after stirring, use 4-6 tsp. unflavored gelatin, or two envelopes, per two-quart batch. Soften it in part of the recipe’s water, then heat gently on stove, in microwave, or over hot water, until the gelatin melts. Add along with remaining water.
 RSS Feed