The Provident Homemaker
  • Recipes and Info
    • Making Bread
  • My Blog
  • Favorite Resources
  • Documents and Files
  • 52 Weeks of Building Storage

Three Month Supply FAQs

4/27/2019

1 Comment

 
Picture
Why store three months of regular food? Is this instead of a year’s supply?

For decades, the Church of Jesus Christ of Latter-day Saints has counseled its members to have at least a year’s supply of food on hand.  That is still the counsel.  
Our modern eating and cooking habits, though, have made it necessary to adjust that storage. The year-supply, long-term storage foods are ones that require cooking skills and time that many people don’t take.  There are many reasons that food storage is a lifesaver—loss of employment, long-term illness, bills that eat up more of the budget than they normally do, natural disasters, and economic upheaval— but if your body is not used to eating whole wheat and beans every day, switching your diet suddenly is a recipe for another hospital stay.  It can even be deadly.  Having 3 months of foods you are used to eating provides a buffer for your time, your diet, and your skill level.  Most family emergencies are over within 3 months. If yours isn’t, though, that 3 months buys you time to start gradually working the long-term storage foods into your diet, so your body adjusts to them. And it gives you time to try out new food storage recipes a little at a time.
The current counsel from our church leaders is to have a three-month supply of foods we normally eat, AND a year’s supply of long-term basic foods.

How much will this cost? Will it be as much as my monthly food budget times three?

Most likely, it will not even be close. To buy your complete three month supply within six months, using the strategies and habits I’ll share next week, will cost around $2/day per person, or $14/person/week.  That may be less than you pay for cell phone service, to say nothing of the cost for the phone itself. 
My experience has been that because of the way you ideally shop for this short-term storage, it costs considerably less than your regular-meals budget.  Can you afford it?  The way I see it, I can’t afford NOT to have a family storehouse.  Most of my shelf-stable grocery items are purchased when each is on sale, usually at 30-70% off the regular price.
 
How often does this food need rotated?  Do I store it and forget it?

That depends largely on what kind of food you get.  Lettuce and cucumbers won't last.

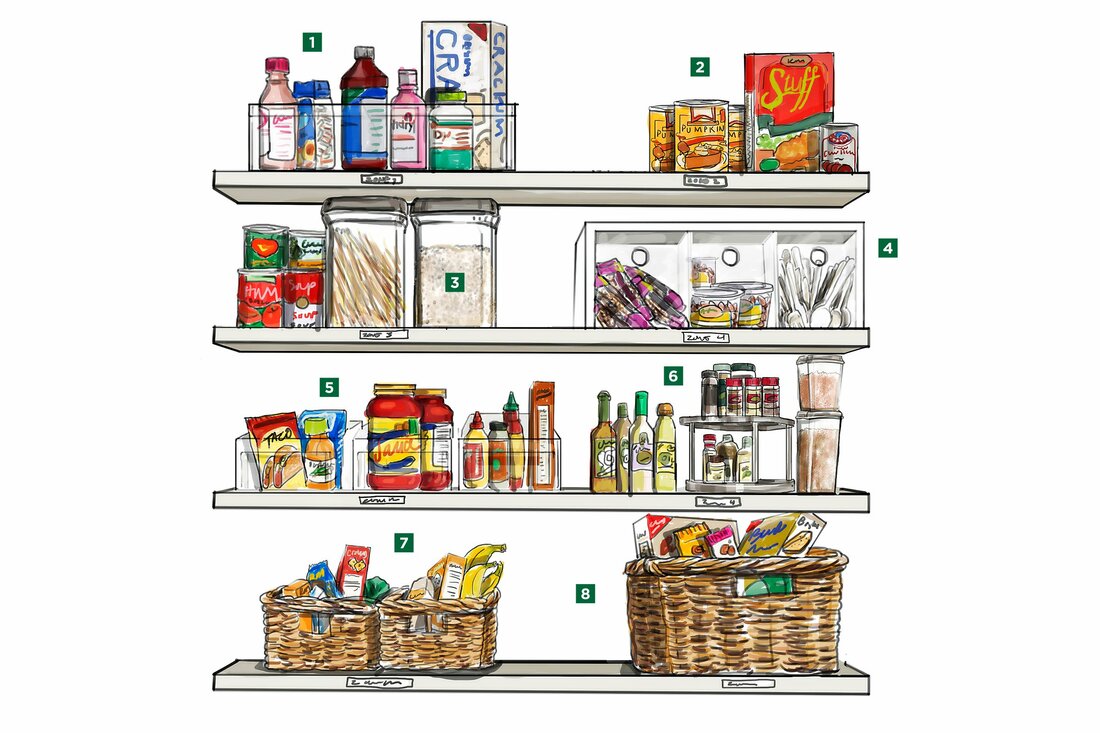
One good storage method has you rotate food once a year, putting the soonest-to-expire shelf-stable foods in your pantry.  Another method—the way I do it—is to treat it as your personal, well-stocked storehouse.  Buy on sale, use what you purchased on sale. That frees up even more of your budget to get food storage!  Freeze-dried, dehydrated, and dry-pack foods can be stored and left alone for a long time.
 
Don’t my regular foods have too short of a shelf life to store this long?

Again, that depends mostly on what they are and how you store them.  The enemies of food are light, heat, water, oxygen, and pests (mostly insects and rodents).  Many fruits and vegetables can store for months at a time in the right temperature and humidity. There are canned versions of most of them. And you can store vegetable seeds as backup for next year’s food.  Well-packaged frozen foods can stay good for a year or more.  (The biggest risk is freezer burn, but the food is still usable, especially when added to soups.)


What about those dates on boxed and canned food?   

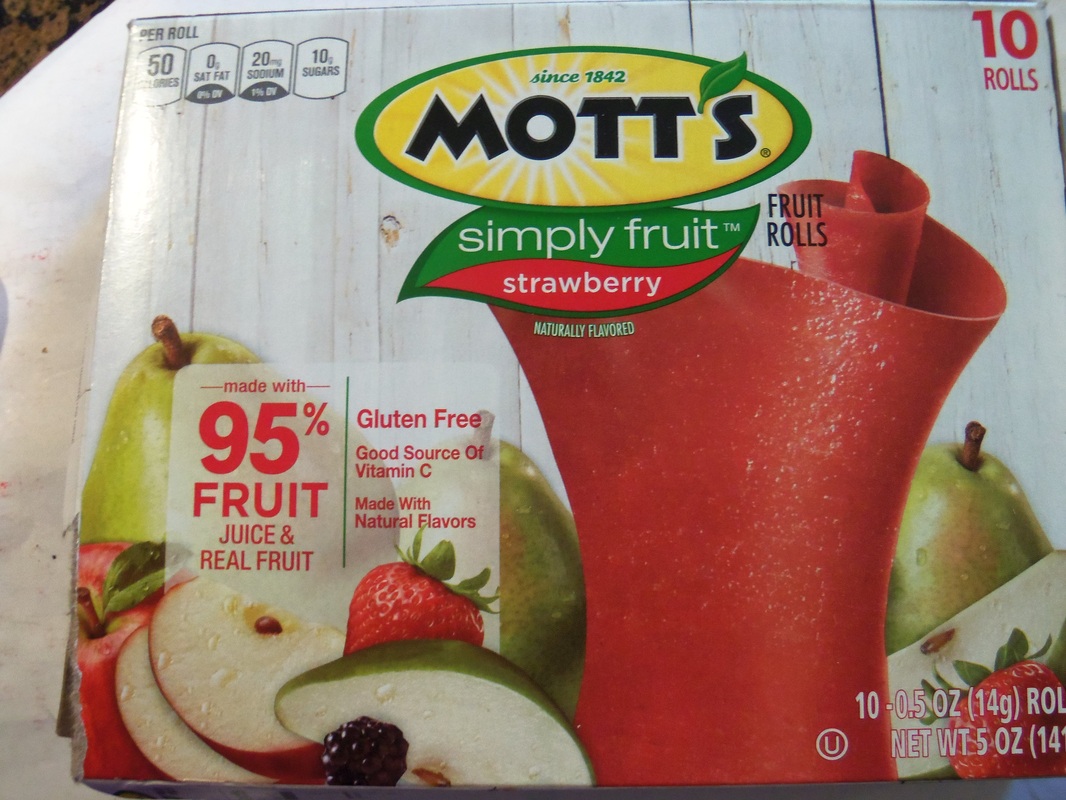
The date on the box or can is NOT the date by which the food will spoil; it’s an arbitrary date the manufacturer stamped on it for purposes of guaranteeing its quality.  Boxed and bagged food-- including breakfast cereal-- when stored properly, can easily last 2-3 years before developing off-flavors. (High-fat foods can get rancid before then; it won't hurt you, but doesn't taste good!) 

Are canned foods safe after their 'best by' date?

While canned foods do eventually lose some of their vitamins and texture, they remain safe and able to sustain life as long as the seal is intact. I know of at least two accounts of separate ships that sank with canned food aboard
.  More than 100 years later, the boats were found, the cans brought up and cleaned off.  Some of the cans were opened and tested; the food was safe and still contained the protein and minerals.  

Here is a statement directly from the Canned Food Alliance--
 “Canning is one of the safest ways to preserve foods. To retain peak quality, the shelf life of canned food is at least two years… The food maintains its high eating quality for more than two years and is safe to eat as long as the container is not damaged in any way.”

If a can is damaged, bulging, or weeping, the seal may have been broken. Toss it out.  The exception to this is tomato products; if they bulge slightly or spurt when you open it, this is not from microbial growth, but from electrolysis between the acidic tomato and the metal can. It forms gas as a by-product.

And the biggest question--

How do I know how much to store?? 
That question gets its own blog post. 

What questions do you still have? Ask in the comments below, and your question may get added to the FAQs.


1 Comment

Week 2 of 52-- Where Do I Store this?

4/19/2019

0 Comments

 
​Now that you've decided it's time to prepare for your family and neighbors, where in the world are you going to fit the necessary food into your house?  If you have a cool, dark room available, that's perfect.  If you're struggling to come up with a place to put food storage, read through these reader-generated suggestions: 
​
​Small spaces solution list 


Click to set custom HTML
Wherever it is—a spare room, a spare corner of an occupied room, a corner of a basement, in an insulated garage or shed, in a closet—you will certainly want at least one shelf to store on.  Find one and set it up.  Strong shelves (ones that can handle at least a couple hundred pounds per level) can be purchased at stores like Lowe’s, Home Depot, Sam’s Club, Costco. One 4’x2’x8’ shelf will typically cost between $70-120. 

If you'd like some ideas on earthquake-proofing your shelves, see here.


To sum up, your task this week is to find a place you can store shelf-stable food,

Get a shelf, and

Set it up.

That's it!
0 Comments

Week 1 of 52- Food Storage: Why? What? How?

4/12/2019

1 Comment

 
WHY?
“Our Heavenly Father created this beautiful earth, with all its abundance, for our benefit and use. His purpose is to provide for our needs as we walk in faith and obedience. He has lovingly commanded us to ‘prepare every needful thing’ (see Doctrine and Covenants 109:8) so that, should adversity come, we may care for ourselves and our neighbors, and support bishops as they care for others.”

“We encourage members worldwide to prepare for adversity in life by having a basic supply of food and water and some money in savings. We ask that you be wise, and do not go to extremes. With careful planning, you can, over time, establish a home storage supply and a financial reserve.” (See All Is Safely Gathered In.)  

Personal preparedness and provident living are part of the Gospel of Jesus Christ. They allow us to handle more of our own needs, and to serve others. 

An earlier Presiding Bishop declared, "The Lord will make it possible, if we make a firm commitment, for every Latter-day Saint family to have a year’s supply of food reserves by [a year from today]. All we have to do is to decide, commit to do it, and then keep the commitment. Miracles will take place; the way will be opened, and next April we will have our storage areas filled. We will prove through our actions our willingness to follow our beloved prophet and the Brethren, which will bring security to us and our families."  

This 52-week blog series is designed to help you get your 3-month and year-supply over the next 12 months.   If you already have your short-term storage, start at Week 26, with the long-term storage foods plan.

Spencer W. Kimball taught,

“Zion is a name given by the Lord to his covenant people, who are characterized by purity of heart and faithfulness in caring for the poor, the needy, and the distressed. (See D&C 97:21.)
‘And the Lord called his people Zion, because they were of one heart and one mind, and dwelt in righteousness; and there was no poor among them.’ (Moses 7:18.) This highest order of priesthood society is founded on the doctrines of love, service, work, self-reliance, and stewardship, all of which are circumscribed by the covenant of consecration.” (General Conference, Oct. 1977; or Ensign, Nov. 1977)


What should you have in your food storage?  
1- Food -- a 3-month supply of things you eat every day, and a year's worth of foods that store well for a long time.  The 3-month supply will be used on a daily or weekly basis; the long-term foods can be used any time-- but do spend time learning to cook with them!  Here's a little-known secret: Once you get your 3-month supply, you're more than halfway done; a year of long-term basic foods are cheaper and simpler to get.  

2- Water-- at least a two week's supply.  A gallon per person, per day, is the minimum.  That's fourteen gallons per person, as a starting number.  I like to keep some of it under each sink in the house.  2-liter bottles and plastic 2-quart juice containers, washed out and refilled, are the perfect size for this.  This is great for the times the water is off for a little while, and the sinks are exactly where you'll want to have containers you can easily pour.  Bigger water storage containers may be kept in the basement, the garage, or in a protected area outside.

3- Financial Reserve   This will likely take a few forms. One is to have some cash on hand, in small bills, in event of short-term emergencies like widespread power outages. Another type of reserve is a personal emergency fund.  A thousand dollars, sitting in a safe and accessible account, will be enough to deal with most emergencies.  A third kind of reserve is to have is enough savings to cover bills for at least 3-6 months.  A year is even better. 

See the ProvidentLiving website for more details on these. 

​
How do I begin?
First, be determined that this is going to happen, starting today.  As Bishop Featherstone said, above, "All we have to do is to decide, commit to do it, and then keep the commitment. Miracles will take place"!  Pray to see how to do this. Bishop Featherstone lists several ways to find the money.

The next step in getting your family storehouse is to take inventory of what you have.  (All stores have to take inventory! At least yearly.) Get a notebook or a clipboard, and write down all the food you have in the house.  Group them in categories that make sense to you.  Put it in a safe place that you'll remember, whether digital or hard copy. You'll use this list in the next two weeks.  

Go through your budget and see where you can free up some money; for food prices in my area, you'll likely need $12-24 per person, per week, to get the 3 month + year's supply within a year. If that seems out of reach, read the Featherstone talk, and remember that the Lord can multiply your efforts.  

1 Comment

Pineapple Coconut Bread Pudding

1/23/2016

1 Comment

 
Picture


Pineapple-Coconut Bread Pudding 
1 (20-oz) can crushed pineapple
¾ cup sugar, divided
2 c. cream or coconut cream*
½ tsp. salt, divided
1 loaf stale French bread, cut in 1" cubes, or a pound of other bread, cubed
1/2 tsp. cardamom
3-4 eggs 
1 c. whole milk or coconut milk
2 tsp. vanilla
1/2 c. shredded coconut

If your bread isn't already stale and dry, put the bread cubes in the oven at 375 until they're dried out.  
Make a caramel sauce- combine 2 Tbsp. juice from the canned pineapple with 1/2 c. sugar in a saucepan.  Heat on high until brown, stirring often.  Add 3/4 c. cream; stir until the caramel chunk has dissolved.  Add 1/4 tsp. salt.  Pour about half of this into the bottom of a greased 9x13 pan.  Save the rest.
Mix together bread, undrained pineapple and cardamom.  Dump into a 9x13 pan.  Using the same bowl as before, beat the eggs, then stir in 1/4 c. sugar, the remaining cream, milk, vanilla, and 1/4 tsp. salt.  Mix until  sugar dissolves.  Pour all of this over the bread and let sit for 5-20 minutes to soak.  Sprinkle the coconut over the top.                                          

Bake at 375 degrees for 30-35 minutes, until center is set.  Serve warm, with a little of the remaining caramel sauce drizzled on top.

*If you don't have cream, use milk instead, for a total of 3 cups.  Also melt 1/4 c. butter and beat it in with the eggs.


1 Comment

What no one tells you about 'orientation'

1/14/2016

2 Comments

 
This may seem like an odd topic for a blog with a name like "The Provident Homemaker".  However, part of the meaning of 'provident' is 'preparing'; and we have some serious mental and spiritual preparing to do.  So what is this about?

There are a number of words that are no longer understood to mean what they used to; words that have been intentionally corrupted.  I've been watching for them; they include emotional trigger words like
"liberal", "rigorous", "liberty", and "discriminate".    After reading this article about a possible ban in Cincinnati on reparative therapy, I got wondering about the word choice in the phrase 'sexual orientation':  (Turns out, this law proposal was sparked as a revolt against parental rights, not only retaliation against God's word. Read the article.)

Turns out that I now have another word to add to my "words co-opted" list: 
"Orientation". 
"the act or process of orienting" or " the state of being oriented".
(Dictionary.com)

At i.word.com, "orient" includes this: 
1 a :to cause to face or point toward the east specifically :to build (a church or temple) with the longitudinal axis pointing eastward and the chief altar at the eastern end
c :to ascertain the bearings of

2 a :to set right by adjusting to facts or principles
b :to acquaint with the existing situation or environment

3 :to direct (as a book or film) toward the interests of a particular group

4 :to cause the axes of the molecules of to assume the same direction"


In other words, orientation is a PROCESS of getting your bearings, setting a course, getting every molecule of your being to align, facing a particular direction. This contradicts the claims that one is born this way and unable to change that. It denies the human ability to grow and adjust, and especially denies the power of the Savior and his Atonement. In addition, the origins of the word actually point to Christ:

orient (verb)-
etymonline.com  "c. 1727, originally "to arrange facing east," from French s'orienter, literally "to face the east" (also the source of German orientierung), from Old French orient "east," from Latin orientum (see Orient)
The east, as you may know from one of the earlier definitions above, or from the common LDS ("Latter Day Saint"/"
Mormon")  practice of having the angel on our temples face that direction, is emblematic of facing and welcoming Christ. Not only does the light of the world rise each morning in the east, but that is the direction Christ is to come from at his coming in glory as our king.

As phrased by Elder Lynn G. Robbins at a recent LDS Conference,
'Which way do you face?'

Do you face towards the family as created by God and Nature?  A mother, a father, bound together by covenants and promises, determined in their loyalty and support to each other and to their children.  It is the basic unit of society, the intended privilege of every child, and when it fails, neighborhoods, cities, and nations are left trying to pick up the pieces; pieces that cannot be completely picked up and mended by human hands.   Does the traditional family matter?  Yes!  It is at the core of God's plan for our happiness. He commanded our first parents, Adam and Eve, to multiply, to provide bodies for His spirit children, and then to teach those precious spirits in the Lord's way: the way of growth and safety.  

What about our day?  Paul warned that "the time will come when they will not endure sound doctrine; but after their own lusts shall they heap to themselves teachers, having itching ears;
And they shall turn away their ears from the truth, and shall be turned unto fables." - 2 Tim. 4:3-4

As a modern apostle, Dallin H. Oaks, once said, “followers of Christ [must] think differently than others." 
 (“As He Thinketh in His Heart,” 8 February 2013). Jesus' response to the mocking Pharisees was, “Ye are they which justify yourselves before men; but God knoweth your hearts:  for that which is highly esteemed among men is abomination in the sight of God” (Luke 16:15).

Humanism says there is no right, no wrong and no God. Instead, I assert that this life is Act 2 in a 3-act play, and God gives inspired commandments to enable us to have real happiness now and the best possibilities in that next, much longer, Act 3.  As we learn to think like God, we can develop the ability to see the genuine truth of all things, and will tap into the power to align our wills and actions to his Word, the Lord Jesus Christ.

2 Comments

Storing Food through the Winter

11/27/2015

0 Comments

 
There are lots of fresh foods you can store without needing a freezer, canner, or fridge.  I haven't built a root cellar, but discovered that different places in my yard, garage, and house have the right conditions for several of these foods.
Potatoes are happy on my bare garage floor until late January. After January they have to be moved up 1-2 feet, onto the cement stairs, to avoid freezing. Same with onions. Apples are better in the garage on the workbench, which is a couple feet off the ground and a few degrees warmer (but still cold). Pumpkins are happy in the basement or in a dark closet, off the floor so they avoid moisture. Carrots and parsnips are fine to leave in the ground, covered with a pile of dead leaves or a thick layer of straw if I want any hope of digging them during the winter. Otherwise they can be dug in spring, after the winter cold has made them sweeter.The link below is a 5-page handout from the University of Wisconsin which lists types of foods, their ideal storing temperature and any necessary humidity, expected length of storage, and plans for creating your own root cellar.

http://nchfp.uga.edu/how/store/wisc_vegetables.pdf

What will you store this year?


Picture
0 Comments

Week 4 Preparedness Challenge

10/24/2015

0 Comments

 
Week 4- make a plan to obtain the food storage. Do something to start. What you do depends on where YOU are and what your circumstances are.  This article is a good starting point.  
This post is longer, in order to try to give pointers and resources to everyone in every stage of preparedness.  Use what's useful, ignore the rest until you're ready for it.
If you're trying to figure how on earth to buy that extra food... case lot sales are going on right now, where items are often half the regular price. Some places- like the Bosch Kitchen Centers in Orem, Sandy, and on Highland Drive--  have Conference sales for long-storage items like wheat and honey.  Plus the Home Storage Center has fantastic prices on wheat, beans, and more.  You do not need to be a LDS church member to purchase items there.
Set aside a certain amount of money each month, and use it. For more ideas, see this Conference talk by Elder Featherstone.

Do you need your 3-month supply?  Do you have that in place and are ready to move on to building your long-term ("year") supply?  Do you have long-term storage but just need to get organized or fill in some gaps?  

To build a three-month supply, you and your family decide on 2 weeks of meals that they like.  Figure how much of each food item you need for that two weeks, and multiply by 6.  This gives you three months!  Remember that what you already have counts towards this amount.  I have a series of blog posts on a three-month supply, too.

To build long-term storage, first figure how much you need.  I've compiledinformation about that, here. There's even more, here.  It really is not as overwhelming as it sounds.  You'll likely spend as much money on the three-month supply as you will the entire rest of the year's worth; basics are cheap.  Last time I ran numbers, getting that 9-months-more of storage was under $250 per adult, and less for children. (See the link earlier in this paragraph for children's quantities.)  There is a useful spreadsheet here; feel free to change quantities for the different grains, as long as the total remains 300-400 lbs.

"Food storage is often characterized by worldly critics as eccentric — just steps away from building a nuclear bomb shelter under your house and stocking it with guns, ammo and dehydrated rations.

If you have held back from applying your imagination and effort to storing some necessities for a rainy day, let me ask this: Have you ever saved for your child’s education? Have you ever hurried to buy airline tickets a month in advance of Christmas, because you knew that available seats would disappear if you waited longer?

Do you pay for health, disability, auto, or life insurance, even though you are healthy and able, you don’t plan to be in an auto accident, and you are indeed alive and well? Then you are a candidate for food storage and a provident lifestyle.

Even if you never use your food storage for an emergency if you store what you eat and eat what you store and you will always be eating at last year’s prices. You will never have to pay full price for food in the future. Even food goes on sale. It is really that simple. Who wouldn’t love that?" -Carolyn Nicolaysen

President Monson said, one year ago, "We should remember that the best storehouse system would be for every family in the Church to have a supply of food, clothing, and, where possible, other necessities of life... Are we prepared for the emergencies in our lives? Are our skills perfected? Do we live providently? Do we have our reserve supply on hand? Are we obedient to the commandments of God? Are we responsive to the teachings of prophets? Are we prepared to give of our substance to the poor, the needy? Are we square with the Lord?

"We live in turbulent times. Often the future is unknown; therefore, it behooves us to prepare for uncertainties. When the time for decision arrives, the time for preparation is past." 
("Are We Prepared?", Sept. 2014 Ensign magazine)

"It requires faith even among the Latter-day Saints to believe the revelations of God, and to prepare themselves for those things which await the world… And what I wish to say to the Elders and to the Latter-day Saints is—Have we faith in God and in his revelations? Have we faith in our own religion? Have we faith in Jesus Christ? Have we faith in the words of the Prophets?...
If we have faith in these things, then we certainly should prepare ourselves for the fulfillment of them.'
-Wilford Woodruff, "The Parable of the Ten Virgins"


0 Comments

Week 3 Preparedness Challenge

9/26/2015

0 Comments

 
Food storage challenge of the week:

Take inventory of what you have.   Include your fridge,  freezer,  pantry,  basement, ... wherever you have food on hand.

Years ago,  Elder Vaughn J. Featherstone suggested three steps to building your food storage:
1- Inventory what you have

2- decide what you will need to bring levels to where they should be.  That gets broken into a couple steps because now the Church recommends having a 3- month supply of your everyday food,  in addition to the long - term storage foods for a year's supply.   More on that later.

3- Work out a time schedule for when you'll have that 3- month and/or year of food.   I'll send more on how to afford that,  next week.

Then,  of course,  begin.   Or, rather,  continue: you already have begun if you have even one can or box of food on hand! 

- Rhonda

"The Lord will make it possible, if we make a firm commitment, for every Latter-day Saint family to have a year’s supply of food reserves…. All we have to do is to decide, commit to do it, and then keep the commitment. Miracles will take place; the way will be opened… We will prove through our actions our willingness to follow our beloved prophet and the Brethren, which will bring security to us and our families.” 
-Vaughn J. Featherstone

https://www.lds.org/general-conference/1976/04/food-storage?lang=eng

0 Comments

Week 2 Preparedness Challenge

9/20/2015

0 Comments

 
Week 2's challenge is to determine how much water YOU should store, and begin working towards that.

Recommended water storage quantity
:  14 gallons per person.  This is enough to meet basic needs for two weeks:  1 gallon per person per day.  Read more about that here.

Free water storage options:  use 2- or 3-liter soda bottles, 2-qt juice bottles, or any other food-grade plastic container that says PETE on the bottom and has a tight-fitting lid. Do not use milk jugs; they eventually weaken and leak.
Other options: You can often find 35- and 55-gallon blue water storage barrels for sale on the local online classified ads; in Utah they’re also at Macey’s grocery store, Industrial Container, emergency supply stores, and sometimes at Walmart. Used barrels are usually sold for one of two reasons:  someone is moving or just tired of storing the barrels, or they’re being sold by a business after having syrup or other liquid in them.  They are the containers soda companies have their syrup in when it comes to them.  Clean them out and they’re great.  There are also larger size containers you can find—100 gallons or more--, either new or used. 
When purchasing new containers, typically count on $.75-1.50 per gallon capacity, i.e. 55-gallon barrel may cost about $50-75.  You can find them cheaper if you watch sales and ads, or sometimes if you join a group buy.                

 -Rhonda

0 Comments

Creamy Lime Pie Cookies

9/18/2015

0 Comments

 
This is my new favorite cookie.  It is for this week, anyway.  My kids and I invented cookies for a bake-off at the state fair, and this is one of the results.  One of the others we made took first place, but this one is my personal favorite.    
Contests are funny things anyway:  you'd think the best-tasting item wins, but that's not necessarily the case.  First of all, "best taste" always depends on who's doing the tasting. Or the judging, in this case.  Secondly, cookies are given a score, and in this contest, only 40% of it is from how the cookie tastes.  30% is how attractive it ('and its surroundings) are, and 30% here was 'creativity', which, like taste, is very subjective.  

This cookie was dreamed up by a daughter who loves key lime pie, and wanted a cookie that tasted like it.  You'll have extra frosting; you can make a half batch, or it can be frozen, or used to frost cupcakes, or spread on graham crackers... or eaten on a spoon!
My friend who dislikes frosting, likes this  frosting.
Picture
Creamy Lime Pie Cookies 
Makes 2- 2 ½ dozen

Graham Cracker Sugar Cookie:

¾ c. granulated sugar 
½ c. butter or shortening or coconut oil
1 egg
1 tsp. vanilla
1 sleeve graham cracker, finely crushed (about 1 ½ c.)
½ tsp. salt
½ tsp. baking soda
1 c. flour
¼ c. limeade concentrate, thawed.

Heat oven to 375 degrees. Cream shortening and sugar, add egg and vanilla.  Add cracker crumbs, salt, and baking soda; beat well. Mix in flour. Drop by heaping spoonful on lightly greased cookie sheet.  Bake 7-8 minutes.  Let cookies cool two minutes, then brush with the limeade concentrate.  All of it should be gone once all cookies are brushed.  Cool completely before frosting generously with Creamy Lime Frosting.


Creamy Lime Frosting

1 cube butter
2 c. powdered sugar
1 ½ tsp. vanilla
1/16 tsp. salt
4 drops green food color, optional
¼ c. limeade concentrate, mostly thawed
8 oz. cream cheese, still cool, cut in 1” cubes

In a medium bowl, combine butter, powdered sugar, vanilla, salt, and green food color.  Beat until fluffy.  Add limeade concentrate and whip the mixture.  Add cream cheese, a couple cubes at a time, and beat until mixed thoroughly.  Beat on high until light and fluffy, but don’t overbeat or it will go runny.
Picture


0 Comments

What kind of preparedness? & Week 1 Challenge

9/1/2015

0 Comments

 
September is National Preparedness Month.  Each week this month I'll post a weekly challenge of something simple you can do, with no money at all if that's where you are.

We should be prepared for what?
Emergencies. Job loss.  "Eventualities"... like that earthquake we've been told to expect someday.  Illness.  Unavailability of water because somebody broke a water main.  Power outages, long or short.  You name it.
Life.  

Here's a quick overview of some good recommendations for Personal or Family Emergency Planning

Items to consider may include:
•Three-month supply of food that is part of your normal daily diet.
•Drinking water.
•Financial reserves.
•Longer-term supply of basic food items.
•Medication and first aid supplies.
•Clothing and bedding.
•Important documents.
•Ways to communicate with family following a disaster
.

See providentliving.org for more information.

WEEK 1 CHALLENGE:
Create a family emergency contact plan and share it with your immediate family so everyone knows what to do, where/who to call or text, who will be your out-of-state contact, what are the emergency plans at your kids' schools, workplace, how to get people back home... 

The link below has a simple form you can use, and the second page of it has cards to fill out with the info you need, for you or your children to carry.

http://www.ready.gov/sites/default/files/documents/files/Family_Emegency_Plan.pdf

Will you accept the challenge?  I'd love to hear what you did.


0 Comments

April Fools' Day Breakfast

3/31/2015

0 Comments

 
Picture
Mmm.... bacon, eggs, and toast!   

Or not.

Toast:
Pound cake, sliced and toasted.  Then buttered.

Eggs:
The white:  I used some quick frosting  (1 cup powdered sugar, 2 tbsp. melted coconut oil, a bit of vanilla, and enough milk-- any kind-- to let it softly hold its shape.)  Other options include nearly-melted commercial vanilla frosting, stirred sour cream, stirred vanilla yogurt, or stirred Greek yogurt.
The center is a dried apricot, plumped in hot water for about 20 minutes, then blotted dry and shaped by hand to look more round.  I stuck a whole almond inside to make the 'yolk' stand up better.
To make the 'yolk' look more wet, I brushed it with a little bit of corn syrup.

Bacon:
Today I found some natural fruit rolls that I'd not seen before.  I bought some, and found that rather than being the smooth, flat rollup I expected, it was full of different thicknesses in the stripes the machine put down.  This enabled it to pull off in strips to eat.  And it resembled bacon!  One roll yields about four  1 1/4" wide strips, which I cut using a pizza cutter.   Make them ripple a bit when you put them down.
Picture
0 Comments

Creamy High-Protein Pasta, Dairy Free

3/23/2015

2 Comments

 
Picture
This is meat-free, dairy-free, and in the photo above, also made using gluten-free pasta.  Its rich and creamy taste would never make you suspect there are so many 'normal' ingredients missing.  You will not taste the avocado, and surprisingly, it doesn't even make the sauce look green.  It adds richness along with those healthy, satisfying fats.  
If you used canned chickpeas, you'll have about one cup extra; you can either stir those in with the pasta, or save them for another use.
If you don't have an avocado, or don't want to use one, omit it and increase the chickpeas to three cups instead.

12-16 oz. pasta, cooked according to directions; save the cooking water
1 Tbsp. olive oil
3 cloves garlic, minced
2 cups cooked chickpeas- or use 2 cups from two (14-oz) cans, drained
one 6" sprig fresh rosemary, or 1-2 tsp. dried rosemary
1/4 tsp. red pepper flakes
1 medium avocado, peel and pit removed
1 Tbsp. lemon juice
salt and freshly ground black pepper to taste
1/4 c. chopped fresh parsley, or 1 1/2 Tbsp. dried parsley

While the pasta is cooking, heat 1 Tbsp. olive oil in a small skillet over medium-high heat. Add the garlic; cook and stir 2-3 minutes or until fragrant.

In a blender, combine 3 cups of the pasta cooking water (may also use the water drained off the cans of chickpeas), chickpeas, rosemary, red pepper, avocado, and lemon juice.  Blend on high until smooth.  Add salt and pepper to taste (start with 1/2 tsp. salt), and stir in parsley.  
Pour over pasta and toss to coat.  
If the sauce is too thick, add water 1 Tbsp. at a time until it's the consistency you like.  


2 Comments

Favorite Sugar Cookies

2/12/2015

0 Comments

 
Picture
To make cookie pops like the photo above, set the unbaked cookie on top of a craft stick before baking the cookies.  Be sure to cover at least 1 to 1 1/2 inches of the craft stick; press down gently on the dough.  

This recipe makes about two dozen, 3" round cookies.

Soft Sugar Cookies
1 stick butter (1/2 c.), softened
1 c. sugar
1 egg
1/3 c. buttermilk, kefir, OR sour milk (add 1 Tbsp. lemon juice to fresh milk to make 1/3 c.)
1 tsp. vanilla
1/2 tsp. baking soda
1 tsp. baking powder
1/2 tsp. salt
2 1/2 c. flour

Preheat oven to 375 degrees F.  Cream the butter with sugar; beat in the egg, buttermilk, and vanilla.  Combine baking soda, baking powder, salt, and flour; stir in to the other ingredients.  Grease or spray a cookie sheet.  

Put half the dough on a flour-sprinkled counter top.  Sprinkle a little flour on top to prevent your rolling pin from sticking, then roll about 3/8" thick.  Cut out with cookie cutters or canning jar rings.  (I used a ring from a regular-sized canning jar.)

 Bake for 7-10 minutes, depending on size and thickness, until  light golden brown on edges and underside.  Cool completely; frost with your favorite frosting if you like. 

This recipe also makes a great base for a Cookie Pizza.

Picture
To make the rose leaves, sprinkle some sugar on a flat surface, roll a gumdrop flat, a little bit at a time, flipping the gumdrop often so it stays coated with sugar as it flattens.  Trim with a knife or scissors.
0 Comments

Do you want more?

2/2/2015

0 Comments

 
Picture
I've been thinking about some things lately.
More.

It's part of our nature to want more. 
We can focus on getting more stuff, more attention, more money... 
but those are for earth-life only. They stay behind when our mortal frame returns to dust. 

The Lord offers more than that. More than the whole world holds and offers: "all that my Father hath" (D&C 84:38).  More friendship.  More family love.  More light.  More learning.

More than we can fathom. How much more?

"But as it is written, Eye hath not seen, nor ear heard, neither have entered into the heart of man, the things which God hath prepared for them that love him." (1 Cor. 2:9)

Brigham Young explained, "To finite capacity there is much which appears mysterious in the plan of salvation, and there is an eternity of mystery to be unfolded to us; and when we have lived millions of years in the presence of God and angels, and have associated with heavenly beings, shall we then cease learning? No, or eternity ceases. There is no end. We go from grace to grace, from light to light, from truth to truth.”

What else?

"We have more friends behind the veil than on this side, and they will hail us more joyfully than you were ever welcomed by your parents and friends in this world; and you will rejoice more when you meet them than you ever rejoiced to see a friend in this life; and then we shall go on from step to step, from rejoicing to rejoicing, and from one intelligence and power to another, our happiness becoming more and more exquisite and sensible as we proceed in the words and powers of life."
–(emphasis mine), Journal of Discourses, volume 6, pgs. 342-349

May we always work for the kind of "more" that  makes us 'more' useful in God's hands and gives us more happiness.  Real happiness.

0 Comments

Impossible Pumpkin Pie

11/24/2014

0 Comments

 
Picture
Do you feel completely inept when it comes to making pie crust? Here's a recipe you'll love! You can even make it in the microwave instead of the oven.

Impossible Pumpkin Pie
(This pie makes its own crust)

2 c. pumpkin puree
3/4 c. sugar
1 can (12 oz.) evaporated milk 
½ c. Bisquick (or ½ c. flour plus ½ tsp. baking powder)
2 Tbsp. butter or margarine, softened 
2 eggs 
2 tsp. vanilla 
2 ½ tsp. pumpkin pie spice (or 1 tsp. cinnamon, and ½ tsp. each ground cloves,
ginger, and nutmeg)


Beat all ingredients 1 minute in a blend on high or 2 minutes with hand beater. Pour into greased pie plate. Bake at 375 about 45-50 minutes or till knife inserted in center comes out clean. Cool on a flat, heatproof surface (not on a wire rack).

Microwave instructions: place on an inverted (microwavable) dinner plate on medium high (70% power), rotating pie plate 1/4 turn every 5 minutes (unless you have an automatic turntable- then use that). Cook until knife inserted in center comes out clean, 22 to 32 minutes.

0 Comments

Pumpkin Cake Roll

11/17/2014

0 Comments

 
Picture
Pumpkin Roll
Makes 18, 1" slices.  

4 eggs                                                                          
1 1/3 c. sugar
1 c. pumpkin                                                             
1 c. flour                                                                    
1 tsp. baking powder
1 Tbsp. cinnamon                                                            
1 1/2 tsp. ginger
3/4 tsp. nutmeg                                                              
½ tsp. salt
1 c. chopped nuts, optional

Beat eggs until well mixed.  Gradually add sugar; this should take about two minutes.  Beat on high for another two minutes, until sugar is mostly dissolved and the mixture is thick and pale lemon-colored..  Stir in pumpkin.  Fold in flour, baking powder, spices, and nuts.  Grease and flour a 12x18" cookie sheet with 1" high sides, OR line it with parchment and grease the pan sides..  Spread batter in pan and sprinkle with nuts.  Bake at 375 for about 15 minutes, or til the cake springs back when pressed gently in the center.  Remove from oven.  While cake is hot, flip cake over onto a kitchen towel sprinkled liberally with powdered sugar.  Holding one of the wide sides of the cake, very carefully roll it up with the towel, cinnamon roll style. When cool, 2 to 4 hours later, unroll slowly and spread with cream cheese frosting.  Roll the cake again, without the towel!  Slice and serve. 

You can make this ahead of time and freeze it for later use.
If you don't have a 12x18" pan, but have a 10x15 pan, cut the recipe in half.  The batter will not be as deep in the pan, so bake a few minutes less.  (Mine took 12 minutes.)  Roll as above, but hold a narrow side as you roll it up.  This will give you one 10" wide roll.

Fluffy Cream Cheese Frosting
(the 1-1-1-1-1 recipe)

1 stick butter (1/2 c.), softened
1 c. powdered sugar                                                     
1 Tbsp. lemon juice OR water or milk (lemon accents the zing of the cream cheese)
1 tsp. vanilla
1 (8 oz.) pkg. cream cheese, chilled and cut into 8 cubes                                          

Combine butter with powdered sugar, lemon juice, and vanilla.  Beat until smooth.  Add cream cheese, one cube at a time, beating until smooth after each.  Once they're all incorporated, beat another minute or until frosting is fluffy.
0 Comments

Elsa Cape

10/24/2014

0 Comments

 
Picture
Here's a simple way to make a frosty cape for an Elsa costume.  My daughter and I are delighted with how it turned out:  so dainty and elegant!  You'll need one full-size sheet of paper, a can of white spray paint, and fabric.  For my 6-year-old's costume, I bought 1 1/3 yards of 60" wide nylon tulle, pale turquoise color.  Sheer nylon tricot or sheer chiffon would also work, and be less prone to ripping.  (No, ours has not ripped yet.)

Lay out the fabric and fold in half lengthwise, so it's 60" long and half the width you bought.  Cut 4-6" wide scallops along one narrow end.  

Fold the paper and cut out a simple six-pointed star.  Mine was about 4" across.  I reinforced the paper (now my stencil) and helped it lie flat by running 2" wide packing tape in a square around the snowflake.

  Spread the fabric on top of something clean that you don't care if paint gets on.  Darker colors under will make it easier to see the white paint.  In my case, I spread this on the lawn; we have a frosty decoration on it until next mowing!

Spray into your stencil, focusing on the center first, then spraying the points.  Continue until you have all you want, occasionally stopping to wipe excess paint off the stencil (the grass was good for this, too). 

Once the snowflakes are sprayed, 'frost' the edges and scallops of the cape by spraying along the edges.  

With some silver glitter glue or silver sparkle paint, draw on the snowflakes. Add some smaller ones made with only the silver.    Let dry completely.
0 Comments

Peachy Pecan Coffeecake

9/23/2014

0 Comments

 
Picture
We have one peach tree, a fairly early variety.  The little thing produced itself proud this year; we kept thinning, and thinning those peaches throughout the season, fearing the weight of the ripened ones would damage its fairly young form.   We still got somewhere around 1 1/2 to 2 bushels of ripe ones.  Most of them were preserved as rolls of fruit leather, with many more eaten fresh, made into creamy smoothies, or baked into this favorite coffeecake, which we serve as breakfast food.  I got the recipe when I was nineteen and in college, from a friend my age who also loved to bake.  She ended up living in the same apartment complex and I, and we shared several food-related experiences.  She and I drowned our boy-centered troubles one night by staying up late, crying with each other's stories, and consuming an entire cheesecake.

But back to the peaches...
There's nothing like biting into a warm, juicy peach fresh off the tree... or a tree-ripened peach from wherever you can buy them.  If you're not so fortunate, you can use either fresh, frozen, or canned (and drained) peaches for this, but the best flavor- as you'd expect!- will be from using the freshest, sweetest, juiciest peaches you can get.  

Peachy Pecan-Streusel Coffeecake
Cake:
1/2 c. butter, softened 
3/4 c. sugar (1 cup if you like things very sweet)
2 eggs
2 cups flour
1 1/2 tsp. baking powder
1/2 tsp. baking soda
1/2 tsp. salt
1 c. sour cream or yogurt
1 tsp. vanilla
2 c. sliced peaches

Preheat oven to 375 degrees.  Butter or spray a 9x13 pan; set aside.  Cream together the butter and sugar; beat in the eggs.  combine all dry ingredients, add to butter mixture alternately with sour cream and vanilla.  Beat just until smooth.  Spread batter in prepared pan.  Arrange peach slices over batter.  Combine the streusel ingredients and sprinkle over peaches.  Bake 25-30 minutes or until toothpick inserted into center of cake comes out clean (no batter clinging, only crumbs if anything).  Serve warm or at room temperature.

Streusel:
1 c. chopped pecans
1/4 c. brown sugar, packed
1/2 tsp. cinnamon


0 Comments

Santa Rosa Plum Gelato

8/16/2014

1 Comment

 
Picture
Santa Rosa plums are dark on the outside, often with a bluish hue that rubs off, ruby-colored inside, and explode with sweet juice when you bite into a fully ripe one.  They are apparently highly prized, which is nice for me, because my 3-in-1 plum tree is about half Santa Rosa.  They tend to ripen pretty much at once, which means we have only about a two-week window for eating them fresh, and need to be quick about canning, drying, making jam, or otherwise using them.  

Gelato usually uses milk instead of cream, and sometimes fewer egg yolks, as well.  If you use whipping cream in place of the milk, you'll have plum ice cream instead.  You can triple this batch if you really, really want to pull out your ice cream maker, but this smaller batch can be made using a high-speed blender. It's lightly sweet, with just enough brightness from the fruit, and full of flavor.  And yes, you may use other types of plums.  The color may or may not be the same, though, depending on the variety you use.  If you can't have eggs, you could thicken the milk with 1 Tbsp. cornstarch instead, but it won't be as creamy.

One pound of plums can mean anything from 4-10 plums, depending on their size.  If yours are small, ping-pong-ball sized, you'll need about ten.  If they're big ones, 2 1/2" across or so, you'll likely need only 4-5.  Either way, the goal is to end up with about 1 3/4 c. puree.

Santa Rosa Plum Gelato
Makes about one quart

1 lb. Santa Rosa plums
1/8 tsp. almond extract, optional but delicious!
1/2 tsp. vanilla extract
1 c. whole milk, divided (dairy-free options include almond milk, rice milk, or coconut milk)
2 egg yolks
pinch of salt
1/2 c. sugar

Wash plums and remove stems.  Remove pits; you'll to cut them out.  Drop the pitted plums into a high-speed blender, add almond and vanilla extracts, and blend until smooth.   Pour into two empty ice cube trays.  Pour 1/3 c. of the milk into the blender and swish it around to get more of the puree; pour this into the ice cube trays as well.  Put them in the freezer.

Combine the two egg yolks, salt, and the sugar in the unwashed blender.  Heat the remaining 2/3 cup milk in the microwave for 1 minute, until steaming.  Meanwhile, turn the blender on to beat the yolks and sugar.  With the motor running, pour the hot milk in a thin stream into the yolks.  Once it's all in, increase speed to high, and run about two minutes, until the custard thickens slightly.  It will begin to coat the blender sides with a slightly thicker, opaque coating, and the mixture will steam quite a lot.  

Pour the custard into a container with a lid; refrigerate. Wash the blender; there's not much more unpleasant to wash off than dried egg yolk!

3-4 hours later, pull both the now-frozen puree and the now-chilled custard out.  Pour the custard into the (washed!) blender, add the puree cubes, and blend, using the plunger handle to get them to mix.

The gelato will be a soft-serve consistency.  If you want to be able to form round scoops, pour in a container and return to the freezer for another 1-3 hours.

1 Comment
<<Previous
Forward>>

    Need a Search bar?
    One day I may upgrade my website-- but until then, use your web browser search bar. Type in my web address and what you're looking for, like this-- 
    www.theprovidenthomemaker.com  pumpkin --  and you should get results.


    Author

    I'm a disciple of Christ, a member of the Church of Jesus Christ of Latter-day Saints, a family-defending, homemaking, and homeschooling mom of eight children, two of whom sometimes can't have milk or wheat. Growing up on a farm in a high mountain valley, my parents taught me to 'make do', work hard, smile, and help others.  I love cooking, learning, growing food and flowers, picking tomatoes, and making gingerbread houses --which CAN be made allergy-friendly-- with my children.  I hope you find something to help you on my site!

    Archives

    April 2024
    July 2023
    April 2022
    September 2021
    March 2021
    December 2020
    April 2020
    March 2020
    February 2020
    January 2020
    December 2019
    November 2019
    October 2019
    September 2019
    August 2019
    July 2019
    June 2019
    May 2019
    April 2019
    January 2016
    November 2015
    October 2015
    September 2015
    March 2015
    February 2015
    November 2014
    October 2014
    September 2014
    August 2014
    July 2014
    June 2014
    May 2014
    April 2014
    March 2014
    February 2014
    January 2014
    December 2013
    November 2013
    October 2013
    September 2013
    August 2013
    July 2013
    June 2013
    May 2013
    April 2013
    March 2013
    February 2013
    January 2013
    December 2012
    November 2012
    October 2012
    September 2012
    August 2012
    July 2012
    June 2012
    May 2012
    April 2012
    March 2012
    February 2012
    January 2012
    December 2011
    November 2011
    October 2011
    September 2011
    August 2011
    July 2011
    June 2011
    May 2011
    April 2011
    March 2011
    February 2011
    January 2011
    December 2010
    November 2010
    October 2010
    September 2010

    Categories

    All
    Alcohol
    Alternate Cooking
    Appearances
    Apple
    Apricots
    April Fools
    Aprons
    Bananas
    Beans
    Beef
    Beets
    Bench
    Beverages
    Bonnet
    Bread
    Breakfast
    Budget
    Budgeting
    Cake
    Candy
    Canning
    Carrots
    Cheese
    Chicken
    Children
    Chocolate
    Christmas
    Cleaning
    Coconut
    Comfrey
    Common Core
    Constitution
    Cookbook
    Cookies
    Cooking Oil
    Crafts
    Dairy Substitutions
    Dehydrating
    Dessert
    Dried Fruit
    Earth Oven
    Earthquake
    Easter
    Edible Weeds
    Eggs
    Emergency Prep
    Essential Oils
    Faith
    Family Home Evening
    Fertilizing
    Food Storage
    Fourth Of July
    Freezer
    Frosting
    Fudge
    Garden
    Gardening
    Gingerbread
    Gluten
    Gluten Free
    Gold
    Government
    Grains
    Gratitude
    Hat
    Herbs
    Home Remedies
    Home Repairs
    Homeschool
    Home Storage
    Honey
    Hope
    Inflation
    Leftovers
    Legumes
    Lemon
    Main Dishes
    Mixes
    Mothers
    Noah
    Non Artificial Colors
    Non-artificial Colors
    Nuts
    Oats
    Oil
    Orange
    Paint
    Peaches
    Pear
    Pie
    Pizza
    Plums
    Poem
    Popcorn
    Pork
    Potatoes
    Powdered Milk
    Prayer
    Preparedness
    Projects
    Prophecy
    Pruning
    Pumpkin
    Quick Bread
    Rhubarb
    Rice
    Salad
    Salt
    Sauces
    Self Reliance
    Self-reliance
    Sewing
    Shelf Life
    Shelves
    Sky
    Smoothie
    Snacks
    Soup
    Spices Or Seasonings
    Squash
    Strawberries
    Substitutions
    Sugar
    Summer Fun
    Three Month Supply
    Time
    Tomatoes
    Trees
    Truffles
    T-shirts
    Tuna
    Ultra Gel
    Valentine\'s Day
    Vegetables
    Water
    Watermelon
    Wheat
    Work
    Year Supply
    Zucchini

    RSS Feed

Web Hosting by iPage