The Provident Homemaker
  • Recipes and Info
    • Making Bread
  • My Blog
  • Favorite Resources
  • Documents and Files
  • 52 Weeks of Building Storage

Week 24- weekly assignment, the Teton Dam, and How Much Should I Store?

9/20/2019

0 Comments

 
Weekly Assignment:   B4-3 of your nonfood items like hand soap, toothpaste, batteries, duct tape, laundry soap, diapers, razors, hygiene needs, and toilet paper.  There are only two weeks left in your get-3-months'-supply program!

In June 1976, the Teton Dam broke, unleashing 80 million gallons onto the towns downstream and triggering at least 200 mudslides below. More than 3,000 people were left homeless, 11 people and 13,000 cattle died. My parents bought some apartments in Rexburg in the late 90s; my mom said that when they'd cut into the walls for rewiring or other repairs, they were still finding remnants of the mud that washed down twenty years before.

A few days after the disaster, President Spencer W. Kimball addressed a group of Latter-day Saints at the dedication of the Deseret Mills in Kaysville, UT. This is what he said.
Picture
(Note that he said this to Saints in North America, where it is legal to store food.  In countries where laws put limits on amounts you can store, the Church advises honoring the law. Store what is allowed.)

​More recently, Julie B. Beck, then in the General Relief Society Presidency, declared, "We become self-reliant through obtaining sufficient knowledge, education, and literacy; by managing money and resources wisely, being spiritually strong, preparing for emergencies and eventualities; and by having physical health and social and emotional well-being.”

(the following is the same as in the photo quote above)
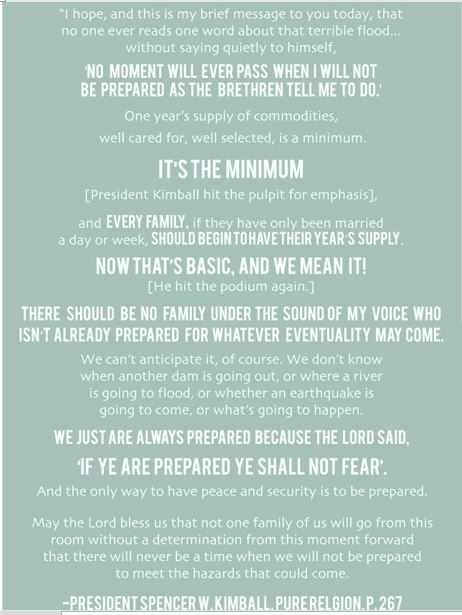
“I hope, and this is my brief message to you today, that no one ever reads one word about that terrible flood and the sadness that it has brought-the loss of life, the loss of livestock, the destruction of farms, the suffering that has come to those good people–I say again, I hope no one here will ever read another word about that disaster without saying quietly to himself, ‘No moment will ever pass when I will not be prepared as the Brethren tell me to do.’ One year’s supply of commodities, well cared for, well selected, is a minimum.

"It’s the minimum [President Kimball hit the pulpit for emphasis], and every family, if they have only been married a day or a week, should begin to have their year’s supply.  Now that’s basic, and we mean it!  [He hit the podium again.]

"There should be no family under the sound of my voice who isn’t already prepared for whatever eventuality may come. We can’t anticipate it, of course. We don’t know where another dam is going out, or where a river is going to flood, or whether an earthquake is going to come, or what’s going to happen. We just are always prepared because the Lord said, ‘If ye are prepared ye shall not fear’ (D&C 38:30). And the only way to have peace and security is to be prepared.

"May the Lord bless us that not one family of us will go from this room without a determination from this moment forward that there will never be a time when we will not be prepared to meet the hazards that could come.” (Pure Religion, p. 266-267)
0 Comments

Week 22 Assignment, and Case Lot Sales!

9/7/2019

0 Comments

 
Picture

How is your B for 3 going?  Have you been following the schedule?  If so, you’re DONE with a 3-month supply of food! Great job! 

Four weeks ago,  your assignment included doing a quick inventory of nonfood items in your home.  This week, re-count what you have, to find how much of it you go through in a month.  Multiply this by 3, to find how much to store for a 3-month supply.  This is what you will be doing for B for 3, for this week and the next four weeks.  The good news is—if you live in Utah or Idaho, this week and next are the case lot sales at Smith’s, Ream’s, Harmon’s, Macey’s and other Associated Foods stores.

Need to be reminded of what is included in ‘nonfood items’? It includes things like toilet paper, soap, shampoo, diapers, razors, deodorant, hygiene items like pads or tampons, first aid supplies, OTC medications, prescription meds for 2-3 months (if you can), dish soap, laundry soap, and more.

Use your weekly budget amount to get these items while on sale; you’ll get so much farther ahead.

Did the photo strike you as being a little odd? It's of a section of my nonfoods storage-- dish soap (BTW, I have no allegiance to any brand, what you see is what was on sale last time I was looking), vacuum bags, and a vacuum belt.  They sit on a shelf next to a stack of blankets; it's summer so the extra blankets sure aren't on my bed!

In a few weeks, your whole 3-month supply should be complete; at week 27 you’ll start building your long-term food storage or year supply.  If you don’t have buckets yet to store bulk food in, right now is a great time to get some.  Macey’s has 5-gallon buckets with lids for $4.50, which is great. If you like the easy-off Gamma Seal lids, they’re on sale, too, for $5.99, usually around $8-10 each.

There are ways to get used buckets for free, or for $1-2, but that’s the topic of another post.

This has been an interesting harvest season.  Two years ago, we bought an older home on a large lot with about a dozen mature fruit trees.  Last year, only the grapes and cherries did well, but this year everything (except the plums) did.  We made SO much apricot leather!  I bought a second (large) dehydrator to keep up.  They're both running right now, turning our small seedless grapes into raisins. Before that, both were filled with sliced yellow squash, to turn into powder. Today my husband and kids picked up the Golden Delicious apples that have fallen, kept the best ones, and made a canner full of applesauce.  Yesterday's project was a couple batches of caramel pear butter- one batch with fall spices, one without.  I have 5 plants producing yellow summer squash-- pattypan, yellow straightneck, and zucchini-- which is too much for anyone (but plenty to share).  Tomatoes that have gone nonstop for weeks.  Peppers that keep on coming. Onions that needed harvesting.  There's a box of pears downstairs that are almost all golden now.  Potatoes need dug. The Concord grapes are nearly purple. The champagne grape vines are holding something like another 3 bushels.  The Golden Delicious apples are days from being ready, with the Red Delicious close behind.   

And we've experience a different sort of harvest season-- the death of several loved ones.  People say these things come in threes.  We had two sets of three in one month's time, though all were unrelated.  
First was a mentor and dear family friend from my growing-up years.  Four days after his funeral, my wonderful father-in-law passed of a sudden heart attack.  The next day, Grant Thompson, an important online mentor for my son, died in a tragic paragliding accident.  The next week, our young stake president from our last stake, died of a heart attack, leaving a wife and 8 children, 5 of whom are young enough to still be at home. The same week, a friend on the next street over accidentally drowned in his fish pond (he had a medical condition that caused his legs to collapse).  And then the week following, my husband's youngest aunt died. 

It's a reminder during this busy, busy time to harvest and preserve-- that each season comes to an end.  We only have so much time to get done what we can.  The season sometimes ends quickly and unexpectedly.
And it's important to do what really matters, to use our time and opportunities in ways that make a difference in days ahead. To do the most good in this life, especially with family and those we can reach.

Rest in peace, those whose summer-of-life season ended. Your love and harvest of memories remains.

0 Comments

Week 21- Making Your Own Taco Seasoning, Weekly Assignment

9/1/2019

0 Comments

 
Picture
Weekly Assignment:   B4-3- This is the last week of doing this for your 3-month food supply items! Next week you’ll start ‘B4-3’ with your nonfood items like hand soap, laundry soap, and toilet paper.

Why spend extra on pre-made seasoning packets when you likely already have all the ingredients? Save some money by making your own seasoning packets, or adding the spices directly to your meat.

Taco Seasoning
2 Tbsp. dried onion
1 tsp. oregano
1½ tsp. chili powder
½ tsp. garlic powder
½ tsp. cumin
½ tsp. salt

This is enough seasoning for 1 pound of ground beef or turkey, or a pound of freshly cooked pinto or black beans.  Cook the meat until browned, add the seasonings and ½ c. water or 8 oz tomato sauce; simmer for a few minutes until it’s the consistency you like. Want to make your meat go further?  Add any of these: 1 cup of cooked rice, a handful of quick-cooking oats and a bit of extra water (or 1/4 c to 1 c. leftover cooked plain oatmeal), a can of beans (drained), 1/2- 1 c. shredded vegetable like carrot or zucchini, 1-2 c. cooked cracked wheat.

The seasoning can be adjusted to your own tastes; if you like cumin, up to 1½ tsp. can be good.  I’ve also seen people add crushed red pepper or cayenne pepper, black pepper, smoked paprika, and a couple tablespoons of brown sugar.  What if you overdo the spices?  See how to fix that, here.  

Something to know about chili powder is that there are two general kinds-- the first is nothing but powdered chili peppers, with a huge range of heat, depending on the type of pepper used. (If it's a spicy one, 1 1/2 tsp. of this in your recipe will likely be too much!)   The second kind of chili powder is a mixture of spices-- including powdered chili peppers- but also including things like cumin, oregano, garlic, salt, and more.  Check the label of your spice bottle to see what yours is made of; if it has salt, you may need to reduce the separate amount of salt. If it doesn't have salt, you may want to add 3/4 tsp instead of 1/2 tsp.

Multi-batch Taco Seasoning (some for now, some for later)
½ c. dried onion
1 Tbsp + 1 tsp oregano
2 Tbsp. chili powder
2 tsp. garlic powder
2 tsp. cumin
2 tsp. salt (use 1 Tbsp if your chili powder doesn’t contain salt)
 
Stir together in a small bowl.  You can keep the whole batch in a glass spice jar and use 3 Tbsp each time you cook 1 lb of burger for tacos, or store single-use quantities in snack-size ziptop bags.  For single use size, divide into four roughly equal portions.  Put each one in a small ziptop bag or other airtight container.  Label, date, and store in the cupboard or freezer.
 
Store in a dark cupboard or in your freezer.

You can even add tomato powder (see here how to make it and how to use it in your recipes)


Use this mix in taco salad, soups (1 batch of seasoning for 1-2 quarts of liquid), salad dressings, dips, Mexican dishes, as a rub for meat, on kebabs, and of course for tacos. (Add 1 tsp seasoning mix to one drained can of beans.)

Want to make more home-seasoned basics?  


Marinara sauce
​

BBQ sauce

Or maybe you're needing ways to use all the tomatoes your garden is producing:

https://theprovidenthomemaker.com/my-blog/category/tomatoes
Picture
Picture
0 Comments

Week 19- Weekly assignment, and making vegetable powders

8/18/2019

0 Comments

 
Picture
Your weekly assignment is B4-3. Did you do your nonfood inventory last week? If not, now is a great time.  

My dehydrator has been running nearly nonstop for a couple weeks now, with a couple of batches of canning interspersed.  I much prefer dehydrating whenever it's an option.  (But I will bottle a whole number of other things-- meat for quick meals, jam/jelly, juices, syrups, ghee, peaches, ...)  Peaches are better canned, but apricots?  They must be an acquired taste-- I acquired it years ago, but my kids haven't.  So we bottle peaches, and dry apricots.  Mostly we turn the apricots into fruit leather.  With the bumper crop we've had this year on our THREE mature apricot trees, that's a whole lot of leather, despite our best efforts to give away as many apricots as possible.  

But that's not all the dehydrator has been used for these last weeks. Dried cherry tomatoes are practically candy... but we've kept up on eating them fresh, with some sharing, so I haven't dried any yet this year.  What I have done is the full 12+ trays loaded with sliced yellow summer squash. It doesn't matter which one.  This year it's a combination of yellow zucchini, yellow straightneck squash, and pattypan squash that got just a little too big.

What do I do with summer squash powder?  Everything I do with the shredded or pureed fresh ones, plus some extras.  Zucchini bread. Zucchini brownies.  Smoothies. Chili, where it's great to help thicken it-- especially if I'm also using tomato powder and onion powder! Soups, where using a little becomes invisible and without any telltale flavor.  Added to regular wheat bread dough. Or muffins. Or pancakes.  

Tomato powder is even better.  I use it in place of tomato sauce, tomato paste, tomato juice, diced tomatoes. Here is a chart that tells you how much tomato powder to use in place of each of those. Tonight I added a bunch to a batch of too-runny salsa. It makes a wonderful base for marinara sauce or pizza sauce, and is used in making my own taco seasoning.  And when added to bread dough along with spices, it makes the bread taste like pizza. 

Pumpkin powder is also great.  It makes pumpkin pie, pumpkin shake, pumpkin roll... anything that you'd use pureed pumpkin in.  And again, I throw it in soup and chili to thicken them and add nutrition, and add to bread to help it stay moist longer.

I once made banana powder out of commercially-dried bananas; a neighbor had bought a 5-lb bag, found that nobody at home would eat them, and brought them to me to see if I could find a use for them.  (The powder was good in banana muffins, banana bread, and smoothies.)

​I've also made mushroom powder, carrot powder, beet powder, and dried crumbled greens. (The greens were a freebie in my yard, an edible weed known as 'redroot pigweed'. A very nutritious member of the amaranth family.) Mushroom powder adds a savory, almost meaty flavor to soups and sauces.  (I made the mushroom powder by starting with a big bag of dried mushrooms found at a Asian market.  If you're local, the place is Ocean Mart in Sandy.) The beet powder is the perfect thing to make from beets that got too big and tough for good eating.  And my favorite use for it is as a natural food color-- though it is also good in smoothies and recovery drinks. (Read what I have on beet powder, near the end of this post.)

All of these powders are made pretty much the same way.  You clean the vegetable,  (Pumpkin is steamed first. The others are handled raw.) slice it an even thickness (1/4- 3/8" is ideal), and dry until crispy.  Add them to a blender or food processor, and run until powdery.  Store airtight; even better if you can remove oxygen and seal the jar or other container.

Are you intrigued?  You can read more about each other these here, along with some recipes and tips:

Zucchini

Summer squash (Ok, zucchini is also a summer squash)

Tomato

Pumpkin

​What will you try?  

0 Comments

Week 18- Make Your Own Cream of Tomato Soup

8/10/2019

0 Comments

 
Your weekly assignment- you have two this time!  B4-3, and do a quick inventory of nonfoods. These include toilet paper, shampoo, soap, dish soap, laundry soap, hygiene supplies. Record what nonfoods are open; note how much is in each. At the end of four weeks, go through them again.  Note how much of each you used; multiply by three to know what you need for 3 months’ supply, or by 12 to know for a year supply. (Purchasing these begins in one month.)

Tomatoes are in full production mode in my garden right n
ow.  I made a couple dozen jars of salsa this week, and picked tomatoes again this morning.  About half of them went into a giant, double-size lasagne for my son's birthday dinner, but there are a couple quarts of cherry tomatoes left over.  I'm debating whether to make a cherry tomato salad tomorrow (yes, it's the right link; scroll down), or this cream of tomato soup. 
It's simple and delicious. Using cherry tomatoes increases the natural sweetness; did you know that commercial versions almost always add sugar to their tomato soup?  

Another advantage to making it yourself is you can substitute out any ingredient you have food sensitivities to.  Can't have dairy?  Use a nondairy milk instead, or coconut cream for a richer version.  Can't have wheat or gluten?  Use cornstarch to thicken it instead of the flour. (You'll only need half as much, and don't add it to the hot vegetables; add it to the blender along with the broth and tomatoes.)


The biscuit recipe is a fast drop biscuit version- the butter is melted before mixing in, rather than cut in. In the photo below, the biscuits were made with cheddar cheese and crumbled bacon in the dough. ​Mmm.

BTW, the link to the cherry tomato salad has two tomato recipes- a surprisingly hearty tomato salad, and the most delicious vegetable gratin I've ever tried.  (Bonus- it uses tomatoes AND the extra zucchini or summer squash that seems to always hide under the leaves until it's big! 
Picture
0 Comments

Week 17, 3-Way Zucchini Bread

8/3/2019

0 Comments

 
Picture
Your weekly assignment:  Buy for Three.

What are these three ways to make this bread?  The base recipe is a simple zucchini bread with nice cinnamon undertones.  The next variation is for chocolate zucchini bread, and the third is my family's favorite, lemon zucchini bread.  
You can make several more variations with this recipe, or even bake them as muffins. This recipe will make about 2 dozen regular-size muffins.

If you'd like a few more ways to use zucchini, check out this link for a shredded zucchini pizza crust, two ways to use zucchini in pie, and a delicious bisque--- a creamy soup-- with a touch of curry. My sister brought that last recipe home with her after living in Ukraine.

There's also a recipe for Zucchini Cakes (think crab cakes or potato pancakes, not chocolate), with an amazing Lime Chipotle sauce to make alongside.

Three-Way Zucchini Bread
3 eggs
¾ c. oil (or applesauce)
1 ½ c. sugar
4 c. packed shredded zucchini, or 3 cups pureed*
3 c. flour
1/2 tsp. baking soda
4 tsp. baking powder
1 Tbsp. cinnamon
1 Tbsp. vanilla
½-1 c. nuts, optional

½-1 c. chocolate chips or butterscotch chips, optional

Heat oven to 375 degrees.  Beat eggs until light and foamy; add oil, sugar, zucchini, and vanilla.  Add dry ingredients, including nuts if using them.  Mix well.  Pour into two greased 8x4 loaf pans.  Bake for about 50-60 minutes, or until a loaf tests done- a toothpick inserted near the center will come out with just a few crumbs, not all wet.  The bread’s top will spring back when lightly pressed with a finger, too.

 
*You'll need slightly over 1 1/2 pounds of zucchini.  Or substitute any other summer squash. I often use yellow crookneck squash. It's especially good in the lemon version, where it gives a beautiful lemony color.

Chocolate Zucchini Bread: Omit cinnamon, or reduce it to 1 tsp.  Add ½ c. unsweetened cocoa powder; reduce flour by ¼ c. Stir in ½ c. semisweet chocolate chips if you want.  Almonds are tasty in this bread.   Try it with peanut butter chips, or white chocolate chunks either mixed in or sprinkled on top before baking.
Picture
Lemon Zucchini Bread: Omit cinnamon.  Increase sugar to 2 cups.  Add ¼ c. lemon juice and the zest of one lemon, about 2 Tbsp. (If you don’t have a fresh lemon, instead of zest you can use any one of these: ½ tsp. lemon extract, 2 tsp. dried zest, or 12 drops food-grade lemon essential oil.)  This is really good with walnuts.  Orange juice and zest are a nice version, too. I prefer to remove the zest with a vegetable peeler.  Since I’m pureeing the zucchini anyway, I toss the lemon peel strips into the blender along with the zucchini, and the zest gets chopped up nice and fine.
Picture
0 Comments

Week 16, Anything-Goes Muffin recipe

7/27/2019

0 Comments

 
Picture
Your week 16 assignment:  Buy for Three.

Two houses, four wards, and almost ten years ago, a friend and I were on a quest to find two things--
the perfect pancake recipe,
and a perfectly adaptable muffin recipe. 

We measured, stirred, cooked, talked, shared and compared.  (I still think the ‘Foolproof Pancake’ recipe is tops.)  And after all that, Laura compiled what I learned about muffins with what she learned about muffins, and the “Anything Goes” Muffin recipe is the result. 

It’s a basic recipe that you can customize- whether sweet or savory, it will make good muffins.  Lemon-blueberry, bacon-cheese mufins, spiced applesauce muffins, oatmeal cinnamon muffins, chocolate raspberry or chocolate banana muffins, and much more.  Do you have a couple overripe bananas sitting on your counter?  This will help you use them up. How about a wrinkly apple that has gone mealy?  It will be delicious chopped or shredded into muffins.
After you've used this recipe-- or formula-- a few times, you'll get to where you don't even need the recipe to make any kind of muffin you can think of.

What will you make with this recipe? 

Or, what did you make?

Picture
Picture
Picture
0 Comments

Week 15- 61 Ways to Use Apricots

7/20/2019

0 Comments

 
Picture
Your weekly assignment:  B for 3   Only 6 weeks to go!

This year my area has a BUMPER CROP of apricots. All along my street I can see these trees drooping--sometimes clear to the ground—with their load of soft orange goodness.  But it can be a little overwhelming.  There are only so many you can eat plain, and it’s nice to have more ways to enjoy them during the time they’re everywhere.  Last week’s post had a link to the Utah State University Extension’s pdf that shared how to preserve them. But we need more.  😊

Don’t have apricots?  Drive around town and look for apricot trees that aren’t being picked. Chances are that the owner would be delighted to have you harvest them; it spares him from having to step on, drive over, or pick up fallen fruit.

1- Eat them fresh!  They’re at their best when picked ripe from the tree, warm and dripping with juice when bitten into.

2- Fruit leather. Next to eating apricots fresh, this is my family’s favorite way to eat them. The photo above is apricot-cherry leather, using about half apricot puree, half cherry.

#3-8 Apricot nectar- puree fresh, pitted apricots with enough water to get them smooth, or puree canned apricots with their syrup.  Drink plain, over ice, with a few drops of vanilla or almond extra, with a drop of lemon oil, or a sprinkle of ginger or cinnamon.  Alternately, mix an equal portion of nectar with milk (try almond milk!), sparkling water, lemon-lime soda, or ginger ale. If you want an actual recipe so you can bottle it, see here.

9- Frozen. Halve them, remove the pit, and freeze in a single layer on a baking sheet. You can pretreat them with a little lemon juice, citric acid, or a syrup of lemon juice and honey. Once frozen, transfer them to freezer bags and return to the freezer.  

10- Grilled.  This recipe calls for brushing halved fresh apricots with honey and butter, grilling, then topping with a drizzle of honey and almond whipped cream.

Apricot jam. 

11- The recipe from Ball canning jars uses a package of liquid pectin.

12- Apricot jam using instant Clear Jel instead of pectin.  This recipe can be frozen or processed in a boiling water bath.   Don’t want to use pectin OR Clear Jel?  Use the Apricot Preserves recipe, below.

13- Apricot jam using dried apricots.  Chop 1 cup (6 ounces) of dried apricots, and combine in a saucepan with 1 c. water and 1 ½ c. sugar.  Bring to a boil; simmer a few minutes, mash, and continue simmering until it thickens.  This will thicken more as it cools.

14- Apricot-pineapple jam.  My mom made a version of this most years that we had apricots.  The pineapple lightens the flavor and adds a nice sweetness.  This recipe gives an option for adding maraschino cherries; I’ve never tried it that way but it sounds good.  It also calls for canned crushed pineapple in syrup; using pineapple canned in juice will work fine too.     If you have liquid pectin, use this version.

15- Apricot preserves. These tend to be more fruity than jam, and the apricots aren’t pureed first.  Honestly, there’s a lot of crossover between jam and preserves. This one requires no pectin- only sugar and lemon juice. (fast versions! With dried apricots, fresh ones)


Apricot butter – the thicker, more deeply flavored cousin to apricot jam.

16- This one starts with fresh apricots and apricot nectar.  See the note above on making your own apricot nectar.  

17- This apricot butter cuts the cooking time down by starting with dehydrated apricots.  If you don’t prefer the kick from crystallized ginger, feel free to leave it out for a little different version.

18- Apricot BUTTER.  Dairy butter with dropped dried apricots, lemon zest, and honey whipped into it. 

19- A smoother Apricot BUTTER, with dried apricots soaked and pureed before being beaten into soft dairy butter. 

20- Home-bottled apricots.

21- Dried apricots.  Apricots may be dried in the sun, the oven, or in a dehydrator.  Instructions for all three methods can be found here.  

22- In smoothies. Use a handful of fresh, pitted apricots. A dash of vanilla or almond extract makes it extra nice.

23- substitute fresh apricots for fresh or canned peaches in almost any recipe.

24- substitute dried snipped apricots for dried peaches in almost any recipe.

25- substitute fresh apricots for fresh or canned plums in almost any recipe.

26- substitute dried snipped apricots for pitted prunes in almost any recipe, sweet or savory.

27- Use pureed apricot (or any other fruit) as a replacement for half of the butter or oil in muffins, other quickbreads, or cookies. 

28- Purees can instead be used to replace some or all of the liquid in a recipe.  2 cups of puree will replace 1 cup of liquid.

29- Syrup for pancakes, crepes, sweetener for drinks, over ice cream, or on other desserts.  Juice the apricots using a steam juicer, (or use apricot nectar) mix with an equal part of sugar (1 c. juice to 1 c. sugar).  Bring to a boil to dissolve the sugar. Refrigerate, freeze, or place in jars and process in a boiling water bath.

30- Apricot sauce. Use over pancakes, in crepes, over ice cream, brushed over cakes, used as a filling in the center of cupcakes, and also on broiled salmon, chicken or pork, fresh or baked on to make a glaze.  At its simplest, combine equal parts apricot puree with sugar; bring to a boil to dissolve sugar.  For a thicker sauce, stir 1 Tbsp. cornstarch in to the sugar, for each cup of puree, before boiling.  For extra flavor, to each cup of sauce, add any of the following: ¼ tsp. almond extract, 1/8 tsp. cinnamon, ½ tsp. ground ginger or 1 1/2 tsp. grated fresh ginger (or puree it with the apricots to begin with), a sprinkle of ground cloves, a tablespoon of fresh lemon juice, zest of half a lemon.  Garnish with candied pecans or almonds, chopped candied ginger, a sprinkle of cinnamon, or lemon zest.

Apricot quickbread (baking powder-raised bread)

31- Apricot quickbread using pureed apricots. This recipe calls for canned ones, but you can use 1 pound of fresh apricots instead.  Pit them before pureeing. 

32- Apricot quickbread using dried apricots.  There are many variations of this online. Some add dried cranberries, others add semisweet chocolate chips, some have nuts- pecans and almonds both complement apricot.  

33- Apricot-Almond Muffins- stir ½ c. snipped dried apricots and ½ c. chopped almonds into a 12-muffin batch of muffin batter.  After baking, dunk tops in melted butter, sprinkle with cinnamon sugar and finely chopped almonds- or mix an almond glaze to spoon over the tops.  Almond glaze- stir together 1 Tbsp. milk or water, ½ tsp. almond extract, and about 1 cup of powdered sugar.  Add more water or powdered sugar as needed to make of drizzling consistency.
 
Apricot yeast bread

                34- My version, with orange, apricot, and pecans. I've got an awesome recipe somewhere for a seedy, dried fruit breakfast bread that includes apricots, and is served in wedges with cream cheese spread on top, but I'll have to look harder to find it.  Maybe it will get its own post.

                35- Bread machine version, with dried apricots, orange juice, and oats.

               36- Apricot Daisy Ring- a beautiful yeast bread in the shape of a daisy, with apricot preserves and a light almond glaze on top.  I love to bake it the day before and serve for breakfast.   The earliest version I’ve seen of this recipe came from a 1980’s Better Homes and Gardens “Breads” cookbook.
 
Cookies:

               37- Chewy apricot -almond oatmeal cookies, using dried apricots.  (includes tips on how to use dried fruit in general) 

               38- Jam-filled thumbprint cookies, using apricot jam or preserves, with or without chopped nuts.

Apricot bars.  There are different options, starting with either chopped dried apricots simmered in water, or using apricot preserves- but almost always on a shortbread-type bottom layer. 

               39- These Apricot-Oat bars from The Pioneer Woman use apricot preserves, brown sugar, and lots of nubbly oats.  

                40- This version also uses apricot preserves, but no oats,  Instead, it has coconut and walnuts.
 
Dinner

                41- Apricot-glazed moist Italian meatloaf. There are pureed apricots mixed into the meatloaf itself, too.  Again, the recipe calls for canned apricots; substitute a pound of fresh ones, pitted.  Reserve ½ c. of the puree to make the glaze.

               42- Apricot-glazed Pork Tenderloin, using apricot preserves, Dijon mustard, garlic, and thyme.

Apricot Chicken-

                43- One-pot, 5-ingredient Apricot Glazed Chicken, using bone-in chicken thighs, apricot preserves or jam, onion soup mix, and French dressing (homemade options are included). I’ve seen a variation on this where you use Russian dressing instead of French.
​
                44- Apricot chicken using boneless tenderloins, apricot jam, and dried apricots

                45- Apricot Glazed Chicken for One (or two).  Super simple, using one chicken breast, a tablespoon each of apricot preserves and French or Russian salad dressing, and a pinch of ginger.

                46- Apricot Chicken Stir Fry-- a kind of Sweet and Sour chicken—with boneless chicken breasts, apricot preserves, onion, bell peppers, pineapple chunks, garlic, ginger, and more. Cashews are an option. Serve over rice, couscous, or quinoa, or to the side of any of those, mashed potatoes, or cauliflower mash.

                47- Apricot Chicken using thighs or drumsticks, fresh apricots, ketchup, and apricot preserves.

                48- Slow Cooker Apricot Chicken- using bone-in thighs, dried apricots, lemon, onions, Dijon mustard, garlic, and thyme. 

               49- Moroccan Rice Pilaf, with Basmati rice, onion, dried apricots, dates, olive oil, chopped almonds, cumin, cinnamon, and other spices. It may sound odd, but it’s really good.  Sometimes I add a little diced smoked turkey. 


Apricots with goat cheese. This is a classic combination that can be done a few different ways. Don't have soft goat cheese?  Use cream cheese instead.

                50- Apricot-Goat Cheese Swirls- spread apricot leather with a layer of soft goat cheese.  Sprinkle with some chopped fresh basil, mint, or thyme if you have it. Roll up, wrap, chill for at least a couple hours, then slice.  Serve as a snack or hors d’oeuvres.

                51- Apricot-Goat Cheese Ball with dried apricots, rosemary and shallots


Apricot Parfaits

                52- Simple breakfast parfaits- pureed fresh halved apricots, poured over yogurt and sprinkled with granola. We’ve had these a couple times in the last two weeks.

                53- ‘Foodie’ Parfaits.  I don’t use alcohol, so would most likely use a little apple juice to replace the brandy.  And mascarpone is pricey, so softened cream cheese or Greek yogurt would stand in for it at my house.  And vanilla extract would be used instead of a scraped vanilla ban. But the fresh mint?  I’ve got a whole bunch of it growing happily on the ditchbank.

54- Apricot Cream Dessert. A fluffy, whipped-cream based concoction.

55-That last one is related to an apricot cheesecake my mom made often in the 70s; essentially, you replace the whipping cream with 16 ounces of EITHER cream cheese or cottage cheese, which gets pureed along with the apricots.  The whole thing is poured over a cookie crumb crust, graham cracker crust, or thin shortbread crust. (You bake the crust first, in a 9x13 pan.) Pour the filling over the top.  Sometimes she would spread pineapple topping (a 20-oz can crushed pineapple with juice, boiled with 2 Tbsp. cornstarch to thicken) over the whole thing once the apricot cheesecake was set.   Lower fat, lower sugar, and completely refreshing!

56- Apricot Cupcakes, using your choice of either apricot jam, or a filling you make with dried apricots, water, and sugar.

57- Apricot Cake, Aprikosenkuchen, a coffeecake. This cake fits in a 9” springform pan and uses two whole pounds of apricots.  It’s a delicious way to use apricot that are a little underripe, or mealy.  And it’s great when the fruit is fully ripe, too.    make your own apricot jam to brush as a glaze over the top: after pureeing half of the apricots, as directed in the recipe, set aside 1 Tbsp. of the puree.  While the cake is baking, mix this reserved puree with 1 Tbsp. sugar or honey, and bring to a boil in the microwave, about 45 seconds. Let it cool while the cake finishes baking, and brush it over top once the cake is out of the oven.
 
58- Apricot Nectarine Shortcake with Vanilla Whipped Cream

59- Browned Butter Almond Cake with Apricot Whipped Cream; the whipped cream uses apricot preserves. And anything with browned butter and almonds is going to be a winner.

60- Almond Apricot Tart.  It’s a beauty, with an almond shortbread crust, rich filling reminiscent of pecan pie without the pecans, topped with halved apricots.  It’s served with freshly whipped cream.

61- Apricot Salsa.  Why not? Mango salsa is one of my favorites, the Granny Smith apple salsa I tried was great...


Are there more recipes?  Yes; I didn’t even make it to my hard-copy old cookbooks (Chez Panisse Apricot Sherbet or Apricot Mousse, plus whatever is in the 1958 Betty Crocker book…) , nor the hand-written 3x5 cards in the recipe boxes. There’s still Apricot Cream Soup, Upside Down Apricot Cake, Apricot Cobbler and Apricot Crisp, Apricot-Cherry Pie… 
But this will give you a good start!
0 Comments

Week 14- Preserving fruits and vegetables

7/13/2019

0 Comments

 
Picture
Your weekly assignment:  B for 3   Only 7 weeks to go! (How's your shelf looking?)

If you have a garden or fruit trees, or like to visit farmers’ markets, you’re likely starting to wonder about how to handle the food that so proliferous right now.  The Utah State University (USU) Extension has resources for you! It covers freezing, canning, dehydrating, and best varieties to use, from Apples to Zucchini.   After going to this link,  click on “Preserving the Harvest Fact Sheets”.

For example, in the Apricot “fact sheet”
the 'sheet' is 9 pages of information--

-How to select and prepare apricots

-Freezing to preserve them, in syrup, sweetened without syrup, plain, or as puree

-Canning them- how many pounds or bushels will fill how many jars, how to get them ready (in halves or as nectar), how to process them, for how long, for your altitude

-Making apricot jam, jelly preserves- with pectin, or without pectin

-Drying apricots- including preparing them, and drying them using a dehydrator, the sun, or an oven

-Nutrition information for apricots
​
-Storing them- fresh, canned, dried, or frozen

And all this, for so many other fruits and vegetables!
0 Comments

Homemade Pancake Mix

7/7/2019

0 Comments

 
Picture
Do you want a lovely, hot breakfast, but need to speed it up?  Or do you simply want to have complete control over what goes into your food?  Either way, this pancake mix is your friend.   

Don’t want a mix, just a good pancake recipe?  Here’s one I’ve used for 25 years—“Foolproof Pancakes”.  The original recipe was clipped out of a local newspaper when I was a newlywed. I can't tell you how many other recipes I tried first.  This was the best.
 

Pancake Mix

12 c. flour (I like to use 6 c. white flour, 6 c. whole wheat flour)
3 c. dry milk powder
¼ c. sugar
2 Tbsp. baking soda
2 Tbsp. salt
1 cup coconut oil or shortening

Mix together the flour, milk powder, sugar, baking soda, and salt. Add the coconut oil or shortening, and cut it in until well distributed.   Store in a container with a tight-fitting lid.  Makes about 16 cups.

To use it, combine 1 1/4 c. mix, 1 egg, 1 cup water.  You'll get about 12 batches this size from the whole mix
.  
 
You can make pumpkin pancake mix, too!  


Want to make simple gourmet fruit syrup?  

0 Comments

Week 12- Homemade Pizza Pockets

6/29/2019

0 Comments

 
Picture

Week 12 assignment-- Going off your  Inventory Shopping List and this week’s sales, buy the 3 months’ worth of as many different items as you can (= Buy For 3) as your new budget allows.    You'll do this through Week 21.

Have you ever made pizza from scratch?  It's delicious. To get directions on making pizza, go to the basic bread recipe, and scroll down until you see “Pizza”.  Directions are there, including for making enough of a super-simple red sauce for your pizza.  You'll want the sauce for pizza pockets, too.

Pizza pockets are fun, portable, completely customizable, AND they freeze well.  You can make them to suit food allergies; nondairy cheese can be used in these if you like. This recipe can be doubled, tripled, quadrupled  make whatever quantity you want to make for dinner plus extras for packable lunches. 

To make 8 regular pizza pockets or 6 large ones, you'll need:

-One loaf’s worth of bread dough

-8 oz. shredded cheese

-One 8-oz. can of tomato sauce (you'll only use half)

-Dried or fresh herbs- oregano, basil, thyme, garlic powder, onion powder, ground black pepper, rosemary, fennel (use whatever you have and like.  I often use only oregano, garlic and onion powder)

-Toppings-- crumbled bacon, pepperoni, cooked sausage, leftover chopped cooked chicken or hamburger, mushrooms, zucchini (shredded and squeezed dry), chopped bell peppers, spinach leaves, diced tomato, olives… Plan on ¼- ½ c. of each topping, for each 8 pockets you make.
 
Roll dough out as you would for pizza crust, a rectangle about 8x15”.  While the dough relaxes after rolling, pull out your sauce, cheese, and other toppings.  Oil a 12x18" baking sheet, sprinkle with cornmeal for extra crunch, OR line with parchment. After your toppings are ready, roll the dough larger, to make it measure about 13x19". 

With a pizza cutter or knife, cut the rolled dough down the center the long way, then in fourths the other direction. (See photo, below.) This will give you eight rectangles, each about 4x6”.

Picture
Picture
Spread pizza sauce on one long side of each rectangle, leaving a 1” clean border around those edges. Sprinkle with any toppings and about 2 Tbsp. of cheese. Brush the edges of the bare half with water; this will help the pockets seal better around the edges after crimping.

Fold each pocket in half the long way, lining up edges.  Crimp (pinch) the edges with your fingers or by flattening with the tines of a fork.  Set on the oiled baking sheet. Cover with a kitchen towel and let rise for 15 minutes. While they rise, preheat the oven to 400° F.  Remove the kitchen towel. 

For shiny rolls, brush with beaten egg (whites, yolks, or both) before baking, or brush with milk or butter for better browning. Bake about 20 minutes, or until browned on the bottom. Remove to a cooling rack.  Let cool at least 10 minutes before eating; they continue baking internally in those first several minutes. 


Refrigerate or freeze any that you didn't eat right away.

If you’re going to freeze them, first cool them completely.  Freeze them on a baking sheet, and then transfer to a ziptop freezer bag, labeled and dated.

Picture
Picture
Picture
Picture
Picture
0 Comments

Week 10- assignment, spreadable butter, and dairy-free 'butter'

6/15/2019

0 Comments

 
Your Week 10 assignment is another week of Buy for Three- within your weekly budget amount, look at your customized 3-month ingredient list, look through the grocery ads, and buy as many sale items as you need for that list.   

What do you have so far in your home? 

Here are a couple of budget-friendly recipes to help you free up more of your grocery money-

Spreadable butter
 
And for those of you who can’t have dairy, a recipe for dairy-free 'butter' that you can make at home! It’s spreadable, bakeable, and even makes good frosting. 
0 Comments

Week 9 - Make Your Own Frozen Bread Dough

6/8/2019

0 Comments

 
Have you ever used frozen bread dough- whether rolls or loaves?  Did you know you can make your own? Fleishman Yeast company came up with the first make-at-home frozen dough recipe.  The earliest version I've found is from a booklet they published in 1987. In cooking terms, that's pretty new! 

It's simple; make as much as you want to have on hand.  The same batch can be shaped into loaves or rolls-- even into oven-rise pizza crusts, cinnamon rolls, caramel nut rolls, pizza pockets, breadsticks, and more.  There are lots of ways to use it; see some of them here.
​

Freezer White Bread Dough

Makes 4 loaves (8"x4"),
OR 5 dozen "Texas size" (2-ounce) rolls,
OR about 7 dozen regular (1.3 oz) dinner rolls. 
Or any combination you like.


INGREDIENTS
12 1/2 to 13 1/2 cups flour 
1/2 cup sugar
2 tablespoons salt
2/3 cup dry milk (optional)
4 packages active dry yeast*  
1/4 cup butter, softened, or olive oil
4 cups warm water (120 to 130°F)

In a large bowl thoroughly mix 4 cups flour, sugar, salt, dry milk, and active dry yeast. Add butter or oil. Add the warm water to dry ingredients and beat for two minutes at medium speed of electric mixer, scraping bowl occasionally. Add 1 1/2 cups flour. Beat at high speed two minutes, scraping bowl occasionally. The dough will start to become stretchy. Stir in enough additional flour to make a stiff dough, for a total of 12 1/2 to 13 1/2 cups of flour. (This can vary because of the humidity level in the air, how you measured your flour, and how accurately you measured the water.) Sprinkle flour onto a clean surface (countertop or table), dump the dough on top, and knead until smooth and elastic. This will take about 10-15 minutes. Cover with a towel so it doesn't dry out; let rest 15 minutes.

For loaves, divide dough into 4 equal pieces. Form each into a smooth loaf about 7-8" long.  Place on greased baking sheets. Cover with plastic wrap. Freeze until firm. Transfer to plastic bags, or wrap in plastic wrap and then in foil. Try to use within 2-3 months. The dough won't 'go bad', but will get freezer burned if not wrapped well, and the yeast may weaken, with the bread not rising as high.  My worst experience was with dough that was about a year and a half old. It simply didn't rise much at all. Dough that won't rise is still great for making into fried scones!

To bake the loaves- remove from freezer and rub oil all over the loaf. (This keeps it from drying out as it thaws and rises.)  Place in greased 8 1/2-inch by 4 1/2-inch loaf pans. Let rise in warm place, free from draft, until doubled in size, about 4-6 hours.

Bake at 350°F about 35 minutes, or until done. (Sides of loaves will have browned.) Remove from pans and let cool on wire racks. 

To freeze in dinner roll sized pieces (these will thaw much more quickly), divide the batch into 4 equal pieces.  For "Texas" rolls, divide each piece into four more equal pieces.  Divide each of these into four equal pieces.  (Each original fourth becomes 16 this way.)  Smooth each one and place on a greased baking sheet. Cover with plastic wrap and freeze. Transfer to freezer storage bags.

To make regular rolls,  divide the batch into 4 equal pieces.  Divide each into four more equal pieces.  Divide these smaller ones into 5 equal pieces, giving you 20 from each original fourth.  Smooth each one, place on a greased baking sheet, cover with plastic wrap and freeze. Transfer to freezer storage bags.

To bake, pull from freezer, place on greased baking sheet, cover, and let rise in a warm place until doubled, about 2 hours.  Bake at 350
°F about 15-20 minutes, or until lightly brown on bottoms.


For more freezer-dough baking tips, see here.

*Instead of using packets, the equivalent amount of active dry yeast is 3 Tbsp.+ 1 tsp. active dry yeast.  To use instant yeast instead, use 3 packets or 2 1/2 Tbsp. 

The photo below is the 1987 book the original recipe came from.  (I modified it some.)


Picture
0 Comments

Week 8- Canning meat, beans, and vegetables

5/30/2019

0 Comments

 
Your ​Week 8 assignment-- Going off your  Inventory Shopping List and this week’s sales, buy the 3 months’ worth of as many different food items as you can (= Buy For 3) as your new budget allows.  Only 10 more weeks of this step!

This week's skill:
Did you know that you can bottle meat, beans, stew, and chili at home?  When you find a great sale price on meat, you can buy a bunch and save yourself a lot of money in future months!  For instance, a couple months ago I found boneless skinless chicken for $1/lb. I bought a case (40 lbs), froze about 10 lbs in meal-sized quantities, and bottled the rest.  The bottled chicken makes for quick meals, and I know exactly what was added to it.  In this case, that meant chicken and salt.  Other times I’ve put sliced carrots, celery, onions, and herbs in the jars with the meat, to have a great base for a quick, wholesome chicken noodle soup or pot pie. My food storage includes home-bottled chicken, beef, salmon, pork broth, chicken broth, black beans, pinto beans…

Did you watch the video at the top, on making bottled stew?  Do you have some of the dehydrated diced carrots from the Home Storage Center?  They're great for adding to canned foods.  It helps to soak them in hot water for at least 10-20 minutes first, so they don't soak up all the water in your jar while it cooks.

Meat, beans, and vegetables (except tomatoes) are in the category called ‘low acid’, compared to things like tomatoes and fruits, which are ‘high acid’, or contain higher acidity.  Higher acid foods may be processed using a big pot with boiling water to heat the jars and food, but low acid foods have to be heated to a higher temperature.  This means the only way to safely bottle them is with a pressure canner—a pressure cooker made to hold 7 or more jars at a time.  They start around $65 and go up from there, but you may have a friend who is willing to let you try it out at her house, or borrow it if you’re the confident type.  (I have one. It's very similar to the one in the video above. Come on over!)

Where can you find instructions on pressure canning?  Most pressure canners come with an instruction book and charts, and there are great resources online.
 
The first place to know is your local Extension Office.  In Utah, that’s the Utah State University Extension office, and somebody there knows the answer to just about any question you come up with on the topics of food, kitchens, preserving, budgeting, gardening, yard care, house and garden pests, and more. They’ll even test your pressure cooker gauge every year for $2.

https://nchfp.uga.edu/ has lots of canning information; one of its pages is this one.  It has instructions on canning
Chicken, Rabbit, Chicken or Turkey Broth, Chili, Meat (ground or chopped), Meat (strips, cubes, or chunks), Meat Stock, Meat and Vegetable Soup, Mincemeat Pie Filling, Clams, Crab, Fish (fresh or smoked), Oysters, and Tuna!

This page has info on how canning preserves food, how to make sure your food is safe, what jars, lids, and canners to use, how to know if the jars sealed correctly, canning food for special diets (including baby foods), and more.
 
Other good resources are The Ball Blue Book  and its online counterpart, https://www.freshpreserving.com/home

The Ball Complete Book of Home Preserving

So Easy to Preserve    (388 pages of instructions and recipes from the Extension Office in Georgia)

There are lots more.  Look for USDA-tested recipes.
​_____________ 

Are you ready to try this?? It's great!
0 Comments

Week 7- Protecting your Food from damage

5/25/2019

0 Comments

 
Your ​Week 7 assignment-- Going off your  Inventory Shopping List and this week’s sales, buy the 3 months’ worth of as many different items as you can (= Buy For 3) as your new budget allows.    Since this is the week of Memorial Day, ketchup, hotdogs, and other BBQ and quick-meal staples are on sale.

Since your food storage is intended for emergencies, and earthquake is a real possibility where I live, it's wise to protect the food from getting damaged or ruined in one.  The biggest risks are food falling off a shelf—this is especially bad for glass canning jars!—or the shelf itself tipping over. (See minute 1:06 in the video above.)  To keep food from sliding or shaking off a shelf, put something in front of the food—run a string, attach a bungee cord, or create a lip using wood or part of the shelf.
To keep a shelf from tipping over, attach an L-bracket or earthquake strap on the wall, to a stud, and then secure the shelf to the L-bracket. There's a post here with photos and more information.

You’ll also need to protect your food from moisture-

Store in clean, dry buckets
with tight-fitting lids or PETE plastic containers. In a dry climate like Utah, that’s enough.  My sisters in Hawaii and Juneau, however, had to use Mylar liners inside of their buckets to keep moisture out. See this post on where to get new or used food buckets. 

Don’t let buckets sit on bare cement floors or come in direct contact with a cement wall.  Moisture travels through cement, and the bucket plastic also lets a little moisture through.  If you have bare cement floors, stick something between the floor and the buckets—a piece of carpet, a rug, a board, even cardboard. That will allow air to circulate and evaporate that tiny bit of moisture.    (NOTE- if you have a bucket of sugar that is exposed to moisture, that sugar will become a giant lump of sugar.  It is still perfectly usable; you’ll just need to whack it apart.)
 
The other enemies of food are heat, light, oxygen, and pests (bugs and rodents).  The darker, cooler, and more airtight you can store things, the longer they'll last.  This is especially true for oil, which goes rancid quickly when warm and in a bright area.

Store things that mice might get into, in plastic buckets, bins, or tubs with lids.  Mice LOVE chocolate.  I learned that the hard way.  One year, we had one mouse in our house, and he found the storage room.  At the time, I kept all my baking chips in an open cardboard box.  He chewed through most of the bags, eating quite a bit.  He taste-tested the mint chips and butterscotch chips and then left those alone.  (But not before chewing through those bags too!)

Since that time, I've kept my chocolate-- dipping chocolate, bags of Halloween candy, candy bars-- and other baking chips in small buckets; Smith's bakery gives away 2 1/2 gallon buckets.  Just ask at the bakery counter if they have any that day, or will save some.  The bakery gets its frostings and fillings in those buckets, and throws away buckets most days. 

On another topic, if you didn't see it on the 52 Weeks to Food Storage list, you can buy popcorn by the pound and make it into your own microwave popcorn!  
Picture
0 Comments

Reducing Food Waste-- What to do with Sour Milk -- Make Cheese and More!

5/18/2019

0 Comments

 
Week 6 assignment-- Going off your  Inventory Shopping List and this week’s sales, buy the 3 months’ worth of as many different items as you can (= Buy For 3) as your new budget allows.    You'll do this through Week 21.
_______________

A big part of food management at home is reducing waste.  There are many ways to do this. 

Serve only what you’ll eat.  Refrigerate, freeze, or re-purpose leftovers. Or share with a neighbor.  A friend of mine regularly fixes a plate of leftovers immediately after dinner, and takes it across the street to an elderly widow.

You can use a lot of your food prep trim - lemon peels can be used to flavor things, clean kitchen disposals, make homemade lemon extract and lemon sugar. Shriveled lemons, orange, grapefruit, or limes are good for making marmalade. Tops and bottoms of celery can be frozen and saved to make broth or to add flavor when you cook dry beans. Broccoli stems can be trimmed and cooked along with florets, or chopped and added to salad for a nutritious crunch.  Things you can't re-purpose or eat can be fed to chickens, and many can be added to the compost pile.

If you wonder how much improvement you could make-- and how much money you could save on food!-- remember this:
“What’s measured gets managed.”

For one week, notice, measure, and take notes on what gets thrown out. 
 Aramark, a food service contractor, began doing this, and has reduced their food waste by nearly half (44%). For them, that was 479 tons of food saved from being sent to landfills. 

This is an interesting article on what some restaurants have done to reduce waste. Most of what they've tried works in homes, also.

You may have heard that in the US we waste 40% of our food-- 63 million tons of it per WEEK. But do you know where that waste is happening?

The largest share of it (43%) is happening in our homes-- 27.1 million tons of it per year. That's about 51 ounces per person, per week, or 3.17 pounds. If my family was average, that would mean the 8 of us currently at home would be throwing out 25 pounds of food every week. Shocking!
​
That would count food trimmings when I'm cooking, vegetables and fruits that went bad before getting used, whatever is wasted on a plate, leftovers that didn't get eaten in time, and anything that got burned too badly to eat. :)

We waste much less than average, though, and truthfully throw out very little. We belong to the "Clean Your Plate Club" that my grandma and mom talked about; all but the tiniest kids have learned to only serve up what they are willing to eat. We serve the 2- and 4-year-olds their food, and only in small amounts. If they want more, they get it after the other food on their plate is gone. Usable trimmings get saved for soup or broth. Unusable ones go to the chickens. Produce that went bad gets washed and trimmed; any good parts are used, bad parts go to the chickens. (We call these, "chicken treats"!) Bananas and apples that are getting mushy get put in smoothies or in baked goods. We understand what "expiration" dates mean on food, and so use our senses of smell, sight, and taste to know if they're still fine. (And they ARE, for much, much past those dates.)   When I miss a container of leftovers in the back of the fridge and find it after a week, that goes to the chickens too. Somehow we had THREE gallons of milk go sour this week, so they were turned into quick cheese; the whey went in muffins and bread. 

Let’s look at how to reduce waste with one item- MILK.

What can you do when milk goes sour?  This applies whether it happens before the ‘sell by’ date or after. Why does milk go sour? Does that mean it will make you sick?


Milk is high in lactose, which is the natural sugar found in milk.  When bacteria are introduced to the milk, they eat the sugars and convert them into lactic acid (=fermentation).   This means the milk has less sweetness, and more sourness.   This is the process used and controlled when making yogurt, cultured buttermilk, cottage cheese, and more.  

Some bacteria can make you sick, others are perfectly safe.  Because you don’t know which bacteria made your milk go sour, using uncooked sour milk has a possibility of making you sick.  Cooking with it, however, kills the bacteria, and is therefore safe.

Ways to use sour milk
 

-use it in place of buttermilk in pancakes, biscuits, chocolate cake, cornbread, wheat   bread, or any other recipe. 
-freeze it for using in recipes next time.

-pour a cup around your garden plants- it’s good fertilizer!  Milk is used to help grow     giant pumpkins, and helps prevent blossom end rot in tomatoes.  
- feed to chickens, pigs, or dogs (boil it first if you’re concerned for your dogs)
- make CHEESE! 


That’s right, you can take sour milk and turn it into cheese.  The fastest, easiest ones to make are cottage cheese and Queso Fresco, a mild fresh cheese. The method for both is the same until after the cheese curds are drained.

One gallon of milk will make about one pound of cheese.
 

Cheese from Sour Milk
You will need:

Sour milk
Salt
Vinegar or lemon juice—maybe.
 
Spray the inside bottom of a heavy saucepan with nonstick cooking spray.  Heat over low for about a minute to form a coating-- this helps the milk proteins NOT stick to the bottom of your pan.(You can skip the spray and still be fine.  Just stir more.)  Add your sour milk, and heat over medium-high until the milk starts to steam, stirring often.  If your milk is sour enough, it will start to curdle-- separating into curds and whey.  (Remember "Little Miss Muffet"?  Curds are the white clumps, whey is the yellowish liquid left behind.)  If your milk isn’t separating on its own, add up to ¼ c. of vinegar or lemon juice, a few DRIPS at a time, stirring after each addition.  The milk will immediately start to curdle.  Remove from heat and let it rest for one minute. 

Put a fine-mesh sieve over a large bowl and pour the curds and whey into the sieve.  Move the sieve to the sink, and rinse with hot water to get the acid out.  Rinse with cold water for about a minute, until no more whey is in it.  Add salt, ½ tsp. per cup of curds.

Cottage Cheese-
For each cup of curds, stir in 2-4 Tbsp. of yogurt or sour cream.  Cover and refrigerate.  This works great in recipes like lasagna.  I can make a batch of cottage cheese (using dry milk powder) faster than I can drive to the store and purchase it. (That’s saying something; the store is about a mile away.)
 
Queso Fresco-
After draining, rinsing, and salting the curds, put them in a couple layers of cheesecloth or on a flat (non-terrycloth!) dish towel.  Twist the top of the fabric closed, and tightly squeeze the cheese over the sink.  More liquid will come out.  Attach the twisted part of the towel (your ‘bag’) to a cupboard handle, and set a bowl under it to catch any more drips.  Let hang overnight.

If you want a nice flat, round shape, instead of hanging the bag, set it inside something round—a clean, empty 29 oz peach can, a food storage container, or whatever you have.  Set something on top of the cheese, and put something heavy on top of it to press it down.  Let that sit overnight. 
In the morning, wrap and refrigerate the cheese.  Use within a week or two; this one doesn’t have a long shelf life.  Here are ways to use it. https://www.thekitchn.com/queso-fresco-the-cheesemonger-91408
 
 ---------------------------------------
Now you have leftover whey - a yellowish, clear liquid that contains protein, carbs, calcium, phosphorus, and several B vitamins.
 
The resulting whey in this recipe is ‘acid whey’ (versus ‘sweet whey’) because it is a little acidic.  How to use it?  Very much as you would sour milk or buttermilk.  Use in most recipes that call for water or milk.  Use it as a tenderizing marinade for meat; add flavors and spices as you like.  Use it to make whey lemonade, feed it to animals (chickens love it!), or as a last resort, pour in your compost bin.  It’s also reportedly used as a great hair rinse, but I haven’t tried it yet.

What else have you done with sour milk, or with whey?
0 Comments

Prophets See Ahead

5/11/2019

0 Comments

 
“Prophets see ahead. They see the harrowing dangers the adversary has placed or will yet place in our path. Prophets also foresee the grand possibilities and privileges awaiting those who listen with the intent to obey.”
-Neil L. Anderson, quoting then-Elder Russell M. Nelson, in “The Eye of Faith”, April 2019 
 
Recently, I ran across a talk that Harold B. Lee-- then of the Twelve Apostles-- gave during the middle of World War II.  He shared several things that the First Presidency had asked the people to do in the few years before, and what happened afterwards nationally that made it apparent that our prophets were prophetic in their counsel. The biggest takeaway for me was the pattern of counsel given and how it later proved them prophets, though not given in a manner we'd usually consider as 'prophesying'. I highly recommend reading it; there was a lot of Church history that meshed with bits I knew of WWII history.  And there were pieces I had to look up.

"For the prophecy came not in old time by the will of man: but holy men of God spake as they were moved by the Holy Ghost.”(2 Peter 1:19-21)  "Surely the Lord God will do nothing, but he revealeth his secret unto his servants the prophets." (Amos 3:7)  "Wherefore, I the Lord, knowing the calamity which should come upon the inhabitants of the earth, called upon my servant Joseph Smith, Jun., and spake unto him from heaven, and gave him commandments."(D&C 1:17) 

Prophecy most often comes in the form of commandments, not as "thus saith the Lord" or "this is going to happen" statements.  (President Nelson has, however, given plenty of prophetic promises too. I have a list you can see if you want it.)

Here's more of the pattern.

In 1998 and 2000, President Gordon B. Hinckley said he couldn't get Pharoah's dream of the seven good and seven bad years off his mind, and said, "There is a portent of stormy weather ahead to which we had better give heed."    In 2001, when the Twin Towers were destroyed, the stock market fell a huge amount.  It wasn't a huge deal economically for long, but it was for a little while. And 7 years later, a huge shift in the economy occurred.

In 2007 the church (First Presidency) published the "All is Safely Gathered In" guides for financial safety and food storage. They created food storage packs at the Home Storage Centers- those boxes with 6 big cans in them. Each included wheat, rice, milk, the All Is Safely Gathered In booklets. In January 2008 this information was shared again through the Church News.

Do you know what happened at the end of September 2008?

It was the stock market crash, followed by 'the Great Recession', from which the nation has only recently recovered.

Have you ever noticed that the Church is always ahead of the curve, whatever the curve happens to be?

A couple months ago, the First Presidency sent bishops a letter and a lesson outline, asking them to use one of the two next possible 5th Sundays (2nd hour block) to teach "Being Wise in Managing our Finances" to their ward members.  This included an impressive amount of cautions concerning investing, like this line- "Do not invest if you cannot afford to lose your investment".  

The Lord works through small and simple means- including through living prophets' counsel and commandments.
 
As Harold B. Lee said in his talk,

"We as a people seem to be willing to accept many of the ancient prophecies as having been literally fulfilled but when we see prophecies fulfilled in our own day we are prone to question and to express some doubts. As the Master said, ' . . A prophet is not without honor, but in his own country'  Mark 6:4 and he might have added, 'Save in his own time'."

What else have our modern prophets said? Here are several quotes.

“Liv[ing] principles of self-reliance and provident living… are essential things which must be done before nonessential things. … What a different world and Church this would be if every Latter-day Saint sister… was self-reliant enough to be able to give freely of her knowledge, talents, and resources”.  -Julie B. Beck, "What Latter-day Saint Women Do Best"

“Loving God and loving our neighbors is the doctrinal foundation" of all programs in the church.  "Teach members to provide for themselves and their families and to assist the poor and needy in the Lord’s way.”
-M. Russell Ballard, “The True, Pure and Simple Gospel of Jesus Christ”

“A cardinal principle of the gospel is to prepare for the day of scarcity. Work, industry, frugality are part of the royal order of life… Inspired preparation rests on the foundation of faith in Jesus Christ, obedience, and a provident lifestyle. Members should not go to extremes, but they should begin. We call upon priesthood bearers to store sufficient so that you and your family can weather the vicissitudes of life.” 
-Keith B. McMullin, https://www.lds.org/general-conference/2007/04/lay-up-in-store?lang=eng  
 
“There is a careful way and a casual way to do everything, including living the gospel.” 
-Becky Craven, “Careful versus Casual”
 
"We no longer have the luxury of spending our energy on anything that does not lead us and our families to Christ. That is the litmus test . . . for our lives. In the days ahead, a casual commitment to Christ will not carry us through." 
-Sheri L. Dew, "We Are Women of God"

“How do we become self-reliant? We become self-reliant through obtaining sufficient knowledge, education, and literacy; by managing money and resources wisely, being spiritually strong, preparing for emergencies and eventualities; and by having physical health and social and emotional well-being”.
-Julie B. Beck,  Basic Principles of Welfare and Self-Reliance, 4)

"Self-reliance is taking responsibility for our own spiritual and temporal welfare and for those whom Heavenly Father has entrusted to our care. Only when we are self-reliant can we truly emulate the Savior in serving and blessing others. It is important to understand that self-reliance is a means to an end. Our ultimate goal is to become like the Savior, and that goal is enhanced by our unselfish service to others. Our ability to serve is increased or diminished by the level of our self-reliance.”
-Robert D. Hales, "Becoming Self-Reliant"

“There may be…times when we recognize a need but feel inadequate to respond, assuming that what we have to offer is insufficient. To do just as He did, however, is to minister by giving what we are capable of giving and to trust that the Lord will magnify our efforts to bless our “fellow travelers on this mortal journey.” … Although we may feel that our efforts are inadequate, … small and simple acts are powerful because they invite the companionship of the Holy Ghost”.
-W. Christopher Waddell, “Just as He Did”

“the Holy Spirit affirmed two things to me. First, the work of ministering to temporal needs is vital and must continue. The second was unexpected, yet powerful and clear. It was this: beyond selfless service, it is supremely important to prepare the world for the Second Coming of the Lord Jesus Christ.”
-D. Todd Christofferson, “Preparing for the Lord’s Return”
0 Comments

Week 5 assignment and DIY Instant Oatmeal Packets

5/11/2019

0 Comments

 
Picture
Your assignment this week is to look through the grocery ad for things on your inventory list that you need. With the budgeted amount of money you have (ballpark figure is $14 per week, per person) buy your three months' worth of however much you can on your list.

Do you like to use instant oatmeal?  You can save money (and know exactly what you're eating) by making your own. It's so quick and handy to have it all made up!
 
Homemade Instant Oatmeal 
4 cups quick oats (oatmeal), gluten-free if you need them
1-3 tsp. cinnamon
½ - 2/3 cup brown sugar*
½ - 1 tsp. salt
optional: 1/2 cup dry milk powder
optional: 1 c. chopped dried fruit or toasted nuts

Put 1 ½ c. of the oats in a blender; blend on high until almost powdery.  Dump this into a medium-sized mixing bowl; stir in cinnamon, brown sugar, salt, and milk powder and fruit/nuts if you’re using them.
 
After making it for the first time, see if it needs adjusted for your family’s tastes-- take 1/4 c. of this mix, combine in a bowl with ½ cup water, and microwave for 60 seconds. Taste it.
Is it great? Does it need more cinnamon? Sugar? Salt?  Add as needed, then cook another bowlful to see.  Take notes so you don’t have to do this next time.  😊 
 
Store in a canister, a quart-sized ziptop bag, or pre-portioned into snack-sized ziptop bags.
This batch can easily be doubled or tripled.
 
You can pre-portion these into snack-size baggies (then reuse baggies!), or just keep a measuring cup in the canister or bag. If you want individual servings measured out ahead of time, place either 1/2 c. or 1/3 c. mix in each baggie.

TO USE:
One large serving:  use ½ c. mix and 1 c. water.  Microwave 90 seconds; let stand. 
One small serving: use 1/3 c. mix and 2/3 c. water.  Microwave 60 seconds; let stand.
For four large servings (or 6-8 small ones), use four cups boiling water and add 2 to 2 ½  cups oatmeal mix.
Adjust water and/or mix to make it as thin or thick as you like.  

    
* For children who aren't yet accustomed to sugary oatmeal, use 1/2 cup brown sugar.  For those sugar-addicted husbands, you may need to add more. Regular sugar, evaporated cane juice, or an appropriate amount of stevia may be used. 
If your brown sugar is lumpy, it can be added to the blender with the 1 ½ c. of oats and blended with them.
 
Here are some flavor combinations; the sky's the limit!

Apple Cinnamon- Use the higher amount of cinnamon; you might even go up to 1 ½ to 2 Tbsp. Stir in 1 c. chopped dried apples.

Apricot Almond- Add 1 tsp. almond extract to the oats being blended.  At the end, stir in ½ c. finely chopped dried apricots and ½ c. chopped toasted almonds.

Banana Maple- Add ½ tsp. maple extract and ½ to 1 c. banana chips to the oats when they’re blended.

Chai Spice- Use 2 tsp. cinnamon, 1 tsp. ginger, ½ tsp. cardamom, and ¼ tsp. cloves. (If you like, you can also add ¼ tsp. ground black pepper and ½ tsp. allspice.)  For Vanilla Chai, add 1 Tbsp. vanilla to the oats when they're blended, or use vanilla powder.
 
Date Nut- Use the higher amount of cinnamon. At the end, stir in ½ c. finely chopped dates and ½ c. toasted chopped walnuts or other nut.  TIP- if you chop the dates and the nuts together, the dates won’t stick to your knife as badly.
 
Dinosaur- Use the higher amount of cinnamon. Stir in ¼ c. dinosaur-shaped sprinkles.
 
Maple Brown Sugar- Add ½ tsp. maple extract to the oats being blended. Use the higher amount of brown sugar (dark brown if you have it), and the lower amount of cinnamon.

Pumpkin Spice- Use 2 tsp. cinnamon, plus 2 tsp. ginger, 1 tsp. nutmeg, and 1/2 to 1 c. pumpkin powder. Best if you also use the 1/2 c. dry milk powder.

Raisin, Apple & Walnut- Use the higher amount of cinnamon.  At the very end, stir in ½ c. chopped raisins, ½ c. chopped dried apple, and ½ c. chopped toasted walnuts.

Strawberries and Cream- Use either ½ c. dry milk powder, or ½ c. powdered creamer. Stir in 1 c. chopped dried or freeze-dried strawberries. You can also make Raspberries and Cream, Blueberries and Cream, or Peaches and Cream this way.
 
Very Berry- Add 1 tsp. vanilla to the oats being blended. Use the lower amount of cinnamon.  Omit brown sugar, and use 1 c. of the berry drink mix from the Home Storage Center. Stir in 1 c. chopped dried cranberries or other dried berry.
0 Comments

Week 4- Where do I get the money?

5/4/2019

0 Comments

 
The week 4 assignment:
Going off your new Inventory Shopping List and this week’s sales, buy the 3 months’ worth of as many different items as you can as your new budget allows. This plan calls for buying your 3 month foods each week over the next 18 weeks. From now on, I'll refer to this as B for 3. 

My friend Heidi recommends this inventory app- you scan items and they’re automatically entered.  I can’t vouch for it yet, but she loves it.

How can you afford to buy all this extra food?

Waste less- this saves $$ on your regular food budget, freeing up money. Did you know the average family of 4 throws away more than $2000 of food every year?  (See ways to waste less, here.)  This alone has the potential to completely fund your food storage!

Budget it in- in addition to freeing up money by reducing the food you waste, there are other ways to find money you already have.    Plan on finding $14/person/week.  Vaughn J. Featherstone gave a talk years ago on how to get your full year’s worth of food within just one year.  He recommends sitting down as a family and deciding on ways.  Some of his suggestions include

-skip going on a vacation; use the money for food storage, and spend the time on growing a garden.

-at Christmas time, designate 25-50% of the regular gift budget for food storage.
-make your clothes last longer.  Don’t replace anything that still has good use in it, and mend or repair what can be.

- cut your entertainment budget by 50%.  Find memory-building activities that are free.

-Sell a ‘luxury item’ like a snowmobile, ATV, boat, camper, etc.  (Modern note: If you have a storage unit, sell what’s in it; use the proceeds --and the rent savings-- for food.)

-watch the grocery sales, buy extra when what you need is on sale.

-reduce the meat you buy and switch in a protein source that costs less. Buy less ice cream, candy, chips, magazines… whatever is tempting to you there.  Spend the difference on what’s on your inventory purchase list.
 
If after going through Elder Featherstone’s suggestions it still looks impossible, pray to see what you can do.  Ways will open. God is still a God of miracles!

Grow and Glean- Grow the food you can- berry bushes can fit easily in a landscape, as can fruit trees, herbs, and vegetables.  Gleaning- when a neighbor has too many zucchini or tomatoes, volunteer to take some.  Use them in recipes, freeze them, bottle them, dehydrate them-- seasoned dried zucchini slices are great for snacking! Very often there are people around who have fruit trees they don't harvest. Knock on a door and ask!  Usually they're a little sad about it going to waste otherwise, and grateful to have someone use it.

Buy smart – My dad laughingly said he learned in college about the ‘SOS’ Method. This can mean Stay Out of Stores or Stock up On Sales.  Both have their place and their limits.

Stay Out of Stores-- the fewer times a week or month you visit stores, the less money you will spend there!  

Stock up when things are on sale- know what the regular prices are, so you can recognize a good price.  Buy as much of your 3 month's worth as you can fit in the budget.  (Remember it’s only a ‘deal’ if you were going to buy it anyway.  Don’t buy stuff just because it’s on sale. Be intentional!)  If chicken is an amazing price, you can buy a case or however much your family will use; divide it into meal-size freezer bags, raw or cooked, or bottle it to store on the shelf.

Buy when others don’t want it.  Buy foods that are marked down because they are at or near the ‘best by’ date.  (The date matters much less on some foods than others.)  Work this week’s sale produce into your meals and snacks.  Ask the produce guy at the grocery store if they have too many bananas; several times I’ve been able to buy a 40-lb case of bananas for $10 or even $5.  That’s enough for about three rounds of filling my dehydrator with sliced bananas, plus a batch or two of banana bread for the freezer.  (My kids adore home dried bananas.)   Some stores give away their day-old bread and other bakery items rather than marking them down.  If you’re local, give me a call; I have access to some of this and am looking for people to share with!

Know the best places to buy things - call around or look online. But don’t spend too much time running from place to place. Remember the first SOS.

Two places you might not have considered that have great deals are the Home Storage Centers -- you can buy in person or order online-- and NPS-- a store that sells inventory overage, lost and missing freight.(This is in Salt Lake and Utah counties only.  Other areas may have similar stores.)
Again, if you’re local, I’m glad to show you around at either place.  NPS has amazing deals- including on GF and dairy-free items-- but not everything there is inexpensive. I tend to shop there once every couple months, and get a lot of what’s good.


How can you afford to build your food storage?  
-Waste Less
-Budget it In
-Grow and Glean
-Buy Smart!
0 Comments

Week 3 of 52- How much food is YOUR three-month supply?

4/27/2019

0 Comments


Now that you have a record of the food already in your house, identified a place to store more, and set up a shelf, it’s time to find out how much of what food items it will take to feed YOUR family for three months!  This method can work for anyone, whether you have food allergies, picky eaters, or other special diets.

Sit down with your family on Sunday or Monday-- during Home Evening works great-- and get your children’s suggestions of favorite meals. Plan a menu of at least breakfasts and lunches for anywhere from one week to a month. (At our house, lunch is leftovers, or sometimes sandwiches.) 

Need ideas for meals? Here’s a month plan from me,  a collection from Wendy DeWitt, a list of things my family likes, and a Shelf Stable Recipe Book collected from readers of FoodStorageMadeEasy  
 
Then you need to figure out how much of each food item or ingredient you need for each meal.  There are at least two good ways to do this—3x5 cards, or spreadsheets. There’s a digital spreadsheet that will add your totals for you, and a printable one if you prefer to do it in hard-copy.

3x5 cards-

The method in a nutshell:
If you’re planning 7 breakfasts and 14 dinners, pull out 7 + 14 cards.   Write a meal at the top of each one.  Below that, on the left, write down each ingredient or food item you need for that meal, including water and salt.  In the middle, write down how much of it you need for that meal.  Once all cards are done, make a master shopping list from them.
Read more about this method on page 1 of Wendy DeWitt’s food storage booklet. She also has a video explaining her system- watch from minute 6:55 to about 9 minutes.  She uses this method for her year-long storage, but we’re only using it for the 3-month supply.

Spreadsheet method: 

You start out the same-- choose 7 or more breakfasts, 7 or 14 or more dinners, list out the ingredients/foods and quantities.  This Three-Month Supply Excel Spreadsheet will do all the math for you. If you're not sure how to use it, watch this tutorial.   If you prefer to have a hard copy to write on, go to the same link as the Three-Month Supply spreadsheet; there's a downloadable, printable version there as well.
0 Comments
<<Previous
Forward>>

    Need a Search bar?
    One day I may upgrade my website-- but until then, use your web browser search bar. Type in my web address and what you're looking for, like this-- 
    www.theprovidenthomemaker.com  pumpkin --  and you should get results.


    Author

    I'm a disciple of Christ, a member of the Church of Jesus Christ of Latter-day Saints, a family-defending, homemaking, and homeschooling mom of eight children, two of whom sometimes can't have milk or wheat. Growing up on a farm in a high mountain valley, my parents taught me to 'make do', work hard, smile, and help others.  I love cooking, learning, growing food and flowers, picking tomatoes, and making gingerbread houses --which CAN be made allergy-friendly-- with my children.  I hope you find something to help you on my site!

    Archives

    April 2024
    July 2023
    April 2022
    September 2021
    March 2021
    December 2020
    April 2020
    March 2020
    February 2020
    January 2020
    December 2019
    November 2019
    October 2019
    September 2019
    August 2019
    July 2019
    June 2019
    May 2019
    April 2019
    January 2016
    November 2015
    October 2015
    September 2015
    March 2015
    February 2015
    November 2014
    October 2014
    September 2014
    August 2014
    July 2014
    June 2014
    May 2014
    April 2014
    March 2014
    February 2014
    January 2014
    December 2013
    November 2013
    October 2013
    September 2013
    August 2013
    July 2013
    June 2013
    May 2013
    April 2013
    March 2013
    February 2013
    January 2013
    December 2012
    November 2012
    October 2012
    September 2012
    August 2012
    July 2012
    June 2012
    May 2012
    April 2012
    March 2012
    February 2012
    January 2012
    December 2011
    November 2011
    October 2011
    September 2011
    August 2011
    July 2011
    June 2011
    May 2011
    April 2011
    March 2011
    February 2011
    January 2011
    December 2010
    November 2010
    October 2010
    September 2010

    Categories

    All
    Alcohol
    Alternate Cooking
    Appearances
    Apple
    Apricots
    April Fools
    Aprons
    Bananas
    Beans
    Beef
    Beets
    Bench
    Beverages
    Bonnet
    Bread
    Breakfast
    Budget
    Budgeting
    Cake
    Candy
    Canning
    Carrots
    Cheese
    Chicken
    Children
    Chocolate
    Christmas
    Cleaning
    Coconut
    Comfrey
    Common Core
    Constitution
    Cookbook
    Cookies
    Cooking Oil
    Crafts
    Dairy Substitutions
    Dehydrating
    Dessert
    Dried Fruit
    Earth Oven
    Earthquake
    Easter
    Edible Weeds
    Eggs
    Emergency Prep
    Essential Oils
    Faith
    Family Home Evening
    Fertilizing
    Food Storage
    Fourth Of July
    Freezer
    Frosting
    Fudge
    Garden
    Gardening
    Gingerbread
    Gluten
    Gluten Free
    Gold
    Government
    Grains
    Gratitude
    Hat
    Herbs
    Home Remedies
    Home Repairs
    Homeschool
    Home Storage
    Honey
    Hope
    Inflation
    Leftovers
    Legumes
    Lemon
    Main Dishes
    Mixes
    Mothers
    Noah
    Non Artificial Colors
    Non-artificial Colors
    Nuts
    Oats
    Oil
    Orange
    Paint
    Peaches
    Pear
    Pie
    Pizza
    Plums
    Poem
    Popcorn
    Pork
    Potatoes
    Powdered Milk
    Prayer
    Preparedness
    Projects
    Prophecy
    Pruning
    Pumpkin
    Quick Bread
    Rhubarb
    Rice
    Salad
    Salt
    Sauces
    Self Reliance
    Self-reliance
    Sewing
    Shelf Life
    Shelves
    Sky
    Smoothie
    Snacks
    Soup
    Spices Or Seasonings
    Squash
    Strawberries
    Substitutions
    Sugar
    Summer Fun
    Three Month Supply
    Time
    Tomatoes
    Trees
    Truffles
    T-shirts
    Tuna
    Ultra Gel
    Valentine\'s Day
    Vegetables
    Water
    Watermelon
    Wheat
    Work
    Year Supply
    Zucchini

    RSS Feed

Web Hosting by iPage