I know that God has directed my paths, that I benefit most from this when I pay attention and listen for his counsel and direction. I'm grateful for the struggles and learning he's helped me through; they prepare me to become more like he is, and to better serve him and his children.
|
We're in the transition between the celebration of Christmas and the reevaluation of a new year; here's some of what I've been thinking about. We just don't know all the long-term effects of our actions... but he does; he who knows the end from the beginning. He tells us, My name is Jehovah, and I know the end from the beginning; therefore my hand shall be over thee, and "I am God, and there is none like me, 10 Declaring the end from the beginning, and from ancient times the things that are not yet done" (Isaiah 46:9-10). I know that God has directed my paths, that I benefit most from this when I pay attention and listen for his counsel and direction. I'm grateful for the struggles and learning he's helped me through; they prepare me to become more like he is, and to better serve him and his children.
0 Comments
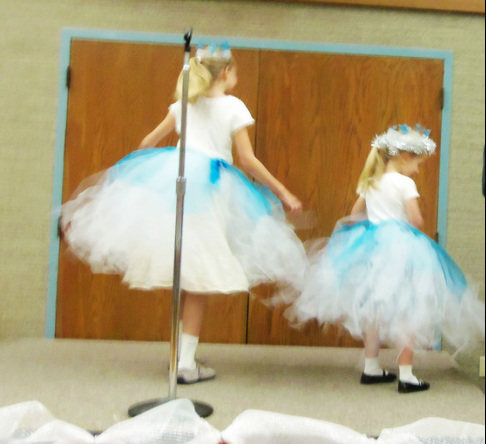
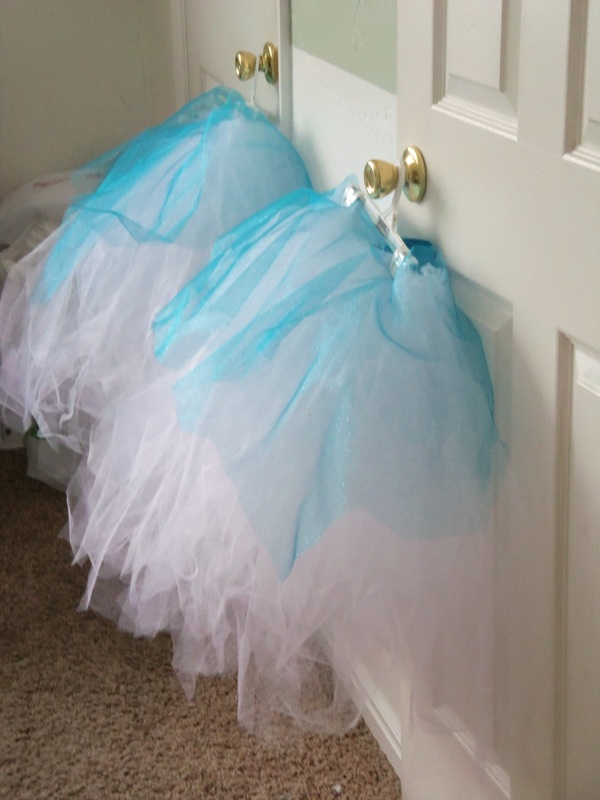
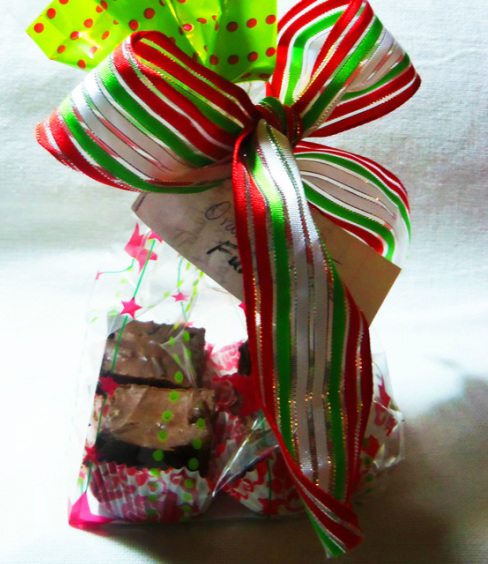
Did you ever learn the song that starts, "Here comes Suzy Snowflake"? Our family was asked to come up with a musical number for a party... and that's what we chose. And my girls got some great dress-up skirts out of it. (I told them they're early Christmas presents... and now that we've performed, the skirts get wrapped and put under the tree.) On the Youtube video below, she shows you a quick way to cut strips of netting: roll the tulle without creating wrinkles; cut the roll into 3” strips. She used 4 colors, 1 yd each, for a 2-4-year-old’s skirt. For that shorter skirt, she cuts each strip in half. She says it takes about 45 minutes to make one; we spent about an hour apiece but that was with my 11-year-old doing most of the tying. I used her method but made longer skirts- the biggest of the two was 27" long, the small one was 24" long. So I made the strips 54" long for the first, 48" long for the second. When I got to the fabric store, I found that the more delicate-looking Illusion netting, 108" wide! so I could get twice as many strips per yard- was on sale for $1/yd, so I got that instead of the coarser netting. I used almost 5 yard for the bigger skirt and about 4 1/2 yards for the smaller one. For the larger snowflake overlay skirt (18" long), I bought turquoise sparkle tulle, folded it in sixths cut a circle with a 22" radius (needed 1 ¼ yds); cut out a circle for the center, and cut it like a very simple snowflake. The smaller overlay (14" long) only required 1 yard. By the way, there's a great website that allows you to create snowflakes online and see what they'll look like before having to cut any actual paper. The snowflake crowns were cut from the bottom of a plastic gallon-sized milk jug, then my girls colored the snowflakes blue. See the slideshow for photos of that. Are you trying to eat healthier but really, really crave fudge? This one uses healthy fats and honey. It's also dairy-free and gluten-free for those who need to avoid those.
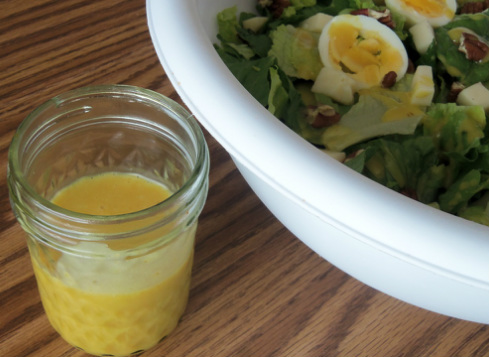
Avocados are high in three amazing fats: both phytosterols and PFAs (polyhydroxylated fatty alcohols) are documented to be anti-inflammatory, and oleic acid, which helps our digestive tract absorb fat-soluble nutrients. Coconut oil is healthy for many reasons, including being anti-inflammatory and having a high lauric acid and medium-chain fatty acids content. But enough about that. The big question is, doesn't avocado totally mess up the flavor here? No. I have a pretty discriminating set of tastebuds, and the only way I can detect the avocado is by a faint fruity flavor. Because of that, some of my favorite variations of this fudge include fruit: orange zest or oil, chopped dried cherries (and toasted almonds!), and the like. This fudge is really only a slightly thicker version of my ChocolateTruffle Pie. The recipe below includes both orange and pecans; if you don't want them, just omit the pecans and orange zest or orange oil. You can also use this recipe to make truffles; cut into squares, then quickly roll each square into a ball; roll in cocoa powder or chopped nuts to coat. Orange-Pecan Fudge makes about 3/4 of a pound 1 ripe avocado, peel and pit removed 1/4 c. coconut oil 1/4 c. honey 1/4 c. unsweetened cocoa powder 2 Tbsp. water zest from half of an orange (about 1/2 Tbsp.), or 2 drops orange essential oil 3/4 tsp. vanilla pinch of salt (1/16 tsp.) 1/4 c. toasted chopped pecans Line a 5 1/2 x 3 loaf pan (or 2-cup rectangular or square container) with foil; spray with nonstick cooking spray. Set aside. Put the water, zest (should be about 1 Tbsp), honey, coconut oil, cocoa, avocado, vanilla, and salt in a blender or food processor. Run on high for 1-2 minutes, until smooth. Pour into prepared pan. Cover and refrigerate 2-3 hours until set. Store in the refrigerator or freezer. If freezing this, let pieces thaw about 10 minutes before serving. I don't know how long it will keep in the fridge because it gets eaten so quickly. But the one piece that survived us for a week and a half was still good. Any longer than a week, though, it'd be better preserved in the freezer. Wrap tightly. Yesterday I got to have lunch with some friends at a neighbor's house. We each brought something; Emily, whose house we met at, made Apple Butternut Squash Soup; this link goes to the recipe on her website. I had lots and lots of Romaine lettuce on hand, thanks to another friend... so a salad seemed in order. I started out intending to make honey-mustard dressing, but it lacked something... so I looked around the kitchen to see what to use. In went some orange peel and the white parts of some green onions. Oh. That was good! Next about a pound of lettuce and the green parts of three green onions were mixed with around half of the dressing; just enough]to lightly coat. Then four or five sliced hardboiled eggs went on top, 4 oz. of cubed cheese, and a big handful of toasted pecan pieces. Everyone loved it, except the person who didn't try it because she's allergic to eggs and nuts. :/ This would be delicious brushed onto chicken a few minutes before done baking. Honey-Orange Dressing Makes about 1 cup 1/4-1/3 c. honey (depends if you want this more sweet or more tangy) 1/4 c. apple cider vinegar 1/4 c. olive oil 1 tsp. prepared mustard 1/4 tsp. salt 1/4 tsp. pepper (I used 2 drops of essential oil) 2 Tbsp. onion (I used the bottom 1 1/2" from 3 green onions) 1 1/2 tsp. orange zest (I used about half the peel from a clementine) Throw everything into a blender; puree until smooth. This December, would you like a daily thought, song, scripture, story, and/or activity to help you feel more of the calm spirit of Christmas? My friend Amy over at LDS Holistic Living has a Christmas Advent Calendar you can use or download for free. It's designed specifically with members of the LDS faith in mind, but anyone can find great things in it. If you're interested, you can get the calendar here.
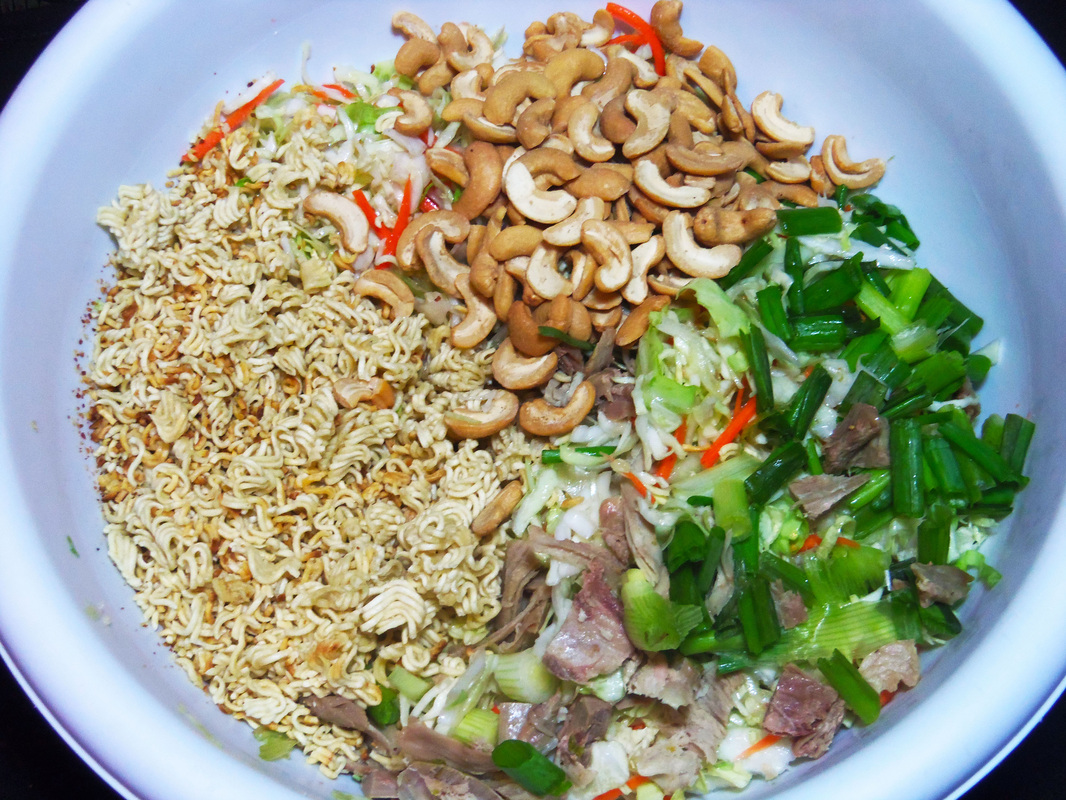
Meanwhile, here's a sample: The Real Story Behind the 12 Days of Christmas Catholics in England were prohibited by law from practicing their faith, both in private and in public from 1558 to 1829. Being a Catholic was treated as a crime. There was no restored gospel at the time, however there were good Christians who knew without doubt the true church was not one that was mainly created merely for the convenience of King Henry the Eighth who wanted to sin and have a church justify his actions. So in secret they continued to teach their children their religion. "The Twelve Days of Christmas" was written in England during this time frame. It was written to help children learn about their religion. The entire song is writing in symbolism and hidden meanings because it was illegal to have anything in writing that would indicate adherence to the Catholic faith. To be caught could mean imprisonment, hanging, or drawn and quartered. Christmas referred to a twelve day period that starts with Christmas day. "The Twelve Days of Christmas" referred to a twelve day period that began Christmas day. While the world may have celebrated Christmas for about twelve hours, these Christians celebrated it for twelve days as a reminder that the gifts of God are with us for twelve months of the year. It also represented the idea that we should be thankful for the gifts of God and follow His teachings for all twelve months of the year and not just one day a year. The song begins, "On the first day of Christmas my true love gave to me..." The "true love" represents God, as our greatest love should be for Him. The word worship means that which we love the most. The "me" who receives these presents is the Christian man or woman. 1. The "partridge in a pear tree" was Jesus Christ who died on a structure made from the wood of a tree. In ancient times a partridge was often used as mythological symbol of a divine, sacred king. 2. The "two turtle doves" were the Old and New Testaments - another gift from God. Doves symbolize peace and the Gospel contained in these scriptures, when practiced, brings peace. 3. The "three French hens" were faith, hope and love - the three gifts of the Spirit that abide (I Corinthians 13). The French hens can also represent God the Father, His Son Jesus Christ and the Holy Ghost. 4. The "four calling birds" were the four Gospels which sing the song of salvation through Jesus Christ. 5. The "five golden rings" were the first five books of the Bible also called the "Books of Moses." 6. The "six geese a-laying" were the six days of creation. 7. The "seven swans a swimming" were "seven gifts of the Holy Spirit." (I Corinthians 12:8-11, Romans 12, Ephesians 4, 1 Peter 4:10-11) 8. The "eight maids a milking" were the eight beatitudes. 9. The "nine ladies dancing" were nine fruits of the Holy Spirit. But the fruit of the Spirit is love, joy, peace, longsuffering, gentleness, goodness, faith, meekness, temperance: against such there is no law." (Galatians 5:22) 10. The "ten lords a-leaping" were the Ten Commandments. 11. The "eleven pipers piping" were the eleven faithful disciples. 12. The "twelve drummers drumming" were the twelve points of the Apostles' Creed. Most salads like this use so much dressing that there's a pool of it at the bottom of the bowl. And the dressing is about all you taste.
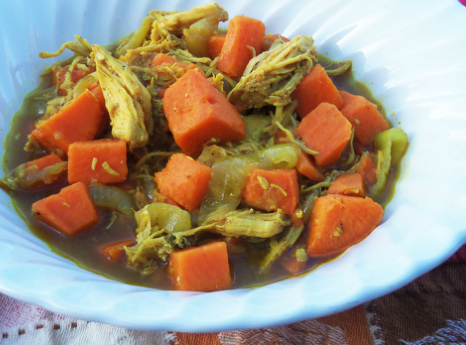
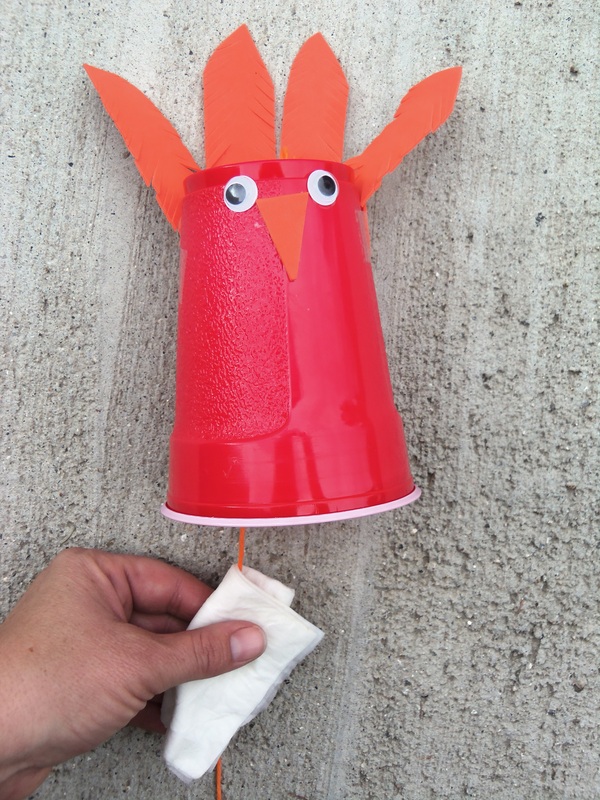
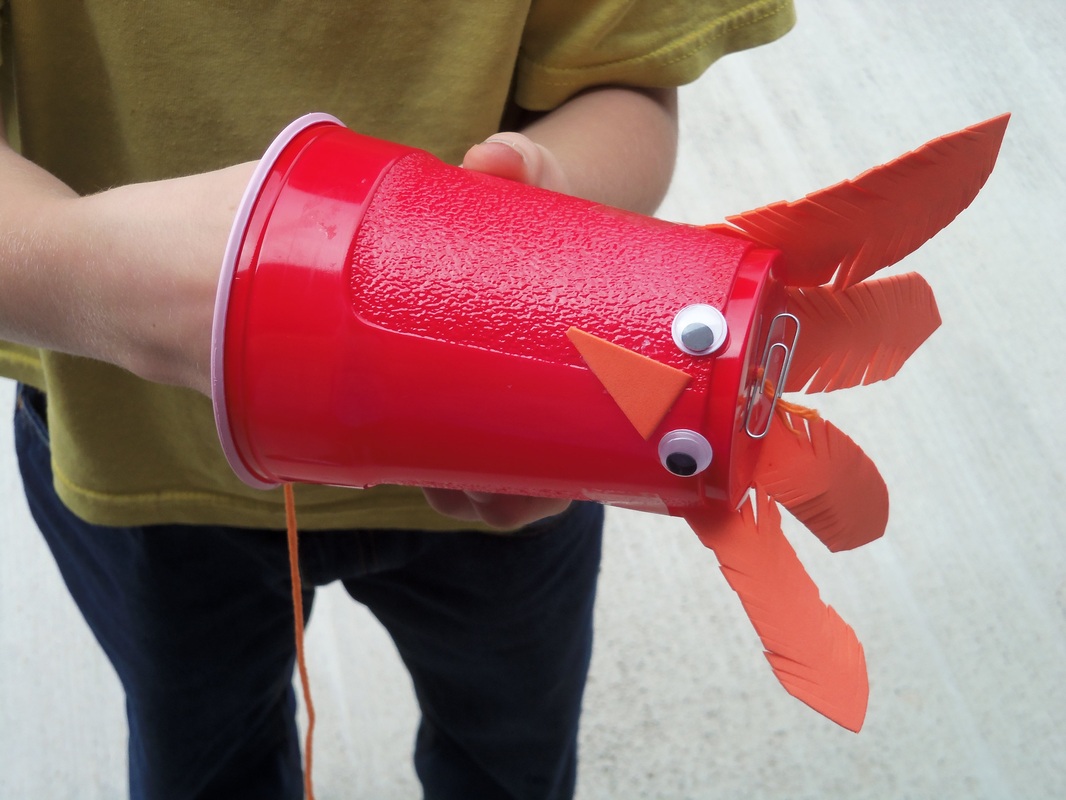
Not this one. There's enough oil in the salad to help you unlock those fat-soluble vitamins; both cabbage and cashews are very high in Vitamin K. And you can actually taste the cabbage, in a way that accents only its best features. If you have any left over, even though the noodles will not stay crunchy by the next day, the cabbage does. Cabbage Ramen Salad Serves 4-6. Or two who really, really like it. 1 tsp. olive oil 1 package Ramen noodles 2 Tbsp. olive oil 1 Tbsp. rice wine vinegar or apple cider vinegar 1 Tbsp. honey or sugar 1/2 tsp. salt 1/4 - 1/2 tsp. black pepper 1/2 tsp. ginger OR 1 1/2 tsp. chopped crystallized ginger OR 1 drop ginger essential oil 1 small cabbage, shredded, OR a 14-16 oz package coleslaw mix (cabbage and carrots) 2 green onions, chopped 1 c. cooked turkey or chicken, diced 1/2 c. cashews, optional Heat 1 tsp. olive oil in a large skillet on high heat. Break the Ramen noodles into small pieces and add to the hot oil. (You won't need the flavor packet for this recipe.) Stir dry noodles constantly for about 2 minutes, until some of the noodles start turning a toasty brown. Remove from heat and set aside. In a medium bowl, combine remaining 2 tbsp. olive oil, vinegar, honey/sugar, salt, pepper, and ginger. Stir well to combine. Add the cabbage or coleslaw mix, green onions, turkey/chicken, and cashews. Stir thoroughly, until no puddle of dressing remains on the bowl's bottom. Serve right away for the crunchiest noodles. Curry is becoming known as a bit of a superfood. The spice blend's famous color is from one of its ingredients, turmeric. Turmeric is now known to reduce inflammation- brain, systemic, and joints. Here's a great way to use up some leftovers in a flavorful, healthy way! Curry has an affinity for sweet, so it mixes perfectly with sweet potatoes or yams. When I was in college, I lived in the cheapest off-campus apartment around. There were several foreign students in the complex, and one day we had a potluck dinner together. One of the first foods on the table was an amazingly yellow... something. So I asked what it was. "Curry," she responded, "It's a food from Korea.". Further down the table was another bowl of yellow food. I asked about it. "Chicken Curry," she explained, "The Jamaicans invented it." Another friend walked up with a now-familiar color. I asked. "Curry. It's from Africa." It was good. All three were. Good enough I could see why everybody claimed it was from their own native country. Since my roommate was the Jamaican, that's whose recipe I got, though I had to watch her make it and estimate the amounts at the time. This recipe is based on hers, though she used bone-in chicken thighs, less onion but added a couple green onions, potatoes instead of sweet potatoes, and serve it not only over rice, but also with thick, chewy 'Jamaican Dumplings'. The recipe is flexible. Curry. From America. Sweet Potato Curry with Turkey- makes about 6 cups 2 Tbsp. oil 1-2 Tbsp. curry 2 medium onions, sliced into rings 1 c. cooked turkey, cubed (can use chicken instead) 1 lb. sweet potatoes, peeled and cubed* 1/2 tsp. salt 1/4- 1/2 tsp. pepper, to taste water *I used raw sweet potatoes, but feel free to use cooked ones- you can even get away with using leftover Thanksgiving baked sweet potatoes as long as they're not too saccharine; reduce cooking time accordingly. Heat oil on medium-high heat until shimmering-hot. Add the curry powder- amount depends on how strong you like it. (I like it strong.) Stir, and let it heat for about a minute to 'bloom' the flavor. It's done when it starts to smell delicious and a little toasty. DON'T burn it. (Nasty, bitter flavor!...) Reduce heat to medium, add onion; cook until they are tender, stirring occasionally. Stir in turkey, then add sweet potatoes, salt, and pepper. Add water until the food is nearly covered. Put a lid on the pan and simmer, covered, for about 20 minutes or until just tender. Remove lid, increase heat and gently boil until liquid is reduced by about half. Serve hot by itself or over rice. Optional:sprinkle with any of the following: chopped peanuts green peas mandarin orange segments shredded coconut diced apple dollop of sour cream or unsweetened yogurt chopped hardboiled eggs bits of dried fruit This is actually an instrument. Or a noise maker, depending on your perspective and the personality of the child holding it. It's a variation of the Brazilian & African cuica, used in Samba music. (See a video of an actual musician using a higher quality cuica on the YouTube video below. At any rate, this one can be made to make a clucking or 'gobble'y sound. These are entertaining by themselves, or add it in to an impromptu marching-around-the-yard band! You could have a whole flock of chickens or turkeys. To make one, you'll need A disposable plastic cup, googly eyes, paper/real feathers/paper or foam beak, an 18-20” length of cotton (not nylon) yarn, something to poke a hole with, a paperclip, dollar-bill sized piece of a paper towel, water. Using a nail or whatever works, poke a hole in the top. Thread the string through the hole, and tie the top end of the string onto a paperclip or washer, to keep it securely on the right side of the hole! Decorate. If you want to see someone make one and use it, see here. Have fun! First, a bit of trivia:
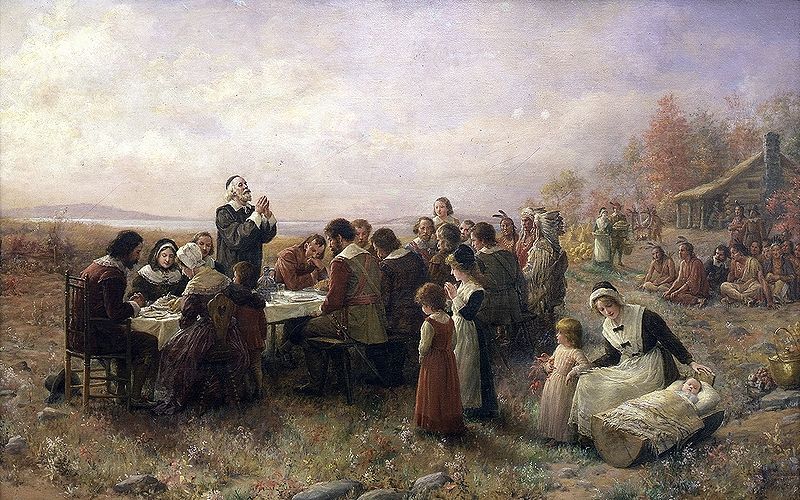
Did you know? While pumpkins were certainly a part of the first feast of thanks-giving, they were usually roasted or stewed. And eaten very, very often! For pottage and puddings and custards and pies Our pumpkins and parsnips are common supplies, We have pumpkins at morning and pumpkins at noon, If it were not for pumpkins we should be undoon." Pilgrim verse, circa 1633 ______________________ Please take some time this week to gather your children, grandchildren, neighbors, or whomever you care about, and teach them of our nation's heritage of gratitude. Some great resources are below, including what George Washington said in his Proclamation for a Day of Thanksgiving. Each generation must learn this, or it dies out, leaving a gaping hole that entitlement and selfishness rush in to fill. Gratitude is not only the greatest of virtues, but the parent of all the others. — Marcus Tullius Cicero (106 BC-43 BC), Pro Plancio (54 BC) The following is from the Providence Foundation's Nov. 2013 newsletter. (Thank you to them!) Celebrating Thanksgiving Thanksgiving is an uniquely American holiday. We have been giving thanks to God in private and public from the foundation of the nation. In fact, governments regularly issued official days of Prayer and Thanksgiving from the planting of the first colonies up until the present. Over 1400 Days of Prayer, Thanksgiving, and Fasting were proclaimed by colonial, state, and national governments from 1620-1815, and hundreds more have been issued since then. A few items to help you remember and pass on our heritage of thanking God include: Why We Celebrate Thanksgiving You can use this article to share with your family the origins of Thanksgiving Day. Some Early Government Thanksgiving Proclamations 1. President George Washington, Proclamation for a Day of Thanksgiving, Thursday, November 26, 1789 2. Governor Thomas Jefferson of Virginia, Thanksgiving Proclamation, December 9, 1779 3. Proclamation for a Public Thanksgiving, New Hampshire, December 10, 1778 4. Proclamation for Thanksgiving Day, Continental Congress, December 18, 1777 Issued during the American Revolutionary War by the Continental Congress, this was the first national Thanksgiving Day in America. The explanation of the proclamation is from W. DeLoss Love, The Fast and Thanksgiving Days of New England (1895). Love lists over 1400 days of prayer and fasting and prayer and thanksgiving observed by civil governments (colonial, state, and national) from 1620-1815. 5. Proclamation for a Day of Thanksgiving and Prayer, Massachusetts, June 29, 1676 On June 20, 1676, the Council of Massachusetts appointed June 29 as a Day of Thanksgiving and Prayer, in response to the colonists’ victory in King Philip’s War. The broadside of this proclamation is the earliest printed thanksgiving broadside known. At the top is the seal of Massachusetts, which shows an Indian speaking the words, “Come Over and Help Us.” How about this for a new side dish? I love rosemary and olive oil. Or butter. Or both. :)
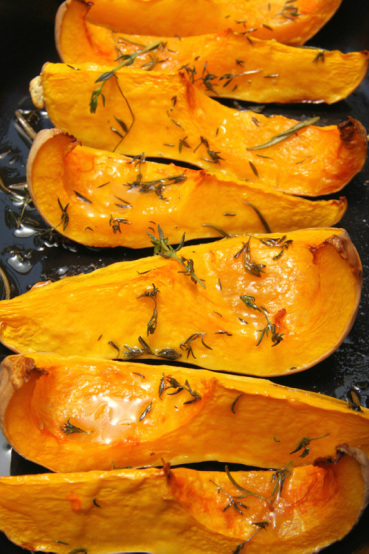
This recipe showed up at my house this week in a save-the-farmlands newsletter, of all things. (I'm all for saving farmlands, but how about nixing the property tax instead of government paying them subsidies?!) And since my live rosemary died over last winter and there's a bottle of rosemary essential oil in my cupboard, I adapted it to use that. You can substitute about any squash you have on hand that is a similar size. Or use something large, like half a banana squash or pumpkin, or kabocha squash, etc, but if you do, then double the amount of other ingredients except rosemary oil. Caramelized Butternut Squash with Rosemary 1 butternut squash 1 tablespoon olive oil 1/4 teaspoon salt 3 tablespoons unsalted butter 2 sprigs rosemary or one drop of rosemary essential oil (better if you have a 1 ml bottle, then use two of those tiny drops) on top of the butter Preheat oven to 375 degrees F. Cut the squash in half lengthwise; scoop out seeds. (You can wash, roast, and salt these, just like pumpkin seeds.) Put the squash cut-side up on a baking tray. Drizzle with olive oil, sprinkle with salt. In each natural 'bowl' where the seeds used to be, add 1 Tbsp. butter and a rosemary sprig. EXCEPT: if using rosemary oil, melt 2 Tbsp. butter and add the drop to it. Pour half into the cavity of each squash half. Cover tightly with foil and bake for 45 minutes, or until tender when poked with a fork. Remove from oven and pull off the foil; let cool until you can handle it. Scoop out the flesh. Heat the last 1 Tbsp. butter in a large skillet over med-hi heat. Once melted and hot, add the cooked squash. Gently toss until some parts become caramel-y brown. Serve hot. NOTE: the photo shows the squash as it comes out of the oven, not after being scooped out and browned. If you want it browned from the oven, do this instead: When tender, pull off foil and brush the last tablespoon of butter over the cut edges. Return to the oven and turn on the broiling element. Broil, checking every minute. (I am not kidding. Seriously check every minute!) If your baking tray is on the middle rack in the oven, this will probably take about 3-4 minutes. If the tray is up high, close to the element, it might only take 1 minute, maybe 2. Have you ever started a recipe only to discover that it called for "pumpkin pie spice"? And there was no such thing in your cupboard?
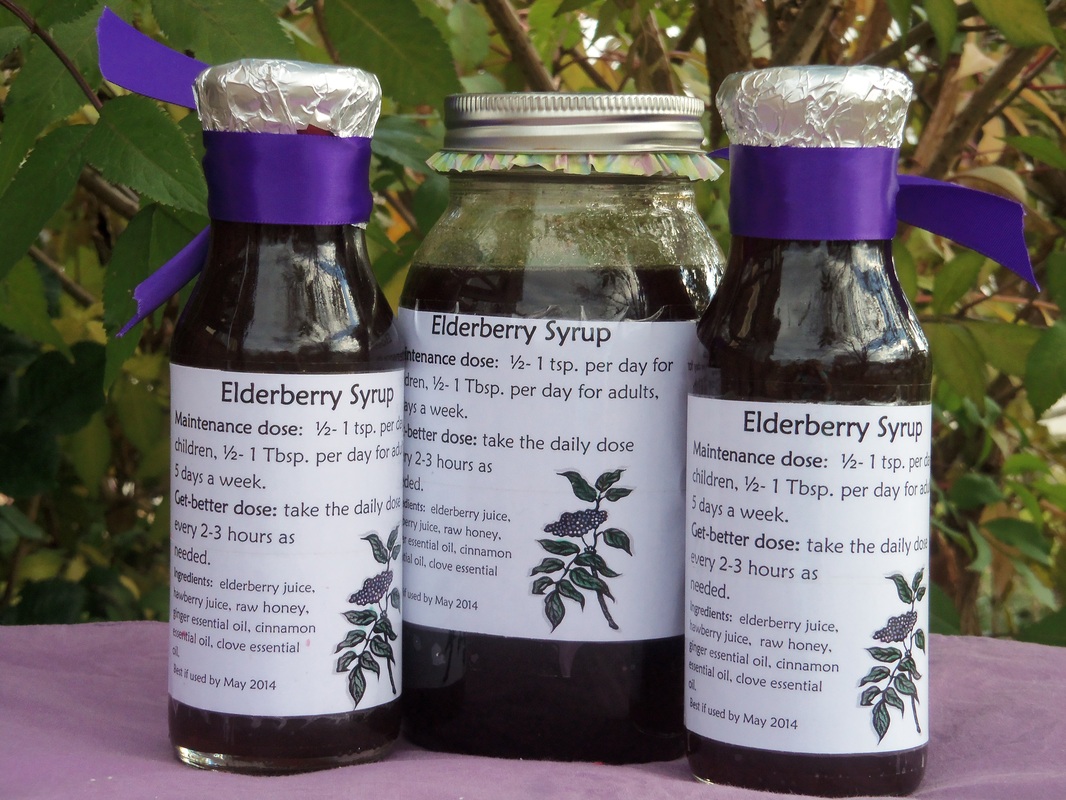
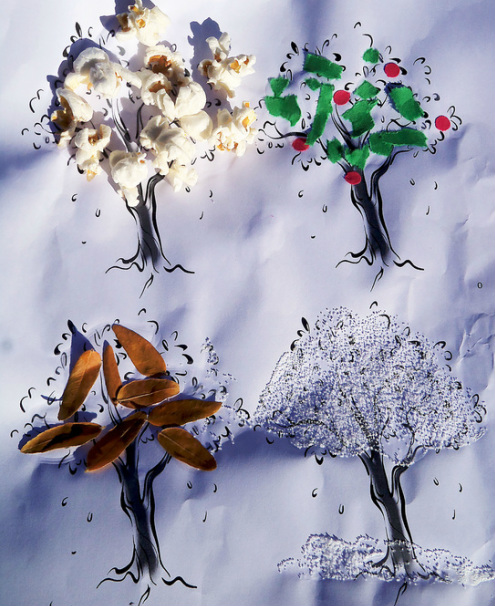
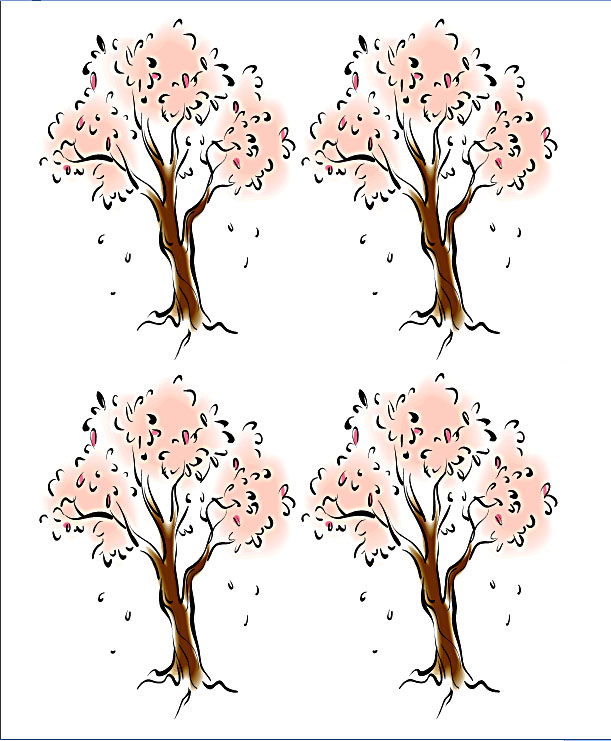
You can make your own very easily. Mix a big batch and fill a jar, or just use the ratios below to put directly in your recipe. For instance, if your recipe calls for 2 tsp. pumpkin pie spice, use double the amounts below. No need to stir them together first, either, just drop them in. If you have cinnamon but not all three of the others, you can leave one of them out and still be fine. (Just don't leave out the cinnamon!) Pumpkin Pie Spice Makes 1 teaspoon. 1/2 tsp. ground cinnamon 1/4 tsp. ground nutmeg 1/8 tsp. ground ginger 1/8 tsp. ground cloves Mix ingredients well. Bigger batch, for filling a spice jar: Makes 1/4 c (4 Tbsp or 12 tsp.) 2 Tbsp. ground cinnamon 1 Tbsp. ground nutmeg 1 1/2 tsp. ground ginger 1 1/2 tsp. ground cloves Elderberry syrup is known as a wonderful immunity booster and antiviral- which means it'll help knock down the flu or any other virus-caused illness. It's also really, really delicious on pancakes. Or a splash added to desserts or fruit salads. Or brushed on a spice cake. Or mixed with chilled sparkling water. Or... you get the idea. Now that there's a jar in my fridge, I may have to watch to be sure my children don't sneak in and use up all my 'medicine'. Just for that reason, I wax-sealed the lids on the jars I plan to share with others. I've already used it. My family has had a nasty cold or flu this week; we've had missed school days and work days from it. Yesterday it hit me hard, and felt like it was on the verge of turning into bronchitis or pneumonia. I've been taking either elderberry infusion (tea) or the syrup at least three times a day since feeling it come on a couple days ago, and today I feel much better. I suppose that may or may not have anything to do with the elderberries... but I'm keeping the routine up until I'm better! Yum. I started with 2 pounds of berries, used a steam juicer, and the first 2-3 cups of juice were nice and dark; strong enough to use without boiling to condense it. The longer the berries steamed, though, the lighter the juice got, so I boiled down the last three cups to yield about 1 1/2 cups. You'll notice in the photos below that some of those berries don't look exactly the same as the others... I have a young hawthorn tree. It produces berries, but not yet enough to make a batch of anything yet. The haw berries are said to be good for reducing inflammation (as well as normalizing blood pressure and helping strengthen and regulate the heart)- so I threw them in with my elderberries. Honey is used in this instead of sugar because of its soothing, anti-inflammatory, and healing properties. If you want to make a wax seal, paraffin works great. I had a small ball of red cheese wax I'd saved, and used that. Elderberry Syrup Start with 2-3 cups elderberry juice (depending on strength)- if not strong, boil to reduce to 2 cups. To the warm, NOT hot juice (if you want to preserve the enzymes if using raw honey), stir in these ingredients: 2 cups honey 5 drops ginger essential oil 3 drops cinnamon essential oil 2 drops clove essential oil Store in the refrigerator. Probably best used within a couple months- though I've had syrups stay nice for a year, refrigerated. You could store them longer if you seal them in sterilized jars. To use medicinally, take a tablespoon straight or mixed in 6-8 oz warm water, every 3 hours if you're sick and an adult, or take once a day as a general immunity booster. See the label below for more details. If you want to start with berries but don't have a steam juicer, and want to use the spices themselves instead of essential oils, combine 4 oz (2/3 c.) berries in 3 ½ c. water, a thumb-sized piece of fresh ginger, 1 tsp. cinnamon, and ½ tsp. cloves; Simmer until water is reduced by almost half; strain, pressing on the berries. Cool until just warm, stir in honey. On a related note, you can use jelly to make gourmet pancake syrup: see here. Last week we had a lesson on the four seasons in the group of 5-and-unders that I teach in a homeschool co-op. We started with four trees on a page; each tree gets something glued to it: spring- popcorn summer- tear bits of green construction paper, hole punch red paper for apples fall- tiny brown leaves (I used honey locust) or torn brown paper bag winter- drizzle school glue all over tree and across the base, the child uses a finger to spread it smooth; sprinkle with table salt. Their favorite was the winter tree! You can even listen to Vivaldi's The Four Seasons while making these... The full lesson is below, with activities and songs. Four Seasons lesson/activities
Materials needed: music: Rain is Falling All Around, Popcorn Popping, Once There Was a Snowman, In the Leafy Treetops Vivaldi’s Four Seasons CD, CD player Four Season discovery bottles Autumn sensory box 4-tree papers (1 per child) Popcorn kernels, popcorn popper, bowl with lid, spray bottle with water Green construction paper Red construction paper and a hole punchSmall colored leaves or yellow/orange paper School glue Salt Wipes to clean hands Crayons Seasons song: Rain is Falling All Around (leaves are falling, snow is falling, sun is shining, wind is blowing) Listen to The Four Seasons with eyes closed; what season does it sound like? What do you see? Dance to the music, pretending to be a something in that season: an unfurling leaf, a bird, wind blowing, snow falling... Four Seasons bottles to pass around Four seasons artwork: divide a page into 4 sections each has a tree outline? Older ones can write seasons Get the popcorn popper and kernels ready, sing "Popcorn Popping". Pop the popcorn. While working on the summer trees, sing In the Leafy Treetops. Winter: use fingers to spread glue on the branches and below the tree; sprinkle on salt (or could paint with salt water on tree with a black construction paper background) Sing Once there Was a Snowman Autumn sensory box for when done: a box full of things like a “Can You See?” book- things of different textures and warmth, things to find, things to count, crocheted apples, Mist the leftover popcorn with the spray bottle, add salt. Put the lid on and shake to coat. _________ Is including this lesson useful to anyone? Or should I stick with closer-to-homemaking posts? Today while looking for ways to explain more about Veterans' Day to my children, I came across a Muppets version of "Stars and Stripes Forever". We started watching it, but then it became apparent that the music meant nothing to them. So we started on a learning journey. If you want just the more serious side, skip down to the last video on here. The one that, while we watched it, my 11-year-old turned to me and asked, "Is this something real?" Yes. Yes, it is. I'm not convinced that we've been truly justified in many of the wars in the last 100 years, but I recognize the intent and courage of those who were doing the actual fighting, among whom are family members Thank you, veterans. First, we learned that "Stars and Stripes Forever", by John Philip Sousa, is our official national march. (I didn't know we had a national march...) A little about the music: Sousa was on a tour of Europe in 1896, when he got word that his band director had suddenly died. Here's what Sousa himself said in his autobiography, Marching Along, about this time and how the march came about: "Here came one of the most vivid incidents of my career. As the vessel (the Teutonic) steamed out of the harbor I was pacing on the deck, absorbed in thoughts of my manager's death and the many duties and decisions which awaited me in New York. Suddenly, I began to sense a rhythmic beat of a band playing within my brain. Throughout the whole tense voyage, that imaginary band continued to unfold the same themes, echoing and re-echoing the most distinct melody. I did not transfer a note of that music to paper while I was on the steamer, but when we reached shore, I set down the measures that my brain-band had been playing for me, and not a note of it has ever changed." Sousa later wrote words to go along with the music; in the National Band version below, they use only these words as a verse: Hurrah for the flag of the free! May it wave as our standard forever, The gem of the land and the sea, The banner of the right. Let despots remember the day When our fathers with mighty endeavor Proclaimed as they marched to the fray That by their might and by their right It waves forever. If you want to know all of the words, they're at the very bottom of this post. Now my kids had some context for the Muppets' version: Complete lyrics- written by John Philips Sousa- to "Stars and Stripes Forever":
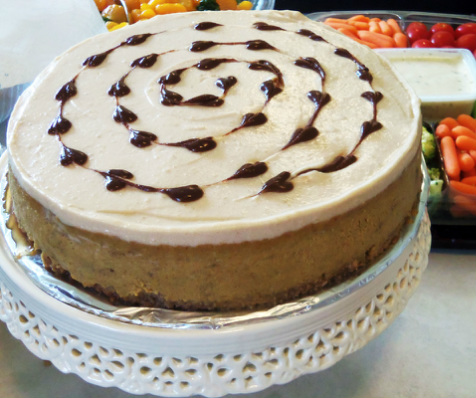
Let martial note in triumph float And liberty extend its mighty hand A flag appears 'mid thunderous cheers, The banner of the Western land. The emblem of the brave and true Its folds protect no tyrant crew The red and white and starry blue Is freedom's shield and hope. Other nations may deem their flags the best And cheer them with fervid elation But the flag of the North and South and West Is the flag of flags, the flag of Freedom's nation. Hurrah for the flag of the free! May it wave as our standard forever, The gem of the land and the sea, The banner of the right. Let despots remember the day When our fathers with mighty endeavor Proclaimed as they marched to the fray That by their might and by their right It waves forever. Let eagle shriek from lofty peak The never-ending watchword of our land; Let summer breeze waft through the trees The echo of the chorus grand. Sing out for liberty and light, Sing out for freedom and the right. Sing out for Union and its might, O patriotic sons. Other nations may deem their flags the best And cheer them with fervid elation, But the flag of the North and South and West Is the flag of flags, the flag of Freedom's nation. Hurrah for the flag of the free. May it wave as our standard forever The gem of the land and the sea, The banner of the right . Let despots remember the day When our fathers with might endeavor Proclaimed as they marched to the fray That by their might and by their right It waves forever. See the bottom of this post for photos on making the heart-swirl pattern. A friend of mine has to avoid dairy, wheat, and oats- and we were going to be together at a potluck lunch on Thursday. The pumpkin cheesecake last week (for a different group) was such a hit I decided to adapt it so she could enjoy it too. But with a bit of chocolate. Like pumpkin-chocolate chip cookies. I wanted it to be relatively inexpensive- no quart of coconut yogurt! -that stuff's pricey. Coconut milk and coconut cream, sure. I have that on hand. No recipes using those appeared to be online anywhere, though I found the chocolate-version crust here. There were some cashew-puree based ones- but not only did I not have time to soak nuts, but wanted this to be a recipe even the nut-allergic could use. So I started with my tried-and-true 'normal' recipe, and adapted. And I was willing to buy one 6-oz cup of coconut yogurt to put in the (optional) topping. You won't taste the apple cider vinegar, but it adds both the tartness and savoriness you'd get from cream cheese. If you have 2 (14-oz) cans coconut milk and a 19-oz can of coconut cream, that will be exactly enough for the filling, the topping, and the ganache. If you want to use honey in the filling instead of sugar, use just 1 cup honey plus 1 Tbsp. Since this also adds about 1/4 cup of water, add about a tablespoon additional pumpkin powder OR a tablespoon oat or coconut flour so the cheesecake won't be too soft. Gluten free, dairy free Pumpkin Cheesecake Crust: 1 c. fine-shred coconut, toasted 1 Tbsp. coconut oil, melted 1 ½ Tbsp. honey 1 tsp. vanilla 1 ½ Tbsp. cocoa powder Stir together and press firmly onto the bottom of a 9” springform pan. Set aside. For a fall-spice crust instead of chocolate, omit cocoa powder, and instead use ½ tsp. cinnamon + ¼ tsp. cloves + ½ tsp. ginger Filling: 1 1/3 c. sugar 1 tsp. cinnamon 3/4 tsp. ginger ¼ tsp. nutmeg ¼ tsp. cloves ½ tsp. salt 6 Tbsp. (slightly heaped 1/3 c.) pumpkin powder 2 (14-oz) cans coconut milk 3 Tbsp. apple cider vinegar 1 Tbsp. vanilla 5 large eggs, room temperature 1 c. coconut cream Mix all together, in order. Don’t overmix or whip air into it, or it may crack while baking. Bake at 350 F for 75-90 minutes in a water bath, until center jiggles like Jello and internal temperature is 145-150 F. Cool in oven or on counter, then chill, covered, in fridge 4 hours or more. Rum-flavor Topping: 1 cup coconut cream, well chilled ½ cup coconut yogurt ½ cup brown sugar 1/8 tsp. salt 1 ½ tsp. rum extract Whip cream until just beginning to thicken; add all else and whip. Spread over chilled cheesecake. Chocolate Ganache drizzle: ¼ c. (1 ½ oz) dairy-free chocolate chips 3 Tbsp. coconut cream or coconut milk Heat gently to melt chocolate chips; whisk until smooth. Drizzle on cheesecake. Saturday was work-in-the-yard-before-the-storm-hits day.
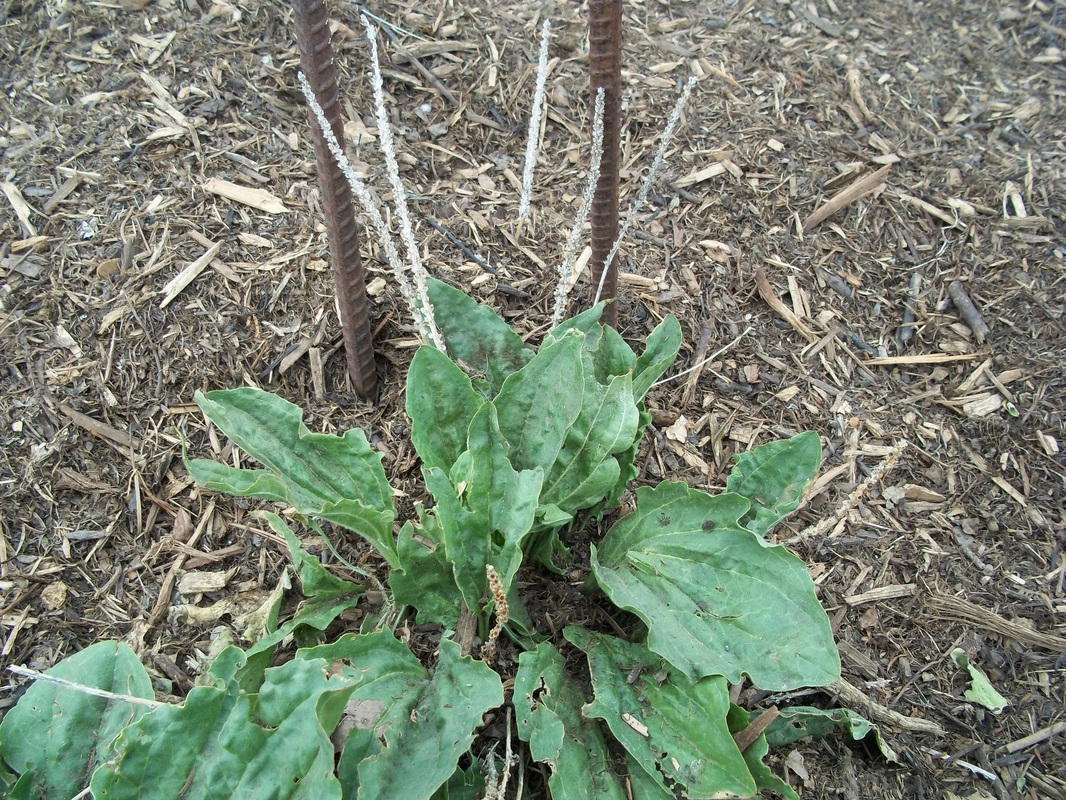
The garden needed prepared for the winter: potatoes dug, the now-dry corn cobs pulled from their perches on the stalks, the final beets pulled, more chard and broccoli harvested, dry and tangled tomato vines yanked from the fence they'd been trained on, carrots prepared to stay through the winter. Tilling would have been nice, but between the garden and what was going on in the house, there wasn't enough time to get to it. As it was, I only got halfway through the garden list. But my kids finally got the house clean -- the weekly deeper-cleaning-- along with a post hole dug and fence repaired with my husband. With a lot of reminders. (The kids, that is...) While stripping corn cobs from the stalks, I felt something sharp on the pad of my ring finger. When I looked, a large drop of blood pooled up immediately; I had sliced my finger on a corn husk. I turned back to my work, but felt something wet running down the finger. Looking again, I saw that it was bleeding quickly, leaving small spatters of blood on the ground. Turns out that the cut was fairly deep. I ignored it for another few minutes, but the bleeding had not slowed. Not wanting to stop my work lest the chickens -- who were in the garden too-- would get to the corn, I looked around, found some still-growing plaintain, and tore a leaf off. The leaves are not only known for helping stop bleeding and helping heal, but have strong fibers running through them. I wrapped the leaf around my wound, winding the trailing fiber around an extra couple times. It stayed on snugly while I worked, and the tightness was soothing. When I pulled it off ten minutes later, the bleeding had stopped completely. It didn't restart, either, when I finally -carefully- washed off the dried blood. This stuff works! My husband laughed when he heard the story, and said it was "so MacGyver-ish". I took that as a high compliment. [UPDATE 11/06/13- this bond failed at ballot, about 67% to 33%]
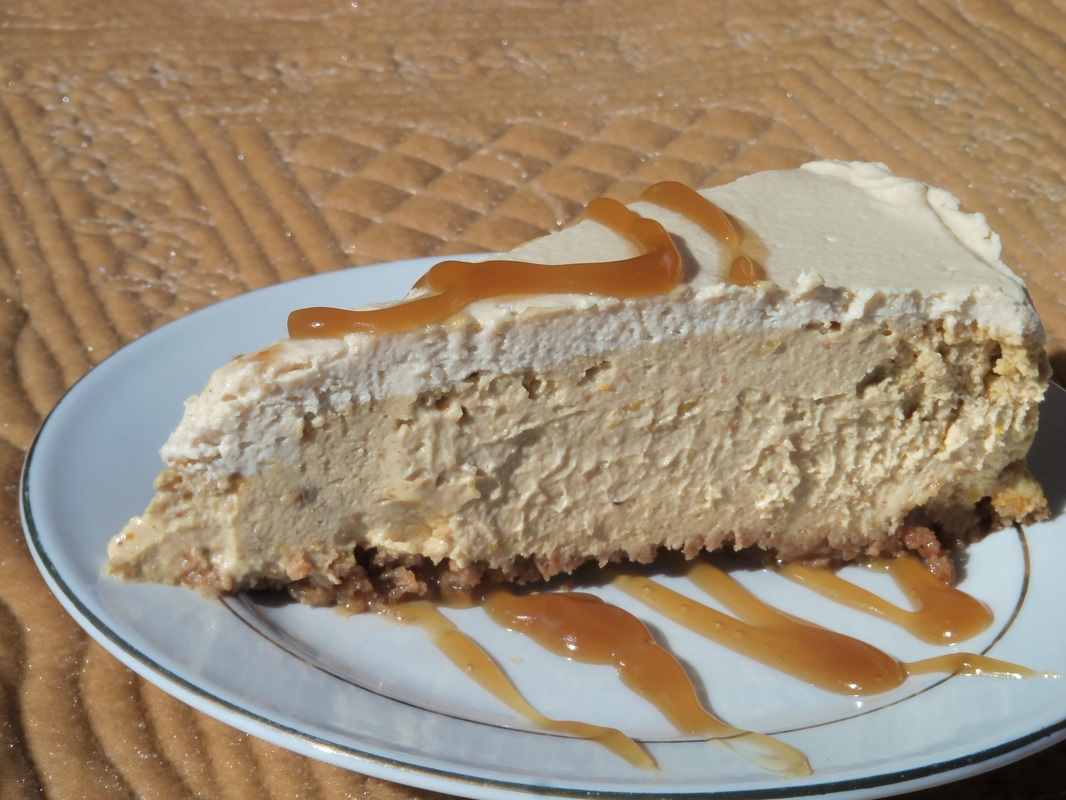
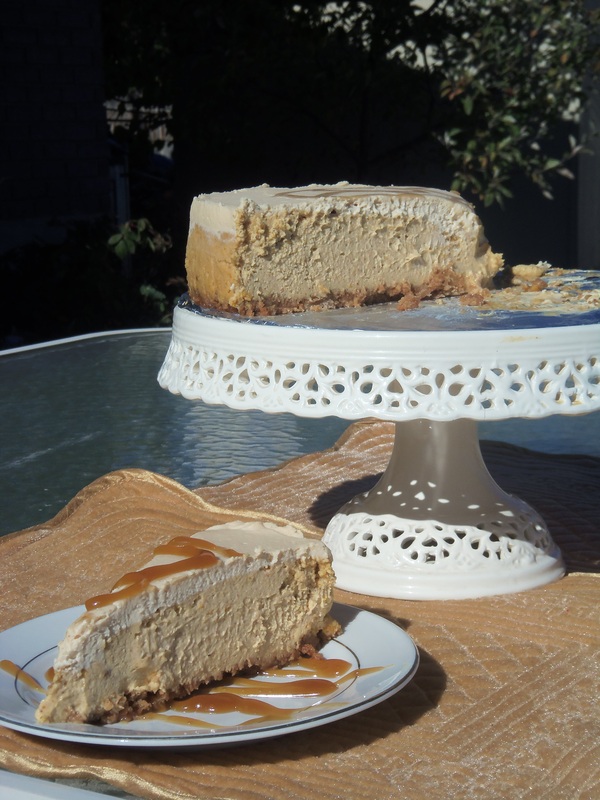
Each one of the half-dozen elected officials I've talked to has decided- mostly reluctantly- that they need to vote for the bond. (Since first writing this, three mayors have come out against it.) It seems that all we hear, everywhere we turn, is that "we have to" and there are no other good options- so I'm trying to spread the word about some options we really do have. What do you do when you can't afford to do the thing you can't afford not to do? (the link is to what a South Jordan city councilman thinks we need to do- I disagree! -but he also raises a good point about how the bond may or may not actually help specific cities in the district.) In the household of a good steward of money, you generally go without that thing until you can pay for it, find ways to make it cost less, and meanwhile look for other solutions. The bond is not the only option, and is a LOT of money with little guarantee of best use. See some concerns from the Utah Taxpayers' Association and the school board's response on page 4 of their October 2013 newsletter. According to the statistics listed on a SL Tribune editorial, this half-billion is to be able to house an extra 12,000 students over the next decade. So if you've heard that we have to have this money to house all the new students coming, that's not the whole story. If it was, that would be $41K per student. It's also to rebuild a couple schools, add air conditioning to all that don't have it, and "seismic and safety renovations". A concern I have with the bond is how it is designed. KSL posted an article a week ago about it. The end of the article infers that Jordan School District would not ask for more money in the near future; their information is misleading. JSD will ask again, and soon. When I attended a meeting about the bond last spring, the board members were asking for $940 million; almost a billion dollars! It was to cover growth over the next 15-20 years. When they got back the survey results, they found support would be better if they cut the dollar amount in half, so what we have now is a half-price bond that will be paid over the same 15-20 years, but will only pay for building schools during the first 5-10 years. In other words, they are expecting another half-billion-dollar-plus-inflation bond to come up in five to ten years from now, which would be tacked on to the already-raised rates if this one passes. What options do we have? Online learning offers amazing opportunities without the overhead. Middle schools and high schools could be put on a three-semester track, which would allow the buildings to be used 50% more. An uptick in homeschooling would help; Utah spends over $8000 per student per year when you count building expenses; it was $8,224 back in 2008. That means I personally am saving the district about $25,000 for this school year alone by homeschooling my three youngest children. After 13 years of this, the savings would total $300,000; even more once you add inflation. That's just one person's contribution. Splitting JSD into a few smaller districts would help; then each community or city could make decisions based on what will actually be built in their area. Research shows that a district hits maximum effectiveness at around 3,000-4,000 students (one high school and its feeder schools). South Jordan alone has over 14,000 students, which is nearly the size of the whole Cache Valley School District. High schools with between 600-900 students result in the best learning and scores. In them, our children are more likely to be treated as individuals and less likely to fall through the cracks. Smaller schools also require less busing; and sometimes none at all. No, the bond- at least as currently proposed- is not the only solution, and I'm tired of taxation's steady erosion of what we earn. A bit here, a bit there, until 30% of my phone bill consists of nothing but extra taxes and fees, until my property taxes easily clear the $2,000 mark in my downsized house, until everything I do that involves money has a chunk (or several) taken by others in the name of helping. I'm willing to help myself and my neighbors on my OWN terms now, rather than abdicate my responsibility... and agency. There is a need for housing new students and possibly upgrading facilities, but I believe we should not agree to either a half-billion-(or later billion-) dollar bond until the district commits to more cost-effective construction and education along with ways to maximize building use. I'm voting NO on this bond. -Rhonda This seasonal New York-style cheesecake is not exactly "lite", just light. Not leaden. But it is a little lower fat because I substituted one cup of cottage cheese in place of the original one cup of heavy cream. :) This gives it a higher protein content and reduces the fat. This is an amazing pumpkin cheesecake, with just the right amount of tartness, sweetness, and spice. I adapted it from an America's Test Kitchen recipe. The whipped cream topping is optional but perfect. The recipe- which is below- calls for a 9-inch springform pan. I don't own one, but I do have a 9-inch round cake pan. I use it instead by cutting out a circle of parchment paper and lining the bottom with it, spraying the inside edges with cooking spray, and going ahead with the baking. When it's done, run a knife around the inside edge to help it pull away, cool and chill completely, and invert the pan over a plate. Tap hard. If it's being really stubborn, run hot water over the bottom of the pan (held at an angle so the plate doesn't fill with water) and try again. Pumpkin Cheesecake
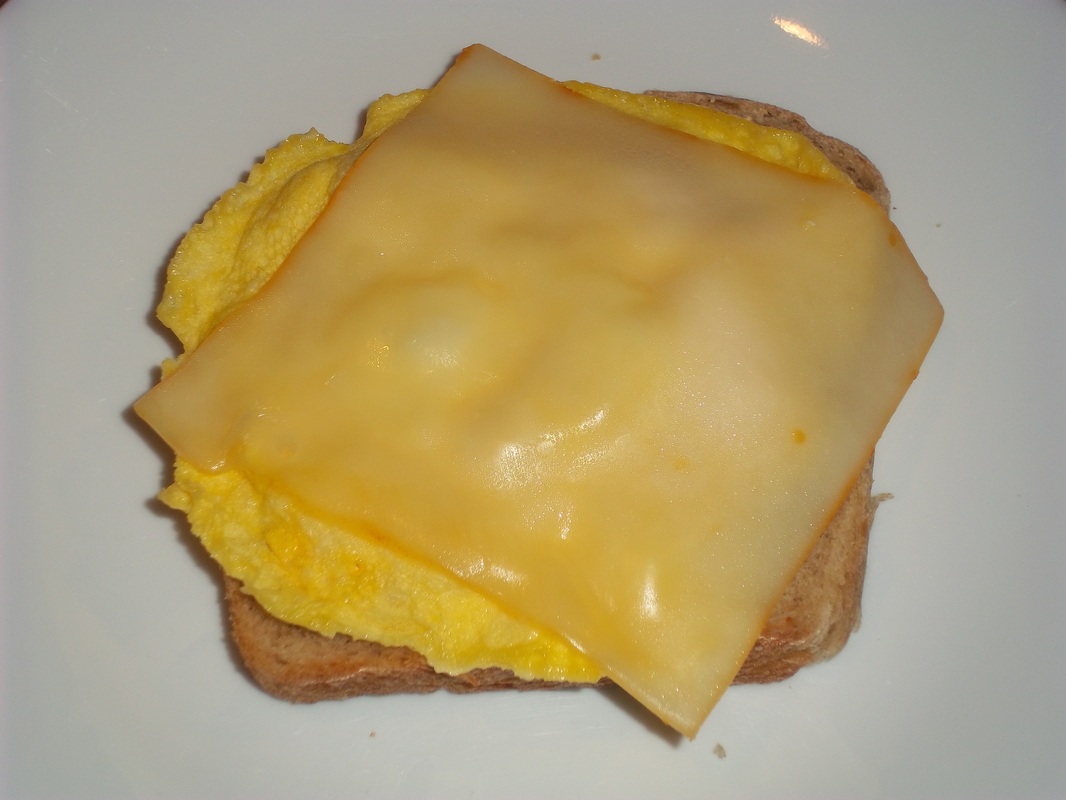
Crust 1 sleeve (about 5 ounces) graham crackers- whack it a few times to break into chunks 6 tablespoons butter 3 tablespoons sugar 1/2 teaspoon ground ginger 1/2 teaspoon ground cinnamon 1/4 teaspoon ground cloves Preheat oven to 325 degrees F. Put the cracker pieces in a blender or food processor; run until finely ground. Put the butter in a 2-cup microwave-safe container and melt it, about 30 seconds in the microwave. Dump in the crumbs, sugar, ginger, cinnamon, and cloves. Mix well, then sprinkle over the bottom of a 9" springform pan. Press down evenly using the bottom of a glass or something else flat. Bake for about 15 minutes, until it starts smelling delicious. Remove and let cool while you make the filling. Filling 2 cups pumpkin puree (canned or your own- or, better yet, use pumpkin powder)* 1 1/3 cups sugar 1 teaspoon ground cinnamon (or use 2 tsp. pumpkin pie spice in place of these four spices) 1/2 teaspoon ground ginger 1/4 teaspoon ground nutmeg 1/4 teaspoon ground cloves 1/2 teaspoon salt 3 (8-ounce) packages cream cheese, room temperature 1 tablespoon vanilla extract 1 tablespoon lemon juice 1 cup cottage cheese 5 large eggs room temperature Pour the pumpkin puree on a triple layer of paper towels, spread evenly, then top with another triple layer. Press firmly to absorb the extra moisture. The Test Kitchen said that when they didn't do this, the cheesecake was always wet. OR- best idea ever!- use your pumpkin powder, using only half the water you normally would. That means you'd use 6 Tbsp. pumpkin powder-- barely over 1/3 cup-- plus enough warm water to equal one cup. (Ta-da! aren't you extra-glad now that you made some?!) Bring 4 quarts of water to a boil for a water bath later. Put the pumpkin in a blender or food processor, and add the sugar, cinnamon, ginger, nutmeg, cloves, salt, cream cheese, vanilla, lemon juice, cottage cheese, and eggs. Blend until smooth. Pour over crust. Put this pan in a roasting pan or on a jelly roll pan if that's all you have. Put it in the oven, then pour water in that larger pan, enough to come about halfway up the sides of the cheesecake pan. Bake for about 1 1/2 hours, until the center wobbles like Jello instead of like water; a thermometer poked into the center should register 145-150 degrees F. Run a knife around the inside edge of the cheesecake, then put the cheesecake pan on a wire rack to cool. When cool, chill for at least 4 hours to let it firm up. (I didn't have that much time; mine cooled on the counter for 30 minutes, then went in the fridge for 3 hours. It was a little soft in the center, but sliced OK. The leftovers sliced much more nicely the next day.) Brown Sugar and Rum (flavor) Cream Topping 1 cup whipping cream, very cold 1/2 cup sour cream or 4 oz. cream cheese, softened 1/2 cup packed light brown sugar 1/8 teaspoon salt 1/2 tsp. rum flavor* Whip the cream until it barely starts to thicken. Add sour cream or cream cheese (I used cream cheese since I was out of sour cream), brown sugar, salt, and rum flavor. Beat about a minute, until thick; spread on top of cooled cheesecake. *I have a whole bunch of Stephen's Gourmet Rum Sauce mix packets; each packet makes 2 cups of sauce; I used half of one dry mix in place of part of my sugar. But I don't know if the company still makes the mix; I got them for ten cents apiece on a clearance deal. So you can use rum flavor. Or use 2 tsp. rum if you happen to like it. Or, if you live nearby, call me and you can have a packet. :) I also cooked a bit of the sauce and used that to drizzle a design on the top of the cheesecake. Mini chocolate chips sprinkled on top would be great instead, as would some sugared pecans or hazelnuts. Mmm. My 11-year-old loves butterflies. Really loves them. She saved her money and bought a butterfly encyclopedia, studies it intently, draws them incessantly, folds origami ones, and analyzes any she spots outside. So I wasn't surprised when she wanted to be a monarch butterfly for Halloween. We looked online and found a couple tutorials- one for felt wings, another using foam core board, then made something almost completely different. It was cheaper, and probably easier. And the only things I had to buy were orange posterboard and crushed panne. She is tickled pink. Or orange and black, in this case. Here's what we used: 2 full-sized posterboard, orange ($1 each) a realistic drawing of butterfly wings like this a ruler 2 black Sharpie markers scissors Con-tact clear liner (optional) 1 wire hanger 3 hot glue sticks and a glue gun 2 18" wooden dowels (3/8" thick) 1 1/2 yards of 1/4- 1/2" elastic and for the dress, 1 1/4 yards of black knit crushed panne velvet ($4) and a T-shirt that fit her well to use as a pattern, but you could use black sweats or whatever else works. __________________________________ This was really easy for me because she did all the tracing, coloring, and cutting for the wings. :) And the dress took about 1 hour total, including her doing some of the sewing, from the time I spread the fabric out on my fancy cutting surface (the living room floor) until the time the dress was being slipped over her head. Quick version of instructions: 1- draw a grid on the butterfly picture and on one posterboard. I used one posterboard for each side of the butterfly. Make a scale drawing on your posterboard using the scale method of drawing. Or if your computer can handle it, enlarge it to be big enough 2- color in the black using the markers. 3- Flip it face-down. Put the other posterboard on top, then put them both up on a window so you can see where to trace for the second set of wings. 4- Cut out, then cover with Con-tact liner if you want. 5- overlap each top wing slightly and glue or tape them on the back so they stay together. 6- using a hanger, hot glue gun, a piece of leftover posterboard, and wooden dowels or something else narrow and stiff, assemble the wings. 7- add two loops of elastic to the center, big enough to go around the child's shoulders. I used two 26" long pieces, then knotted them. See the slide show to see what I did. I didn't want to spend as much time on this tutorial as we did on the costume... but if you have questions, leave a comment! :) Today I read a research article about how having breakfast as your biggest meal of the day rather than dinner can lead to both better insulin sensitivity and increased fertility. In the study, they had women consume about 980 calories at breakfast, which was just over half the amount for the whole day. If you use two slices of homemade or other good-quality whole-wheat bread (about 120 calories apiece), one large egg (80 cal), and a one-ounce slice of real cheese (about 100 cal), you're almost halfway there. I love to eat this with a fresh apple (a medium-large apple is about 100 calories). OK, so that's still not up to the numbers in the study. But it's a great breakfast anyway. Maybe make two? In less time than it takes to go through the drive-through, you can have a breakfast sandwich you made yourself. At the bargain-hunting prices I pay for food (including making the bread), a two-slice sandwich costs just under $ .30. (The bread costs me about $ .50 for a 1 1/2 pound loaf. See the recipe here.) Dress it up with anything you want on it, or leave it simple. I don't add salt to the egg because the cheese and bread are salty enough for me. For more flavor, add a sprinkle of oregano or other seasoning. You can make it as healthy as you like; I use homemade whole-wheat bread for a breakfast that sticks with me for more than an hour. Here are the quick instructions: microwave one beaten egg for about 45 seconds, top it with a slice of cheese, put this on top of a slice of toast. If you want a sausage-and-egg sandwich, before cooking your egg, put one precooked sausage link into the cereal bowl, chop it up with the fork, then add the egg and beat it. The photos below have more detailed instructions. |
Need a Search bar?
|




 RSS Feed