The Provident Homemaker
  • Recipes and Info
    • Making Bread
  • My Blog
  • Favorite Resources
  • Documents and Files
  • 52 Weeks of Building Storage

Caramel Apple Cupcakes

10/15/2011

1 Comment

 
Picture
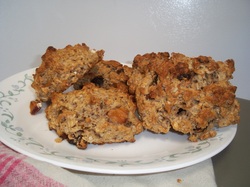
Aren't these so cute?  I saw them in a magazine someplace last week; wish I could remember which one it was!    Anyway, when there was a bake sale at school a couple days ago, it was the perfect excuse to make them!

You can make any kind of cupcake; I chose an applesauce cake recipe to go along with the look.  These also got a caramel filling, topped with caramel frosting, rolled in sprinkles, and then poked with a clean craft stick.

Mix up a batch of cake batter, either from scratch, or using a yellow, white, or spice cake mix: to make it applesauce cake, replace half the oil or butter in the recipe with twice as much applesauce (you can replace all the oil, but the cupcakes will be a little bouncy- fat adds tenderness).  For a 24-cupcake batch (same size as for a 9x13 pan full), also add 1 Tbsp. cinnamon.  If you have them (or like them!), you can also add a total of 2 teaspoons of other spices: ground cloves (go easy here!), nutmeg, ginger, and/or cardamom.  Bake as usual.  When cool, fill them if you like.  I used a sweetened condensed milk caramel (see Making Tres Leches Cake, second paragraph down), mixed with an equal amount of vanilla pudding to make it go further, since I was making 5 dozen.  Use whatever you like- homemade or jarred caramel sauce, butterscotch pudding, sweetened cream cheese (2 Tbsp. sugar per 8 oz. cream cheese), cream cheese frosting, or whatever sounds good with apple or caramel.
Picture
Make a batch of caramel frosting (see second page here); leave the pan over low heat to keep it warm and soft.  If you want sprinkles on the edges, pour a layer about 1/4" deep in a wide bowl or on a plate.

Picture
Dip the top of a cupcake in the warm caramel frosting.

Picture
Let excess drip off for a couple seconds...

Picture
then twist the cupcake so the drips end up on the frosted top.

Picture
Put the cupcake on its side in the dish of sprinkles, then rotate it around to coat the edges all around.

Picture
Set it on a tray for easy transporting, and insert a craft stick.


Done!  (Wasn't that awesome?)

1 Comment

Almost-Instant Brownie

7/7/2011

11 Comments

 
Picture
Do you have instant hot chocolate mix?  You can make a brownie in two minutes, counting cooking time.  You don’t even need a bunch of ingredients.

It will cost you about $ .30-40, depending on how much you paid for the packets.  The packets have about 3 Tbsp of mix in them: about 1 Tbsp. each of sugar, cocoa powder, and whey/creamer/milk powder.  If you have the kind of cocoa mix that you have to add to milk (instead of water), it's basically half cocoa powder and half sugar (i.e., 1/4 c. mix= 2 Tbsp. cocoa powder, 2 Tbsp. sugar).  You can use mix in any recipe that calls for both cocoa powder and sugar, as part of the ingredients.

I made these brownies three different ways, just to see what would happen when substituting different ingredients.  I've tried it with raspberry-chocolate mix, it's delicious.  Use whatever you have, play around with it if you feel like it, and if it’s not perfect, put a little more ice cream on top!

Version 1:  Cakey Brownie

2 packets of instant hot chocolate mix (I used Nestle Rich Chocolate because I found it in the back of the pantry)
2 Tbsp. sugar (use honey if you don’t have sugar)
1 Tbsp. softened butter, or use vegetable oil
1 egg
3 Tbsp. flour, or 1/3 c. quick oats (if you use a packet of sweetened instant oatmeal, reduce the sugar by 1 Tbsp.)

            In a microwave-safe bowl, beat together the mix, sugar, butter, and egg.  Stir in the flour.  Microwave for 60-90 seconds, until mostly cooked.  There should be a shiny, uncooked spot about the size of a dime or quarter.  It will finish cooking as it cools.  Serve with ice cream, and/or hot fudge sauce, chopped nuts, or whatever you have.


Version 2: More Chewy brownie

Use ingredients for Version 1, but beat the egg first by itself, and only use half of it in the batter.


Version 3: No Eggs (or oil/butter) in the House

Hey, this sounds weird, but what is mayonnaise made out of? Oil, and egg.  Mostly.  Look up “Chocolate Mayonnaise Cake; you’ll find some great recipes.

 2 packets of instant hot chocolate mix (I used Nestle Rich Chocolate because I found it in the back of the pantry)
2 Tbsp. sugar (use honey if you don’t have sugar)
1 ½  oz. Mayonnaise (use condiment packets, or use 3 Tbsp. from a jar)
3 Tbsp. flour, or 1/3 c. quick oats

Mix, stir, microwave for 60-90 seconds, until cooked.


Picture
This is what the batter using a whole egg looks like.

Picture
This is the same batter with only 1/2 egg in it.

Picture
The brownie after cooking: see that small shiny spot close to the center?  It's still a little doughy, but will finish cooking as it sits.

11 Comments

Strawberry Pops

5/31/2011

1 Comment

 
Picture
Cold, sweet, and slightly tangy Strawberry Pops. 

Photo courtesy Anitra Kerr

Today I bought more strawberries, they weren't as cheap as they've been past years, but they're awfully good.  Meanwhile, I'm anxiously waiting for all the blossoms on my strawberry plants to become fruit!

I got this recipe in a newsletter (SimplyLivingSmart.com) and wanted to pass it on.  The original recipe called for powdered sugar or agave, but use whatever sweetener you like.


Strawberry Pops
1 1/2 pints strawberries, rinsed and hulled
sweetener to taste: about 1/4 c. sugar or agave, or 3 T. honey, or 1/2 c. powdered sugar, or 3-4 packets of stevia

Pulse strawberries with sugar and 1/3 cup water or orange juice (YUMMIER) in food processor until pureed, with some chunks of berries remaining. Pour half of mixture into a bowl.
Pulse remainder until smooth. Stir puree into mixture in bowl. Pour into 3-ounce molds or plastic cups, insert sticks or wooden spoons, and freeze until solid, at least 8 hours.

I'm going to make some strawberry-rhubarb pops: using one chopped and cooked stalk of rhubarb in place of a half pint of the strawberries.  There should be enough sugar in the recipe anyway (if not, I'll add 'til it tastes good), and the rhubarb with give it a little kick.  Kind of like the orange juice does, but a little more tangy.  And a dash of vanilla is always good.
1 Comment

How to use dried fruit; Chewy Apricot-Almond Oatmeal Cookies

5/24/2011

4 Comments

 
When you buy dried fruit, what do YOU do with it?  For a long time we mostly just ate it straight, as a snack.  The exception was raisins, which occasionally got thrown into oatmeal cookies, cinnamon rolls, or hot cereal.   So how do I use dried fruit now?  We still love to snack on it, but I use it several other ways, too-

·
        
as part of trail mix- any dried fruit is great
·         granola- think beyond raisins- cherries, figs, dates, papaya, apricots.
·         cooked with hot cereal, especially with a nuts and a little spice- often you won't need any extra sweetener
·         stirred into yogurt (unsweetened or flavored)
·         as a ‘fruit compote’-  reconstituted and served in the soaking liquid, especially with a little cardamom or cinnamon added
·         sprinkled into salad- try dried cranberries, strawberries, cherries, diced dried pear or apple. For an extra kick, soak the fruit in balsamic vinegar or any kind of citrus juice
·         throw into a smoothie
·         soaked and put in yeast bread- my favorite sweet bread  adds snipped apricots, pecans, and diced candied orange peel .
·         fruit cake.  Homemade.  This is entirely a different animal than those artificially-colored and –flavored ones from the store.  Use a rich butter, egg, and brown sugar base.  My favorite combo is dried apricots, pecans, and diced (homemade) candied orange peel.  Sometimes with raisins.
·         soaked (or not) and snipped into quickbreads or muffins.  Maple-fig-walnut is really good.
·         Reconstituted and baked into pie, cobbler, or crisp. 
·         soaked and run through the blender as a puree- use in cakes, muffins, breads to increase moisture and sweetness.  You can usually reduce the fat in the recipe by the same amount as you added of puree.
·         pureed (as above); use as a fruit sauce on pancakes, waffles, cake, or icecream.     You can even make this puree into jam. 
·         mixed into cookies.  Favorite-ever recipe is at the bottom of this post.

_____________________________________________
When should you soak the fruit?    Do this when you are adding it to anything that depends on moisture- if you add it unsoaked to breads or anything else baked, the fruit will soak itself while the food cooks- taking liquid away from the dough or batter.  This leads to tougher baked goods.  For this reason,  I prefer to soak raisins before swirling them inside cinnamon rolls or raisin bread.   You can also soak it anytime you want the fruit softer and less chewy, as in salads.  Don’t add soaked fruit to granola (unless you’re going to eat it immediately); moisture in granola can cause mold.

When you’re reconstituting dried fruit, don’t expect it to look and feel just like fresh.  Drying breaks down cell walls some, so the reconstituted fruit will more closely resemble the cooked version.  (In other words, reconstituted apples will NOT be crunchy.)

How do you reconstitute the fruit?  Soak it:  boiling water works fastest, but will kill any enzymes remaining in the fruit.  Cold water works, but takes about three times as long.  Warm water is a happy medium.  Plan on 5-30 minutes when using hot water, 10-60 minutes for warm, or 30 minutes plus for cold water.  Times will vary depending on the hardness of your water (soft water works faster), how old the fruit is, how dried-out it is, if it’s sweetened (sweeter=longer), and how big the pieces are.   Use only enough water to barely cover the fruit; using more will rob the fruit of more of its sweetness.  Save the soaking liquid; use it in the recipe if you can.  I love to drink it… this can also be used as a pancake syrup.   If you find you’re sensitive to the sulfur dioxide that some fruits are treated with (to improve  color and shelf life), draining and discarding the liquid can remove some of this preservative.   

______________________________________________________ 

If dried until crisp, the fruit can be turned into a powder, using a blender, food processor, or coffee grinder. Use in any recipe you want fruit flavor- baking, hot cereal, smoothies, and more. What about shelf life?- it's best within 1 year; quite a bit longer if oxygen-free, cool and dark.  When not at its best, it's still food!

______________________________________________________
 

Here’s the recipe for one of my favorite cookies.  Ever.  A friend of mine who DOESN’T LIKE COOKIES loves these!   They’re  good without the glaze, but adding that last little kick of flavor (and eye appeal) elevates them to fantastic.   You could substitute dried chopped tart cherries for the apricots.  (If you add chocolate chips to that variation, leave off the glaze; it’d be overkill.  Unless maybe you’re drizzling melted chocolate!)


Chewy Apricot-Almond Oatmeal Cookies

1 c. butter, softened
¾ c. brown sugar
½ c. (granulated) sugar
1 egg
½ tsp. almond extract
1 c. flour
1 tsp. baking soda
2 ½ c. regular or quick-cooking oats
6 oz. (1 c.) dried apricots, snipped
½ c. finely chopped almonds (toast first for best flavor)

Preheat oven to 375 degrees.  Beat butter until almost smooth.  Add sugars and beat until fluffy.  Mix in egg and almond extract,  beat well.  Add flour and baking soda and mix.  Fold in oats, apricots, and almonds.  Add 2 tsp. water if needed.

Scoop by heaping teaspoonfuls onto an ungreased cookie sheets.  Bake about 8-10 minutes or until just brown around edges.  The centers should still look wet, they continue to cook internally for the next twenty minutes.  Let cookies cool on tray for one minute, then remove to a cooling rack. Drizzle almond glaze on them in a criss-cross pattern.  This is really fast when you put the cookies close together and drizzle them with long sweeping lines.

 Glaze:
2 c. powdered sugar
½ tsp. almond extract
2-3 Tbsp. water

Mix to get a good drizzling consistency.  Put glaze in a plastic baggie, poke or snip a small hole in it (how big depends on how thin your glaze is), and  drizzle this on the cookies.  Leftover glaze can be mixed into pancake or muffin batter, or used as a glaze on muffins. (Almond Poppyseed, anyone?)

4 Comments

Using Dried Fruit; Cherry Chocolate Bliss Bites

5/20/2011

2 Comments

 
Picture
Dried tart cherries: my favorite cherry for recipes.

Photo from Nutty Guys

Next week’s post will have several ideas for using dried fruit.
_____________________

Why buy, or make, dehydrated fruits?  My favorite reasons are that it preserves fruit without needing electricity (as in freezing), and it stores in a smaller space when compared to canning.  It also intensifies the flavors, allowing me to use it as a sweetener.  


If you’re buying them, how do you know what a good price is?  The simplest way is to judge by serving size.  One ounce of dried fruit is a serving, about equal in size to one medium fresh apple or peach.  If a one-pound can of dried apples costs
$5.75/lb (which it does at the Home Storage Center), that means you’re paying about 35 cents per apple.   If you want to figure how that compares with price per pound fresh, 25 lbs of fresh apples reduce down to about 4 lbs.    4/25 of 1 lb @$5.75= .92/lb fresh apple price.    

For other fruits, a fairly good estimate is 1 lb very-dried fruit = 5 lbs fresh; most fruits are somewhere around 80% water to begin with.  1 lb moist-dried fruit = 3 lbs. fresh, figuring about 2/3 of the water has been evaporated away.   This isn’t exact, but is close, and is simple enough to remember and use.  Dried blueberries (moist) at $ 12.30/lb are like paying $ 4.04/lb for fresh, or about $ 1.53 for a 6-oz clamshell.  It costs around four dollars a pound to buy frozen blueberries, plus then I pay to run the freezer at home. Twelve bucks a pound sounds expensive, but it’s about half  the price of fresh around here.  They’re definitely worth having some on hand.  Just keep them out of reach of the kids, or you won’t have any left!

If you live anywhere around Salt Lake City, you can get ‘returns’ at Nutty Guys’ warehouse for $1.50 per one-pound bag (of anything they sell).  Returns are anything that didn’t sell within their 6-7-month “sell by” date; they get returned to the warehouse.  Returns are unpredictable, you never know what will be there on the shelf, but they make for incredible bargains.  Dried fruit is considered at its peak for one year.  You can extend this by keeping it sealed, dark, and cool.  This is something at its best when rotated regularly.
_____________________

Here’s one way to use dried tart cherries;  I always get them cheapest from Nutty Guys. (Returns shelf, hooray!)  I created this recipe for a bake-off at the state fair a few years ago.  The ingredients sound strange together, but, boy, are they good.  The balsamic vinegar accentuates the chocolate and adds brightness to the cherry.    (The recipe took 1st place.)  These are like a very dark, intense truffle, with bits of sweet-tart, chewy cherry.  They take only five minutes to mix.

CHERRY-CHOCOLATE BLISS BITES

1/4 cup dried tart cherries, coarsely chopped
1 Tbsp balsamic vinegar
1/4 tsp almond extract
1/3 cup sweetened condensed milk
1 (4 oz) bar Ghirardelli 60% cocoa bittersweet chocolate, broken*

Place dried cherries in a small microwavable bowl; pour in balsamic vinegar and almond extract. Microwave 30 seconds to help plump the cherries; set aside.

Microwave condensed milk 45 seconds or until hot but not boiling. Add chocolate and stir until mostly smooth. Add cherry mixture. Stir until well combined.

Pour into a loaf pan or other 2 cup container, bottom lined with parchment. Chill in freezer for 15 minutes or in refrigerator for 45 minutes until set.

Cut into squares or roll into balls.    This recipe can be doubled or tripled.

*Any semisweet or bittersweet chocolate (bar or chips) can be substituted.  Try to get something around 60% cocoa solids.  I used Ghirardelli’s because that was who sponsored the contest.  If you quadruple the batch, you’ll use the whole can of sweetened condensed milk (1 1/3 c.) and one whole pound of chocolate.


2 Comments

Cookbook- Miscellaneous, Pies, Quick Breads 1

4/4/2011

0 Comments

 
Picture
Different pies and piecrusts.  The card only covers cream pie varieties, but has a few different crusts.

Picture
Did you want to see closer?

This one is chocolate-peanut butter cream pie.

Picture
Apple Cider Syrup is YUMMY.  We use the recipe to make many flavors.  Our latest favorite is made using mango juice.

Picture
Crunchy on the outside, velvety on the inside, simple Drop Biscuits.  The batch pictured uses about half whole-wheat flour.

Picture
Craggy, crisp, and hearty- use the Drop Biscuit recipe to make Drop Scones.  Here, I swapped some oats for some of the flour, and stirred in chopped figs and toasted nuts.

Miscellaneous card 1 apple cider syrup, basic syrup, easy jam, cooking grains, 5-min marmalade

Miscellaneous card 2 granola, granola bars, home remedies, seasoned salt, seasoned flour, spice chart 

Pies  cream pie filling, shortbread crust, meringue, crumb crust, pat-in-pan crust, traditional crust

Quick Breads card 1  drop biscuits, English scones, biscuit mix, soft breadsticks, rolled biscuits, shortcake, biscuit dough ideas

0 Comments

Cookbook- Desserts, Fruits and Vegetables

3/18/2011

0 Comments

 
Picture
Picture
Here's the next bit of the book.    Have you had enough time to look through the other sections yet?

Desserts
- apple crisp for one (or more!), other flavors of Crisp, no-baked Cheesecake, lowfat New York style cheesecake, Pudding/ Cream Pie filling and variations.
Fruits and Vegetables- dressed-up green beans or other vegetables, the 'creamy' salad family: Coleslaw, carrot salad, Waldorf salad; ways to cook vegetables and flavors to add, how to steam-saute vegetables; roasted winter squash, green salad ideas, fruit salad ideas.
0 Comments

How to eat well and still spend less; Quick & Cheap Meals

2/3/2011

0 Comments

 
Picture
photo courtesy of photos8.com

Hi everyone,

Does it always seem like too much of your budget goes to food?  Do you wonder what amount of money is 'normal'?  If so, go to the Official USDA Food Plans pdf.

This page will give you the 2010 averages, based on nutritionally balanced diets cooked at home.  Now that you see how frugal you really are, here are some tips to help even more; pick just one or two to try so it's not overwhelming. Then all that's left is deciding how that new-found money is going to better use!

Ways to eat well on less money:

*Buy on sale and get extras so you never pay full price.

*Buy the fresh fruits/veggies that are $1/lb or less.

*Find ways to throw away less- only serve up what you will eat, save wilted veggies in the freezer for soup later, re-purpose leftovers.

*Use meat mostly as a flavoring (mixed in with other ingredients), not as its own dish.

*Buy meats that you can get for $2/lb or less, or whatever is bargain-price for your area.

*When you buy meat, get a bunch on sale, then cook it all at once.  Package and freeze most of it for future, faster, meals.

*Buy flour, sugar in bulk, make more things from scratch.

*Keep your kitchen clean so you like being there!  (You don't need to do it all yourself!  Doing dishes 'all the time' causes depression for me- once I added that to my kids' job charts, I felt much better!)

*Grow a garden where you used to have some lawn- you get the same water bill, more food.  Packets of seeds can last 4-5 years if kept cool and dark.   Or split packets with a friend.  

*Make your own bread instead of buying it.

How much can you save on bread?  Cost varies by recipe, but mine comes out to less than $ .50 per loaf ($. 42), including the electricity for baking, for top-quality whole-wheat bread.  (Well, frankly, the quality varies by week....)   If you eat two loaves a week, that saves you $200/year when compared to $2.50/loaf of bread.   We go through 6 loaves a week, so we’re saving over $600 per year.  Yes, a stand mixer and grain mill  definitely pay for themselves!  For the recipe I use, see Basic Bread on my website.
 
Yesterday the Teachers' Quorum (14-15 yr. old boys) came to my house for their weekly activity.  They've been learning about nutrition and safe food handling, so they all pitched in and cooked a meal.    Their handout included budget-friendly, adaptable, and fairly fast recipes; the kind that would be especially valuable when in college or on missions.  For these recipes, click on Quick & Cheap Meals.  The boys did great with them, I think you'll like them, too.   

Happy cooking and budgeting!
0 Comments

Softening Brown Sugar

12/30/2010

0 Comments

 
Picture
Does this look familiar?  It's almost hard enough to build with...

Picture
Less than a minute later, it can be measured!


Did you know sugar stores forever?  It doesn't ever spoil or go rancid.  And here's a little practical science for your kitchen- brown sugar is hygroscopic,  meaning that it attracts moisture from the air.   Cookies made with it have a better chance of being chewy.  This also depends, of course, on how long you let them bake!  Brown sugar adds moistness, chewiness in baked goods, and a deeper, caramel-like flavor.  All of this is because of the small amount of molasses in it.  Most brown sugar is just refined white sugar with molasses added at the factory.  Turbinado, or raw cane sugar is an exception to this- the brown color in it is because the molasses wasn't taken out to begin with.

What this hygroscopic nature means for you is that if there’s any moisture available to the sugar, it will soften up over the course of several hours or overnight.  Some ways to add moisture are:

·         Add a slice of apple to a sealed container of brown sugar.  Let sit.

·         Add a slice of bread.  This is a great use for those heels that sometimes don’t get eaten.  When it’s totally dried out, you can crush it into breadcrumbs.

·         Soak a small  (clean!) terra-cotta pot, saucer, or shard (piece of a broken pot), in water.  When it’s moist, add it to your brown sugar container.  This one’s reusable! Just soak it again when dry.

·         Put a dampened cloth or paper towel in the container, or just put the brown sugar in a bowl and cover it with the damp cloth.


·         Any place the brown sugar actually touches something wet, the moisture may drive out the molasses (which is what makes it brown) and leave a white, moist section of sugar.  It’s fine.  Stir it back in.


 If you can’t wait that long for your sugar, there are more options:

·         Microwave the brown sugar for 30 seconds.   If it’s not softened yet, put it in for a little longer.  It will be soft and easy to measure, but only while it’s still warm!  Crumble it while you can, measure what you need, and put the rest in a container with one of the ideas above.

·         If you don’t have a microwave, you can use a grater to get what you need off that solid block of sugar.

·         If you have molasses on hand, stir it into regular sugar.  This is how they make brown sugar at the factory!  For light brown sugar, use 1/2 Tbsp (1 ½ tsp). molasses to 1 cup white sugar.  If you want dark brown sugar, use 1 Tbsp. molasses instead.

·         Knock off some chunks with a hammer or other heavy item.  Weigh them instead of using a measuring cup.  A cup of brown sugar weighs about 7 ounces. (For the curious or the kitchen scientist, a handy chart listing other foods’ weights per cup, see http://www.veg-world.com/articles/cups.htm)  Most recipes use some form of liquid- add the hard sugar lumps to the recipe's liquid to let it soften, dissolve, or mix in.

One great thing to make with brown sugar is

Caramel Pudding
2-4 Tbsp. butter
1/4-1/2 c. brown sugar
1/4 c. cornstarch OR 1/2 c. flour
2 c. milk
1/8 tsp. salt, optional
2 eggs
1 tsp. vanilla

In a medium sauce pan, melt the butter over medium heat, stir occasionally until it turns brown and smells heavenly.  Remove from heat.  Add brown sugar, cornstarch, and salt; stir until smooth.  Gradually stir in the milk; return to heat and stir until it comes to a boil.  Meanwhile, beat the eggs in a medium bowl.  Pour a thin stream of the hot milk into the beaten egg, stirring constantly, until about half the milk is mixed with it.  This keeps the egg from curdling (scrambling).  Pour the egg mixture back into the boiling mixture; cook and stir for two minutes more.  

For more variations on pudding, see White Sauces and Pudding 

 
0 Comments

Candy Cane Bread

12/27/2010

0 Comments

 
Picture
This one doesn't taste like a candy cane- though you could make it so that it does!

I just noticed that in my 'dinner rolls' post there were no instructions for making that candy cane bread.  So here they are.  Use the same technique to make cinnamon rolls, only those need sliced at the end of making the roll.
Picture
The simplest way I've found to roll a rectangle is to give the shape a head-start before rolling it out.  Pat or stretch it into an oblong shape.

Picture
Roll it out to its full finished length.  In this case, I have a pound of dough that I want to be about 8x14, so it's now rolled to be 14" long.

Picture
Then work on getting it the right width.  Eight inches is the width of my thumb to pinky, when I stretch my hand.  It doesn't have to be exact when you roll these things out; a hand width is a great measuring tool!

Picture
Spread soft butter on it, using a utensil or your hand.  If your butter is cold and hard, your hand warms it up in a hurry.  The butter prevents the dough from sticking to itself, which leaves your finished spiral open (great for letting frosting ooze into if you're making cinnamon rolls!).  This means you DON'T want to spread the butter clear to the edge; stay about an inch or two away from one long edge.

Picture
Sprinkle with cinnamon and sugar, if that's the filling you want.   I 'eyeball' this kind of thing, but this was about 1- 1 1/2 tsp. cinnamon and 2-3 Tbsp. sugar.  Again, stay an inch away from one long edge.

Picture
You can add whatever you want as filling- this one has the cinnamon and sugar, but then also has raisins, chopped toasted hazelnuts, and some chopped candied orange peel.

Picture
This flavor was the most popular with everyone who tried it this year- raspberry filling, sprinkled with little chocolate chunks, or chocolate chips.  I get the raspberry filling from the bakery at a local grocery store; it's cheaper than I can make it, plus it doesn't go runny when heated, like raspberry jam does.  Raspberry jam does have better flavor, however.

Picture
Start rolling the dough, starting with the long side opposite the unbuttered one.

Picture
This is when you'll be glad you remembered to keep the butter away from the edge.  Pinch the edge to seal.

Picture
Curve the roll into a candy cane shape and put it pinched-side down on a cookie sheet.  Butter it or use parchment paper.   When I have different flavors on the same cookie sheet, I sprinkle or spread some of the filling on top, too, so it's easy to tell them apart.   Let rise until nearly doubled, 45-90 minutes, depending on the temperature of your kitchen, and bake at 350- 375 degrees F  about 20-25 minutes, or until well browned on bottom, and a little browned on top.  It will continue to cook outside the oven for the next 15-20 minutes.  When they're cool.  Drizzle with icing, chocolate syrup, melted chocolate or white chocolate, or melted jam, and sprinkle with some nuts, cinnamon, or chocolate chips if you like.

0 Comments

Far Above Rubies; Dinner Rolls and sweetbreads

12/9/2010

0 Comments

 
Picture
To make 2 oz. Butterhorn rolls- start with one pound of dough and roll it into about a 12" circle.  Spread softened butter on all except the middle, leave about a 2-3" circle unbuttered so the dough can stick to itself.  With a pizza cutter or knife, cut into eight wedges.  Roll each one up, starting with the wide edge.  Pinch the point so it sticks to the rest of the roll.  Put the rolls on parchment or a greased baking sheet, point-side tucked securely underneath so it doesn't unroll during baking. Curve ends a bit, then cover and let rise.
If you're making a bunch of these, use a loaf's worth of dough (about 1 1/2 lbs), roll into a 12-15" circle, and cut into 12 wedges.

Picture
Great gift bread for Christmas- the Candy Cane loaf.  This one has a raspberry-chocolate swirl through it; see the slice at right.  I like to give these to neighbors with a little poem about the symbolism of the candy cane

This week here  is a review of the ideal we work towards as women, and then the info from the Dinner Rolls class I held this week.

---------------

Have you read Proverbs chapter 31 lately?  The Hebrew word for 'virtuous' is חַיִל, 'chayil,' and means POWERFUL, STRONG, and EFFICIENT. Virtues are strengths. Excellence in particular attributes.

Who can find a powerful woman? Her price is far above the most valuable gems. 

I think most of us remember reading verse 10, but look what else it says. 


"Who can find a  virtuous woman? for her price is far above rubies.  The heart of her husband doth safely trust in her, so that he shall have no need of spoil. She will do him good and not evil all the days of her life.

"She seeketh wool, and flax, and worketh willingly with her hands. She is like the merchants’ ships; she bringeth her food from afar. She riseth also while it is yet night, and giveth meat to her household, and a portion to her maidens. She considereth a field, and buyeth it: with the fruit of her hands she planteth  a vineyard. She girdeth her loins with strength, and strengtheneth her arms. She perceiveth that her merchandise is good: her candle goeth not out by  night. She layeth her hands to the spindle, and her hands hold the distaff. She stretcheth out her hand to the poor; yea, she reacheth forth her hands to the needy.

"She is not afraid of the snow for her household: for all her household are clothed with scarlet. She maketh herself coverings of tapestry; her clothing is silk and purple.

"Her husband is known in the gates, when he sitteth among the elders of the land.  She maketh fine linen, and selleth it; and delivereth girdles unto the merchant.

"Strength and honour are her clothing; and she shall rejoice in time to come. She openeth her mouth with wisdom; and in her tongue is the law of kindness. She looketh well to the ways of her household, and eateth not the bread of idleness. Her children arise up, and call her blessed; her husband also, and he praiseth her

"Many daughters have done virtuously, but thou excellest them all.
Favour is deceitful, and beauty is vain: but a woman that feareth the Lord, she shall be praised. Give her of the fruit of her hands; and let her own works praise her in the gates."

I know that all of us can grow by picking something in those verses on which to begin-- or continue-- our efforts.  Are you ‘afraid of the snow for [your] household’?  Or are they going to be fine through lean times because of your preparations? 
​________________


For  the basic bread recipe along with these variations, see my Google Docs version  

This makes 2 dozen 2 oz. rolls (if basic shape rolls, closely spaced, they’ll fill a 12x18 baking sheet perfectly), two dozen medium-small cinnamon rolls (a trayful),  two 8x4” loaves, OR three 1-lb. ‘candy cane’ loaves.

 
Dinner Roll/Sweetbread Dough

3 cups flour to start with (5-6 cups total)
2 tsp. salt
2 tsp. yeast
¼-1/3 c. sugar
3 Tbsp. oil or butter
1 egg
2 cups hot water or milk (no hotter than 130 degrees F or it will kill the yeast)

      Mix salt, yeast, sugar, oil, water, and first amount of flour in a bowl.  Beat about two minutes with a wooden spoon.  Stir in half of what’s left, then mix in more until too stiff to stir.  Dump out onto a floured counter and knead for 8-10 minutes, adding only enough flour to keep the dough from sticking to the counter.   The dough should be smooth and elastic after kneading.  (Yes, you could use a stand mixer for this, too….)

     Cover with a kitchen towel or plastic grocery bag and let rise 1 to 1 ½ hours, or until doubled.  Punch down and shape into rolls or loaves.  Place on greased baking sheet or in 8x4 loaf pans and let rise about 45 minutes or until nearly doubled.  Bake at 350 for about 30 minutes or until the bottoms of rolls, or sides of loaves, are brown.  (Tip a loaf out of the pan to check.)  Remove from pans and cool on a rack.

 
This is my basic bread recipe with three tweaks: egg, milk, and more sugar.

The egg helps make the bread more moist, springy, higher-rising, and tender.  The white helps add strength and leavening.  The yolk adds a tiny bit of color, plus some richness and tenderness from the natural fats in it, especially from the lecithin (worth a whole blog post just for lecithin!) it contains.

Milk helps a little bit with browning, as well as making the internal structure (“the crumb”) softer and smoother.  It’s one of those things that may be harder for an amateur to notice, but it makes enough of a difference that I always use it in sweet breads for competitions.  If you have powdered milk available, just mix the milk powder in with the other dry ingredients, and use water.  For this size batch, you’ll use 6 Tbsp powder, which is just over 1/3 c.

Sugar makes a big difference in the crust browning, or ‘caramelizing’, as well as in the flavor of the bread.  Sugar can also help the yeasts grow, but it only helps to a certain point.  No-sugar-used bread will still rise, but will take twice as long.  And you can get it to brown, too, because of the natural sugars in the flour, but you have to use a higher temperature.  When I’m making bread with no sugar, I bake it between 400 and 450 degrees F, which gives a nice brown crust.  If you cook bread with sugar in the dough, if you cook that hot it will be black on the outside before the inside is done.  When baking sweetened breads like this, then, keep the temperature between 350-400; the bigger the loaf, the lower temperature.  Smaller things, like individual rolls, can still handle up to 400 degrees because the insides can cook quickly.  The other thing about sugar, helping the yeasts grow, is kind of funny.  A moderate amount of sugar is good food for the yeast, but over a certain point actually slows down its growth.  To compensate, let it rise a little longer, or add more yeast. 


Picture
How long the rolls are in the oven will make a HUGE difference in how dry or moist and velvety they are.  Cook them just until the bottoms are brown and they sound a bit hollow.  They will continue to cook for 15-20 minutes after coming out of the oven.  The roll on the left is overbaked and is dry.  The one on the right is perfect. See how the sides are golden brown where the baking pan touched? 
​If you want more color on top, brush with oil or butter after baking; this will intensify the color that is there.  You can also brush them before baking, with milk, beaten egg, or melted butter.  Each one has a little different effect; see which you prefer.

Picture
(left) Mock Cloverleaf rolls, (right) Cloverleaf rolls.  Start with 2 oz dough, a little bigger than a golf ball.  For the Mock style, shape it into a smooth ball, put in greased muffin tins, and make two snips with scissors to create four points.
For the Cloverleaf, divide each golf-ball-sized into three; shape each into a smooth ball.

Picture
For cinnamon rolls, roll dough into a rectangle.  A two-loaf batch will make 2 dozen; roll into a 24x10 rectangle, spread with butter (so the rolls will 'peel' open and let frosting seep between the spirals!), sprinkle with cinnamon and sugar, raisins if you want.  Roll up and pinch to seal.

Picture
Cut into 1” sections using dental floss or thread, put on greased baking sheet, let rise, and bake.  Frost (Cream Cheese Frosting is great!!!) or glaze while warm.

Picture
To make a filled ladder loaf, roll dough into a rectangle.  I used one pound of dough and rolled it to about 8" by 14".  Whatever amount of dough you use, roll it to about 1/4-inch thick.  Put filling down the center third.  I used apple pie filling from a can, but you can use cream cheese and jam, rehydrated dried fruit, nuts and cinnamon, or thinly sliced or chopped fruit, sweetened or not, depending on what you have.  What's in your house or yard that might taste good in this?

Picture
Make cuts about an inch apart.  You'll want to have the same number on each side.  A pizza cutter makes great work of slicing.

Picture
Bring opposite slices together; pinch together in the middle to seal them.  Let it rise until dough is nearly doubled, then bake.  Great with a drizzle of glaze (powdered sugar and water), maybe with a sprinkle of cinnamon or nuts on top for a nice presentation.

0 Comments

Bishop McMullin clip, more on 3-month supply; Spreadable Butter, Snow Ice Cream

11/26/2010

0 Comments

 
(originally from 3/4/10)

Today the information is from two Internet sources:

Here’s a link to Bishop Keith B. McMullin (Bishop for the whole church) speaking on Family Home Storage:http://providentliving.org/channel/0,11677,1706-1,00.html   click on TV icon in upper right corner of page. It’s about a one-minute clip, and very good, simple advice to listen to.

At http://www.utahpreppers.com/2009/10/food-storage-short-life-supply/ there is a good post on a three-month supply- starting it, using it, maximizing shelf time, replacing it, advantages of having it. 

And just a note: remember the email about storing vegetables without a ‘real’ root cellar?  Yesterday (March 3) we ate butternut squash from last year’s garden, it was delicious!  I kept it, along with a couple pumpkins and a giant zucchini, in a dark basement room.  They’ve been just been sitting on top of a couple food storage buckets; I learned a couple years ago that they spoil quickly with moisture, so they can’t sit on a cement floor. They’ve stayed about 65 degrees there, so it requires nothing unusual.  One pumpkin got dropped a month ago, bruising it, so one side has started to go soft.  Maybe we’ll have pumpkin pie tomorrow, to use it before it spoils.  The other pumpkin is still perfect, and the zucchini, well, now there’s an interesting experiment.  It really is big, about 18” long, and bigger around than my hands can reach.  It sat on my counter for about a month, until I decided it might as well go downstairs to see what would happen.  It has blanched.  It slowly lost its green color, now hardly any is left, but it’s still firm.  I’ll let you know how it cooks up.

How’s your food storage coming?  Are you finding the joys in shopping from your own pantry?  Is it saving you trips to the store?  Mine is a great blessing to me and my family.  I love feeling that we could weather whatever economic storm comes our way.   This is also the third month on the three-month challenge.  If you’re not 2/3 of the way there, don’t panic or give up, just start.  If you are that far or more, go look at your shelves/freezer of food and admire your work, and thank the Lord for it.

-Rhonda

Spreadable Butter
2 cubes butter, softened
1 c. oil, use olive oil if you like
¼  tsp. salt

Beat butter until smooth; while beating slowly add in olive oil, then salt.  Pour in whatever size container you want it in; store in refrigerator.   Make any quantity you like- you’ll always use equal amounts of butter and oil, and some salt for flavor.

Snow Ice Cream

1 cup milk, evaporated milk, or cream
1/2 cup sugar
1/2 tsp. vanilla or other flavor
6-8 cups fresh clean snow (6 c. if heavy, wet; 8 if powdery)

 Mix together milk, sugar, and vanilla.  Pour over snow.  Mix well and eat right away.
You may substitute a can of sweetened condensed milk for the milk and sugar- tastes good, but costs more.

 
0 Comments

Cleaning Out and Stocking Up; Chocolate Popcorn

11/18/2010

0 Comments

 
Picture
 

Here is a great idea I heard this week:  go through all your extra stuff (house, garage, back of the cupboards, storage unit if you have it, basement) and tag everything you don't really need.  Even if you like it, if  you don't need it, let it go.  Sell it on Craigslist or ksl, or we could have a giant yard sale...   Then use the money to pay off debt.  Or get food storage.  Or to help someone else. 

Remember the church's website, http://www.providentliving.org?   Being provident means making the most of what you have.  What you have isn't useful if it's sitting.  Have fun!  You’ll be amazed at how thankful you feel for what you could clean out.  It’ll even help you spend less on Christmas!  

“‘Self-reliance means using all of our blessings from Heavenly Father to care for ourselves and our families and to find solutions for our own problems.’ Each of us has a responsibility to try to avoid problems before they happen and to learn to overcome challenges when they occur. …

“How do we become self-reliant? We become self-reliant through obtaining sufficient knowledge, education, and literacy; by managing money and resources wisely, being spiritually strong, preparing for emergencies and eventualities; and by having physical health and social and emotional well-being.”- Sister Julie Beck

 Chocolate Popcorn

One 10-12 oz. bag chocolate chips
8-9 quarts popped corn

 Melt chips, pour over popcorn and mix.  Put in a 225 degree F oven for about 30 minutes, stirring about every 10 minutes.  Cool and store. 

You can also skip the baking step, but baking makes it a little less messy to eat; less melting on your fingers.  That might not be important to you, though…

 Use any kind of chips: dark, milk chocolate, white chocolate, peanut butter, butterscotch, mint, or a combination.  Try chocolate  drizzled with a little bit of melted peanut butter chips.  Or use different colors for a baby shower.  Or stir in some toasted chopped nuts (butter toffee peanuts, anyone?)  Reese's Pieces, cut-up pieces of caramels or candy bars, or anything else that sounds good.
0 Comments

What is Provident Living? and "Warm Delights" copycat recipe

11/16/2010

0 Comments

 
Picture
You, too, can be just two minutes away from a personal-sized warm cake.   One minute to find a cake-mix box and mix 1/2 cup of it with 1/4 c. water, one minute to microwave.  This one is yellow-cake 'warm delights' with chocolate frosting.  My favorite is chocolate cake with a couple mini chocolate-almond bars broken into it.

Great for those smaller households or college students! 

Picture
OK, I think this looks like a bowl of Cream of Wheat. It's really yellow cake with 1 1/2 tsp. cinnamon sugar swirled on top before cooking.  Yum. 
I know the cake mix calls for eggs, but I made this mini version both without eggs and with the right (tiny) amount- they were nearly identical.  The batch with egg in it rose a little bit higher, but that was about it.  Not worth dividing an egg for.

Scroll to the bottom of this post for the complete recipe.

 (originally 5/21/10)

The LDS Church has a wonderful, helpful website, providentliving.org.  The name got me thinking, what does ‘provident’ really mean?  I know the general idea, but what are the details of it?  So here’s what I found.  Some synonyms for it are: careful, conserving, frugal, prepared, prudent, scrimping , thrifty, vigilant, wise.


Antonyms include careless, extravagant, shortsighted, wasteful.

So basically it means being wise with your resources and planning ahead. Right along with ‘self-reliance’, it means planning so that you “rely on yourself” in emergencies or difficulties, not on the city, or the government, or the church, or your neighbor’s food storage.  We’ll share, and you know it, but if you’re prepared, then you have the blessing of helping others instead  of using resources up faster.  We have the safety nets of family, church, and community in place, and sometimes we have to use them, but we are to plan so we have to rely on those backups as little as possible.  Don’t make your Plan A “have someone rescue me”.  That’s Plan B or Plan C.  Or D.  The Visiting Teaching message from January 2010 included this from Sister Julie B. Beck:

“‘Self-reliance means using all of our blessings from Heavenly Father to care for ourselves and our families and to find solutions for our own problems.’ Each of us has a responsibility to try to avoid problems before they happen and to learn to overcome challenges when they occur. …

“How do we become self-reliant? We become self-reliant through obtaining sufficient knowledge, education, and literacy; by managing money and resources wisely, being spiritually strong, preparing for emergencies and eventualities; and by having physical health and social and emotional well-being.”1


So there’s a lot to it, but think about this one:  are you preparing for emergencies and whatever else may/will eventually happen?  Earthquakes, job loss, sickness, car repairs…prayerfully put plans in place to avoid and overcome these challenges.  “Organize yourselves, prepare every needful thing”- D&C 88:119.  If you need any help on your journey to provident living, your visiting teachers will be glad to help; I will too. Pat yourself on the back for what you’ve already done, and figure out what’s next.   I know that the Lord will bless you as your exercise faith in this principle.

* * * * * * *  

“Warm Delights” copycat  (10 cents per serving when cake mixes are on sale….)

½ cup any flavor cake mix       
1/4 cup water

Microwave in a bowl for 1 minute, let stand a couple minutes to cool. 

If you like, add before cooking: 1 Tbsp. chocolate chips/chunks or a few Hershey’s kisses for Molten Chocolate, a few unwrapped, quartered caramels, or a generous sprinkle of cinnamon sugar lightly swirled in;   use your imagination!  After cooking, add a drizzle of caramel topping, lemon sauce, fudge sauce, whatever sounds good.  For upside-down German Chocolate, mix together 1-2 Tbsp. cream cheese, 1 tsp. sugar, and 1-2 tsp. coconut.  Dollop on top before cooking the cake. 

One cake mix will yield about 9 of these.     Or use Bisquick: 1/3 c. mix, 1 ½ Tbsp. sugar, 1 Tbsp. unsweetened cocoa with 1/4 cup water.
0 Comments

Ezra Taft Benson garden quote; Using Wheat Without a Mill

11/9/2010

0 Comments

 
Picture
(originally from 6/17/10)
QUOTE OF THE DAY:
Ezra Taft Benson

"There are blessings in being close to the soil, in raising your own food, even if it is only a garden in your yard and a fruit tree or two.  Those families will be fortunate who, in the last days, have an adequate supply of food because of their foresight and ability to produce their own" (The Teachings of Ezra Taft Benson, p. 266).

In Google Docs there
 is a file with the recipes  I made for the basic-foods class today; Using Wheat Without A Mill.  It covers different ways to use your wheat (all without a mill- a grinder-), including sprouting it, cooking it whole or cracked, how to crack it in the first place, blender-wheat recipes (including a chart to help you convert your own recipes to use whole wheat with the blender), making malt, and soaking wheat before using it.  The last page also has links to some great recipes and resources for using your wheat.   These links are also listed below.
 
Please buy wheat!  You cannot beat it for price.  You can buy it by the bag at the Family Home Storage Center, you don’t have to get it in the cans. White wheat there is $5.80 for a 25 lb bag, which is about 23 cents per POUND, which is enough to make one whole loaf of bread.  You pay that much, or more, for each OUNCE of breakfast cereal.  If you don't have a grain mill (grinder), or don't know yet how to use wheat if it's not already flour, now is a great time to jump in and get some wheat anyway.  If you're worried that you won't be able to rotate/use it before it goes bad, don't let that stop you from following the commandment to build your food storage.  It lasts for a long, long time.  Decades or more, if stored right.  Get it, then learn how to use it.  It's healthy stuff to have on hand anyway! It’s also inexpensive insurance.  You'll be glad you have it, and I know you’ll be blessed for following the prophet's counsel.

-Rhonda

Notes from what we tasted and learned at the class- these and more are in the handout, link is above:

We sampled Blender Wheat Pancakes, Wheat Puree Bread, Wheat Salad with Chicken and Corn, Strawberry Nut Jello Salad (the 'nuts' are wheat), Gourmet Banana Nut Cookies, cooked wheat, cracked wheat, sprouted wheat, malt powder .  Also covered was the difference between COOKED and SPROUTED wheat, and how to make malt. 

Why  eat it:  it's CHEAP, stores a LONG time, high in fiber, high in some proteins, vitamins, minerals.

 (summary of the class):   How to eat it:  Grind in blender (2 cups for 1 ½ minutes) or food processor (the dry grains or soaked/cooked), crack in blender, cook whole or cracked, sprout and eat as kernels (as breakfast cereal, or ground beef extender, or rice/pasta/nut substitute), make malt, or sprout and eat as wheat grass or wheat grass juice.

Ways to cook wheat:  in a Thermos, rice cooker, crock pot, regular pan, use in breads (quick/yeast), cakes, salads, (including Jello).  You may cook them then freeze for later. 

Why soak grains before eating them- phytates (phytic acid, the form the phosphorus is in) are anti-nutrients, they bind with and so block absorption of minerals, especially zinc, that you need for proper growth and immune system strength. You inactivate phytates by making the grain think it’s sprouting- warm, moist. Also, soaking freshly ground grain in warm liquid also destroys the phytic acid by activating the enzyme phytase.  A diet rich in Vitamins D, C, A, and calcium help mitigate the effect of phytic acid on the body.  Sprouted wheat is a vegetable, does not lose gluten, but the amino acid profile and vitamins change and it becomes more easily digestible.

 Wheat Berries

2 cups hard red winter-wheat berries
7 cups cold water
1 teaspoon salt


Place wheat berries in a large heavy saucepan. Add water and salt.
 Bring to a boil over high heat, then reduce heat, cover, and simmer gently for 1 hour, stirring occasionally. Drain and rinse. To serve hot, use immediately. Otherwise, follow the make-ahead instructions. Makes about 4 1/2 cups.                    
MAKE AHEAD TIP: Cover and refrigerate  or freeze. 
For Cracked Wheat,  put ¼ to ½ cup of uncooked wheat in a blender, run for 30 seconds or til cracked. 

NUTRITION INFORMATION: Per 1/2 cup: 151 calories; 1 g fat (0 g sat, 0 g mono); 0 mg cholesterol; 29 g carbohydrate; 6 g protein; 4 g fiber; 263 mg sodium; 0 mg potassium.
2 Carbohydrate Servings
Exchanges: 2 Starch

Ready-made toppings for your cooked wheat:
Applesauce
Pure fruit spreads
Fruit butters, such as apple, apricot, prune, pear
Marmalades, jams, preserves, conserves
Frozen berries and fruits, with or without syrup
Nut butters- peanut, almond, cashew
Lemon and lime curds
Maple syrup
Pure honey, whipped, unfiltered or in unusual flavors such as sage, lavender, or chestnut
Chocolate-hazelnut and chocolate peanut butter spreads
Sundae toppings

Making malt: http://www.dryit.com/diastaticmalt.html 

Put 1 cup of wheat kernels in a quart jar, cover with water, and let soak for about 12 hours.  Drain the water (which has vitamins and minerals- save for broth, watering plants, or making bread), rinse, and drain completely.  Rinse and drain 1-3 times a day for 2 days, until the sprouted part is about the same length as the grain. Spread on cookie sheets to go in the sunshine or warm oven or in a dehydrator; dry thoroughly but don’t heat over 130 degrees, so you don’t kill the enzymes.  Grind in a mill or in your blender.  Makes about one cup.  Store tightly covered.  This will keep indefinitely in the fridge or freezer.  Use about 1-1 ½   teaspoon (1/10 of 1% flour) per loaf of bread.  More than this will give you sticky dough and is not beneficial. 

The enzyme in malt (diastase) converts starch in the dough to sugars (maltose) that the yeast can use; longer fermentation (rising) times are needed to be most effective.   Malt replaces sugar/honey and feeds the yeast, browns the crust.  It also has lots of enzymes and vitamins, and so makes your bread more digestible and more nutritious.  The enzymes also improve the flavor, make a finer texture, and increase shelf life.  If you wanted to make malt syrup, you would slowly cook the sprouted grain to get a dark syrup.

Also see:  http://makinghomemadewineandbeer.blogspot.com/2008/05/making-malt-extract.html 

Links:


http://everydayfoodstorage.net/training-cooking/grains, http://everydayfoodstorage.net/2008/10/12/pumpkin-blender-wheat-waffles-with-caramel-sauce/food-storage-recipes Pumpkin Blender Wheat Waffles with Caramel Sauce, http://everydayfoodstorage.net/category/long-term-food-storage/grains/wheat/blender-wheat  Red, White and Blue Blender Pancakes (blender pancakes with red and blue berries, whipped cream), http://everydayfoodstorage.net/2008/04/01/food-storage-gourmet-blender-wheat-cookie/food-storage-recipes Gourmet Blender Banana Wheat Cookie, http://everydayfoodstorage.net/2008/06/24/bring-one-of-these-one-of-a-kind-salads-to-your-next-gathering/food-storage-recipes Feta Wheat Berry Salad, Wheat Berry Salad with Apples and Cashews

http://selfreliantsisters.blogspot.com/search/label/Wheat%20Berries Black Bean, Edamame, and Wheat Berry Salad, Crockpot Wheat Berries, Stovetop Wheat Berries, Pressure Cooker Wheat Berries, Carroll Shelby’s Chili, Wheat Berry Pineapple Chicken Salad, Wheat Berry Salad, Wheat Nuts (like Corn Nuts); http://selfreliantsisters.blogspot.com/2010/02/4-blender-pancake-recipes.html 4 different blender pancake recipes to try

http://www.foodnetwork.com/search/delegate.do?fnSearchString=wheat+berry&fnSearchType=site  Wheat Berry Tapenade, Mushroom Wheat Berry Pilaf, Cumin-Scented Wheat Berry-Lentil Soup, Zesty Wheat Berry-Black Bean Chili, Rice, Red Lentil, and Wheat Berry Salad, Wheat Berries and Greens (Farro e Verdure)

http://www.foodnetwork.com/search/delegate.do?fnSearchString=wheat+berry&fnSearchType=site Easter Wheat Pie (Pastiera di Grano); the same type recipe baked in a springform pan to be a cake is as http://www.celtnet.org.uk/recipes/miscellaneous/fetch-recipe.php?rid=misc-la-pastiera-di-grano

http://www.ldspreparedness.com/Files/cookbook.pdf   The “New Ideas For Cooking with Food Storage” cookbook (20 pages).  Meat substitutes and extenders, Bulgur Wheat, another Blender Wheat Pancake recipe with variation for Waffles, Chinese Fried Wheat (instead of rice), Italian Fried Wheat, Spanish Fried Wheat, Cracked Wheat Casserole (includes burger too), Popped Wheat (similar to Corn Nuts), how to cook it: stovetop, Thermos, gas range’s pilot light, crockpot, as cracked wheat.

http://www.suegregg.com/  for whole foods, including lots of blender wheat recipes

0 Comments

Making Tres Leches Cake

11/8/2010

1 Comment

 
Picture
If you've never had a Tres Leches cake, you're in for a treat!  It's very moist, with a Dulce de Leche flavor throughout.  It's soaked with a mixture of 'three milks'- whole milk, evaporated milk, and cream, normally.  I tend to use whatever's on hand, though.  If you don't have cream, replace with an equal amount of evaporated milk.  You can even whip evaporated milk, if it's very cold.  30 minutes in the freezer usually does the trick.

Picture
This is how you get the Dulce de Leche flavor- caramelize a can of sweetened condensed milk.  It takes two hours if you let the unopened can boil, ALWAYS completely covered by water (or it could explode). Or if you open up the can and pour it in a bowl,  it takes 7-15 minutes in the microwave.  It really boils up, though, so use the biggest microwave-safe bowl you own!  And cover it with plastic wrap.  The condensed milk on the left is caramelized; the condensed milk on the right is what it looks like beforehand.

Picture
The baked cake, a sturdy hot-milk sponge cake.  Let it cool for ten minutes, then poke holes all over, using a skewer or similar.  (My 'skewer' is the bottom of an instant-read thermometer.)

Picture
While the cake is still hot, but the 'milks' mixture is cool-ish, pour all over the cake.  It will start soaking in.  Refrigerate for at least 3 hours, to let the liquid totally soak in and start to set up a bit.

Picture
You know how food blogs make it look like everything is always perfect?


Well... 
 a doubled recipe + the same size bowl = scrubbing!

For an easy-to print version, click on one of these, below.
Tres Leches Cake recipe
, or Gluten-free, Dairy-free, Egg-free version here.

To get the milk mixture to soak in properly, the cake should be hot and the milks room temperature: make the milk  mixture first so it can cool during cake baking time. This was modified from the Cook’s Country recipe.  I live at 3500 ft. elevation, and their version kept falling in the center.  If you live around sea level, you might need to increase the sugar back up to 2 cups, and the baking powder to 2 tsp.  

Tres Leches cake

Milk Mixture:
1 (14 oz) can sweetened condensed milk (or use the powdered-milk version)
1 (12 oz) can evaporated milk
1 c. heavy cream (sometimes I just add 1 c. more evap. milk instead)
1 tsp. vanilla
           Caramelize the sweetened condensed milk by either boiling the can (covered at ALL TIMES by water) for two hours OR in the microwave:  pour into a large microwave-safe bowl, cover with plastic wrap, and microwave for 7-15 minutes, until slightly darkened and thickened.  Stir every couple minutes, especially at the end.  This takes 7 ½ minutes in my microwave.  If it looks a little burned, it’s still OK.  Stir in about half of  the evaporated milk, then set aside 3 Tbsp. for the top of the cake. Whisk in the remaining evaporated milk, cream, and  vanilla.  Set aside.

Cake:
½ c. unsalted butter (if using regular butter, reduce salt by ¼ tsp.)
1 c. milk
4 large eggs, room temperature
1 ¾ c. sugar
2 tsp. vanilla
2 c. flour
1 ½ tsp. baking powder
1 tsp. salt
1/2 tsp. cinnamon, optional (I prefer the cake without)
           Preheat oven to 350 degrees. Heat together the butter and milk until the butter melts; set aside.  Beat the eggs for about 30 seconds, then slowly add the sugar while beating.  Beat on med-high for 5-7 minutes, until they become very thick and glossy.  Mix in vanilla and hot milk/butter.  Add flour, baking powder, and salt  (I dump them on in that order, then mix them with my fingers a bit before beating them into the batter.)  Pour into a greased and floured 9x13 pan.  Bake for about 30 minutes, until cake tests done with a toothpick.  Let sit on a cooling rack for 10 minutes.  Poke holes every half inch all over the cake with a skewer; pour milk mixture over top.  Let sit for 15 minutes, then refrigerate for at least 3 hours and up to 24.  Frost right before serving.

Frosting:
1 c. whipping cream
3 Tbsp. reserved cooked sweetened condensed milk
1 Tbsp. sugar
1 tsp. vanilla
           Beat all together until whipped and thick enough to spread.
1 Comment

Fall Gardening checklist; Creamy Blender Frosting- Chocolate and more!

11/4/2010

0 Comments

 
Picture
Chocolate Blender Frosting on pumpkin cake.

Picture
Dump these in the blender, mix on high...

Picture
...until it looks like this.  Yum!

Hi everyone,  

Most of the garden is done right now, since the frost a couple weeks ago.  Here’s a section from one ‘Fall Gardening checklist’ online:  
“After you harvest, it's time to clean up your garden. Cut back perennials to a few inches above the ground -- they'll grow back next year -- and pull out annual and vegetable plants. Put healthy plants on the compost pile, said Toby Day, associate horticulture specialist at Montana State University Extension. "But if the plant material is diseased, throw it away instead of composting it. Most compost piles don't get hot enough to kill disease or insects." Also, throw away weeds so they don't go to seed in your compost.

Day recommended a few related cleanup jobs before the temperature drops: Remove soil from pots and bring them indoors so they won't freeze and crack. Bring in liquid fertilizers and other substances that shouldn't freeze. Blow out your irrigation lines. And clean, sharpen and oil garden implements so they don't rust.   Enrich your soil before you head indoors for the winter. Larry Sagers recommended shredding everything from corn stalks to woody branches and tilling the material into the ground. If you don't have a shredder, he suggested renting one for the day. "Compost costs around $30 to $50 per yard to buy," he said. "My take is I'll shred my own."

Read more:
http://www.ehow.com/feature_7293587_fall-gardening-checklist.html  
    

* * * * * *
    
This is a fabulously smooth frosting.  The consistency is closer to store-bought frosting than any other homemade I've found, but the flavor is WORLDS above the stuff from a can.  For a wonderful, rich hot fudge sauce, see below, There are pictures on my blog of how to make this, and lots of variations- milk chocolate, butterscotch, caramel, peanut-butter chocolate, 'Nutella' flavor- click on this link:   Creamy Blender Frosting
 

Creamy Chocolate Blender Frosting
(original, very dark version)

 6 blocks (6 oz.) unsweetened chocolate                   
1 ½ c. granulated sugar

1 c. evaporated milk, cream, or coconut cream         
6 Tbsp. butter (not margarine)

1 tsp. vanilla                                                                         
Pinch of salt, optional

Chop chocolate, then put everything into a blender.  Blend on low until better chopped, then scrape down sides with a spatula. Blend on high until it becomes dark and smooth.  This may take about ten minutes, or only two minutes in a Vitamix or similar.   Makes 3 cups.

  For different flavors, try using a different extract than vanilla- maple, orange, rum, mint.  You could also add a teaspoon of frozen concentrated orange juice, a couple Tbsp. of maraschino cherry juice in place of the same amount evaporated milk (along with maybe a 1/2 tsp. almond extract).  Or 1/2 tsp. cinnamon for a nice winter flavor.  You can reduce chocolate to 5 blocks, for slightly less intensity, and have it still work.

  If you have any extra frosting, use it as a base for hot chocolate: 2-3 Tbsp. per cup of milk, use a blender to mix.  (Personally, I use up my extra by putting it on a spoon...)    

Hot Fudge Sauce: Use the same ingredients, except reduce butter to 2 Tbsp.  Instead of mixing in a blender, bring to a boil in a small saucepan; let cook for 2 minutes, until sugar is dissolved.
0 Comments

Voting quotes and information, things to do with that Halloween candy

10/28/2010

0 Comments

 
Picture
Hi everyone,

Are you ready to vote? I felt I should share some statements our church leaders have made.  Below, you will find some great web resources to help you be informed on the candidates, ballot items, and judges in our area.  I’m sure there are more out there; these are the ones I’m aware of.

Joseph Smith said: "Even this nation will be on the very verge of crumbling to pieces and tumbling to the ground, and when the Constitution is upon the brink of ruin, this people will be the staff upon which the nation shall lean, and they shall bear the Constitution away from the very verge of destruction."  In other places, Joseph referred to this time being when the Constitution would hang by a thread.  What is this last thread that is holding up the Constitution?  President Ezra Taft Benson told us that this “our franchise (a right granted) to vote."

John Taylor said that the Elders of Israel (remember that women couldn’t vote, yet) should “understand that they have something to do with the world politically as well as religiously, that it is as much their duty to study correct political principles as well as religious” (Journal of Discourses, 9:340)


“It is time, therefore, that every American, and especially every member of the priesthood, became informed about the aims, tactics, and schemes of socialistic-communism. This becomes particularly important when it is realized that communism is turning out to be the earthly image of the plan which Satan presented in the pre-existence. The whole program of socialistic- communism is essentially a war against God and the plan of salvation—the very plan which we fought to uphold during ‘the war in heaven.’” (Ezra Taft Benson, Secret Combinations, Conference Report, October 1961.)

Also see Ezra Taft Benson, The Constitution- A Heavenly Banner, and D&C 98:6-10 

This year there are four proposed amendments to the Utah Constitution, a number of races including the State Board of Education, a proposition for a bond, and 37 judges to vote on. If you go to https://vote.utah.gov/  you will find a box at the bottom of the page that says "What's On My Ballot?".  Click on this and it will ask you some basic questions that verify if you are a registered voter.  After this, it takes you to a screen that shows exactly what will be on your ballot when you go to vote.  There are lots of links there to learn more about everything on your ballot.

Vote.Utah.gov - you can click on race by judicial district. You can find your district at https://secure.slco.org/clerk/elections/index.cfm    

 Full Listing of Utah Candidates 

Project Vote Smart 2010 Ballot Measures,  or  Constitutional Amendments 

2010 Voter Information Pamphlet

As for voting on the judges, they each have a 'scorecard', found online on the Utah Voter Information Pamphlet, staring on page 37.  The scores are determined by the Utah Judicial Council, see http://www.utcourts.gov/committees/members.cgi?comm=1 for who this includes.  Please read what their definitions are, because that affects the judges' scores (for instance, their definition of 'integrity' doesn't completely match mine).     Good luck, do your homework, and go vote!

 + + + + + + + + +

Here are some simple things to do with Halloween candy, from Living On A Dime.com:

"After the kids are done Halloweening, I grab 24 candies for each child to save for a countdown to Christmas instead of buying the calendars in the stores. I usually keep them in a bag but you can get the kids to decorate shoe boxes or stick the candy to a calendar with tape."

 
Candy Bar Milk Shakes

1 cup mini candy bars, chopped
2 cups (1 pint) ice cream (chocolate or vanilla)
1/2 cup chocolate syrup
1 1/4 cups milk

Chop candies in a blender or food processor.   This is easier if they are partially frozen. Add the rest of the ingredients. Mix until blended. This makes a thick shake. Add 1/4 cup milk for a thinner shake. Makes 2 milkshakes, about 16 oz. each, or 5 shakes if you make them 6 oz. each!

 
0 Comments

Gladness and Cheer, Just-Fruit-and-Nut Bars

10/27/2010

0 Comments

 
Picture
Picture
Picture
(Originally 9/2/10)

I love this time of year!  The temperatures have dropped enough that the roses are reblooming, the grass is having an easier time, and the mornings and  late evenings have the smell of earth and coolness.  The garden is in full swing, tomatoes are fragrant and sweet,  most of the lumps that come out of my garden are potatoes instead of rocks, and I get to be creative using squash again.  What a fulfilling time, enjoying the fruits of our labors (or others’ labors, if you prefer the farmers’ market or grocery store).  It brings to mind   D&C 59:18-19 “Yea, all things which come of the earth, in the season thereof, are made for the benefit and the use of man, both to please the eye and to gladden the heart;

   Yea, for food and for raiment, for taste and for smell, to strengthen the body and to enliven the soul.”

I’m grateful for the beauties of the earth that the Lord has given us, for the wonderful things he’s put here for us to wisely enjoy.  The recipe at the end of the email uses nothing but some of these things that grow for us. Enjoy!


Here is a bit from Elder Maxwell, from a talk he called “Be Of Good Cheer”- both sobering and encouraging. 


“We are living in a time in which we shall see things both wonderful and awful. There is no way that we can be a part of the last days and have it otherwise. Even so, we are instructed by our Lord and Exemplar, Jesus Christ, to “be of good cheer.” (D&C 61:36; D&C 78:18.)

Jesus has given that same instruction to others before, when the stressful circumstances in which they found themselves were anything but cheerful.

“In the world ye shall have tribulation: but be of good cheer; I have overcome the world.” (John 16:33; italics added.)

What precious perspective we obtain from the gospel of Jesus Christ concerning things that really matter—against which we measure the disappointments of the day!

Jesus calls upon us to have a deliberate trust in God’s unfolding purposes, not only for all humankind but for us individually. And we are to be of good cheer in the unfolding process. The Lord has made no secret of the fact that He intends to try the faith and the patience of His Saints. (See Mosiah 23:21.) We mortals are so quick to forget the Lord: “And thus we see that except the Lord doth chasten his people with many afflictions … they will not remember him.” (Hel. 12:3.)

Given the aforementioned grand and overarching reasons to rejoice, can we not “be of good cheer” in spite of stress and circumstance?

President Brigham Young said of a geographical destination, “This is the place.” Of God’s plan of salvation, with its developmental destination, it can be said, “This is the process”!   

(from “Be of Good Cheer” by Neal A. Maxwell,  Oct. 1982 Conference) http://lds.org/ldsorg/v/index.jsp?hideNav=1&locale=0&sourceId=1ca9c5e8b4b6b010VgnVCM1000004d82620a____&vgnextoid=2354fccf2b7db010VgnVCM1000004d82620aRCRD
If you can make the time, please read the whole thing, it’s wonderful!


Now for the recipe: these fruit/nut bars are basically the same as the old-old recipe for ‘fruit balls’ or ‘dried fruit candy’, if you’ve run across those before.  The dates are there both for sweetness and stickiness to hold the whole thing together.  

Just-Fruit-and-Nut Bars (the original 'energy bar') and naturally gluten-free!

1/3 cup chopped pecans - toasting the nuts will increase the flavor
1/3 cup chopped dates
1/3 cup chopped dried apples 

 Put the pecans in a food processor (or blender?) and chop until finely ground.  Remove and do the same with dates and apples.  Add the nuts back in, add a pinch of cinnamon, and process until it holds together.  Divide into 6 pieces, mold each one into a bar, and wrap tightly in plastic wrap, waxed paper, or parchment.  81 calories each, if you care.   (I’m thinking these things ought to be double-sized- plus I’ll make my batch with 1 cup of each ingredient.)

If you can’t have nuts: the nuts are there to give body and fat for shaping, digestibility and energy, so try a combination of chopped-up rolled oats and coconut oil (or butter)

Variations:

Apricot-Almond: use equal amounts dried apricots, dates, and almonds

Cherry Tart:  equal parts dried cherries, dates, and walnuts or almonds

Peanut Cookie: use peanuts and only dates (2/3 cup).  Add a pinch of salt and a bit of vanilla.

Cashew Cookie: same as Peanut Cookie, except use cashews.

How about using dates, dried pineapple, macadamias, then rolling in coconut?

Or use any nut and dried fruit you have, or whatever else sounds good…..

 
0 Comments

Rescuing old, stale bread; sustaining ourselves

10/27/2010

0 Comments

 
Picture
Caramel Bread Pudding using leftover bread.  This batch was made from some loaves I accidentally left cooking while I went to my son's concert.  Good thing it was short!!!  I trimmed off the burnt outside, then cubed it.

Picture
For some recipes, the drier and staler your bread, the better! 

(original date: 9/10/10)


This week I’ve got a couple recipes to help you ‘re-purpose’ some of that bread that might otherwise end up in the garbage.  If it’s dry, great!  If it’s crumbling, great! If it’s stale, perfect!  The only time you don’t use it is if it’s moldy.  Even then it’s still good for the compost pile, if it’s in an enclosed container to keep out rodents.  Meanwhile, here’s some food for thought from Brigham Young, one of the most practical of people.

“My faith does not lead me,” President Young said, “to think the Lord will provide us with roast pigs, bread already buttered, etc.; he will give us the ability to raise the grain, to obtain the fruits of the earth, to make habitations, to procure a few boards to make a box, and when harvest comes, giving us the grain, it is for us to preserve it—to save the wheat until we have one, two, five, or seven years’ provisions on hand, until there is enough of the staff of life saved by the people to bread themselves and those who will come here seeking for safety. … [The fulfillment of that prophecy is yet in the future.]

“Ye Latter-day Saints, learn to sustain yourselves. …  

“Implied faith and confidence in God is for you and me to do everything we can to sustain and preserve ourselves. …  

“You have learned a good deal, it is true; but learn more; learn to sustain yourselves; lay up grain and flour, and save it against a day of scarcity. …  

“Instead of searching after what the Lord is going to do for us, let us inquire what we can do for ourselves.” (Discourses of Brigham Young, Deseret Book, 1966 ed., pp. 291–93.) , quoted in Marion G. Romney, “Church Welfare Services’ Basic Principles,” Ensign, May 1976


Today’s recipes give you a couple good ways to not waste that dried-out, stale, or crumbly bread.  We have a little problem at our house with the heels of the bread- somehow I always find a heel or two in a bag at the back of the cupboard, dried out by then, of course.  Those either get turned into croutons or French toast right away, or get stuck in my ‘old bread’ bag in the freezer.  When I have enough, we make stuffing or bread pudding.


Homemade Croutons

 Cut bread into cubes and turn it into croutons: either sauté in, or drizzle with, olive oil or melted butter (1 Tbsp. for each 1-4 slices),  sprinkle with garlic powder, onion powder, dill, oregano, parsley, Parmesan cheese, ranch dressing mix (1/2 pkgs per loaf of bread), or anything that sounds like a good idea. Bake at 350 degrees for 15-20 minutes, or until dry and crispy.  Spread on a paper towel to cool, store when cool in a ziptop bag.  They’ll keep for a good couple of weeks, if you don’t eat them first.

________________________________

The ideal bread pudding is custard-y and creamy inside with a little bit of crunch on the outside. 
Basic Bread Pudding

12 slices bread, cut in 1” squares, (the more stale, the better! – or bake them)
½ -1 cup raisins, soaked, optional
1 Tbsp. cinnamon
3-6 eggs (less makes it more dry, more makes more of a custard)
¾- 1 ½ cups sugar, to suit your tastes, white or brown
¼ cup butter, melted
2 tsp.vanilla
½ tsp. salt
3 c. hot milk- ideally half-and-half, or one 12-oz can evaporated milk and 1 ½ c. milk
pinch ground nutmeg

 Mix together the bread, raisins, and cinnamon.  Dump into a 9x13 pan.  Using the same bowl as before, beat the eggs, then stir in sugar, butter, vanilla, and salt.  Mix until sugar dissolves.  Slowly mix in the hot milk.  Pour all of this over the bread, sprinkle with nutmeg, and let sit for 5-20 minutes to soak.  Bake at 375 degrees for 25-30 minutes, until center is set and a knife inserted in the center comes out mostly clean.  If you bake this in a hot water bath, it will come out more custardy.  Serve warm.  Very nice with a dollop of whipped cream, scoop of ice cream, or a drizzle of some kind of sweet sauce (vanilla sauce, caramel sauce, rum sauce, maple syrup, etc.)

 Variations: Use any dried or chopped fruit in this, (this is a great way to use those two lonely, shriveled apples sitting on your countertop!), shredded coconut, cocoa or melted chocolate (2-4 squares), chocolate chips, pecans or other nuts, rum extract, orange extract or zest.

For the liquid, you can substitute eggnog, hot chocolate, coconut milk, and about anything that sounds good.  One great combination is shredded coconut with chocolate milk..... 

 Even if you think you don’t like bread pudding, you’ll probably love this one:

 Caramel Bread Pudding- fills a 9x13 pan

15 slices good-quality white bread, cut into 1” pieces (about 16 cups)- baked until crisp (about 10 minutes at 450 degrees)
1 ½ sticks butter
2 cups light brown sugar
1 cup heavy cream or evaporated milk
¼ c. corn syrup or honey
5 tsp. vanilla, divided
3 c. half-and-half, or use  the last ½ cup evaporated milk from your can (above),use whole milk for the remaining 2 ½ cups here.  
5 large eggs


Melt butter and sugar together in a saucepan on medium-high heat.  Stir about 4 minutes, or until bubbly and golden.  Remove from heat and stir in cream or evaporated milk, corn syrup, and 2 tsp. vanilla.  Pour one cup of this caramel into a greased 9x13 pan.  Set aside one more cup of caramel, to use as topping later.  To the remaining caramel, add the half-and-half (or mixture of evaporated milk and whole milk).  Beat the eggs together, then whisk in the half-and-half mixture a little at a time.  Add remaining vanilla.  Fold in the bread, and let sit until soaked through, about 20 minutes. Meanwhile, heat oven to 350 degrees. Put bread mixture into the 9x13 pan, bake about 40-45 minutes, until the top is crisp and the custard is barely set.  Serve warm, with the reserved cup of caramel drizzled on top.

 
0 Comments
<<Previous
Forward>>

    Need a Search bar?
    One day I may upgrade my website-- but until then, use your web browser search bar. Type in my web address and what you're looking for, like this-- 
    www.theprovidenthomemaker.com  pumpkin --  and you should get results.


    Author

    I'm a disciple of Christ, a member of the Church of Jesus Christ of Latter-day Saints, a family-defending, homemaking, and homeschooling mom of eight children, two of whom sometimes can't have milk or wheat. Growing up on a farm in a high mountain valley, my parents taught me to 'make do', work hard, smile, and help others.  I love cooking, learning, growing food and flowers, picking tomatoes, and making gingerbread houses --which CAN be made allergy-friendly-- with my children.  I hope you find something to help you on my site!

    Archives

    April 2024
    July 2023
    April 2022
    September 2021
    March 2021
    December 2020
    April 2020
    March 2020
    February 2020
    January 2020
    December 2019
    November 2019
    October 2019
    September 2019
    August 2019
    July 2019
    June 2019
    May 2019
    April 2019
    January 2016
    November 2015
    October 2015
    September 2015
    March 2015
    February 2015
    November 2014
    October 2014
    September 2014
    August 2014
    July 2014
    June 2014
    May 2014
    April 2014
    March 2014
    February 2014
    January 2014
    December 2013
    November 2013
    October 2013
    September 2013
    August 2013
    July 2013
    June 2013
    May 2013
    April 2013
    March 2013
    February 2013
    January 2013
    December 2012
    November 2012
    October 2012
    September 2012
    August 2012
    July 2012
    June 2012
    May 2012
    April 2012
    March 2012
    February 2012
    January 2012
    December 2011
    November 2011
    October 2011
    September 2011
    August 2011
    July 2011
    June 2011
    May 2011
    April 2011
    March 2011
    February 2011
    January 2011
    December 2010
    November 2010
    October 2010
    September 2010

    Categories

    All
    Alcohol
    Alternate Cooking
    Appearances
    Apple
    Apricots
    April Fools
    Aprons
    Bananas
    Beans
    Beef
    Beets
    Bench
    Beverages
    Bonnet
    Bread
    Breakfast
    Budget
    Budgeting
    Cake
    Candy
    Canning
    Carrots
    Cheese
    Chicken
    Children
    Chocolate
    Christmas
    Cleaning
    Coconut
    Comfrey
    Common Core
    Constitution
    Cookbook
    Cookies
    Cooking Oil
    Crafts
    Dairy Substitutions
    Dehydrating
    Dessert
    Dried Fruit
    Earth Oven
    Earthquake
    Easter
    Edible Weeds
    Eggs
    Emergency Prep
    Essential Oils
    Faith
    Family Home Evening
    Fertilizing
    Food Storage
    Fourth Of July
    Freezer
    Frosting
    Fudge
    Garden
    Gardening
    Gingerbread
    Gluten
    Gluten Free
    Gold
    Government
    Grains
    Gratitude
    Hat
    Herbs
    Home Remedies
    Home Repairs
    Homeschool
    Home Storage
    Honey
    Hope
    Inflation
    Leftovers
    Legumes
    Lemon
    Main Dishes
    Mixes
    Mothers
    Noah
    Non Artificial Colors
    Non-artificial Colors
    Nuts
    Oats
    Oil
    Orange
    Paint
    Peaches
    Pear
    Pie
    Pizza
    Plums
    Poem
    Popcorn
    Pork
    Potatoes
    Powdered Milk
    Prayer
    Preparedness
    Projects
    Prophecy
    Pruning
    Pumpkin
    Quick Bread
    Rhubarb
    Rice
    Salad
    Salt
    Sauces
    Self Reliance
    Self-reliance
    Sewing
    Shelf Life
    Shelves
    Sky
    Smoothie
    Snacks
    Soup
    Spices Or Seasonings
    Squash
    Strawberries
    Substitutions
    Sugar
    Summer Fun
    Three Month Supply
    Time
    Tomatoes
    Trees
    Truffles
    T-shirts
    Tuna
    Ultra Gel
    Valentine\'s Day
    Vegetables
    Water
    Watermelon
    Wheat
    Work
    Year Supply
    Zucchini

    RSS Feed

Web Hosting by iPage