The Provident Homemaker
  • Recipes and Info
    • Making Bread
  • My Blog
  • Favorite Resources
  • Documents and Files
  • 52 Weeks of Building Storage

How many dried bananas from a whole box?

4/15/2022

1 Comment

 
Picture
For details on how I dry these, see Chewy Dried Bananas. 
...and by "whole box" I mean the 40-pound boxes you see the produce guy emptying to restock the banana shelf. 

In other words, 40 pounds of fresh bananas will shrink down to what total space after dehydrating them?  The short answer is 7-9 quarts. Around the volume of two gallons, give or take a quart. 

It's hard to tell exactly because of a few factors.  The first is that a box is rarely exactly 40 pounds.  It's usually a little bit more, and sometimes a few pounds more.  
The second is that it depends on how many bananas get eaten before they're tucked away for later.  That could mean some were eaten fresh, some were made into banana bread, some were used in smoothies, and-- the easiest way to have a bunch disappear-- some (or many) were eaten after drying but before you whisked them away.  

In my case, my family started with three boxes.  

Yes, that's one hundred-twenty pounds. Or a few more. 

Why?  

Simple.  

We love them-- they're great for snacks, car trips, and packed lunches; they store well for a year (or a few); I hadn't seen any cases at a good price for a long time; and our dried banana stash was getting low. Low-ish. AND-- this is important-- my neighbor who ran across them called from the store asking if I wanted any slightly-overripe bananas. For $3 per box.  (No, that's not a typo.) Since my family was leaving town the next day, I said yes, to two boxes.  One for me-- we could get them sliced and on trays that night, and dried just in time to leave town-- and one for my sister in Idaho, which is where we were going. (She dehydrates, too.)

The next week, I was at that store again -- with my kids begging to look for more because those fresh dried bananas were SO GOOD. Sure enough, they still had lots. The now more-overripe bananas were $1 per box.  

Perfect.  Buy food when the store wants it OUT, and FAST. And use or preserve it quickly. 

From that 3 boxes, here's what our yield was:
  • 18 quart jars tucked away, plus at least a jar or two’s worth eaten by my kids as they helped,
  • 2 (12x18) trays of banana bars (one regular, with caramel icing, the other were chocolate banana bars, with chocolate icing)
  • one 11x15 pan of gluten-free banana bars  (all the bars were for a youth dance)
  • three loaves of banana bread,
  • two loaves of gluten-free banana bread
  • 1-2 pounds of bananas frozen in ziplock bags, for future smoothies

How can the bananas get dried before they get too ripe?  Well, not all of them did.  That's why there was so much banana baking going on. When we got to that last box, if something was too ripe, or bruised, it got tossed into the bake-with-it bowl, to be mashed. 

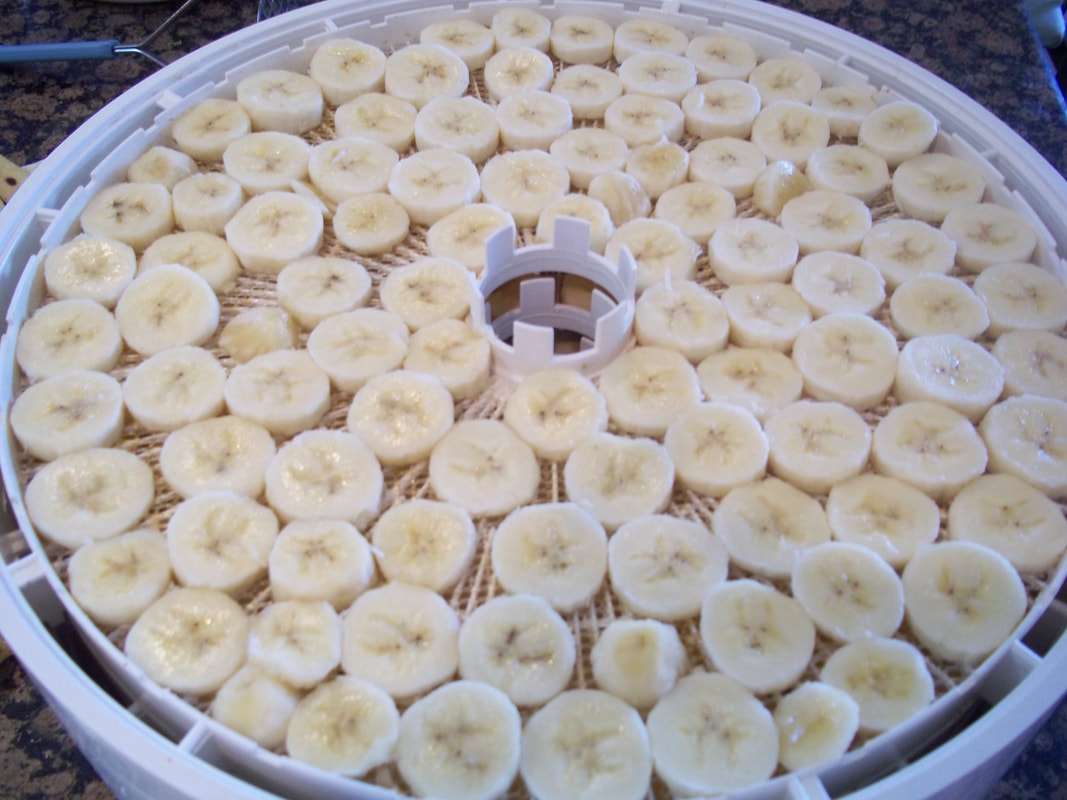
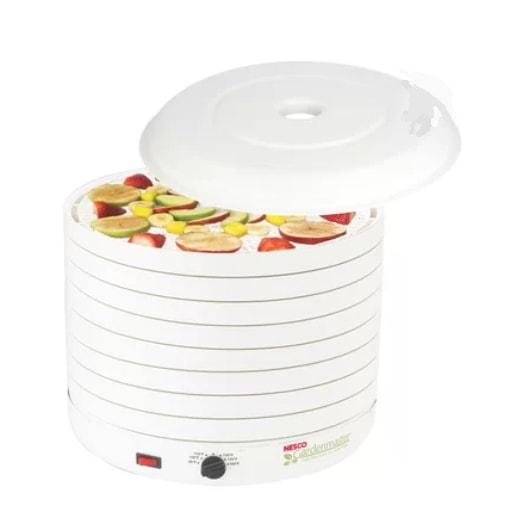
In addition, I have two large dehydrators, with 12 trays each. (They were much cheaper when I bought them!) 
A 40-pound box of bananas, sliced, fits nearly perfectly on those 24 trays.  It takes the dehydrators about a full day to dry them.

How did I get 12 trays each, when they come with only 8?  You can buy extra trays, but they’re about $12 apiece (sold in packs of 2). 

That's not how I got them. 

My first dehydrator was the same type and size. That one was purchased through the local classifieds for $25. It still works, but the new ones are a little more powerful, so the old base is in the basement, on standby just in case it’s needed. 

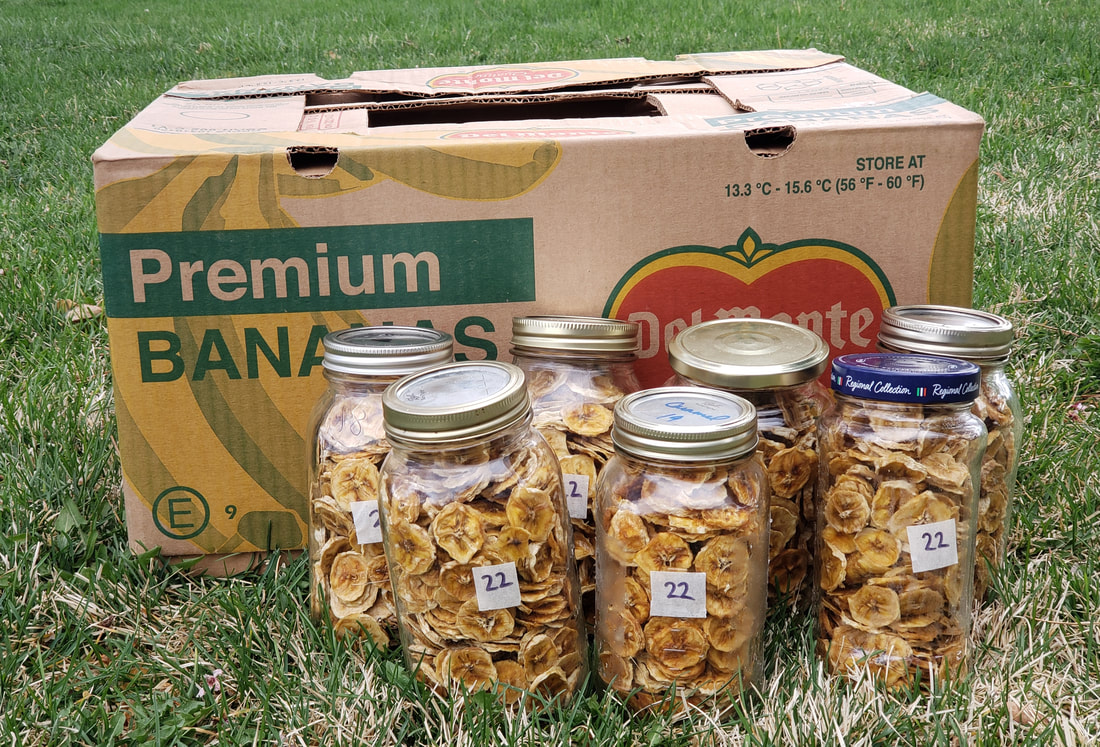
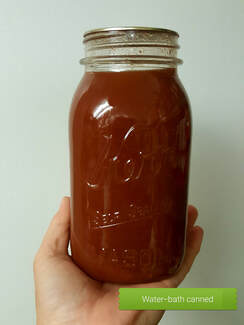
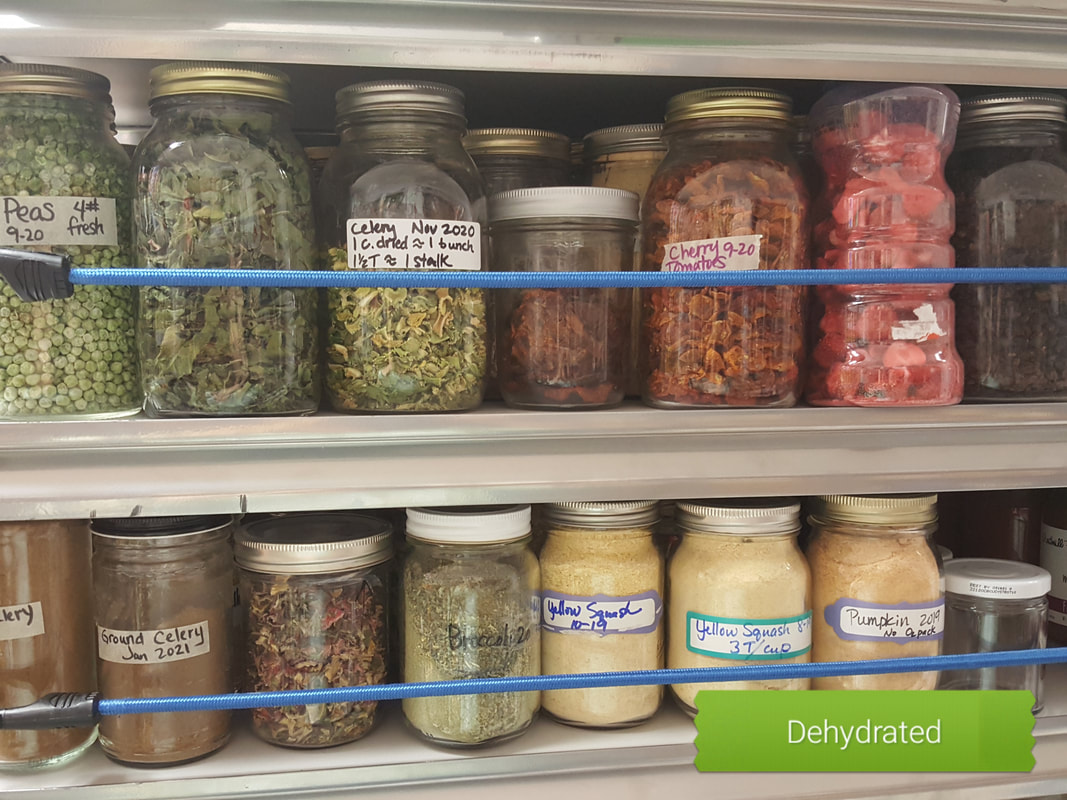
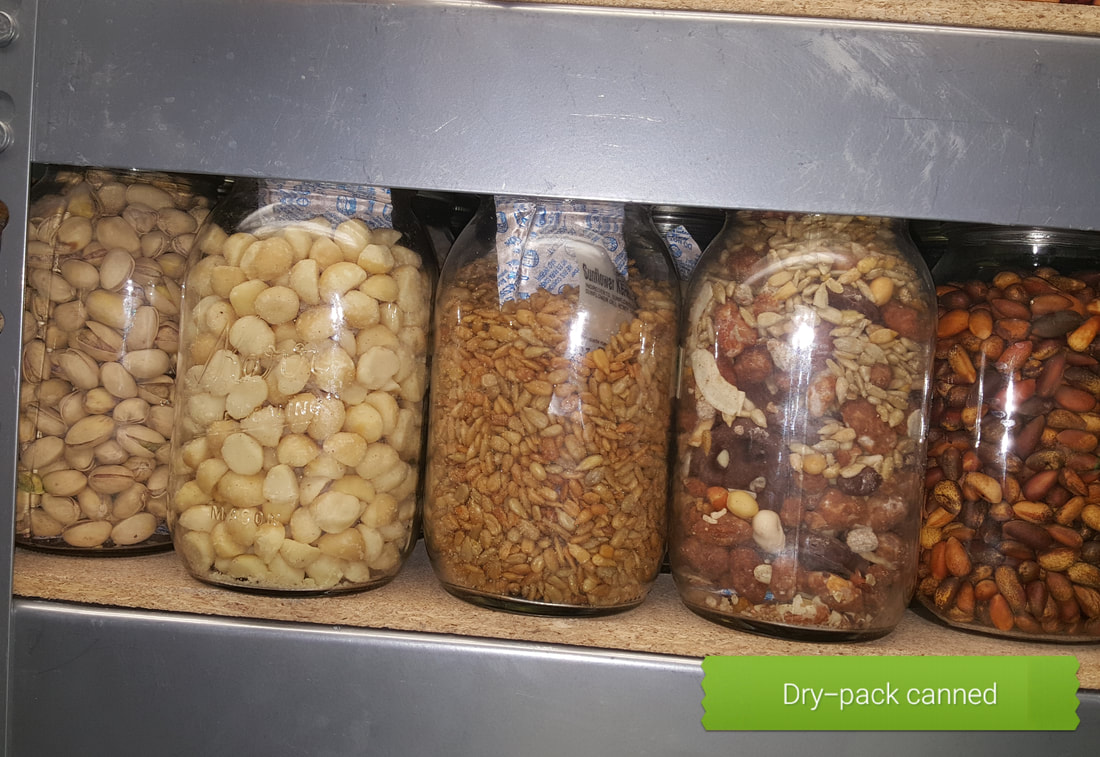
Also notice, in the photo at the top of this post, that when I say "quart jars," it doesn't necessarily mean canning jars.  Oh no.  These jars just need to be airtight.  I use cleaned-out mayonnaise jars and pasta sauce jars too.  If you're a canner, you've likely learned that if the rim of a jar gets chipped, that often prevents the canning lid from sealing properly.  My solution now is to write a big X on the jar with a Sharpie, and use that jar ever after only for dehydrated foods.  Waste not, want not.  
​
Or at least 'want less.'
Picture
1 Comment

Mom's Double Double Apple Crisp

9/25/2021

0 Comments

 
Picture
This is called the 'Double-Double' recipe because each of the three main topping ingredients (butter, brown sugar, flour/oats) is double the quantity of the one before. You can use that same ratio to make cookies- to a quantity double what’s listed below (= use 1/2 cup butter) also add one egg, ½ tsp. baking soda, ½ tsp. salt, and a big handful of chocolate chips or whatever else you want in there.  You've got cookie dough!
 
Mom’s Double-Double Apple Crisp
Makes 4-6 servings

5-6 apples, peeled and sliced—enough to mostly fill an 8x8 baking pan --or about 4 c. dried apple slices
¼ cup butter, softened or melted
½ cup brown sugar
1 cup flour- or use ½ cup quick oats and ½ cup flour (gluten-free flour works just fine)
Optional: 3/4 tsp. nutmeg and/or cinnamon
 
If using dehydrated apples, put them in the 8x8 pan, cover with boiling water and let them soak while you make the topping. 

In a small to medium bowl, stir together the sugar and butter. Mix in everything else until no flour patches remain, but you still have some lumps. (They’re the best part!) 
Drain off extra water from the apples, leaving just a little in the bottom.  (Save the drained water for making bread, breakfast oatmeal, for feeding a sourdough start, add to a smoothie or other drink. It contains a little bit of Vitamin C and some natural sweetness.)
 
Cover the apples with the topping.  Bake at 375° F for about 25 minutes, until topping is browned and crunchy.  If using fresh apples, you’ll need to bake it 30-45 minutes. 
 
Serve with whipped cream or ice cream.


Picture
Picture
0 Comments

Save the Squash!

9/20/2021

0 Comments

 
On the Studio5 morning show on September 7, I taught a short segment on things to do with your summer squash, including a better way to freeze it.  Here's a link to the Studio 5 video and the recipe that was shared-- 

Glazed Lemon Poppyseed Surprise Muffins
Makes 12-15

Muffins:
1 pound yellow summer squash (to make 2 cups puree)
Zest of one lemon*
¾ c. sugar
1 egg
¼ c. vegetable oil or melted butter
1 tsp. vanilla extract
1 tsp. almond extract
2 c. flour
½ tsp. salt
1 Tbsp. baking powder
1 Tbsp. poppy seeds

Glaze:
Juice of 1 lemon
Sugar

Preheat the oven to 375°. Lightly coat the inside of 12-15 muffin cups with cooking spray. Wash and trim the summer squash; cut into 1” chunks. Place in blender or food processor along with lemon zest, sugar, egg, oil or butter, and extracts. Puree until smooth. In a medium-sized bowl, combine flour, salt, baking powder, and poppy seeds. Stir until seeds are evenly distributed. Pour lemon-squash mixture over top; stir until just combined and there are no flour pockets left. Divide between muffin cups, and bake for about 20 minutes, until lightly browned and top springs back when lightly pressed.

While muffins are baking, make the glaze: measure your lemon juice, put it in a microwave-safe cup, mug, or small bowl, and add double that amount of sugar. For instance, if you have 3 Tbsp. juice, add 6 Tbsp. sugar. Stir. Heat in the microwave until it just comes to a boil, and stir again. Set aside to cool until the muffins are done.

When the muffins are baked and still hot, pour or brush the lemon glaze over top. Use it all up!

*If you don’t have a fresh lemon, instead of the fresh zest, use any of these instead: ½ tsp. lemon extract, 2 tsp. dried zest, or 12 drops food-grade lemon essential oil.
0 Comments

Food Preservation-- Quick overview

3/20/2021

0 Comments

 
This is the "Preservation" section of a presentation given at CSW 2021, the Convention on the Status of Women, typically held each spring in New York.  Cathy Mauluulu of Big Ocean Women and I taught the "Four Ps" of greater self-reliance when it comes to food:  Principles, Production, Preservation, and Propagation. (Our portion of the video begins at 1:23:45.)
Picture
No matter who you are or where you live, there’s a way to better use the resources around you. 
​

A few years ago I read a report saying that in the United States, 40% of the food grown is wasted, rather than eaten. Some of that happens in the field, some in warehouses or stores, some in restaurants or homes.  That’s awful.  And it’s not just a problem in wealthy nations.  Not even close.  It turns out that in developing countries, 40% of the food grown is wasted rather than eaten.  More of it spoils in the field, since it’s harder to get to market, or to preserve it for extended periods.  

Picture
If you can get the food when it’s plentiful and in danger of spoiling if not handled quickly, preserving it is a way to not only save money and prepare for the future, but a way to reduce the waste in the world. And of course, reducing waste saves money.  One thing I do fairly often is buy several pounds of food when it’s marked down because of nearing its sell-by date, take it home, and right away preserve it for later.  It most often gets cooked, packaged in a useful size for my family, labeled, and frozen.  If it's meat, sometimes I’ll pressure can it instead for quick meals later. Either way, whenever we eat it, we’re eating at last month’s or last year’s prices.  And yes, in places where it’s legal to have a year’s worth of food on hand, getting that much basic food is not only doable, but saves you so much money! In times that the prices rise—whether because there’s a shortage, or because there’s high demand—if I have plenty of food on hand, I can hold off buying until the prices drop. This benefits everyone. It helps me because I’m eating on last year’s prices. And it helps my community because not buying the in-demand food then leaves more for those others who need it.

Waste less in your own home and garden, and don’t eat up everything right away.  It’s the food version of “spending less than you earn.” See what you can preserve for later. Even storing away a tablespoon of rice per day will add up. 

A cookbook from almost two hundred years ago explains, “The true economy of housekeeping is simply the art of gathering up all the fragments, so that nothing be lost.  I mean fragments of time, as well as materials, … whatever be the size of the family, every member should be employed either in earning or saving money... and should be taught to consider every day lost in which some little thing has not been done to assist others.” (America Frugal Housewife, 1838)
One important aspect of preserving is to share, especially anything you don’t have time, space, or energy for. Whatever is around should be used to benefit someone.

Picture
Some of the methods of preserving include dehydrating or drying, pickling or brining, smoking, freezing, dry-pack canning, pressure canning, boiling-water canning, or ‘root cellaring’—which doesn’t actually require a real root cellar.  Your area and circumstance will best fit with at least one or two of those.   How can you learn what will be best?  What are your area’s traditional ways of preserving? Find a mentor—the older and more experienced, the more wonderful it is on both sides. Create a ‘maternal economy,’ a sisterhood, a brotherhood, utilize the experienced home economists at your local extension office.

Some climates are warm and dry, which is perfect for drying foods.  When I lived in El Paso,Texas as a little girl, we dried apricot halves up on our hot black asphalt roof, with the fruit spread out on clean window screens and covered lightly to keep off bugs.  When we moved to a much colder climate, we dug a hole in the garden and buried a big, clean garbage can in which we stored our carrots through the winter. Eventually we bought an electric dehydrator—which is still one of my favorite tools.  In my previous house, we had very limited space to store foods, so I started drying some of the foods that I used to bottle.  Take tomatoes, for instance.  Six quarts’ worth of tomatoes could now fit into a single quart jar, once the tomatoes were dehydrated and powdered.  Tomato powder can be used in almost any recipe that calls for canned or cooked tomato products-- everything from tomato juice to pizza sauce to tomato paste. Now I make powders out of lots of vegetables- bell pepper, celery, tomato, mushrooms, pumpkin, zucchini. They thicken and flavor soups and sauces, or hide in smoothies or baked goods like bread or brownies. Powdered zucchini or pumpkin can be used in any recipe that calls for puree.
​
There’s so much that can be done to preserve and use food instead of wasting it! Links to instructions and resources for dehydrating, as well as the other preservation methods, are below, as well as on my "Favorite Resources" page. ​
►How to Waste Less food posts: 
-Reducing Food Waste, and What To Do With Sour Milk
-Cutting Food Waste

►How to eat well and still spend less 

►Canning 101 -  Free video trainings from the USU Extension Office, for lots of kinds of canning, from marmalade to meat.
​
►Canning Meat, from Backwoods Home Magazine
 
►"How To Can Anything"    You'll have to see this one to appreciate the treasure trove it is. It has step-by-step canning photos, how-to's, why-to's, why-not-to's, plus lots and lots of recipes.  Also has links for purchasing what you'll need.  

►Which foods can be safely bottled at home    
There's also a great FB canning group, called "We Might Be Crazy But We're Not Stupid"-- they are careful to stay within USDA safety guidelines. 

►Tattler reusable canning lids          

►http://www.dehydrate2store.com/  - how, what, and why to dehydrate.  Lots of videos, including one on building good-looking, shallow shelves for your storage jars.
 
►How to dry-pack foods  This link has several links within it. 

►Making and Using Vegetable powders 
 
►Storing Vegetables At Home --How to store them through the winter, even without a root cellar. 

►Storing Fruits and Vegetables at home:  see page 5 at this link for a chart of what foods prefer similar conditions.
 
►http://www.motherearthnews.com/modern-homesteading/root-cellaring-zm0z85zsie.aspx   Written by Mike and Nancy Bubel (who wrote the book on Amazon, considered the 'bible' of root cellaring!)

►http://www.nepanewsletter.com/cellar.html gives an excellent, detailed overview of what you learn in the Bubel's book

►“Return of the Root Cellars”-- great overview. 

►hows, whys, recipes, and supplies for making consistent quality pickled (lacto-fermented) foods. I haven’t tried these yet, but I have been adding more fermented foods to our diet.   Also this: https://myfermentedfoods.com/how-make-lacto-fermented-pickles/  
0 Comments

Week 32-  Storing grains and more – dry pack and vacuum method

11/16/2019

0 Comments

 
Picture
To help with building your year's supply (this is Week 6 of 26), see this chart. 

How do you keep your dry foods safe?  That depends on a number of factors, including the local climate, humidity levels, if your storage area is cool and dark or not, and how long you need to store it. 
  
One good option is the ‘dry pack’ method. 
You pack (or pour) dry food into an airtight food grade container.
 
There are better and worse ways to do this. (See here for ALL about it!)
 
Several years ago I attended a class at a local grocery store where the teacher showed us how to extend the shelf life of dry foods.  Some of those foods were wheat and rice, but she included chocolate and nuts.  You can store peanut M&Ms?!  She said this was an experiment, but they’d stored beautifully for a year and she didn’t know how much more to expect.
 
She used glass canning jars, lids, and a seal-a-meal (vacuum packaging)  attachment for canning lids. 

I don’t have the attachment, but discovered something else that works-- oxygen packets!  A 300cc oxygen pack will remove oxygen from filled containers up to a gallon in size. The cheapest way I’ve found to buy these is through the Church’s website, in quantities of 100.  If you’re buying them elsewhere, know that a 100cc oxygen pack is powerful enough for any container of one quart or less.

Oxygen packets are little squares—about 2” across and mostly flat—that contain iron powder.  Oxygen crosses through the packaging material, where it causes the iron inside to rust.  This permanently locks up the oxygen. 

Oxygen packets are recommended for dry-pack canning for two reasons-
  1. their use quickly removes oxygen that could keep insects alive in what you’re storing, and
  2. removing oxygen extends the shelf life of a food.
 
Three things, more than any others,  shorten shelf life of foods once moisture has been reduced--oxygen, light, and heat.  If you can remove the oxygen, the food will last longer. This is especially true if you store it someplace dark or cool, and preferably both. 
 
But removing oxygen also creates a vacuum, which can seal the jars for you.  No seal-a-meal vacuum attachment needed. 
I’ve been dry-packing food in glass canning jars, as well as PET and PETE plastic bottles, for about ten years.   
PETE plastic bottles include those you buy juice in.  Check the bottom of the bottle, and if it says PET or PETE, you can use it.  You can also use food storage foil pouches, which can be cut to whatever size you like, and sealed all the way around.

Make sure your containers are clean and dry, then fill most the way with whatever food you’re placing in it.  Add an oxygen packet, screw on the lid, label, and store somewhere cool and as dark as you can find.  (I like to run a band of masking tape around the lid edge, so I can tell at a glance later if someone opened it—a real possibility in a houseful of children!) 

Simple, right?

But dry-canning in glass jars—vacuum canning-- has been a game-changer for me. You can use any size of canning jar, from the little 4-oz ones to the big 2-quart size.
 
Here’s how I do it:
Get jars, lids, and rings ready- they need to be totally clean and dry. 
Get your food ready- totally clean, with moisture levels below 10%

Get your oxygen packets ready- keep them in their sealed package or airproof jar until the last minute. 

Fill the jars up to the neck only, or a little below the neck.  You’ll need a little bit of extra space in there, and overfilled jars don’t seal well.  Set a new lid and ring (band) to the side of each one. Wipe off the top of each jar, to be sure you have a clean surface for the lid to seal to. Open up the oxygen packets, and, working quickly, drop a packet into each.  Quickly top each jar with a lid and screw the band on.  Label each jar with the contents (if not obvious) and the date (always).

Oxygen packets will start to absorb oxygen immediately, and you don’t want them using up all their power before they’re in the jar!  You can tell the packets are working because they warm up.      
Store the leftover packets in a glass jar with a lid and band firmly screwed on.  They’ll be ready the next time you need them.

The oxygen packets will do their job in the food jars over the next 48 hours, dropping the oxygen content down to .1%.  As this happens, suction is created inside the jar, making the lid seal.  It’s not as secure of a seal as you get with regular canning (steam, water bath, or pressure), but it almost always holds.  Avoid bumping the tops of the jars, since this can knock lids loose.  Leave the bands on for at least the full 48 hours.  You can leave them on the whole storage time if you like. 


I’ve have learned a few things along the way. 

Removing oxygen makes a huge difference, and I can even store foods with a high fat content (peanut M&Ms!) for a few years without them going rancid. 

When storing my homemade tomato powder the first year, I used oxygen packets with some jars, and not with others.  Dried foods are listed as ‘best within a year,’ though that depends a lot on storage conditions.  Two years later, there was a visible difference between the oxygen-free tomato powder and the untreated powder.  The ones with oxygen removed were still as brightly colored—and nicely flavored—as at the beginning, while the others had lost both color and flavor. 
 
How long does sealing and removing air extend shelf life? 

That depends.
 
When stored in my cool, dark basement, nuts have remained great for about 5-6 years.  I recently opened two jars of walnuts canned in 2010! One jar had remained sealed, but the other hadn’t. While the sealed-jar nuts were definitely better three years ago, they were still in the realm of ‘OK’.  Barely.  But the ones that had lost their seal?  Awful.   Really, truly awful.  The smell of rancid oil assaulted my nostrils as soon as the lid was lifted, and those nuts—stored side-by-side with the other jar—were several shades darker.  (I gave those to the chickens.  Not sure whether they got eaten or not.)   So the moral of the story is to ROTATE your food.  Use it.  I try to store the right amount of food to be able to go through it in the next two years, and that would have been great.  Try to use any high-oil-content food within at least five years.

But low-oil foods like rice and wheat?  They’ll store nearly indefinitely.  20, 25, 30 years or more are the estimates from BYU’s food studies. But still rotate using it.

Things I’ve successfully home dry-packed (stored in airtight containers with oxygen packets)

→Rice
→Vegetable powders- tomato, zucchini, pumpkin, beet
→Citrus sugar (dried zest from orange, lemon, or lime, added to sugar and run through the blender to form a powder.  I use it in place of orange or lemon extract.) https://www.theprovidenthomemaker.com/1/post/2010/10/garden-seeds-homemade-orange-flavoring-and-easy-marmalade.html
→Dried candied orange peel (also used to flavor recipes- see the same link as citrus sugar)
→Thoroughly cooked and dried crumbled sausage (all dry packed foods MUST be below 10% water content, or you risk botulism)
→Raw almonds, walnuts, pecans, macadamia nuts, pecan meal, pumpkin seeds, pine nuts, pistachios, smoked almonds, honey-roasted peanuts …
→Sesame seeds, flax seed,
→Spices
→Bridge mix
→Trail mix
And probably more that we’ve long since eaten and forgotten about.
 
I don’t dry-can dried fruit, because it lasts a few years anyway, we’re pretty good at rotating through it, AND I haven’t wanted to do the measuring and weighing to determine if the moisture content is low enough to dry-can it safely.
 
The things people usually dry can at home are wheat, rolled oats, beans, lentils, rice, etc.

So why did I put these other things in jars with oxygen packets?

There are 3 typical reasons- (1) something was at a really good price and I wanted to have it last, (2) I naturally had a lot of that thing, or (3) I was curious to see if it would work! 
 
In the case of all those nuts and seeds, there used to be a local nut packaging company that only allowed its wholesale customers to keep any particular product on the shelf for six months.  Whatever didn’t sell in that time was returned to the company, who would resell this ‘expired’ product for $1 per one-pound bag… no matter if the bag contained gummy bears or macadamias.  Most of the time the nuts were still very good—depending on how and where the store displayed them—in a hot window or on a cool, darker shelf.  As you can see from the photo and list of things I’ve vacuum-canned, my friends and I took full advantage of this!  
0 Comments

Week 19- Weekly assignment, and making vegetable powders

8/18/2019

0 Comments

 
Picture
Your weekly assignment is B4-3. Did you do your nonfood inventory last week? If not, now is a great time.  

My dehydrator has been running nearly nonstop for a couple weeks now, with a couple of batches of canning interspersed.  I much prefer dehydrating whenever it's an option.  (But I will bottle a whole number of other things-- meat for quick meals, jam/jelly, juices, syrups, ghee, peaches, ...)  Peaches are better canned, but apricots?  They must be an acquired taste-- I acquired it years ago, but my kids haven't.  So we bottle peaches, and dry apricots.  Mostly we turn the apricots into fruit leather.  With the bumper crop we've had this year on our THREE mature apricot trees, that's a whole lot of leather, despite our best efforts to give away as many apricots as possible.  

But that's not all the dehydrator has been used for these last weeks. Dried cherry tomatoes are practically candy... but we've kept up on eating them fresh, with some sharing, so I haven't dried any yet this year.  What I have done is the full 12+ trays loaded with sliced yellow summer squash. It doesn't matter which one.  This year it's a combination of yellow zucchini, yellow straightneck squash, and pattypan squash that got just a little too big.

What do I do with summer squash powder?  Everything I do with the shredded or pureed fresh ones, plus some extras.  Zucchini bread. Zucchini brownies.  Smoothies. Chili, where it's great to help thicken it-- especially if I'm also using tomato powder and onion powder! Soups, where using a little becomes invisible and without any telltale flavor.  Added to regular wheat bread dough. Or muffins. Or pancakes.  

Tomato powder is even better.  I use it in place of tomato sauce, tomato paste, tomato juice, diced tomatoes. Here is a chart that tells you how much tomato powder to use in place of each of those. Tonight I added a bunch to a batch of too-runny salsa. It makes a wonderful base for marinara sauce or pizza sauce, and is used in making my own taco seasoning.  And when added to bread dough along with spices, it makes the bread taste like pizza. 

Pumpkin powder is also great.  It makes pumpkin pie, pumpkin shake, pumpkin roll... anything that you'd use pureed pumpkin in.  And again, I throw it in soup and chili to thicken them and add nutrition, and add to bread to help it stay moist longer.

I once made banana powder out of commercially-dried bananas; a neighbor had bought a 5-lb bag, found that nobody at home would eat them, and brought them to me to see if I could find a use for them.  (The powder was good in banana muffins, banana bread, and smoothies.)

​I've also made mushroom powder, carrot powder, beet powder, and dried crumbled greens. (The greens were a freebie in my yard, an edible weed known as 'redroot pigweed'. A very nutritious member of the amaranth family.) Mushroom powder adds a savory, almost meaty flavor to soups and sauces.  (I made the mushroom powder by starting with a big bag of dried mushrooms found at a Asian market.  If you're local, the place is Ocean Mart in Sandy.) The beet powder is the perfect thing to make from beets that got too big and tough for good eating.  And my favorite use for it is as a natural food color-- though it is also good in smoothies and recovery drinks. (Read what I have on beet powder, near the end of this post.)

All of these powders are made pretty much the same way.  You clean the vegetable,  (Pumpkin is steamed first. The others are handled raw.) slice it an even thickness (1/4- 3/8" is ideal), and dry until crispy.  Add them to a blender or food processor, and run until powdery.  Store airtight; even better if you can remove oxygen and seal the jar or other container.

Are you intrigued?  You can read more about each other these here, along with some recipes and tips:

Zucchini

Summer squash (Ok, zucchini is also a summer squash)

Tomato

Pumpkin

​What will you try?  

0 Comments

Week 15- 61 Ways to Use Apricots

7/20/2019

0 Comments

 
Picture
Your weekly assignment:  B for 3   Only 6 weeks to go!

This year my area has a BUMPER CROP of apricots. All along my street I can see these trees drooping--sometimes clear to the ground—with their load of soft orange goodness.  But it can be a little overwhelming.  There are only so many you can eat plain, and it’s nice to have more ways to enjoy them during the time they’re everywhere.  Last week’s post had a link to the Utah State University Extension’s pdf that shared how to preserve them. But we need more.  😊

Don’t have apricots?  Drive around town and look for apricot trees that aren’t being picked. Chances are that the owner would be delighted to have you harvest them; it spares him from having to step on, drive over, or pick up fallen fruit.

1- Eat them fresh!  They’re at their best when picked ripe from the tree, warm and dripping with juice when bitten into.

2- Fruit leather. Next to eating apricots fresh, this is my family’s favorite way to eat them. The photo above is apricot-cherry leather, using about half apricot puree, half cherry.

#3-8 Apricot nectar- puree fresh, pitted apricots with enough water to get them smooth, or puree canned apricots with their syrup.  Drink plain, over ice, with a few drops of vanilla or almond extra, with a drop of lemon oil, or a sprinkle of ginger or cinnamon.  Alternately, mix an equal portion of nectar with milk (try almond milk!), sparkling water, lemon-lime soda, or ginger ale. If you want an actual recipe so you can bottle it, see here.

9- Frozen. Halve them, remove the pit, and freeze in a single layer on a baking sheet. You can pretreat them with a little lemon juice, citric acid, or a syrup of lemon juice and honey. Once frozen, transfer them to freezer bags and return to the freezer.  

10- Grilled.  This recipe calls for brushing halved fresh apricots with honey and butter, grilling, then topping with a drizzle of honey and almond whipped cream.

Apricot jam. 

11- The recipe from Ball canning jars uses a package of liquid pectin.

12- Apricot jam using instant Clear Jel instead of pectin.  This recipe can be frozen or processed in a boiling water bath.   Don’t want to use pectin OR Clear Jel?  Use the Apricot Preserves recipe, below.

13- Apricot jam using dried apricots.  Chop 1 cup (6 ounces) of dried apricots, and combine in a saucepan with 1 c. water and 1 ½ c. sugar.  Bring to a boil; simmer a few minutes, mash, and continue simmering until it thickens.  This will thicken more as it cools.

14- Apricot-pineapple jam.  My mom made a version of this most years that we had apricots.  The pineapple lightens the flavor and adds a nice sweetness.  This recipe gives an option for adding maraschino cherries; I’ve never tried it that way but it sounds good.  It also calls for canned crushed pineapple in syrup; using pineapple canned in juice will work fine too.     If you have liquid pectin, use this version.

15- Apricot preserves. These tend to be more fruity than jam, and the apricots aren’t pureed first.  Honestly, there’s a lot of crossover between jam and preserves. This one requires no pectin- only sugar and lemon juice. (fast versions! With dried apricots, fresh ones)


Apricot butter – the thicker, more deeply flavored cousin to apricot jam.

16- This one starts with fresh apricots and apricot nectar.  See the note above on making your own apricot nectar.  

17- This apricot butter cuts the cooking time down by starting with dehydrated apricots.  If you don’t prefer the kick from crystallized ginger, feel free to leave it out for a little different version.

18- Apricot BUTTER.  Dairy butter with dropped dried apricots, lemon zest, and honey whipped into it. 

19- A smoother Apricot BUTTER, with dried apricots soaked and pureed before being beaten into soft dairy butter. 

20- Home-bottled apricots.

21- Dried apricots.  Apricots may be dried in the sun, the oven, or in a dehydrator.  Instructions for all three methods can be found here.  

22- In smoothies. Use a handful of fresh, pitted apricots. A dash of vanilla or almond extract makes it extra nice.

23- substitute fresh apricots for fresh or canned peaches in almost any recipe.

24- substitute dried snipped apricots for dried peaches in almost any recipe.

25- substitute fresh apricots for fresh or canned plums in almost any recipe.

26- substitute dried snipped apricots for pitted prunes in almost any recipe, sweet or savory.

27- Use pureed apricot (or any other fruit) as a replacement for half of the butter or oil in muffins, other quickbreads, or cookies. 

28- Purees can instead be used to replace some or all of the liquid in a recipe.  2 cups of puree will replace 1 cup of liquid.

29- Syrup for pancakes, crepes, sweetener for drinks, over ice cream, or on other desserts.  Juice the apricots using a steam juicer, (or use apricot nectar) mix with an equal part of sugar (1 c. juice to 1 c. sugar).  Bring to a boil to dissolve the sugar. Refrigerate, freeze, or place in jars and process in a boiling water bath.

30- Apricot sauce. Use over pancakes, in crepes, over ice cream, brushed over cakes, used as a filling in the center of cupcakes, and also on broiled salmon, chicken or pork, fresh or baked on to make a glaze.  At its simplest, combine equal parts apricot puree with sugar; bring to a boil to dissolve sugar.  For a thicker sauce, stir 1 Tbsp. cornstarch in to the sugar, for each cup of puree, before boiling.  For extra flavor, to each cup of sauce, add any of the following: ¼ tsp. almond extract, 1/8 tsp. cinnamon, ½ tsp. ground ginger or 1 1/2 tsp. grated fresh ginger (or puree it with the apricots to begin with), a sprinkle of ground cloves, a tablespoon of fresh lemon juice, zest of half a lemon.  Garnish with candied pecans or almonds, chopped candied ginger, a sprinkle of cinnamon, or lemon zest.

Apricot quickbread (baking powder-raised bread)

31- Apricot quickbread using pureed apricots. This recipe calls for canned ones, but you can use 1 pound of fresh apricots instead.  Pit them before pureeing. 

32- Apricot quickbread using dried apricots.  There are many variations of this online. Some add dried cranberries, others add semisweet chocolate chips, some have nuts- pecans and almonds both complement apricot.  

33- Apricot-Almond Muffins- stir ½ c. snipped dried apricots and ½ c. chopped almonds into a 12-muffin batch of muffin batter.  After baking, dunk tops in melted butter, sprinkle with cinnamon sugar and finely chopped almonds- or mix an almond glaze to spoon over the tops.  Almond glaze- stir together 1 Tbsp. milk or water, ½ tsp. almond extract, and about 1 cup of powdered sugar.  Add more water or powdered sugar as needed to make of drizzling consistency.
 
Apricot yeast bread

                34- My version, with orange, apricot, and pecans. I've got an awesome recipe somewhere for a seedy, dried fruit breakfast bread that includes apricots, and is served in wedges with cream cheese spread on top, but I'll have to look harder to find it.  Maybe it will get its own post.

                35- Bread machine version, with dried apricots, orange juice, and oats.

               36- Apricot Daisy Ring- a beautiful yeast bread in the shape of a daisy, with apricot preserves and a light almond glaze on top.  I love to bake it the day before and serve for breakfast.   The earliest version I’ve seen of this recipe came from a 1980’s Better Homes and Gardens “Breads” cookbook.
 
Cookies:

               37- Chewy apricot -almond oatmeal cookies, using dried apricots.  (includes tips on how to use dried fruit in general) 

               38- Jam-filled thumbprint cookies, using apricot jam or preserves, with or without chopped nuts.

Apricot bars.  There are different options, starting with either chopped dried apricots simmered in water, or using apricot preserves- but almost always on a shortbread-type bottom layer. 

               39- These Apricot-Oat bars from The Pioneer Woman use apricot preserves, brown sugar, and lots of nubbly oats.  

                40- This version also uses apricot preserves, but no oats,  Instead, it has coconut and walnuts.
 
Dinner

                41- Apricot-glazed moist Italian meatloaf. There are pureed apricots mixed into the meatloaf itself, too.  Again, the recipe calls for canned apricots; substitute a pound of fresh ones, pitted.  Reserve ½ c. of the puree to make the glaze.

               42- Apricot-glazed Pork Tenderloin, using apricot preserves, Dijon mustard, garlic, and thyme.

Apricot Chicken-

                43- One-pot, 5-ingredient Apricot Glazed Chicken, using bone-in chicken thighs, apricot preserves or jam, onion soup mix, and French dressing (homemade options are included). I’ve seen a variation on this where you use Russian dressing instead of French.
​
                44- Apricot chicken using boneless tenderloins, apricot jam, and dried apricots

                45- Apricot Glazed Chicken for One (or two).  Super simple, using one chicken breast, a tablespoon each of apricot preserves and French or Russian salad dressing, and a pinch of ginger.

                46- Apricot Chicken Stir Fry-- a kind of Sweet and Sour chicken—with boneless chicken breasts, apricot preserves, onion, bell peppers, pineapple chunks, garlic, ginger, and more. Cashews are an option. Serve over rice, couscous, or quinoa, or to the side of any of those, mashed potatoes, or cauliflower mash.

                47- Apricot Chicken using thighs or drumsticks, fresh apricots, ketchup, and apricot preserves.

                48- Slow Cooker Apricot Chicken- using bone-in thighs, dried apricots, lemon, onions, Dijon mustard, garlic, and thyme. 

               49- Moroccan Rice Pilaf, with Basmati rice, onion, dried apricots, dates, olive oil, chopped almonds, cumin, cinnamon, and other spices. It may sound odd, but it’s really good.  Sometimes I add a little diced smoked turkey. 


Apricots with goat cheese. This is a classic combination that can be done a few different ways. Don't have soft goat cheese?  Use cream cheese instead.

                50- Apricot-Goat Cheese Swirls- spread apricot leather with a layer of soft goat cheese.  Sprinkle with some chopped fresh basil, mint, or thyme if you have it. Roll up, wrap, chill for at least a couple hours, then slice.  Serve as a snack or hors d’oeuvres.

                51- Apricot-Goat Cheese Ball with dried apricots, rosemary and shallots


Apricot Parfaits

                52- Simple breakfast parfaits- pureed fresh halved apricots, poured over yogurt and sprinkled with granola. We’ve had these a couple times in the last two weeks.

                53- ‘Foodie’ Parfaits.  I don’t use alcohol, so would most likely use a little apple juice to replace the brandy.  And mascarpone is pricey, so softened cream cheese or Greek yogurt would stand in for it at my house.  And vanilla extract would be used instead of a scraped vanilla ban. But the fresh mint?  I’ve got a whole bunch of it growing happily on the ditchbank.

54- Apricot Cream Dessert. A fluffy, whipped-cream based concoction.

55-That last one is related to an apricot cheesecake my mom made often in the 70s; essentially, you replace the whipping cream with 16 ounces of EITHER cream cheese or cottage cheese, which gets pureed along with the apricots.  The whole thing is poured over a cookie crumb crust, graham cracker crust, or thin shortbread crust. (You bake the crust first, in a 9x13 pan.) Pour the filling over the top.  Sometimes she would spread pineapple topping (a 20-oz can crushed pineapple with juice, boiled with 2 Tbsp. cornstarch to thicken) over the whole thing once the apricot cheesecake was set.   Lower fat, lower sugar, and completely refreshing!

56- Apricot Cupcakes, using your choice of either apricot jam, or a filling you make with dried apricots, water, and sugar.

57- Apricot Cake, Aprikosenkuchen, a coffeecake. This cake fits in a 9” springform pan and uses two whole pounds of apricots.  It’s a delicious way to use apricot that are a little underripe, or mealy.  And it’s great when the fruit is fully ripe, too.    make your own apricot jam to brush as a glaze over the top: after pureeing half of the apricots, as directed in the recipe, set aside 1 Tbsp. of the puree.  While the cake is baking, mix this reserved puree with 1 Tbsp. sugar or honey, and bring to a boil in the microwave, about 45 seconds. Let it cool while the cake finishes baking, and brush it over top once the cake is out of the oven.
 
58- Apricot Nectarine Shortcake with Vanilla Whipped Cream

59- Browned Butter Almond Cake with Apricot Whipped Cream; the whipped cream uses apricot preserves. And anything with browned butter and almonds is going to be a winner.

60- Almond Apricot Tart.  It’s a beauty, with an almond shortbread crust, rich filling reminiscent of pecan pie without the pecans, topped with halved apricots.  It’s served with freshly whipped cream.

61- Apricot Salsa.  Why not? Mango salsa is one of my favorites, the Granny Smith apple salsa I tried was great...


Are there more recipes?  Yes; I didn’t even make it to my hard-copy old cookbooks (Chez Panisse Apricot Sherbet or Apricot Mousse, plus whatever is in the 1958 Betty Crocker book…) , nor the hand-written 3x5 cards in the recipe boxes. There’s still Apricot Cream Soup, Upside Down Apricot Cake, Apricot Cobbler and Apricot Crisp, Apricot-Cherry Pie… 
But this will give you a good start!
0 Comments

Week 14- Preserving fruits and vegetables

7/13/2019

0 Comments

 
Picture
Your weekly assignment:  B for 3   Only 7 weeks to go! (How's your shelf looking?)

If you have a garden or fruit trees, or like to visit farmers’ markets, you’re likely starting to wonder about how to handle the food that so proliferous right now.  The Utah State University (USU) Extension has resources for you! It covers freezing, canning, dehydrating, and best varieties to use, from Apples to Zucchini.   After going to this link,  click on “Preserving the Harvest Fact Sheets”.

For example, in the Apricot “fact sheet”
the 'sheet' is 9 pages of information--

-How to select and prepare apricots

-Freezing to preserve them, in syrup, sweetened without syrup, plain, or as puree

-Canning them- how many pounds or bushels will fill how many jars, how to get them ready (in halves or as nectar), how to process them, for how long, for your altitude

-Making apricot jam, jelly preserves- with pectin, or without pectin

-Drying apricots- including preparing them, and drying them using a dehydrator, the sun, or an oven

-Nutrition information for apricots
​
-Storing them- fresh, canned, dried, or frozen

And all this, for so many other fruits and vegetables!
0 Comments

Pumpkin Shake

10/29/2012

0 Comments

 
Picture
Pumpkins are one of the most inexpensive, nutritious vegetables around... right now they're under 20 cents per pound where I live.  One cup (8 oz.) of pumpkin has more than 700% of your daily Vitamin A needs, 7g fiber, 3g protein, 19% RDA for iron, 17% RDA for Vitamin C, and 6% RDA for calcium.  All this for 83 calories and about 10 cents.

We grew a few, but the garden was pretty sad in general and we ended up buying a couple for our annual pumpkin-carving party at Grandma's house.  (To tell you how bad the garden was... the only pumpkins that survived were in the SANDBOX, where one son had spilled some pumpkin guts in late spring.  Yeah.  Go figure.  They even survived our free-roaming chickens.)

So now we have several carved jack-o-lanterns to set on the front porch for Trick-or-Treating.  The day after Halloween they'll get cleaned, sliced, and either cooked or dehydrated and turned to powder. My kids are excited at the possibilities.  Their favorite is pumpkin pie, but this shake tastes just like it, in a fraction of the time!

Pumpkin Shake
1 pint vanilla ice cream (about 4 heaping ice cream scoopsful)
1 1/2  c. milk
1 1/2 Tbsp. pumpkin powder*
1/4 tsp. pumpkin pie spice OR 1/8 tsp. cinnamon plus a dash (to taste) each ground cloves,     ginger, and/or nutmeg
2 Tbsp. brown sugar, OR molasses, OR honey

Put all ingredients in a blender and mix on high until smooth.  Makes about 3 1/2 cups.

*If you don't have pumpkin powder, use 1/2 cup plain pumpkin puree, and reduce the milk to 1 cup instead of 1 1/2 cups.

Optional mix-ins:
2 Tbsp. raisins (add before pureeing so they get finely chopped)
2-3 oz. cream cheese
2-4 Tbsp. chocolate chips

Get this recipe and many more ways to use pumpkin, free, from The Great Pumpkin Cookbook.


0 Comments

Zucchini Powder

9/22/2012

1 Comment

 
Picture
Do you have too much zucchini?  

You could give it away.  Or shred and freeze it.  Or puree it and then freeze.  (I prefer pureeing & freezing because it maintains the same texture when thawed. It hides better in zucchini bread and soup, too.)

OR....

dehydrate it and turn it to powder.  

It takes very little space to store it this way, and it's easy to use.  Mix 2-3 Tbsp. of powder with enough hot water to equal one cup- for one cup (8 oz.) of puree.

Try it in Lemon-Zucchini Bread or Curried Zucchini Bisque (creamy soup).  Mmm.

See this post for how to best store the powder.
1 Comment

Chewy Dried Bananas

8/25/2012

4 Comments

 
Picture
If you've only had 'banana chips' from the store- you have missed out.  Those cardboard-like sorry excuses for fruit are NOTHING like home-dried bananas.  Banana chips are fried  (very high in fat) and bland; on the other hand, home-dried ones are sweet and chewy.

Sometimes you can buy a case of bananas for a steep discount- a friend of mine has an arrangement with one of the local grocery stores.  She calls them once a week or so, and if they have too many bananas, they sell her the 40-lb. case for $8.  That's $ .20/lb.   This week I found some at NPS for $4/case! 

To dehydrate them, you can, of course, use any dehydrator available, or even dry them on clean window screens on a hot roof or in a hot car...

Mine, so that you can get a size comparison, is an American Harvest (now Nesco) 'GardenMaster'.   (I got it used through the local Classified ads, 15 years ago, for $40.)  I have the extra trays, for a total of 8.  Each tray can hold almost 2 lbs. of sliced bananas, 15 lbs. total.  So the 40-lb box fills the trays twice, with enough left over for a double batch of banana bread (to freeze) and eating a bunch fresh. 

I dry them on about medium heat- 120 degrees F or so, and it takes about 18-20 hours.  They'll be a little bit more dry if you let them cool before packing into jars.

If you want the dried product to be a little lighter in color, you can coat or dip them in a lemon-honey mixture.  Combine 1/4 c. honey, 1/4 c. water, and 2 Tbsp. lemon juice.  Mix well.  The easiest way to use it is put it in a clean spray bottle and mist the slices once they're on the tray.   The photos below are of untreated slices.

Dehydrate, enjoy!
4 Comments

Preparing For- and Handling- Trials; Strawberry Leather; Group Orders

5/28/2011

0 Comments

 
Picture


Have you found good deals on strawberries?  Or are your plants starting to produce them?  We love to make and eat strawberry leather, though I often mix strawberry puree with applesauce or any other mashed fruit, to make the strawberries go farther.  For a simple way to make fruit leather, see http://www.theprovidenthomemaker.com/1/post/2010/11/what-to-do-now-in-the-garden-fruit-leather.html

___________________________ 

If you’re in the Salt Lake valley, I just learned about a lady who puts together group orders every month; she lives just a mile down the road from me.  The prices are great, and the food is good quality.  It comes from a Utah/Idaho farmers’ co-op; most of the items are even organic.  Her website is http://www.organicemily.com 

____________________________

The following excerpts from an article are from Ezra Taft Benson, published in the Ensign magazine, January 1974, entitled “Prepare Ye”.  He repeats D&C 38:30 three times in it (“if ye are prepared, ye shall not fear”), and this talk has been extensively quoted.  It contains at least 12 segments I’ve quoted or heard quoted.  Read through the talk, and see how many pieces of it you’ve heard before.


Here are some excerpts:

“In Matthew, chapter 24, we learn of “famines, and pestilences, and earthquakes. …” (Matt. 24:7.) The Lord declared that these and other calamities shall occur. These particular prophecies seem not to be conditional. The Lord, with his foreknowledge, knows that they will happen. Some will come about through man’s manipulations; others through the forces of nature and nature’s God, but that they will come seems certain. Prophecy is but history in reverse—a divine disclosure of future events.

Yet, through all of this, the Lord Jesus Christ has said: “… if ye are prepared ye shall not fear.” (D&C 38:30.)

…At the April 1937 general conference of the Church [of Jesus Christ of Latter-Day Saints], President J. Reuben Clark, Jr., of the First Presidency, asked: “What may we as a people and as individuals do for ourselves to prepare to meet this oncoming disaster, which God in his wisdom may not turn aside from us?” President Clark then set forth these inspired basic principles of the Church welfare program:

“First, and above and beyond everything else, let us live righteously. … Let us avoid debt as we would avoid a plague; where we are now in debt, let us get out of debt; if not today, then tomorrow.  Let us straitly and strictly live within our incomes, and save a little.

“Let every head of every household see to it that he has on hand enough food and clothing, and, where possible, fuel also, for at least a year ahead. You of small means put your money in foodstuffs and wearing apparel, not in stocks and bonds; you of large means will think you know how to care for yourselves, but I may venture to suggest that you do not speculate. Let every head of every household aim to own his own home, free from mortgage. Let every man who has a garden spot, garden it; every man who owns a farm, farm it.” (Conference Report, April 1937, p. 26.)

…There are blessings in being close to the soil, in raising your own food, even if it is only a garden in your yard and/or a fruit tree or two. Man’s material wealth basically springs from the land and other natural resources. Combined with his human energy and multiplied by his tools, this wealth is assured and expanded through freedom and righteousness. Those families will be fortunate who, in the last days, have an adequate supply of each of these particulars.”

…  “Healthful foods, proper rest, adequate exercise, and a clean conscience can prepare us to tackle the trials that lie ahead.”

0 Comments

Using Dried Fruit; Cherry Chocolate Bliss Bites

5/20/2011

2 Comments

 
Picture
Dried tart cherries: my favorite cherry for recipes.

Photo from Nutty Guys

Next week’s post will have several ideas for using dried fruit.
_____________________

Why buy, or make, dehydrated fruits?  My favorite reasons are that it preserves fruit without needing electricity (as in freezing), and it stores in a smaller space when compared to canning.  It also intensifies the flavors, allowing me to use it as a sweetener.  


If you’re buying them, how do you know what a good price is?  The simplest way is to judge by serving size.  One ounce of dried fruit is a serving, about equal in size to one medium fresh apple or peach.  If a one-pound can of dried apples costs
$5.75/lb (which it does at the Home Storage Center), that means you’re paying about 35 cents per apple.   If you want to figure how that compares with price per pound fresh, 25 lbs of fresh apples reduce down to about 4 lbs.    4/25 of 1 lb @$5.75= .92/lb fresh apple price.    

For other fruits, a fairly good estimate is 1 lb very-dried fruit = 5 lbs fresh; most fruits are somewhere around 80% water to begin with.  1 lb moist-dried fruit = 3 lbs. fresh, figuring about 2/3 of the water has been evaporated away.   This isn’t exact, but is close, and is simple enough to remember and use.  Dried blueberries (moist) at $ 12.30/lb are like paying $ 4.04/lb for fresh, or about $ 1.53 for a 6-oz clamshell.  It costs around four dollars a pound to buy frozen blueberries, plus then I pay to run the freezer at home. Twelve bucks a pound sounds expensive, but it’s about half  the price of fresh around here.  They’re definitely worth having some on hand.  Just keep them out of reach of the kids, or you won’t have any left!

If you live anywhere around Salt Lake City, you can get ‘returns’ at Nutty Guys’ warehouse for $1.50 per one-pound bag (of anything they sell).  Returns are anything that didn’t sell within their 6-7-month “sell by” date; they get returned to the warehouse.  Returns are unpredictable, you never know what will be there on the shelf, but they make for incredible bargains.  Dried fruit is considered at its peak for one year.  You can extend this by keeping it sealed, dark, and cool.  This is something at its best when rotated regularly.
_____________________

Here’s one way to use dried tart cherries;  I always get them cheapest from Nutty Guys. (Returns shelf, hooray!)  I created this recipe for a bake-off at the state fair a few years ago.  The ingredients sound strange together, but, boy, are they good.  The balsamic vinegar accentuates the chocolate and adds brightness to the cherry.    (The recipe took 1st place.)  These are like a very dark, intense truffle, with bits of sweet-tart, chewy cherry.  They take only five minutes to mix.

CHERRY-CHOCOLATE BLISS BITES

1/4 cup dried tart cherries, coarsely chopped
1 Tbsp balsamic vinegar
1/4 tsp almond extract
1/3 cup sweetened condensed milk
1 (4 oz) bar Ghirardelli 60% cocoa bittersweet chocolate, broken*

Place dried cherries in a small microwavable bowl; pour in balsamic vinegar and almond extract. Microwave 30 seconds to help plump the cherries; set aside.

Microwave condensed milk 45 seconds or until hot but not boiling. Add chocolate and stir until mostly smooth. Add cherry mixture. Stir until well combined.

Pour into a loaf pan or other 2 cup container, bottom lined with parchment. Chill in freezer for 15 minutes or in refrigerator for 45 minutes until set.

Cut into squares or roll into balls.    This recipe can be doubled or tripled.

*Any semisweet or bittersweet chocolate (bar or chips) can be substituted.  Try to get something around 60% cocoa solids.  I used Ghirardelli’s because that was who sponsored the contest.  If you quadruple the batch, you’ll use the whole can of sweetened condensed milk (1 1/3 c.) and one whole pound of chocolate.


2 Comments

Pumpkin Pancake Mix, making pumpkin powder

1/14/2011

11 Comments

 
Picture
These make great little gifts.  I gave these out during the holidays, when most people are short on time and have had enough 'goodie plates'.  If you want to give them something extra, also include a bottle of syrup (homemade or storebought) or a couple different mixes in a basket.

 Back on 10/27/2010  I wrote a post on making vegetable powders.  Here's one kind you can make- pumpkin powder! The recipe below uses it to make some fragrant, fresh pancakes.   You can also adapt any recipe that calls for pumpkin puree.  I've made pumpkin pie with the powder, and it turns out great.  3 tablespoons pumpkin powder plus just shy of one cup of water is all it takes to make a cup of pumpkin puree.  Most recipes won't require rehydrating the pumpkin first, either.  Just mix everything together, and the powder will rehydrate while it cooks. 

This mix is just a really large batch of "Foolproof Pancakes," made so you only need to add eggs and water.

Pumpkin Pancake Mix

½ cup coconut oil (shortening works too, but I don't use it)
1 ¼ c. brown sugar or raw cane sugar
¼ c. cinnamon
1 ¼ c. pumpkin powder
3 c. powdered milk
1/4 c. baking soda
¼ c. salt
13 c. flour ( ½  wheat, ½ white)

Mix together the coconut oil, brown sugar, and cinnamon.  Stir in everything else.  Store in a container with a tight-fitting lid.  Makes about 20 cups.

To use it,  combine  1 1/3 c. mix, 1 egg, 1 cup water.  You'll get about 15 batches this size from the whole mix.

I made up a smaller bag with 2 2/3 c. mix, which is 12 ounces if you like to weigh things.  The instructions to use the whole bag is to add 2 eggs and 2 cups of water.

My bigger bag has 4 cups mix, about 17 ounces, and mixes with 3 eggs and 3 cups water.  For a ready-made label, click here.


* * * * *
The amount of pumpkin is based on using roughly 1/2 cup of pumpkin puree for a 1-cup-of-flour batch of pancakes.  If you don't have pumpkin powder, omit that ingredient, use just under 1 1/4 cups of mix, 1 egg, 1/2 cup fresh or canned pumpkin puree, and reduce the water to 3/4 cup. 
Picture
To make pumpkin powder, first wash (but don't peel) the outside of a pumpkin.  Scoop out the seeds.

Picture
The seeds are great themselves.  I find them easiest to separate from the stringy fibers by putting them in a bowl of water.  Pinch the seeds off into the water.  Dry them for a couple weeks and save them for planting in next year's garden, or roast them with a little oil and salt.

Picture
Trim off the stem and the blossom end.  Slice the pumpkin lengthwise into pieces about 2" wide.  If you steam them now, the pumpkin will dehydrate in about half the time, and have a mellower, sweeter flavor.  Let cool enough to handle, then cut them about 1/4- 3/8" thick crosswise. 

Picture
Lay the thin pieces in a single layer on a dehydrator try, or on a windowscreen laid down in a hot car, or on a cookie sheet with the oven on lowest setting... whatever you have.  When crispy-dry, put the pieces in a blender and puree until powdered.

This 5-lb pumpkin dehydrated down to just under 7 ounces, which measured 1 1/2 cups of powder.  That's a great space saver!  It takes just 3 Tbsp of this powder to equal 1 cup of puree, after adding water.

Use it in anything that calls for pumpkin; you don't even need to rehydrate it first: just add the right amount of water and powder.  Try Pumpkin Shake!  Or how about a gluten-free, dairy-free Pumpkin Cheesecake? Pumpkin Pie?

Picture
A rainbow of dehydrated vegetables: from left to right:  tomato powder, pumpkin powder, yellow squash powder, and dried & crumbled greens.

11 Comments

Cheap solar cooker; Oven Fried Potatoes

11/6/2010

0 Comments

 
Picture
The BYU Solar Cooker- designed to work well with whatever materials you have on hand to build with.  This one uses cardboard, foil, and a box to support it, though a bucket or some rocks would work too.

(Originally from 7/01/10)

I'm excited right now because this idea works!  Last week I cooked some carrot cake in a really
cheap and simple solar cooker. I got a windowshade at D.I. for $1.50, used a canning jar spray-painted black for a cooking pot, and fastened the edges of the shade with  metal brads (like you use in kids’ projects).  I set it outside, angled it so my shade fell right into from in front, and left it for an hour.  Yummy!   Not only that, but my 'carrot cake' was just my simple muffin recipe with cinnamon, raisins, and a handful of dried (not reconstituted, either) carrots from the Family Home Storage Center. 


So how did I make it?  Mine looked like these two solar cookers- the first uses that car windowshade, and the second just uses cardboard and aluminum foil.  Both designs are VERY similar, they just use different materials.  Use what you have; if you didn’t have aluminum foil but had one of those Mylar emergency blankets, you could use that.  Solar cooking works best from March through October, though you can still use your solar cooker in the cooler months.  It helps to put the cooker against a south-facing wall, to get more reflected energy, during the ‘off’ months.  Here’s the first link:  http://www.solarcooking.org/plans/windshield-cooker.htm .  The other version (from Dr. Steven Jones @ BYU) is made with cardboard and aluminum foil; the website has great info on why, how, and what to cook, including cooking times.  You can even make ICE with a solar cooker.  No kidding. It's at  http://solarcooking.org/plans/funnel.htm  This link also has cooking times for different types of food.


To cook a meal for a family, one way to cook a bigger amount is just use a bigger container.   Maybe layer multiple containers? Or layer food in one container. Usually not every part of a meal needs cooked, anyway.  I have pans that stack together, to cook things simultaneously.  You could also use a gallon-sized glass jar painted black; I got a couple from a store that makes chocolates.  They got the jars when full of maraschino cherries, and sold them to me (empty) for $1.  But any container that is dark (black or dark blue) can be cooked in.  Maybe use a Dutch Oven or enameled cooking pot.

And if you wonder why the instructions for the foil/cardboard solar cooker say to put a wooden block under the jar/pan before cooking, I found out why-  it's to keep heat from escaping out from underneath.  The first time I cooked with this, my carrot cake was a little underdone on the bottom.  Apparently that's why.  

 
I have also baked cookies in my van window.  I was told that it has to be at least 95 degrees outside for that to work, it gets to about 250 degrees in the window that way.  I tried it on  a slightly cooler day (93?) and it worked, barely.  Now if you put the food next to the glass, and put a sunshade BEHIND the food, on the dashboard, that might give you a much warmer (and bigger) cooking spot. Hopefully it doesn't bake your dashboard!  The glass IS tempered, though, so that part should be OK. 


You can also use a vehicle for dehydrating food because it gets so hot. Just be sure to open windows a bit for airflow. ( I haven't tried that one yet, though.)  You can use clean window screens or an old screen door for a drying tray.  Cookie sheets work, too, but drying will take a little longer because the bottom can’t get air.

 * * * * * * *
Those of you who planted potatoes this year probably now have those delicious, creamy ‘new potatoes’ ready.  (Or just use whatever kind from the store….)  Maybe try cooking these in your solar oven!
 
Oven-Fried Potatoes 

2-10  potatoes- however many you want   
1-2   Tbsp.   vegetable oil   
Seasoned salt, dry ranch dressing mix, or Parmesan cheese   

Heat oven to 450 degrees.  Wash potatoes well, then cut into strips or wedges about 1/4-1/2-inch thick , unless they're 'new potatoes'; leave those whole or cut into bite-sized pieces.  Put them all in a bowl, drizzle the oil over them, and then sprinkle a good amount of seasoned salt, dressing mix, or Parmesan cheese over the top.  Stir well and add more salt or cheese if it looks like they need it.  Spread potatoes out on an ungreased cookie sheet.  Bake for about 15-30 minutes or until lightly browned and tender when you poke the thickest one with a fork.  

 
0 Comments

What to do now in the garden; fruit leather

11/5/2010

0 Comments

 
Picture
from photos8.com

(Originally 7/15/10)

JULY in the garden:
• Plant beets and turnips for fall harvest.
• Thin out plants and fertilize.
• Fertilize potatoes with nitrogen.
• Watch watering on tomatoes! Even deep watering is better than frequent shallow watering to avoid blossom end rot.
• Irrigate at ground level rather than over head spray to avoid diseases.
• Keep looking for any signs of pests. Use insecticides only as necessary.
• Stake tomatoes if you haven’t already.
• Remove suckers and pinch back tomatoes as necessary.

This was from Glover Nursery’s website; see it for a month-by-month checklist. 

Remember that you can also plant shorter-season crops; the seed envelope will tell you how many days until harvest for that variety.  The official information for our area (data from Riverton) is that the earliest-ever fall freeze was Sept. 13, average date is Sept. 24, and latest was Oct. 4.  So worst-case scenario is 58 frost-free days remaining, best-case is 80 days, plus whatever length you can extend your growing season by covering your garden with a sheet or blanket for those first frosts.  

 
Now, for that fruit that some of you have coming out your ears-  our favorite way to eat it is ‘Fruit Leather’. 

Here are two samples of how much to use:

Apricot leather:
1 c. apricot puree (1 ½ c. pitted apricots)
1 Tbsp. lemon juice
Around 3 Tbsp.* sugar or honey

*2023 update- over the last several years I've reduced the sugar and lemon in this.  1 Tbsp. sugar/honey for every 1 Tbsp. lemon juice is plenty. I've even dropped it to 1 Tbsp. each per quart of puree, and it tastes delicious. It does sometimes brown more though.


Cherry leather:
1 c. cherry puree (1 ½ c. pitted cherries- or use the food mill for this one)
1 Tbsp. lemon juice

Dry until there are no more sticky spots, roll up and store in an airtight jar.  We’re still eating leather made two summers ago, it’s holding up fine.

 The best leather is made with overripe fruit, too, which is helpful!  Basically, you puree or mash fruit, or send it through a food mill, sweeten it to taste, then dry it.  You can sweeten it with concentrated fruit juice, or with sugar, or honey.  We like it best with sugar because that way the fruit leather crystallizes over time, rather than getting tougher.  You can also add a little lemon juice to keep the leather from turning brown as much.

Whatever you’re going to dry it on/in needs sprayed with Pam or oiled first.  Trust me, you don’t want to forget that step.   Leather is no fun to chip off of trays!  Pour about a ¼” layer, and put it someplace to dry.  It’ll be done in about 24 hours in a dehydrator.  You can also dry it on cookie sheets in your oven (lowest setting, door slightly ajar for air circulation), or in a car parked outside on a hot day. 

A good article on drying is at http://www.backwoodshome.com/articles/shaffer58.html


0 Comments

Summer squash and pumpkin powder, Foolproof Pancakes

10/27/2010

4 Comments

 
Picture
I love these powders!  Left to right: tomato powder, pumpkin powder, yellow summer squash powder, dried crumbled greens to put in soups in the winter.  (These greens are pigweed leaves- one of the wild edible weeds in my yard.)

Picture
Hot, fresh pancakes are simple to make. 

What else can you do with all that summer squash you have?  Make it into leather!  Yes, I know your children won’t think that’s the best snack around, but it’s not for them.  At least not by itself.  Better yet, turn it into powder.

The idea behind this is that pureed squash can be added to soups and breads (as in Zucchini Bread), and it takes a LOT less storage space when it’s dried.  There are at least two ways to get dried pureed squash:

(1)  Puree it, pour it on food dehydrator sheets, dry, and roll up, and

(2)  Slice the squash (1/4” wide is good), dry it like that, then run it through your blender when it’s crispy-dry.   This vegetable powder takes up even less storage space than the leather, plus it reconstitutes faster. If you're doing this with pumpkin, steam it before slicing; it will dry quite a bit faster and not have that raw taste.

(3)  Store it in something fairly airtight, in a dark area.  Canning jars are great, especially if you seal them by using a new lid, the ring, and an oxygen packet. (see Dry Canning.)

Now, how do you use it in recipes?  And how much do you use?  Remember thinking in school that you’d NEVER use  math in ‘real life’?  Ha!  It’s incredibly useful in the kitchen, especially when you start doing your own thing.

Measure and write down the quantity you start with, then measure and write down what you end up with.  Write it on your storage container, trust me, you’ll forget otherwise.   For instance, I started with 2 ½ lbs of yellow squash, which is 5 cups of puree.  I ran it through the blender, poured it on my (SPRAYED) dehydrating sheets, and turned on the dehydrator until it was dry and curling up on the edges and thin spots.  My sheets can fit two cups of puree each, which is one pound, so each roll of ‘leather’ is worth that much in a recipe.  To use it in a recipe, tear it up in pieces and soak it in just under 2 cups of hot water, for probably 30 minutes or so.   Then use it just like fresh puree, in whatever recipe you have.  There are photos and more detailed information on the Zucchini Powder post.

For making the powdered squash: the latest batch, 5 cups of puree, became just 10 tablespoons after drying and powdering.  That means to make one cup of puree, use 2 Tbsp. powder along with just under 1 cup hot water.   Isn’t that amazing? Think of the space that saves!  Five cups, which would have taken up freezer space, now stores in the space of about 2/3 of a cup.  The pumpkin I dried requires 3 Tbsp. plus water to make a cup.  This pumpkin powder bakes up beautifully in pies and breads.

 
When I make vegetable powder, it usually sticks to itself in a big lump after storing a little while.  Normally I just whack it a couple times to break off what I need, or chop around in the jar with a butter knife.  This time something new occurred to me- sometimes a little cornstarch is added to powdered sugar to keep it from lumping.  It’s a good moisture absorber, so my most recent batch has a little cornstarch added to it.  So far, so good.  We’ll see in six months how it really works.  Just in case that quantity messes with my recipes, I wrote how much cornstarch is there, on the jar of powder.  In this case, it’s 1 Tbsp. cornstarch per 2 cups reconstituted puree.  It looks like maybe more than necessary, but so far nothing is sticking!


You can powder about anything- think what you ever use in a pureed form, and make that into vegetable powder.  Tomato powder is great, it can be used to replace tomato paste, tomato sauce,  or tomato juice, depending on how much powder you use with how much water.  Mushroom powder is nice for cream-of-mushroom soup, or for extra flavor in soups and stews, onion powder goes almost without saying, carrot powder is good, too, and beet powder is sneaky but awesome. Throw it in almost anything.  I mostly use it to color frosting, though, since one of my boys can’t have artificial colors without his eczema flaring. It’s also great way to use beets that stayed in the garden a little too long and became a bit woody.  Try this out, and see what you think!


           Foolproof Pancakes -for my size family, we triple this
Makes 10 3" pancakes        (You can also turn this recipe into Pumpkin Pancake mix.)

1   cup   flour   (white or whole wheat)
1   cup   buttermilk or sour milk   
1   tsp.   sugar   
1/2  tsp.   baking soda   
1/2  tsp.   salt   
1   egg   
2   Tbsp.   butter, melted, optional

Combine all and whisk lightly.  Cook on a greased or non-stick skillet,  on medium-high, using 1/4 cup batter per pancake.  Cook until bubbles form around outside edges, then flip and cook until other side is browned.

The original recipe called for 3/4 cup buttermilk and 1/4 cup whole milk, but what I've got above works great.
For blueberry pancakes, stir 3/4 cup of blueberries into batter. 
For banana pancakes, slice one banana into batter. 
Picture
Cook pancakes on high heat, either on a greased or nonstick surface.  When the bubbles around the edges stay 'popped' and the edges are not runny, flip the pancake.

Picture
Cook until the other side is golden as well.  The pancake will puff up when you first flip it, and then it will stop rising.  If you're not sure if it's done, poke one in the center.  It shouldn't be runny.  If you flip the pancakes a second time, they will deflate and be more dense and flat.

4 Comments

Cooking and storing pumpkins, root cellaring

10/16/2010

0 Comments

 
Picture
You can even store summer squash alongside your pumpkins, if the summer squash is very mature, with a hard rind.

Picture
A bowl of thick, tasty Pumpkin Chili.  Don't tell your kids, and they'll never know....
Want to know what nutrients you're getting with that pumpkin?  A whole cup of it has only 49 calories, but is loaded with fiber, Vitamin C, riboflavin, potassium, and lots and lots of Vitamin A.  For the numbers, see nutrition for cooked pumpkin puree.
For the facts on its seeds, which are a great source of protein, Omega-6's, magnesium, potassium, zinc, copper, and manganese, see nutrition for pumpkin seeds.

Hi everyone,

This week we had a pumpkin class at my house.  It was fun, and I think everyone learned at least one new thing.  I have two different ‘handouts’; one is the Pumpkin class handout, two pages from the class; the other is a big collection of recipes I started in college, The Great Pumpkin Cookbook  (If it won't load, get it in two parts, here: The Great Pumpkin Cookbook part 1 and The Great Pumpkin Cookbook part 2).  I had asked a roommate if I could have her jack-o-lantern after Halloween.  When I told her I was going to make pie out of it, she incredulously responded with, “You can do that?  How?”  So I started by typing up instructions, and one thing lead to another…    

The Great Pumpkin Cookbook includes information on cooking pumpkin, canning, dehydrating, freezing, and ‘root cellar’ing it, plus things like Pumpkin Cheesecake, Pumpkin Shake, and Pumpkin Pancakes.  

If you want to learn more about storing vegetables through the winter, with or without a ‘real’ root cellar, click on Storing Vegetables At Home, which is a chart and information from the Wisconsin Extension Office.  
 

Here’s something to chew on, from the LDS Family Home Storage pamphlet; italics are mine:

Dear Brothers and Sisters:

Our Heavenly Father created this beautiful earth, with all its abundance,
for our benefit and use. His purpose is to provide for our needs
as we walk in faith and obedience. He has lovingly commanded us to
“prepare every needful thing” (see D&C 109:8) so that, should adversity
come, we may care for ourselves and our neighbors and support bishops
as they care for others.
We encourage Church members worldwide to prepare for adversity
in life by having a basic supply of food and water and some money in savings.  

 
And another, related, quote:

“Can we see how critical self-reliance becomes when looked upon as the prerequisite to service, when we also know service is what godhood is all about? Without self-reliance one cannot exercise these innate desires to serve. How can we give if there is nothing there? Food for the hungry cannot come from empty shelves. Money to assist the needy cannot come from an empty purse. Support and understanding cannot come from the emotionally starved. Teaching cannot come from the unlearned. And most important of all, spiritual guidance cannot come from the spiritually weak.  President Heber J. Grant declared, “Nothing destroys the individuality of a man, a woman, or a child as much as the failure to be self-reliant.”  -The Celestial Nature of Self-Reliance, Marion G. Romney

 
I challenge you to expand your home storage efforts, to find some part of it to learn more about, to try for the first time (or try better for the second-- or tenth-- time), to do something that will help you become a little bit more self-reliant. The Lord doesn’t ask us to do everything, all at once, but he does ask us to be diligent.  (See Mosiah 4: 27)  I know our capacity and freedom will increase as we do this.

-Rhonda

Here's some great information I found at http://www.americanpreppersnetwork.net/viewtopic.php?f=122&t=2166
"Only fresh and sound produce should be root-cellared. The food should be free from cuts, cracks, bruises, insects and mechanical damage. When I prepare produce for winter storage, I inspect it carefully. Items with any damage are either eaten quickly or canned or frozen. Apples and pears can be made into sauce, squash roasted and frozen, and beets pickled.

Quantities for a family of four:

Apples: 5 bushels
Carrots: 40 to 60 pounds
Cabbage: green, 20 heads; red, 10 heads
Beets: 20 pounds
Celeriac: (celery root, use instead of celery) 10 to 20 heads
Leeks: 40 plants
Potatoes: 100 pounds or more
Jerusalem artichoke: 10 pounds
Onions: 40 pounds
Garlic: 10 to 20 pounds
Winter radish: 10
Parsnip: 20 pounds
Squash: 40 ‘Delicata’ and 30 pounds butternut
Pumpkin: 5 to 10
Turnip and rutabaga: 10 or more"
0 Comments

Shelf-life of spices, homemade onion powder, Creamy Turkey Soup

10/9/2010

0 Comments

 
Picture
Homemade onion powder.  The dried onions cost $2.50/lb at the LDS Church's Home Storage Center.
See the Home Storage Center order form.
What other seasoning (other than salt!) can you get for that much per POUND? 

When you grind up the onions, they reduce in volume by about half; the custard cup had been full before powdering.

Here’s something  from Providentliving.org:

“Three-Month Supply

Build a small supply of food that is part of your normal, daily diet. One way to do this is to purchase a few extra items each week to build a one-week supply of food. Then you can gradually increase your supply until it is sufficient for three months. These items should be rotated regularly to avoid spoilage.”

 
            I guarantee that if I didn’t have a bunch of spices in the cupboard and in storage, I wouldn’t have a “normal, daily diet”!   The holidays are a great time to stock up on spices and other baking supplies, as they go on sale a lot between November and the end of December.  Sometimes there's a 'Buy One, Get One Free' sale.   Two suggestions there:  either get double and be set for the next few years on that spice/extract, OR talk to  friends/neighbors and see who'd like to split with you.   I tend to think that neighbors helping each other that way helps build Zion anyway.  

            Now- how long are your spices good for?  Spice companies tell us to throw out herbs (leaves) after they are one year old, whole spices and seeds after 4 years, ground spices after 3 years,  as they lose potency, BUT- I'd rather have 6-year-old cinnamon than none at all!  I've had older, too, and found them to be fine.  Maybe not gourmet level, but still flavorful.   You can usually tell by smelling in the jar.  If there's not quite enough flavor when I cook, I just add a little more.  No problem.   The cooler and darker your storage area, the better they’ll keep their flavor.   It helps if they are good quality.  I’ve had a brand or two of cinnamon that tasted a bit like dirty bark to begin with. And you can’t always tell by price.   Sometimes I find good quality spices at the dollar store or Big Lots.  I’ve even been able to find almond extract, lemon, etc, there.

            The spices I use most  I buy in BIG containers (like 16 oz. or so)-  cinnamon, garlic powder, parsley flakes, and ginger- the big containers stay in the basement and are used to refill my little ones in the spice cupboard.  The big containers come from Sam’s Club or Macey’s, or whoever has a good price.  Smith’s sells spices in bulk over by their ‘natural foods’ section.  You get whatever quantity you want in a little baggie.  It’s usually a lot cheaper than in the little jars.  And if you like onion powder, you can make it yourself much more inexpensively with the dried onions from the DryPack Cannery- $2 a pound! That’s dirt-cheap for spice. See below with the other recipe.

 
                Spice Things Up! 

from The Wooden Spoon Cooking School, taught for a short time at the LDS Church's Welfare Square.
 
    Basic food storage can be pretty drab.  If the idea of living off of basic ingredients for a substantial amount of time already makes you want to turn green, then you quickly need to add to the basics you already have.  Seasonings and spices will add variety and store nicely!

    Beef, chicken, or ham bouillon granules are excellent secondary storage items.  Wheat and rice, either brown or white, cooked in bouillon, take on wonderful new flavors, as does barley.  In fact, bouillon is an excellent base for many soups, sauces, and casseroles.

    Soy sauce, with its Oriental flavor, is another excellent seasoning.  Fried wheat or rice with fresh vegetables and sprouts is enhanced with soy.  It also adds good flavor to a stir-fry or even to some stews, chicken, or fish dishes.

    Legumes respond well to seasoning salts and spice blends like chili powder, curry powder, poultry seasoning and celery, garlic, and onion salts.

    It is important to keep some sweet spices on hand, such as cinnamon, nutmeg, cloves, ginger, and allspice.  Simple rice pudding, for example, is dependent on such spices for its unique flavor.  The simplest cookies and cakes are enhanced with their use.

    Dried parsley, basil, oregano, marjoram, and rosemary are great to keep in supply.  They can be added to any dish for “Italian” flavors, or added to a simple stew to compliment the natural flavors of the other ingredients. 

    Cocoa, sweet cocoa mix, or a cereal drink like Ovaltine is a good supplementary item to store along with the basic nonfat dry milk.  Punch powder is a welcome flavor in lean times.  Nor should we forget vanilla, almond, maple, and lemon extracts.  All of these items store well.

    Many of these items can be bought in bulk at warehouse retailers (Sam’s or Costco), and can be stored for a great length of time.  As with all food storage items, these should be rotated regularly.  A year’s supply of flavorings could make the big difference between stark or satisfying eating.  

 * * * * * * * * * * * * *

Here's a simply way to get some inexpensive seasoning:
Homemade Onion Powder


2 cups dried onions
1 8-ounce jar with lid (label it!!!)

 
Put the dried onions in a blender and food processor, chop until powdery.  Pour into your jar.   Done.  

 
What else I like to know about it: 2 Tbsp. of onion powder is equal to about 4 Tbsp. (1/4 c.)  dried onions, which is about 1 medium onion.  SO- when your chicken noodle soup, or whatever, calls for 1 medium onion, dump in 2 Tbsp. of onion powder, and your (my!) kids won’t complain about onions in the soup.   Some of my children THINK they don’t like onions- but they say the soup “doesn’t taste right” the times I’ve left them out.  So now I’m sneaky.  I guess they just don’t like the texture.


Easy Creamy Turkey Soup     

Ready In: 35 min.    Yield: 4 ½ -5 cups

1   Tbsp.   dried minced onion, or 1 ½  tsp. onion   powder
1   stalk   celery, sliced in 1/4" pieces   
1   can   (10-3/4 oz.) cream of celery soup ( or cream of chicken, or mushroom)     
1/4   tsp.   thyme     or rosemary
1-1/2   cups   cubed cooked turkey   
3   large   carrots, cut in 1/4" pieces   
1/2   to 1 cup   milk   
1   cup   frozen peas    


            Mix together onion, celery, soup, thyme, turkey, and carrots.  Stir in enough milk to make the consistency you like.  Bring to a boil, then cover and simmer 25 minutes or until vegetables are tender.  Stir in peas and remove from heat.  As the peas heat through, they’ll cool your soup enough to eat it.


To make this faster, you can microwave the celery and carrots, covered and with 1 Tbsp. of water, for 5-10 minutes or until tender. Then just heat the soup until the peas have thawed through.  This will reduce your total cooking time by about 15 more minutes. 

 
This is also good using leftover Christmas ham instead of leftover Christmas turkey, though I’d substitute a couple cubed potatoes or a can of green beans for the carrots.  

 
-Rhonda

 
Here's some great info-

If you click on no other link, check out the spice chart (#3)

 
(1)The dozen "most essential" spices

http://www.spiceadvice.com/newsa/usage/staple_spices.html

 
(2)how, when, and how much spice to add:

http://www.spiceadvice.com/newsa/usage/adding.html

 
(3)quick reference spice chart: what different herbs and spices taste good with:

GREAT for printing out and taping on the inside of your spice cupboard!

http://www.spiceadvice.com/newsa/usage/chart.html

 
(4)details on each spice: the spice encyclopedia

http://www.spiceadvice.com/encyclopedia/index.html

 
(5)antioxidants in spices:    remember hearing how awesome pomegranates and blueberries are for containing antioxidants?   1 tsp. of cinnamon has more than a whole cup of pomegranate juice or a half cup of blueberries.  Several other spices are also high.

http://www.mccormick.com/~/media/Images/ORACChart.ashx

 
0 Comments

Making and using tomato powder

10/6/2010

5 Comments


Picture
Making tomato powder: start by partly-filling your blender or food processor with COMPLETELY dried tomatoes.

Picture
Run blender until ground to a powder.  I usually add a tablespoon of cornstarch to this, to help absorb moisture so they don't clump during- or after- storage.

Picture
Pour into a canning jar or some other airtight container. 

Picture
Label the jar with the year and what's in it.  My label reminds me that there's a little bit of cornstarch in it.  Store someplace cool and dark for the best shelf life.  It should retain most of the vitamins for a year, and the calories and minerals for longer than that.  If you add an oxygen packet, use a new canning lid, and screw the ring on tight, the oxygen absorbtion will create a seal.  I don't know how much longer the powder will store with the oxygen removed, but I figure it's got to be at least double or triple. 

Picture
One use for your tomato powder- this is going to be pizza sauce, as soon as the hot water is added.  For 8 ounces of sauce, use 1/4 cup tomato powder, 1/4 tsp. salt, a few sprinkles each of garlic powder, black pepper, basil, and oregano, and a few fennel seeds if you like.  Stir in 1/2 cup hot water, then let it sit for a few minutes.

Instead of canning tomatoes, I've started dehydrating them.  This was really handy when I first had too many tomatoes to eat, but not enough for a full canning batch.  Once they're REALLY dried, I run them through the blender or food processor to make powder.  My kids can do all the cutting, then load them on the trays.  I fill a quart jar, add an oxygen packet (from the Church cannery), put on a new lid, screw on a ring, and they seal within about twenty minutes.  Six quarts' worth of tomatoes fit in one quart jar, this way.

 
Use the powder in place of any tomato product- tomato paste, tomato sauce, crushed tomatoes, tomato juice, whatever you need.

 
It takes 1/4 c. powder, 1/2 c. hot water, and 1/8- 1/4 tsp. salt to yield one 8-oz can of tomato sauce.  Add spices to  turn it into pizza sauce.

 
More details on making the powder: if the tomatoes are small (cherry tomato size, I cut them in halves or quarters, otherwise I slice them about 1/4" thick.  Dry until they are completely dried. I fill the blender (food processor would work, but I don't have one) to about the 4-cup mark, add a tablespoon of cornstarch to act as a moisture absorber during storage (optional), and turn it on until well powdered.  To store, I've been putting them in canning jars, adding an oxygen packet, then topping with a new lid and a jar ring.  This way, they seal.  

It is not necessary to use the oxygen packet, and I don't have facts on how much it extends the shelf life.  Most dehydrating books say that you still have maximum vitamin content in dehydrated for for one year, and that's without the packet.  My line of reasoning is that taking out the oxygen should at least double or triple the shelf life, plus sealing the jar keeps humidity out.   Just make sure there is no moisture in your food before powdering it, or it will clump and maybe mold.  It often clumps after opening a jar, when I keep it in my cooking cupboard, but it's still completely usable, and the cornstarch can help prevent clumping.   When drying, though, the essentials are to get the food as dry as possible, and store it at least fairly airtight, dark and cool is ideal.

 To use tomato powder , I usually just toss in enough  to 'make it taste right" into whatever soup I'm making, but if you want conversions,  here's what I've figured out:

one 6-oz can of tomato paste: 1/4 c. tomato powder, 1/4 c. hot water, 1/4 tsp. salt
8-oz can of tomato sauce: 1/4 c. powder, 1/2 cup hot water, 1/4 tsp. salt
14-16-oz can crushed tomatoes: 1/4 c. powder, 3/4 c. hot water, 1/4-1/2 tsp. salt
8 oz. tomato juice: 2-4 Tbsp  powder, just under 1 cup hot water, 1/16-1/8 tsp. salt

So the tomato powder-to-water ratio for each one is:

Tomato paste: 1:1
Tomato Sauce 1:2
Crushed tomatoes: 1:3
Tomato juice: 1:4-8

And, of course, you may add any herbs or spices you like.


5 Comments

    Need a Search bar?
    One day I may upgrade my website-- but until then, use your web browser search bar. Type in my web address and what you're looking for, like this-- 
    www.theprovidenthomemaker.com  pumpkin --  and you should get results.


    Author

    I'm a disciple of Christ, a member of the Church of Jesus Christ of Latter-day Saints, a family-defending, homemaking, and homeschooling mom of eight children, two of whom sometimes can't have milk or wheat. Growing up on a farm in a high mountain valley, my parents taught me to 'make do', work hard, smile, and help others.  I love cooking, learning, growing food and flowers, picking tomatoes, and making gingerbread houses --which CAN be made allergy-friendly-- with my children.  I hope you find something to help you on my site!

    Archives

    April 2024
    July 2023
    April 2022
    September 2021
    March 2021
    December 2020
    April 2020
    March 2020
    February 2020
    January 2020
    December 2019
    November 2019
    October 2019
    September 2019
    August 2019
    July 2019
    June 2019
    May 2019
    April 2019
    January 2016
    November 2015
    October 2015
    September 2015
    March 2015
    February 2015
    November 2014
    October 2014
    September 2014
    August 2014
    July 2014
    June 2014
    May 2014
    April 2014
    March 2014
    February 2014
    January 2014
    December 2013
    November 2013
    October 2013
    September 2013
    August 2013
    July 2013
    June 2013
    May 2013
    April 2013
    March 2013
    February 2013
    January 2013
    December 2012
    November 2012
    October 2012
    September 2012
    August 2012
    July 2012
    June 2012
    May 2012
    April 2012
    March 2012
    February 2012
    January 2012
    December 2011
    November 2011
    October 2011
    September 2011
    August 2011
    July 2011
    June 2011
    May 2011
    April 2011
    March 2011
    February 2011
    January 2011
    December 2010
    November 2010
    October 2010
    September 2010

    Categories

    All
    Alcohol
    Alternate Cooking
    Appearances
    Apple
    Apricots
    April Fools
    Aprons
    Bananas
    Beans
    Beef
    Beets
    Bench
    Beverages
    Bonnet
    Bread
    Breakfast
    Budget
    Budgeting
    Cake
    Candy
    Canning
    Carrots
    Cheese
    Chicken
    Children
    Chocolate
    Christmas
    Cleaning
    Coconut
    Comfrey
    Common Core
    Constitution
    Cookbook
    Cookies
    Cooking Oil
    Crafts
    Dairy Substitutions
    Dehydrating
    Dessert
    Dried Fruit
    Earth Oven
    Earthquake
    Easter
    Edible Weeds
    Eggs
    Emergency Prep
    Essential Oils
    Faith
    Family Home Evening
    Fertilizing
    Food Storage
    Fourth Of July
    Freezer
    Frosting
    Fudge
    Garden
    Gardening
    Gingerbread
    Gluten
    Gluten Free
    Gold
    Government
    Grains
    Gratitude
    Hat
    Herbs
    Home Remedies
    Home Repairs
    Homeschool
    Home Storage
    Honey
    Hope
    Inflation
    Leftovers
    Legumes
    Lemon
    Main Dishes
    Mixes
    Mothers
    Noah
    Non Artificial Colors
    Non-artificial Colors
    Nuts
    Oats
    Oil
    Orange
    Paint
    Peaches
    Pear
    Pie
    Pizza
    Plums
    Poem
    Popcorn
    Pork
    Potatoes
    Powdered Milk
    Prayer
    Preparedness
    Projects
    Prophecy
    Pruning
    Pumpkin
    Quick Bread
    Rhubarb
    Rice
    Salad
    Salt
    Sauces
    Self Reliance
    Self-reliance
    Sewing
    Shelf Life
    Shelves
    Sky
    Smoothie
    Snacks
    Soup
    Spices Or Seasonings
    Squash
    Strawberries
    Substitutions
    Sugar
    Summer Fun
    Three Month Supply
    Time
    Tomatoes
    Trees
    Truffles
    T-shirts
    Tuna
    Ultra Gel
    Valentine\'s Day
    Vegetables
    Water
    Watermelon
    Wheat
    Work
    Year Supply
    Zucchini

    RSS Feed

Web Hosting by iPage