The Provident Homemaker
  • Recipes and Info
    • Making Bread
  • My Blog
  • Favorite Resources
  • Documents and Files
  • 52 Weeks of Building Storage

Week 26- storing winter vegetables, and weekly assignment

10/5/2019

0 Comments

 
Picture
This week, B for 3 of nonfood items. If you’re not sure what quantities you need, see the week 22 post.
This is the LAST week in the get-3-months'-supply program! Next week we'll begin the long-term-storage foods.

Did you know that many fresh vegetables can be stored for months at a time?  The USU Extension Office has multiple articles and helps.  This particular article addresses what to do at the end of the garden season for tomatoes, winter squash, onions, and potatoes

"With the first frost just around the corner, many people harvest and store their produce for later use. Many fruits and vegetables can be canned, pickled, dried or frozen. Another option is to store them fresh. Consider this information."  See here for the details. 
 
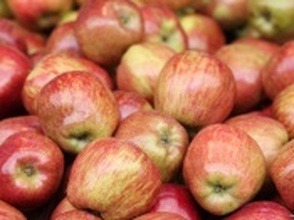
"...Other crops such as apples, pears, cabbage, celery, carrots and parsnips can be stored for an extended period of time. The following fact sheets can be accessed online, and both provide useful information. For a brief overview, visit http://www.ext.colostate.edu/Pubs/Garden/07601.html. For a more complete look at home food storage, see the USU bulletin at http://extension.usu.edu/files/publications/publication/FN_502.pdf"
0 Comments

Week 17, 3-Way Zucchini Bread

8/3/2019

0 Comments

 
Picture
Your weekly assignment:  Buy for Three.

What are these three ways to make this bread?  The base recipe is a simple zucchini bread with nice cinnamon undertones.  The next variation is for chocolate zucchini bread, and the third is my family's favorite, lemon zucchini bread.  
You can make several more variations with this recipe, or even bake them as muffins. This recipe will make about 2 dozen regular-size muffins.

If you'd like a few more ways to use zucchini, check out this link for a shredded zucchini pizza crust, two ways to use zucchini in pie, and a delicious bisque--- a creamy soup-- with a touch of curry. My sister brought that last recipe home with her after living in Ukraine.

There's also a recipe for Zucchini Cakes (think crab cakes or potato pancakes, not chocolate), with an amazing Lime Chipotle sauce to make alongside.

Three-Way Zucchini Bread
3 eggs
¾ c. oil (or applesauce)
1 ½ c. sugar
4 c. packed shredded zucchini, or 3 cups pureed*
3 c. flour
1/2 tsp. baking soda
4 tsp. baking powder
1 Tbsp. cinnamon
1 Tbsp. vanilla
½-1 c. nuts, optional

½-1 c. chocolate chips or butterscotch chips, optional

Heat oven to 375 degrees.  Beat eggs until light and foamy; add oil, sugar, zucchini, and vanilla.  Add dry ingredients, including nuts if using them.  Mix well.  Pour into two greased 8x4 loaf pans.  Bake for about 50-60 minutes, or until a loaf tests done- a toothpick inserted near the center will come out with just a few crumbs, not all wet.  The bread’s top will spring back when lightly pressed with a finger, too.

 
*You'll need slightly over 1 1/2 pounds of zucchini.  Or substitute any other summer squash. I often use yellow crookneck squash. It's especially good in the lemon version, where it gives a beautiful lemony color.

Chocolate Zucchini Bread: Omit cinnamon, or reduce it to 1 tsp.  Add ½ c. unsweetened cocoa powder; reduce flour by ¼ c. Stir in ½ c. semisweet chocolate chips if you want.  Almonds are tasty in this bread.   Try it with peanut butter chips, or white chocolate chunks either mixed in or sprinkled on top before baking.
Picture
Lemon Zucchini Bread: Omit cinnamon.  Increase sugar to 2 cups.  Add ¼ c. lemon juice and the zest of one lemon, about 2 Tbsp. (If you don’t have a fresh lemon, instead of zest you can use any one of these: ½ tsp. lemon extract, 2 tsp. dried zest, or 12 drops food-grade lemon essential oil.)  This is really good with walnuts.  Orange juice and zest are a nice version, too. I prefer to remove the zest with a vegetable peeler.  Since I’m pureeing the zucchini anyway, I toss the lemon peel strips into the blender along with the zucchini, and the zest gets chopped up nice and fine.
Picture
0 Comments

Week 14- Preserving fruits and vegetables

7/13/2019

0 Comments

 
Picture
Your weekly assignment:  B for 3   Only 7 weeks to go! (How's your shelf looking?)

If you have a garden or fruit trees, or like to visit farmers’ markets, you’re likely starting to wonder about how to handle the food that so proliferous right now.  The Utah State University (USU) Extension has resources for you! It covers freezing, canning, dehydrating, and best varieties to use, from Apples to Zucchini.   After going to this link,  click on “Preserving the Harvest Fact Sheets”.

For example, in the Apricot “fact sheet”
the 'sheet' is 9 pages of information--

-How to select and prepare apricots

-Freezing to preserve them, in syrup, sweetened without syrup, plain, or as puree

-Canning them- how many pounds or bushels will fill how many jars, how to get them ready (in halves or as nectar), how to process them, for how long, for your altitude

-Making apricot jam, jelly preserves- with pectin, or without pectin

-Drying apricots- including preparing them, and drying them using a dehydrator, the sun, or an oven

-Nutrition information for apricots
​
-Storing them- fresh, canned, dried, or frozen

And all this, for so many other fruits and vegetables!
0 Comments

Storing Food through the Winter

11/27/2015

0 Comments

 
There are lots of fresh foods you can store without needing a freezer, canner, or fridge.  I haven't built a root cellar, but discovered that different places in my yard, garage, and house have the right conditions for several of these foods.
Potatoes are happy on my bare garage floor until late January. After January they have to be moved up 1-2 feet, onto the cement stairs, to avoid freezing. Same with onions. Apples are better in the garage on the workbench, which is a couple feet off the ground and a few degrees warmer (but still cold). Pumpkins are happy in the basement or in a dark closet, off the floor so they avoid moisture. Carrots and parsnips are fine to leave in the ground, covered with a pile of dead leaves or a thick layer of straw if I want any hope of digging them during the winter. Otherwise they can be dug in spring, after the winter cold has made them sweeter.The link below is a 5-page handout from the University of Wisconsin which lists types of foods, their ideal storing temperature and any necessary humidity, expected length of storage, and plans for creating your own root cellar.

http://nchfp.uga.edu/how/store/wisc_vegetables.pdf

What will you store this year?


Picture
0 Comments

Caramelized Butternut Squash with Rosemary

11/23/2013

0 Comments

 
Picture
How about this for a new side dish?  I love rosemary and olive oil. Or butter.  Or both.  :)

This recipe showed up at my house this week in a save-the-farmlands newsletter, of all things.  (I'm all for saving farmlands, but how about nixing the property tax instead of government paying them subsidies?!)  And since my live rosemary died over last winter and there's a bottle of rosemary essential oil in my cupboard, I adapted it to use that.

You can substitute about any squash you have on hand that is a similar size.  Or use something large, like half a banana squash or pumpkin, or kabocha squash, etc, but if you do, then double the amount of other ingredients except rosemary oil.

Caramelized Butternut Squash with Rosemary 

1 butternut squash
1 tablespoon olive oil
1/4 teaspoon salt
3 tablespoons unsalted butter
2 sprigs rosemary or one drop of rosemary essential oil (better if you have a 1 ml bottle, then use  two of those tiny drops) on top of the butter

Preheat oven to 375 degrees F.
Cut the squash in half lengthwise; scoop out seeds.   (You can wash, roast, and salt these, just like pumpkin seeds.)  Put the squash cut-side up on a baking tray.
Drizzle with olive oil, sprinkle with salt.  In each natural 'bowl' where the seeds used to be, add 1 Tbsp. butter and a rosemary sprig.  EXCEPT:  if using rosemary oil, melt 2 Tbsp. butter and add the drop to it.  Pour half into the cavity of each squash half.  Cover tightly with foil and bake for 45 minutes, or until tender when poked with a fork.

Remove from oven and pull off the foil; let cool until you can handle it.  Scoop out the flesh.  

Heat the last 1 Tbsp. butter in a large skillet over med-hi heat.  Once melted and hot, add the cooked squash.  Gently toss until some parts become caramel-y brown.  Serve hot.

NOTE:  the photo shows the squash as it comes out of the oven, not after being scooped out and browned.  If you want it browned from the oven, do this instead:
When tender, pull off foil and brush the last tablespoon of butter over the cut edges.  Return to the oven and turn on the broiling element.   Broil, checking every minute.  (I am not kidding.  Seriously check every minute!)  If your baking tray is on the middle rack in the oven, this will probably take about 3-4 minutes.  If the tray is up high, close to the element, it might only take 1 minute, maybe 2.

0 Comments

Zucchini Powder

9/22/2012

1 Comment

 
Picture
Do you have too much zucchini?  

You could give it away.  Or shred and freeze it.  Or puree it and then freeze.  (I prefer pureeing & freezing because it maintains the same texture when thawed. It hides better in zucchini bread and soup, too.)

OR....

dehydrate it and turn it to powder.  

It takes very little space to store it this way, and it's easy to use.  Mix 2-3 Tbsp. of powder with enough hot water to equal one cup- for one cup (8 oz.) of puree.

Try it in Lemon-Zucchini Bread or Curried Zucchini Bisque (creamy soup).  Mmm.

See this post for how to best store the powder.
1 Comment

Zucchini Cakes

9/4/2012

0 Comments

 
Picture

Who couldn't use another recipe for zucchini right about now?

This year I really HAVE seen cardboard boxes with a "FREE ZUCCHINI" sign written in permanent marker, along the side of the road.
As you can see, this we're not talking about zucchini CAKE... these are tender, flavorful pan-fried morsels, related to crab cakes.  Without the crab.  There's an endless variety of ways to make these, this particular batch has a Southwestern flair, served with a creamy cilantro-scented Lime Chipotle sauce.    We had them for dinner last night and had leftovers.  They would make a nice accompaniment to grilled chicken or beef, but I served them as a meatless main dish.  
This afternoon about 4:00 I suddenly remembered them again- and promptly finished off the last couple of them for a snack.  YUM! (Actually, I took a couple over to a neighbor, who immediately asked for the recipe.)

This is a pretty big batch, I think it made about eighteen 3-inch cakes.  Feel free to cut the recipe in half.  You can always make the full batch, though, and freeze extras.  Bake at 350 for 10-15 minutes to reheat and recrisp, or toast in a toaster oven.  See below for the recipe.

I got a plainer version originally from JustPutzing.com, though her version was tweaked from one on TheLife'sAmbrosia.com    
Neither one of those used corn.  I like it for the sweet flavor it adds, along with some non-squishy texture, but you can certainly leave it out.  If you do, you'll only need 2 eggs.
Feel free to add in different spices, use different kinds of cheese (the original used Parmesan, in half the amount), or serve with different sauces.  Ranch dip would be delicious.  So would honey mustard.    I intend the next batch to resemble crab cakes even more- I'll add Old Bay to them, a little finely-grated onion, add maybe a teaspoon of honey for a hint of sweetness, and serve with tartar sauce.
Picture
Southwestern Zucchini Cakes


1 lb. zucchini (3 small)
1 cup corn kernels (I used canned, then drained them well)
1 c. shredded mild white cheese (I used Havarti 'cause I found it for $2/lb)
2 Tbsp. salsa if you have it around  (OK without but good for color)
1 cup panko bread crumbs (or other crumbs- bread, cracker, gluten-free, etc)
1/2 tsp. salt
2-3 tsp. chili powder (to taste)
3 medium to large eggs, beaten
3-4 Tbsp. cooking oil 


Shred the zucchini on fine or medium holes.  Grab a handful, hold it over a plate or bowl, and squeeze hard to remove excess liquid.  Put the squeezed zucchini in a mixing bowl, and repeat with all the zucchini.
Stir in the corn, cheese, salsa, bread crumbs, salt, and chili powder.  Taste and add more of whatever you think it needs.  Stir in the eggs, cover, and refrigerate for 20-30 minutes.   (You can skip this step, but this gives the mixture time to bind together, as the egg soaks into the crumbs.  This makes them much easier to form and flip.  While it chills, make the sauce below.)
Heat a skillet over medium heat.  Add 1 Tbsp. oil to it.  When oil is nearly smoking, scoop 3-4 Tbsp of the zucchini mixture into the pan, then flatten to about three inches across.  Repeat with as many as will fit in the pan with about 1" between them.  Cook for 4-5 minutes, then flip over.  Cook for another 2-3 minutes, until golden.  
Add another tablespoon of oil to the pan before starting the next panful.

Makes about 18.   Serve warm or room temperature.

Creamy Chipotle Sauce (adapted from America's Test Kitchen)

Note: Chipotle is smoked jalapeno pepper.  I don't have any on hand, so I came up with a similar flavor  with what I DID have, though it wasn't nearly as hot.  If you like more heat, add a little cayenne or red pepper flakes.  If you happen to have canned chipotle around, use 1-2 tsp., minced, in place of chili powder and Liquid Smoke)

2 Tbsp. mayonnaise
2 Tbsp. sour cream (I didn't have this, either- use plain yogurt, or like I did, thick kefir)
1-2 tsp. chili powder (to taste- my kids were happy with just 1 tsp.)
1/4 tsp. garlic powder, or one minced clove fresh garlic
2 drops Liquid Smoke
2 tsp. minced fresh cilantro
1 tsp. fresh lime juice
2 drops lime essential oil if you have it

Stir together.  Cover and refrigerate about 30 minutes to blend the flavors.
Makes about 1/4 cup.

If you double the recipe, you can have leftovers to change into a fabulous salad dressing: Thin down with a little water or lime juice.  Salt and pepper to taste.
0 Comments

Sugar Pie Pumpkins

10/25/2011

0 Comments

 
Picture
SO... is there a difference between those big pumpkins that are cheaper, and the littler, "Sugar Pie Pumpkins" that are 3 to 10 times the price?

Yes, there is.  The smaller ones are varieties selected for smooth, dense, creamy flesh, with a higher sugar content.  The bigger ones are still good for eating, but usually have a higher water content, and often have stringy flesh.  When I make pumpkin pie using the small sweet ones, I can get away with using only 1/2 cup sugar per 2 cups puree.  If I use the bigger ones, it tastes best if I use the 3/4 cup sugar called for in the recipe.

How big of a pumpkin will you need for one pie?

A very small one.  If you're including the peel in your puree, there will be almost no waste from your pumpkin- only the stem, seeds, and stringy center will be taken out.  (Remember to rinse, salt, and roast those seeds!)  You'll get almost two cups of puree for each pound in your pumpkin, when prepared this way.  Two cups will make one 9" pumpkin pie.  That means a 5-pound pumpkin will yield enough puree for FIVE pies.   And if you use your 25-lb jack-o-lantern?......  Luckily, pumpkin puree freezes well!  My favorite way to preserve it now is by making pumpkin powder.  Less space, no freezer burn, and no electricity required once it's dry.

If you're using big pumpkins, you can still end up with dense, smooth puree if you know how to handle it.  Clean, chop, and steam, boil, or microwave the pumpkin until tender, then run it through a blender or food processor, adding water only if it won't blend without it.  You could use a potato masher, but it won't get rid of the strings.  When it's smooth, you can either use it as-is (which is thinner than usual), or let it sit in a colander lined with cheesecloth or paper towels.  Let it drain at least 1/2 hour.  The water drained off has vitamins in it; use that in pancakes, smoothies, or whatever else occurs to you.  Any winter squash can be used in pumpkin recipes.  I've eaten "pumpkin" pies made of kabocha squash, spaghetti squash, and Hubbard squash.  The spaghetti squash was a lot more watery (drain that liquid off!), and if only mashed, not pureed, the texture resembles coconut cream pie (in fact, there's a recipe for Mock Coconut Cream Pie that takes advantage of this!)  Hubbard and kobocha are both dense, creamy, and sweet, and only required the 1/2 cup of sugar that I use with sugar pie pumpkins. 
0 Comments

Roasted Vegetable Gratin, Fresh Tomato Salad

9/7/2011

1 Comment

 
Picture
Do you have summer squash and tomatoes coming out your ears?  This is a delicious way to use quite a bit of that summertime produce- zucchini and yellow squash baked with caramelized onions and sweet roasted tomatoes.  You can use 2 lbs of any summer squash, but the green and yellow here are pretty together.

Normally a dish like this would be soupy, since these high-water-content vegetables lose moisture as they cook.  These are salted while raw; the salt draws out water.  This makes a big difference.

Two 6-8" long zucchini equal about one pound.

Vegetable Gratin
1 lb. zucchini, sliced 1/4" thick
1 lb.  yellow summer squash, sliced 1/4" thick
2 tsp. salt
1 1/2 lbs. ripe tomatoes (3-4 large ones), sliced 1/4" thick
2 medium onions, halved then sliced thin pole to pole
3/4 tsp. black pepper
5 Tbsp. olive oil
2 cloves garlic, minced (or 1/2 tsp. garlic powder)
1 Tbsp. fresh thyme leaves (1 tsp. dried)
1/4 c. chopped fresh basil

Toss zucchini with 1 tsp. of the salt; put them in a colander over a bowl.  Let stand 45 minutes or until at least 3 Tbsp. liquid drains off.   Put the tomato slices on paper towels or a dish towel, sprinkle with 1/2 tsp. salt; let stand for 30 minutes.  Put another towel or paper towels on top of the tomatoes to press them dry.  Pat squash dry with a dish towel or paper towel. While the vegetables are all draining, brush a 9x13 pan with 1 Tbsp. of the olive oil, set aside.  Heat oven to 400 degrees.  Heat 1 Tbsp. oil in a 12" skillet over medium heat.  Add onions, 1/2 tsp. salt, 1/4 tsp. pepper.  Cook, stirring once in a while, until onions are caramelized: soft and dark golden, 20-25 minutes.  Set aside.

In a small bowl, combine garlic, the remaining 3 Tbsp. oil, 1/2 tsp. pepper, and thyme.  When the zucchini is drained and patted dry, toss the squash with half of the oil mixture.  Spread the squash along the bottom of the 9x13 pan.  Arrange onions on top, then put tomatoes on in a single layer, overlapping if needed.  Drizzle the rest of the garlic oil on top.  Bake about 40-45 minutes, until tomatoes start to brown on the edges.  Increase oven to 450 degrees.  Make the topping, below, and bake 10 minutes or until topping is lightly browned.  Sprinkle with basil and let sit 10 minutes before serving.

Topping:
1 Tbsp. olive oil
1 slice white bread, shredded or crumbled (food processor or blender works well)
2 oz. shredded Parmesan cheese (1 cup)
2 shallots, minced (1/4 c.- or use a mild onion)
 
Stir together.

Picture
Cherry Tomato Salad

4 cups halved cherry tomatoes
1/2 tsp. salt
1 Tbsp. olive oil
1-3 Tbsp. balsamic or other vinegar
2 garlic cloves, minced (or 1/2 tsp. garlic powder)
1 Tbsp. chopped or torn fresh basil (or 1/2 tsp. dried)
1/2 c. shredded Asiago or Parmesan (or use a cubed mild cheese, up to 8 oz)
2 slices good-quality bread, cubed (optional to use, and best if stale)
1/2 c. halved olives

Sprinkle tomatoes with salt and put them in a colander or on some paper towels.  Let sit 30 minutes to drain juices.  Pour them off (great added to salad dressing, soup, or cornbread batter).  Toss all ingredients together, add salt and pepper to taste. 
To meld flavors and soften the bread, it's best if it sits a couple hours in the fridge; or serve immediately.

1 Comment

Cookbook- Desserts, Fruits and Vegetables

3/18/2011

0 Comments

 
Picture
Picture
Here's the next bit of the book.    Have you had enough time to look through the other sections yet?

Desserts
- apple crisp for one (or more!), other flavors of Crisp, no-baked Cheesecake, lowfat New York style cheesecake, Pudding/ Cream Pie filling and variations.
Fruits and Vegetables- dressed-up green beans or other vegetables, the 'creamy' salad family: Coleslaw, carrot salad, Waldorf salad; ways to cook vegetables and flavors to add, how to steam-saute vegetables; roasted winter squash, green salad ideas, fruit salad ideas.
0 Comments

Pumpkin Pancake Mix, making pumpkin powder

1/14/2011

11 Comments

 
Picture
These make great little gifts.  I gave these out during the holidays, when most people are short on time and have had enough 'goodie plates'.  If you want to give them something extra, also include a bottle of syrup (homemade or storebought) or a couple different mixes in a basket.

 Back on 10/27/2010  I wrote a post on making vegetable powders.  Here's one kind you can make- pumpkin powder! The recipe below uses it to make some fragrant, fresh pancakes.   You can also adapt any recipe that calls for pumpkin puree.  I've made pumpkin pie with the powder, and it turns out great.  3 tablespoons pumpkin powder plus just shy of one cup of water is all it takes to make a cup of pumpkin puree.  Most recipes won't require rehydrating the pumpkin first, either.  Just mix everything together, and the powder will rehydrate while it cooks. 

This mix is just a really large batch of "Foolproof Pancakes," made so you only need to add eggs and water.

Pumpkin Pancake Mix

½ cup coconut oil (shortening works too, but I don't use it)
1 ¼ c. brown sugar or raw cane sugar
¼ c. cinnamon
1 ¼ c. pumpkin powder
3 c. powdered milk
1/4 c. baking soda
¼ c. salt
13 c. flour ( ½  wheat, ½ white)

Mix together the coconut oil, brown sugar, and cinnamon.  Stir in everything else.  Store in a container with a tight-fitting lid.  Makes about 20 cups.

To use it,  combine  1 1/3 c. mix, 1 egg, 1 cup water.  You'll get about 15 batches this size from the whole mix.

I made up a smaller bag with 2 2/3 c. mix, which is 12 ounces if you like to weigh things.  The instructions to use the whole bag is to add 2 eggs and 2 cups of water.

My bigger bag has 4 cups mix, about 17 ounces, and mixes with 3 eggs and 3 cups water.  For a ready-made label, click here.


* * * * *
The amount of pumpkin is based on using roughly 1/2 cup of pumpkin puree for a 1-cup-of-flour batch of pancakes.  If you don't have pumpkin powder, omit that ingredient, use just under 1 1/4 cups of mix, 1 egg, 1/2 cup fresh or canned pumpkin puree, and reduce the water to 3/4 cup. 
Picture
To make pumpkin powder, first wash (but don't peel) the outside of a pumpkin.  Scoop out the seeds.

Picture
The seeds are great themselves.  I find them easiest to separate from the stringy fibers by putting them in a bowl of water.  Pinch the seeds off into the water.  Dry them for a couple weeks and save them for planting in next year's garden, or roast them with a little oil and salt.

Picture
Trim off the stem and the blossom end.  Slice the pumpkin lengthwise into pieces about 2" wide.  If you steam them now, the pumpkin will dehydrate in about half the time, and have a mellower, sweeter flavor.  Let cool enough to handle, then cut them about 1/4- 3/8" thick crosswise. 

Picture
Lay the thin pieces in a single layer on a dehydrator try, or on a windowscreen laid down in a hot car, or on a cookie sheet with the oven on lowest setting... whatever you have.  When crispy-dry, put the pieces in a blender and puree until powdered.

This 5-lb pumpkin dehydrated down to just under 7 ounces, which measured 1 1/2 cups of powder.  That's a great space saver!  It takes just 3 Tbsp of this powder to equal 1 cup of puree, after adding water.

Use it in anything that calls for pumpkin; you don't even need to rehydrate it first: just add the right amount of water and powder.  Try Pumpkin Shake!  Or how about a gluten-free, dairy-free Pumpkin Cheesecake? Pumpkin Pie?

Picture
A rainbow of dehydrated vegetables: from left to right:  tomato powder, pumpkin powder, yellow squash powder, and dried & crumbled greens.

11 Comments

Bishop McMullin clip, more on 3-month supply; Spreadable Butter, Snow Ice Cream

11/26/2010

0 Comments

 
(originally from 3/4/10)

Today the information is from two Internet sources:

Here’s a link to Bishop Keith B. McMullin (Bishop for the whole church) speaking on Family Home Storage:http://providentliving.org/channel/0,11677,1706-1,00.html   click on TV icon in upper right corner of page. It’s about a one-minute clip, and very good, simple advice to listen to.

At http://www.utahpreppers.com/2009/10/food-storage-short-life-supply/ there is a good post on a three-month supply- starting it, using it, maximizing shelf time, replacing it, advantages of having it. 

And just a note: remember the email about storing vegetables without a ‘real’ root cellar?  Yesterday (March 3) we ate butternut squash from last year’s garden, it was delicious!  I kept it, along with a couple pumpkins and a giant zucchini, in a dark basement room.  They’ve been just been sitting on top of a couple food storage buckets; I learned a couple years ago that they spoil quickly with moisture, so they can’t sit on a cement floor. They’ve stayed about 65 degrees there, so it requires nothing unusual.  One pumpkin got dropped a month ago, bruising it, so one side has started to go soft.  Maybe we’ll have pumpkin pie tomorrow, to use it before it spoils.  The other pumpkin is still perfect, and the zucchini, well, now there’s an interesting experiment.  It really is big, about 18” long, and bigger around than my hands can reach.  It sat on my counter for about a month, until I decided it might as well go downstairs to see what would happen.  It has blanched.  It slowly lost its green color, now hardly any is left, but it’s still firm.  I’ll let you know how it cooks up.

How’s your food storage coming?  Are you finding the joys in shopping from your own pantry?  Is it saving you trips to the store?  Mine is a great blessing to me and my family.  I love feeling that we could weather whatever economic storm comes our way.   This is also the third month on the three-month challenge.  If you’re not 2/3 of the way there, don’t panic or give up, just start.  If you are that far or more, go look at your shelves/freezer of food and admire your work, and thank the Lord for it.

-Rhonda

Spreadable Butter
2 cubes butter, softened
1 c. oil, use olive oil if you like
¼  tsp. salt

Beat butter until smooth; while beating slowly add in olive oil, then salt.  Pour in whatever size container you want it in; store in refrigerator.   Make any quantity you like- you’ll always use equal amounts of butter and oil, and some salt for flavor.

Snow Ice Cream

1 cup milk, evaporated milk, or cream
1/2 cup sugar
1/2 tsp. vanilla or other flavor
6-8 cups fresh clean snow (6 c. if heavy, wet; 8 if powdery)

 Mix together milk, sugar, and vanilla.  Pour over snow.  Mix well and eat right away.
You may substitute a can of sweetened condensed milk for the milk and sugar- tastes good, but costs more.

 
0 Comments

The Celestial Nature of Self-Reliance, Lemon-Zucchini Bread

10/28/2010

0 Comments

 
Picture
(originally from 8/5/10)
Do you have garden produce yet?  Or are you seeing it at farmers' markets?  We got the first yellow summer squash of the year yesterday.  This is exciting!  Unfortunately, we don’t have zucchini at all because one of my little people stepped on the plants just as they were coming up.  I replanted, but didn’t water well enough that first week…


Fortunately, I still have frozen zucchini from last year.  I used to shred it and freeze it in quart bags, which was the proper amount for a double batch of my zucchini bread, but didn’t like how it thawed.  It separated into water and strings of fiber.  That’s kind of baffling to cook with.  There’s a much better way-  puree it! Chop the zucchini into chunks small enough to fit down your blender, and buzz until smooth.  A bonus is that the texture of your baked goods will be smoother. 

Our favorite recipe to use it is Lemon Zucchini Bread.  It has a little more flavor if you use fresh lemons, but is still good using bottled lemon juice and dried lemon zest.  Or use your lemon-zest-sugar, (find it in the archives under 'homemade orange seasoning', in the Spices or Seasonings category, right. And FYI, Zucchini bread, since it’s a ‘quick bread’, is simply a variation on the muffin recipe.   To see for yourself, go look at the 'Anything-Goes' Muffin recipe.                                          

 *  *  *  *  * 
Now, for the thought of the week- a First Presidency message from 1984, reprinted in the Ensign last year as one of the ‘classics’- “The Celestial Nature of Self-Reliance”.  Or, ‘what does self-reliance have to do with eternal life’? Think about it: Is food/money/water storage a suggestion or a commandment?  This article has something for any of us to work on- whether you haven’t started, are a little ways into it, making a lot of progress, or have built up all your reserves.  I HIGHLY recommend re-reading the whole article, below is a condensed piece of it:

 “Since the beginning of time man has been counseled to earn his own way, thereby becoming self-reliant. It is easy to understand the reason the Lord places so much emphasis on this principle when we come to understand that it is tied very closely to freedom itself.

Now, I wish to speak of a very important truth: self-reliance is not the end, but a means to an end.

Doctrine and Covenants 29:34–35 tells us there is no such thing as a temporal commandment, that all commandments are spiritual. It also tells us that man is to be “an agent unto himself.” Man cannot be an agent unto himself if he is not self-reliant. Herein we see that independence and self-reliance are critical keys to our spiritual growth.  Whenever we get into a situation which threatens our self-reliance, we will find our freedom threatened as well.  If we increase our dependence, we will find an immediate decrease in our freedom to act.

The key to making self-reliance spiritual is in using the freedom to comply with God’s commandments.”

For the whole article, which I know can bless everyone’s life,  go to The Celestial Nature of Self-Reliance at lds.org.

If using fresh lemons for this recipe, you'll need two. 

Lemon-Zucchini Bread


1 lb. zucchini or other summer squash (4 c. loosely packed, or 2 cups pureed)
¼ c. lemon juice*
2 Tbsp. fresh lemon zest, OR ½ tsp. lemon extract, OR 1/8 tsp (16 drops)    lemon essential oil
2 c. sugar
½ c. oil
3 eggs
3 c. flour
1 Tbsp. baking powder
1 c. chopped walnuts, optional

Place lemon juice, zest, sugar, and oil in a bowl and beat.  Add eggs, one at a time, beating well after each.  Stir in flour and baking powder, then add zucchini and nuts.  Pour into two greased and floured 9x5 loaf pans.   Or use three 8x4 pans.  Bake at 375 degrees about 50 minutes (40 for 8x4 pans) or until a toothpick inserted near center comes out clean.  Let cool in pans for 10 minutes, then turn out onto a cooling rack. Wrap or bag when completely cool. The flavor is even better the next day.


See the blender-mixing-method here.  

 *An acceptable substitute for lemon juice in this recipe is 1/4 cup vinegar (apple cider vinegar is better but not necessary) and a little bit extra lemon zest, extract, or essential oil.

 
0 Comments

link to "Top 10 Reasons for not starting food storage"; Curried Zucchini Bisque

10/27/2010

0 Comments

 
 How about another zucchini recipe?  Any summer squash can be used in the recipe.  Since I don’t have zucchini this year, (the seedlings were stepped on...) I’ve been making my lemon-zucchini bread with yellow summer squash, too. “Bisque” usually means a thick, creamy soup thickened by pureeing it, instead of by adding flour.  We made some yesterday using an immature Hubbard squash (picked by an enthusiastic child…), and it was delicious. The recipe came from the Ukraine; my sister ate it- and loved it- there on her mission.   In the bisque, the curry powder is great, but you can also  try other spices you like-   using basil or ground coriander  to taste, or a half packet of ranch dressing mix powder (Remember dressing mix is salty, so leave out the salt in the recipe).  The soup really shines when served with “Best Drop Biscuits” (archived under Quick Breads) or homemade French bread; something with some crunch to contrast with the silkiness of the soup. 

Here’s a video on YouTube about food storage, a lady from Arizona… this segment is “top 10 reasons for not starting food storage”: here if the link didn't work.  The sound doesn't work really well, but it's still worth watching!   http://www.youtube.com/watch?v=HhGaTlwYs-s      I thought it was pretty funny, but it makes you think.  Just remember that when she says ‘year’s supply’, that you don’t worry about that part until you reach Step 4 from the All Is Safely Gathered In booklet on providentliving.org. How much you store, on that step, is up to you to study and pray about.  Here are the four:

1. Gradually build a small supply of food that is part of your normal, daily diet until it is sufficient for three months.

2. Store drinking water.

3. Establish a financial reserve by setting aside a little money each week, and gradually increase it to a reasonable amount.

 4. Once families have achieved the first three objectives, they are counseled to expand their efforts, as circumstances allow, into a supply of long-term basic foods such as grains, legumes, and other staples.

 Happy storing! 
-Rhonda

 
Curried Zucchini Bisque
2 Tbsp. butter
2-4 tsp. curry powder- or use other spices you like
1 medium onion, chopped
¼ tsp. black pepper
3 c. chicken broth, or 3 c. water and 1 ½ tsp. chicken bouillon
1 (7-8 oz.) potato, cut in ½” cubes
1-1 ½ lbs. zucchini, trimmed and cubed
½ tsp. salt
1 ½ c. cream or evaporated milk (12 oz. can)  or a 12-oz. can of coconut milk

            Combine butter, curry powder, onion, and pepper in a medium saucepan.  Cook, stirring, for 2-3 minutes on medium-high heat.  Add broth, potato, zucchini, and salt.  Simmer 20 minutes or until potato is tender.  Add cream and puree the soup until smooth.         Serve garnished with croutons if you like.  Cubed chicken is also good in this. 

 
0 Comments

Summer squash and pumpkin powder, Foolproof Pancakes

10/27/2010

4 Comments

 
Picture
I love these powders!  Left to right: tomato powder, pumpkin powder, yellow summer squash powder, dried crumbled greens to put in soups in the winter.  (These greens are pigweed leaves- one of the wild edible weeds in my yard.)

Picture
Hot, fresh pancakes are simple to make. 

What else can you do with all that summer squash you have?  Make it into leather!  Yes, I know your children won’t think that’s the best snack around, but it’s not for them.  At least not by itself.  Better yet, turn it into powder.

The idea behind this is that pureed squash can be added to soups and breads (as in Zucchini Bread), and it takes a LOT less storage space when it’s dried.  There are at least two ways to get dried pureed squash:

(1)  Puree it, pour it on food dehydrator sheets, dry, and roll up, and

(2)  Slice the squash (1/4” wide is good), dry it like that, then run it through your blender when it’s crispy-dry.   This vegetable powder takes up even less storage space than the leather, plus it reconstitutes faster. If you're doing this with pumpkin, steam it before slicing; it will dry quite a bit faster and not have that raw taste.

(3)  Store it in something fairly airtight, in a dark area.  Canning jars are great, especially if you seal them by using a new lid, the ring, and an oxygen packet. (see Dry Canning.)

Now, how do you use it in recipes?  And how much do you use?  Remember thinking in school that you’d NEVER use  math in ‘real life’?  Ha!  It’s incredibly useful in the kitchen, especially when you start doing your own thing.

Measure and write down the quantity you start with, then measure and write down what you end up with.  Write it on your storage container, trust me, you’ll forget otherwise.   For instance, I started with 2 ½ lbs of yellow squash, which is 5 cups of puree.  I ran it through the blender, poured it on my (SPRAYED) dehydrating sheets, and turned on the dehydrator until it was dry and curling up on the edges and thin spots.  My sheets can fit two cups of puree each, which is one pound, so each roll of ‘leather’ is worth that much in a recipe.  To use it in a recipe, tear it up in pieces and soak it in just under 2 cups of hot water, for probably 30 minutes or so.   Then use it just like fresh puree, in whatever recipe you have.  There are photos and more detailed information on the Zucchini Powder post.

For making the powdered squash: the latest batch, 5 cups of puree, became just 10 tablespoons after drying and powdering.  That means to make one cup of puree, use 2 Tbsp. powder along with just under 1 cup hot water.   Isn’t that amazing? Think of the space that saves!  Five cups, which would have taken up freezer space, now stores in the space of about 2/3 of a cup.  The pumpkin I dried requires 3 Tbsp. plus water to make a cup.  This pumpkin powder bakes up beautifully in pies and breads.

 
When I make vegetable powder, it usually sticks to itself in a big lump after storing a little while.  Normally I just whack it a couple times to break off what I need, or chop around in the jar with a butter knife.  This time something new occurred to me- sometimes a little cornstarch is added to powdered sugar to keep it from lumping.  It’s a good moisture absorber, so my most recent batch has a little cornstarch added to it.  So far, so good.  We’ll see in six months how it really works.  Just in case that quantity messes with my recipes, I wrote how much cornstarch is there, on the jar of powder.  In this case, it’s 1 Tbsp. cornstarch per 2 cups reconstituted puree.  It looks like maybe more than necessary, but so far nothing is sticking!


You can powder about anything- think what you ever use in a pureed form, and make that into vegetable powder.  Tomato powder is great, it can be used to replace tomato paste, tomato sauce,  or tomato juice, depending on how much powder you use with how much water.  Mushroom powder is nice for cream-of-mushroom soup, or for extra flavor in soups and stews, onion powder goes almost without saying, carrot powder is good, too, and beet powder is sneaky but awesome. Throw it in almost anything.  I mostly use it to color frosting, though, since one of my boys can’t have artificial colors without his eczema flaring. It’s also great way to use beets that stayed in the garden a little too long and became a bit woody.  Try this out, and see what you think!


           Foolproof Pancakes -for my size family, we triple this
Makes 10 3" pancakes        (You can also turn this recipe into Pumpkin Pancake mix.)

1   cup   flour   (white or whole wheat)
1   cup   buttermilk or sour milk   
1   tsp.   sugar   
1/2  tsp.   baking soda   
1/2  tsp.   salt   
1   egg   
2   Tbsp.   butter, melted, optional

Combine all and whisk lightly.  Cook on a greased or non-stick skillet,  on medium-high, using 1/4 cup batter per pancake.  Cook until bubbles form around outside edges, then flip and cook until other side is browned.

The original recipe called for 3/4 cup buttermilk and 1/4 cup whole milk, but what I've got above works great.
For blueberry pancakes, stir 3/4 cup of blueberries into batter. 
For banana pancakes, slice one banana into batter. 
Picture
Cook pancakes on high heat, either on a greased or nonstick surface.  When the bubbles around the edges stay 'popped' and the edges are not runny, flip the pancake.

Picture
Cook until the other side is golden as well.  The pancake will puff up when you first flip it, and then it will stop rising.  If you're not sure if it's done, poke one in the center.  It shouldn't be runny.  If you flip the pancakes a second time, they will deflate and be more dense and flat.

4 Comments

    Need a Search bar?
    One day I may upgrade my website-- but until then, use your web browser search bar. Type in my web address and what you're looking for, like this-- 
    www.theprovidenthomemaker.com  pumpkin --  and you should get results.


    Author

    I'm a disciple of Christ, a member of the Church of Jesus Christ of Latter-day Saints, a family-defending, homemaking, and homeschooling mom of eight children, two of whom sometimes can't have milk or wheat. Growing up on a farm in a high mountain valley, my parents taught me to 'make do', work hard, smile, and help others.  I love cooking, learning, growing food and flowers, picking tomatoes, and making gingerbread houses --which CAN be made allergy-friendly-- with my children.  I hope you find something to help you on my site!

    Archives

    April 2024
    July 2023
    April 2022
    September 2021
    March 2021
    December 2020
    April 2020
    March 2020
    February 2020
    January 2020
    December 2019
    November 2019
    October 2019
    September 2019
    August 2019
    July 2019
    June 2019
    May 2019
    April 2019
    January 2016
    November 2015
    October 2015
    September 2015
    March 2015
    February 2015
    November 2014
    October 2014
    September 2014
    August 2014
    July 2014
    June 2014
    May 2014
    April 2014
    March 2014
    February 2014
    January 2014
    December 2013
    November 2013
    October 2013
    September 2013
    August 2013
    July 2013
    June 2013
    May 2013
    April 2013
    March 2013
    February 2013
    January 2013
    December 2012
    November 2012
    October 2012
    September 2012
    August 2012
    July 2012
    June 2012
    May 2012
    April 2012
    March 2012
    February 2012
    January 2012
    December 2011
    November 2011
    October 2011
    September 2011
    August 2011
    July 2011
    June 2011
    May 2011
    April 2011
    March 2011
    February 2011
    January 2011
    December 2010
    November 2010
    October 2010
    September 2010

    Categories

    All
    Alcohol
    Alternate Cooking
    Appearances
    Apple
    Apricots
    April Fools
    Aprons
    Bananas
    Beans
    Beef
    Beets
    Bench
    Beverages
    Bonnet
    Bread
    Breakfast
    Budget
    Budgeting
    Cake
    Candy
    Canning
    Carrots
    Cheese
    Chicken
    Children
    Chocolate
    Christmas
    Cleaning
    Coconut
    Comfrey
    Common Core
    Constitution
    Cookbook
    Cookies
    Cooking Oil
    Crafts
    Dairy Substitutions
    Dehydrating
    Dessert
    Dried Fruit
    Earth Oven
    Earthquake
    Easter
    Edible Weeds
    Eggs
    Emergency Prep
    Essential Oils
    Faith
    Family Home Evening
    Fertilizing
    Food Storage
    Fourth Of July
    Freezer
    Frosting
    Fudge
    Garden
    Gardening
    Gingerbread
    Gluten
    Gluten Free
    Gold
    Government
    Grains
    Gratitude
    Hat
    Herbs
    Home Remedies
    Home Repairs
    Homeschool
    Home Storage
    Honey
    Hope
    Inflation
    Leftovers
    Legumes
    Lemon
    Main Dishes
    Mixes
    Mothers
    Noah
    Non Artificial Colors
    Non-artificial Colors
    Nuts
    Oats
    Oil
    Orange
    Paint
    Peaches
    Pear
    Pie
    Pizza
    Plums
    Poem
    Popcorn
    Pork
    Potatoes
    Powdered Milk
    Prayer
    Preparedness
    Projects
    Prophecy
    Pruning
    Pumpkin
    Quick Bread
    Rhubarb
    Rice
    Salad
    Salt
    Sauces
    Self Reliance
    Self-reliance
    Sewing
    Shelf Life
    Shelves
    Sky
    Smoothie
    Snacks
    Soup
    Spices Or Seasonings
    Squash
    Strawberries
    Substitutions
    Sugar
    Summer Fun
    Three Month Supply
    Time
    Tomatoes
    Trees
    Truffles
    T-shirts
    Tuna
    Ultra Gel
    Valentine\'s Day
    Vegetables
    Water
    Watermelon
    Wheat
    Work
    Year Supply
    Zucchini

    RSS Feed

Web Hosting by iPage