The Provident Homemaker
  • Recipes and Info
    • Making Bread
  • My Blog
  • Favorite Resources
  • Documents and Files
  • 52 Weeks of Building Storage

Week 35- The Provo Sugar Miracle and What it Means For You

12/10/2019

0 Comments

 
Picture
To help with building your year's supply (this is Week 9 of 26), see this chart. 
 
Last week I touched on the importance of salt and sugar in your food storage.  This week I was reminded of an old pioneer story. 
 
Many people know the story of the Miracle of the Seagulls in 1848 for the early Saints in Utah.  But that wasn’t the only time crops were decimated by insects. Some years it was crickets, other it was grasshoppers, other times it was beetles. But the seagulls weren’t the only miracle provided. 

These early settlers were poor-- and often hungry. Journals from the time included these statements and many others:

“We lived on cornbread and molasses for the first winter.”

“We could not get enough flour for bread … so we could only make it into a thin gruel which we called killy.”

“Many times … lunch was dry bread … dipped in water and sprinkled with salt.”

“These times we had nothing to waste; we had to make things last as long as we could.”

The winter of 1854-55 was one of these hard times.  The world had barely emerged from “the Little Ice Age,” and this year many of the Saints’ livestock and horses had frozen to death. The spring brought destructive floods. By summer, some kind of beetle was consuming most of the potatoes. To top it off, grasshoppers proliferated and ruined two-thirds of the wheat crops in the area.  George A. Smith wrote, “Myriads of grasshoppers, like snowflakes in a storm, occasionally fill the air … as far as the eye can reach.” (Works Projects Administration, Provo: Pioneer Mormon City, Portland, Oregon: Binsfords & Mort, 1942, p. 84.)

One account continues, 

“Already near poverty level, the grasshopper-stricken Saints had to make do with whatever food they had on hand. Children were not allowed to cook or help with meals for fear of wasting precious flour and sugar.

“Then, having prayed for divine help, they experienced a miracle not unlike that of Moses’ people in the Paran Desert. At the end of July 1855, the people of Provo discovered a sugary substance on the leaves of trees near their homes. They called it ‘honey dew’ or ‘sugar-manna,’ and word of its discovery spread quickly through the frontier community.

“Many speculated on the origin of the sticky, sweet substance. Some maintained that it came from cottonwood leaves; others that it was found on other leaves and even on rocks. Deposits as thick as window glass were reported.

“Whatever its nature, the sugar-manna was badly needed. Sugar cost a dollar a pound [that’s about $30 in today’s money] and was in short supply. So the people set about gathering and processing the sugary substance. Sister Lucy M. Smith, wife of George Albert Smith, described with some pride the process she used:

“'We had a very dry warm spring and summer and we were very destitute of sweet, so the Good Provider set HoneyDew to the Cottonwood and willow leaves, and so Brother George Adair and wife, Sister Hannah and myself took the necessary utensils, went among the bushes, cut bows washed off the sugar flakes into tubs, strained the sap, cleansed with milk and eggs then skimmed as it boiled. I understand the process necessary, as I had seen my Mother manufacture sugar from Maple sap. We four worked two days, made 50 lbs of nice sugar, besides feasting on Pancakes and Molasses, and making a quantity of candy for the children.
"‘Brother Adair carried over tithing to the Bishop, he said ours was the best of any brought in he wished to know the reason, I told him that he had an old sugar hand along that understood the business.’ (‘Historical Record of Lucy M. Smith,’ Lucy M. Smith Papers, Historical Department of The Church of Jesus Christ of Latter-day Saints, Salt Lake City.)

“Between three and four thousand pounds of sugar was made in this way. When Bishop Elias H. Blackburn of Provo took the tithing sugar to the General Tithing Office in Salt Lake City, he met President Brigham Young, who said that it was sugar from the Lord.” (See Thomas C. Romney, The Gospel in Action, Salt Lake City: Deseret Sunday School, 1949, p. 4.) 
 (Read the whole story here.)
_______
 
So what can we learn from this account, that applies to us and storing food?

First, food storage is important! You never know what factor—or combination of factors—will lead to you needing it.

Second, sugar is very valuable in hard times.  Can you imagine paying $30 for a pound of sugar?  Sugar was one of the items rationed during WWII. 

Third, the Lord helps, but the way He helps usually requires work on our part.  In the Provo Sugar Miracle case, He provided the raw material, but it was hours and days of work to get the sugar in a useful form. 
 
Wouldn’t it be better to do what you can now, while food is plentiful and relatively cheap?
0 Comments

Week 34- The Importance of Storing Sugar and Salt

11/30/2019

0 Comments

 
Picture
To help with building your year's supply (this is Week 8 of 26), see this chart. 
 
The basic year’s supply includes a recommended supply of 8 pounds of salt and 60 pounds of sugar per person.  (“Sugar” here means any kind- granulated, brown, powdered, maple syrup, honey, molasses, corn syrup, sweetened gelatin mixes, jams, jellies, syrups, etc.)  In a day when we’re constantly reminded to eat less sugar and salt, why is storing so much of each recommended? 

For multiple reasons. The first is for cooking; both make things taste better.  Both sugar and salt can be used to preserve food. Sugar is used in canning fruits and making jams, jellies, and syrups.  In addition to this, they can be stored indefinitely without spoiling, and being able to have them in high-stress situations has a both a physical and a psychological affect. They’re also very affordable.  Your year’s supply of salt can cost less than $5, and 60 lbs of sugar starts at less than $20 if you hit the right sales.
 
But isn’t that a whole lot of sugar? 
 
Yes and no.  It’s a lot of sugar! – but considerably less than the average American eats each year.  The most reliable numbers I found – published in July 2019 by the USDA— indicates we consume an average of 73 pounds per year. (To get this number, combine data from Tables 51, 52, and 53).  60 pounds will fit in two 5-gallon buckets, and will allow for up to 1/3 cup per day.  Store any kind of sugar you'll want to use.  I store pretty much all of them. 
 
Last week I posted a link to the Wooden Spoon Cooking School info and and recipes; the same one is useful this week.  It's on oats, honey, and sugar. It includes information and recipes for cooking with honey, as well as for using molasses-- including a simple recipe for Baked Beans. Page 14 has instructions for replacing table sugar with honey in recipes, and the reverse.
 
Salt is important for basic body functions, which is why it’s an ingredient in liquid electrolytes.  (See here for how to make your own.)
 
Salt is an amazing preservative.  It’s used to make brine to preserve or pickle, used dry on meats to cure them, and used along with dehydrating to preserve meats. It’s also useful for saline rinses for stuffy noses, and a good brine makes the best roast turkey of all.
 
Because of all this, I store extra salt. It’s cheap, takes little space, and is endlessly useful.  

0 Comments

Edible Geodes

4/4/2014

0 Comments

 
Picture
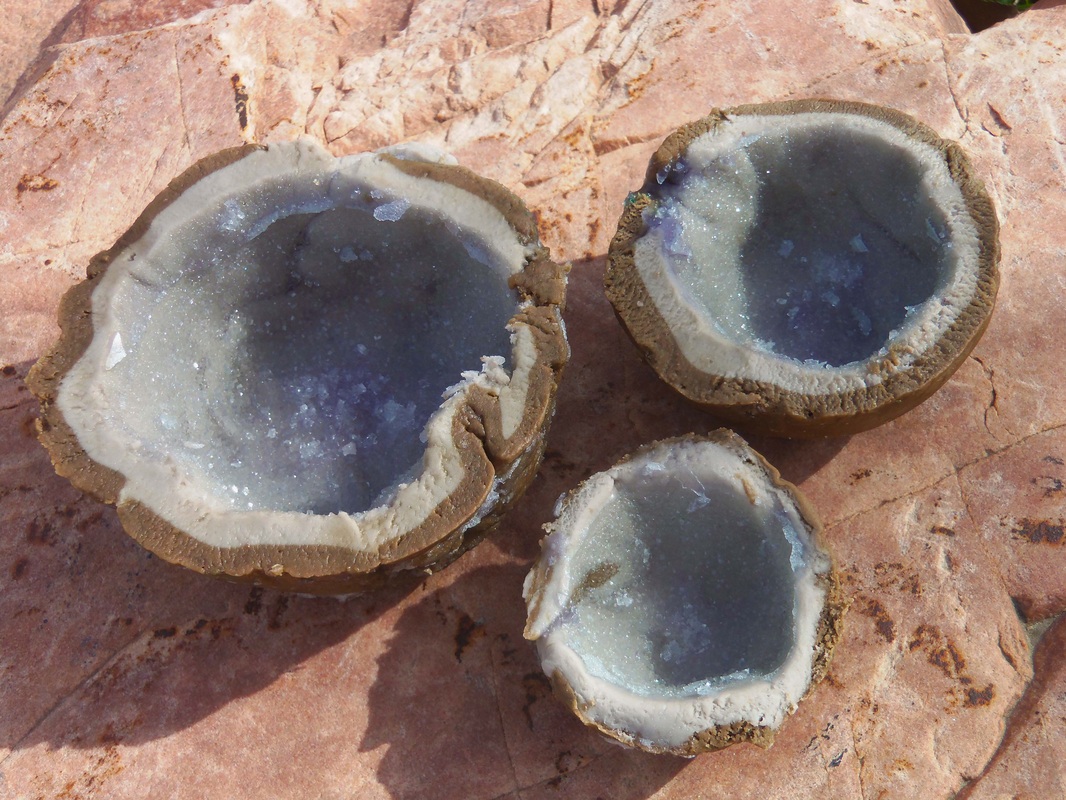
These are fun.  We made them as a little homeschool science project.  EVERYONE in the family thought these were awesome, and we had enough to give a couple to some of my son's friends who are fascinated with rocks.  My next-door-neighbor, the Webelos Scout leader, pointed to a pile of broken rocks on her sidewalk.  "This,"  she said, "was what we did so the boys could feel like they might find a geode- we gave them hammers and rocks from our yard.  We should have made these instead!"

They'd love them too.

These would make some amazing and unusual Easter eggs, too:  make a bunch the same size and wrap two halves together to form a ball.

Edible Geodes
Crystal-growing solution (Rock candy syrup)
1 ½ c. sugar
½ c. water
Mix the two, heat on high in a small saucepan, and stir until the sugar completely dissolves.  Add several drops food color if you want, along with ½ tsp. flavoring (optional). Let cool a bit while you make the rock shells.

Rock Shell (Marshmallow Fondant)
8 ounces marshmallows
2-4 Tbsp. water
1 lb. powdered sugar
¼ c. coconut oil or shortening

Mix marshmallows with 2 Tb. water in a microwave-safe bowl, heat for 30 seconds in microwave.  Stir.  Microwave 30 seconds more, stir. Repeat until it’s melted and smooth.  Add the powdered sugar and mix with a spoon and then with your hands.  Spread 1 Tbsp. coconut oil on clean counter, knead the fondant on top adding more coconut oil when needed.   When smooth and stiff, take half of it and set aside.  Take other half and knead in ¼ c. cocoa powder to make fondant brown.  Roll out ¼“ thick.  Roll out the white half to the same size and stack them on top of each other.    Line a few bowls with aluminum foil, sprayed with nonstick spray.  Cut a piece of the two-layer fondant to fit, and line a bowl with it, with the brown side touching the foil.  Repeat until you run out.   Trim off any fondant that is beyond the lip of the bowl, using scissors.  Set aside.

Pour the sugar syrup into the fondant-lined bowls.  Let them sit, undisturbed, for at least a day (or 2-3 days for bigger crystals).  When ready, break the surface and pour off the syrup. Turn the geodes upside down to drain for an hour.  They’re ready! 

Picture
0 Comments

Dulce de Leche balls (Ositos)

2/6/2014

0 Comments

 
Picture
I've been neighbors with a few Brazilians; they have been warm, kind people who have a strong affinity for desserts made with cooked sweetened condensed milk, or 'dulce de leche'.  There's a plum-caramel filling for cakes, another cake filling made with crushed pineapple and the caramel, and that's just the tip of the iceberg.  

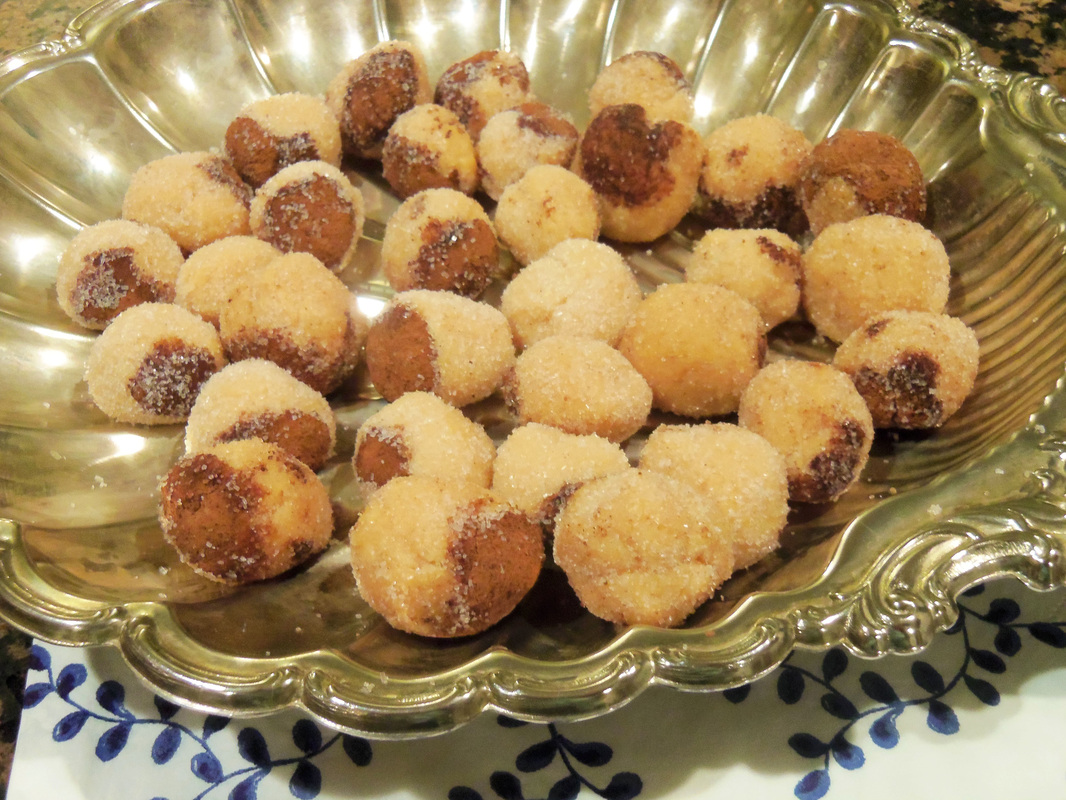
One Christmas my Brazilian neighbor Celia brought over a plate of these creamy, sugar-coated dulce de leche balls.  When I next saw her, I asked for the recipe and what they were called.  She shrugged her shoulders, then said, "little bears, I guess".  This is a simplified version of hers, which contained strained egg yolks and 'crema media' (half-and-half), but the results are just as delicious.  Best of all, these are cooked and ready to shape within ten minutes of starting!

Ositos
1 (14 oz) can sweetened condensed milk
unsweetened cocoa powder
about 1/2 cup sugar, for rolling


Pour the sweetened condensed milk in an ungreased, very large microwave-safe bowl.  Cover the top with plastic wrap  to help avoid boilovers: this boils much higher than you would expect!, Microwave it for 2 minutes.  Stir.  Microwave for 2 more minutes.  Stir, scraping sides down.  Repeat in 2-minute intervals for a total of either 6 or 8 minutes, stirring every two minutes.  It should thicken and darken some. To see if it has cooked enough, drop a little in a cupful of icy water, then pull out after about five seconds.  However hard it gets is how hard it will be when completely cool.  It needs to be able to hold its shape.  Put the sugar in a cereal bowl and set aside.

With buttered hands, pinch off a bit and roll in a ball, about 3/4" across.To get the brown side, drop into unsweetened cocoa powder, then pick it up and drop it  into the sugar.  After you have a few in there, roll or toss to coat, then set on another dish.

Makes 30-36 balls, about 3/4" each.
0 Comments

Fruit-Sweetened Caramel Sauce

4/20/2013

1 Comment

 
Picture
Somehow I've ended up with more dried fruit than planned, and it's getting a little old and turning dark.  Here's a new way to use it: a sugar-free caramel sauce!  Well, "sugar free" doesn't actually mean really all-sugar-free, BUT... all the sugar in this is naturally occurring in the fruit.  So it's no-sugar-added caramel sauce.  Unless you're a sugar addict, in which case you could add as much more sugar as you like!   This is a sauce to spoon, not to pour.  If you'd like it pourable, add more milk or some liquid honey or maple syrup until it's the consistency you want.

Next post will be for a rich, creamy, healthy no-bake New York style cheesecake, using this caramel sauce in the filling as the sweetener.

Fruit-sweetened Caramel Sauce

15 pitted dates (about 110g or 4 oz.)
1 to 1½ c. milk, any kind (I used coconut milk)
¼ c. melted browned butter or ghee, optional but helps give a caramel-y flavor
1/16 tsp. salt
1Tbsp vanilla

Blend until smooth, starting with the lower amount of milk; add more only if needed.  Makes about 1 1/2 - 2 cups.   If you don’t have a powerful blender, soak the dates overnight in the milk or simmer them together for 10 minutes, then puree.  If you prefer it sweeter, add a little honey, brown sugar, or stevia.

Try other dried fruits.  Peach is good.  Pear has naturally caramel undertones and would be delicious with a dash of cinnamon or coriander.  
1 Comment

Softening Brown Sugar

12/30/2010

0 Comments

 
Picture
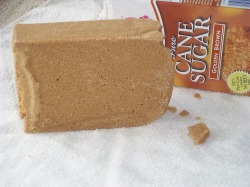
Does this look familiar?  It's almost hard enough to build with...

Picture
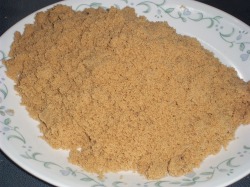
Less than a minute later, it can be measured!


Did you know sugar stores forever?  It doesn't ever spoil or go rancid.  And here's a little practical science for your kitchen- brown sugar is hygroscopic,  meaning that it attracts moisture from the air.   Cookies made with it have a better chance of being chewy.  This also depends, of course, on how long you let them bake!  Brown sugar adds moistness, chewiness in baked goods, and a deeper, caramel-like flavor.  All of this is because of the small amount of molasses in it.  Most brown sugar is just refined white sugar with molasses added at the factory.  Turbinado, or raw cane sugar is an exception to this- the brown color in it is because the molasses wasn't taken out to begin with.

What this hygroscopic nature means for you is that if there’s any moisture available to the sugar, it will soften up over the course of several hours or overnight.  Some ways to add moisture are:

·         Add a slice of apple to a sealed container of brown sugar.  Let sit.

·         Add a slice of bread.  This is a great use for those heels that sometimes don’t get eaten.  When it’s totally dried out, you can crush it into breadcrumbs.

·         Soak a small  (clean!) terra-cotta pot, saucer, or shard (piece of a broken pot), in water.  When it’s moist, add it to your brown sugar container.  This one’s reusable! Just soak it again when dry.

·         Put a dampened cloth or paper towel in the container, or just put the brown sugar in a bowl and cover it with the damp cloth.


·         Any place the brown sugar actually touches something wet, the moisture may drive out the molasses (which is what makes it brown) and leave a white, moist section of sugar.  It’s fine.  Stir it back in.


 If you can’t wait that long for your sugar, there are more options:

·         Microwave the brown sugar for 30 seconds.   If it’s not softened yet, put it in for a little longer.  It will be soft and easy to measure, but only while it’s still warm!  Crumble it while you can, measure what you need, and put the rest in a container with one of the ideas above.

·         If you don’t have a microwave, you can use a grater to get what you need off that solid block of sugar.

·         If you have molasses on hand, stir it into regular sugar.  This is how they make brown sugar at the factory!  For light brown sugar, use 1/2 Tbsp (1 ½ tsp). molasses to 1 cup white sugar.  If you want dark brown sugar, use 1 Tbsp. molasses instead.

·         Knock off some chunks with a hammer or other heavy item.  Weigh them instead of using a measuring cup.  A cup of brown sugar weighs about 7 ounces. (For the curious or the kitchen scientist, a handy chart listing other foods’ weights per cup, see http://www.veg-world.com/articles/cups.htm)  Most recipes use some form of liquid- add the hard sugar lumps to the recipe's liquid to let it soften, dissolve, or mix in.

One great thing to make with brown sugar is

Caramel Pudding
2-4 Tbsp. butter
1/4-1/2 c. brown sugar
1/4 c. cornstarch OR 1/2 c. flour
2 c. milk
1/8 tsp. salt, optional
2 eggs
1 tsp. vanilla

In a medium sauce pan, melt the butter over medium heat, stir occasionally until it turns brown and smells heavenly.  Remove from heat.  Add brown sugar, cornstarch, and salt; stir until smooth.  Gradually stir in the milk; return to heat and stir until it comes to a boil.  Meanwhile, beat the eggs in a medium bowl.  Pour a thin stream of the hot milk into the beaten egg, stirring constantly, until about half the milk is mixed with it.  This keeps the egg from curdling (scrambling).  Pour the egg mixture back into the boiling mixture; cook and stir for two minutes more.  

For more variations on pudding, see White Sauces and Pudding 

 
0 Comments

How much does a year’s supply cost? and Best Drop Biscuits

10/26/2010

0 Comments

 
Picture
Once the dough is mixed, if you use a greased/sprayed 1/4 measuring cup to scoop the dough, you'll get a more traditionally-shaped biscuit.

Picture
Yum.  Tender and light on the inside, crunchy on the outside.  This batch was made with 1 cup whole wheat flour.

How much will your year’s supply cost you?  I just got an emergency supply store’s catalog in the mail; they advertised a year’s supply of food for ‘just’ $3649.95.  For one person.  Is it really that much money to get a year’s supply?

Adding up all the essentials, a month’s worth of food for one person is $16.23

                            A year’s worth for one person is  $194.76

Figure in that you’re getting your year’s supply after building your three-month supply; that knocks it down to getting nine months’worth;

                                                            $146.07 per adult.   

You CAN afford to get your home storage! 

If you really want to spend $3649.95 plus tax, you could buy a year’s supply for not just one person, but for NINETEEN people.  Yes, basic storage is different food than that ‘gourmet’ version, but here’s the counsel we’ve been given:          
"We encourage members world-wide to prepare for adversity in life by having a basic supply of food and water and some money in savings.” “For longer-term needs….gradually build a supply of food that will last a long time  and that you can use to stay alive” (fromAll is Safely Gathered In, First Presidency pamphlet)


Here is the cost breakdown:


Grains, 300 lbs- if you get just wheat and oats, at the cannery they cost between $5.80 and $8.15 for 25 lbs. depending on if you get white or red wheat, quick or regular oats.  If you average this out, it will cost you $6.98 per person, per month.  $83.70 per year’s worth.

Milk, 16 lbs is $1.40/lb at the cannery, which is $1.87 per month, $22.40 per year.

Sugar, 60 lbs is $ .56/lb there, $2.80 per month, $33.60 per year.

Oil, 10 qts –this isn’t sold at the cannery, but the price at Macey’s last week was $2.50 for 1 ½ quarts (48 oz.) At that price, after tax, it’s $1.43 per month, $17.17 per year.  It’s only $14.38 if you buy it at Sam’s Club ($6.98 + tax for 5 qts.)

Salt, 8 lbs- 4# box at Costco or Sam’s Club is a dollar; $ .16 per month, $2 per year.

Legumes, 60 lbs– the cannery sells black beans, pinto, and white, from $14.10 to $16.30 for 25 lbs.  Averaging the prices, it’s  $2.99 a month, $35.92 per year.

Water, 14/gal/person-   You can store this for free by using 2- and 3- liter pop bottles, or juice containers (not milk jugs- they break down).  Or use the 5-gallons square jugs or big blue barrels; they’ll run you about $1 per gallon of storage. 

When you’re done storing these items, you might decide to add a few ‘gourmet’ items- but that’s just extra stuff.

Notice that the costs were just for food, not containers to store them in. Most of my storage containers cost nothing.   You CAN get buckets for free, with a little effort- most bakeries give them away; all their frostings and fillings come in those buckets.  Plan on washing them at home.  There are two main sizes; 5 gallon and 2 1/2  gallon.  I keep packages of dried fruit in the smaller buckets, also cornmeal or other things that I don’t use as much.  They are a great size for a pantry, too.  Some of the buckets have gaskets, some don’t.  The ones that don’t seal well are still good for storing sugar. 

If you want all your wheat, powdered milk, sugar, and legumes in #10 cans from the cannery, it will cost you $85.83 more to get a full year’s worth, $65 to do 9 months' worth.

Here’s the year’s worth breakdown and quantities:    51 cans of wheat $137.80, 11 cans of beans $48.95, 10 cans of sugar $46.50, 4 cans of powdered milk $28.20.

 I don’t can my wheat, sugar, or beans because we go through large quantities; one batch of bread would use a whole can.  Pretty silly storage for me.  Besides, it’s easier for me to find space for 10 buckets than 60 #10 cans; they hold about  the same amount of food.


Best Drop Biscuits
 adapted from Cooks Country
Makes 12

 1 cube butter, melted and cooled a few minutes- set aside 1 Tbsp. of this.
1 cup cold buttermilk or sour milk  (1-2 Tbsp. vinegar in 1 cup regular milk)
2 c. flour
2 tsp. baking powder
½ tsp. baking soda
½  tsp. salt  (3/4 tsp. if you used unsalted butter)
1 tsp. sugar

 Heat oven to 475 degrees, no, that’s not a typo.  Mix together the butter (except reserved) and buttermilk; stir until the butter forms clumps.  (This is a faster way of getting the same results as ‘cutting in’ the butter.)  Mix all the dry ingredients together, then pour in buttermilk mixture.  Stir until just mixed in and dough pulls from side of bowl.   Drop onto  greased or parchment-lined cookie sheet.  A greased  ¼ c. measuring cup makes the perfect size scoop.    Brush with reserved butter.  Bake until tops are crisp and golden, about 12-14 minutes.    Serve warm.  These also reheat well the next day (10 minutes at 300 degrees) and freeze well, too.

You can use powdered milk in this: mix in 3 Tbsp dry milk powder when you’re stirring together the dry ingredients.  Use ice water  and 1-2 Tbsp. vinegar to make 1 cup, stir with the melted butter.

 
0 Comments

Year's Supply quantities, Roast Chicken Dinner with rice, and apple crisp

10/26/2010

0 Comments

 
Hi,

Remember  this?

"We encourage members world-wide to prepare for adversity in life by having a basic supply of food and water and some money in savings.” “For longer-term needs….gradually build a supply of food that will last a long time  and that you can use to stay alive” (from All is Safely Gathered In, First Presidency pamphlet)

Here is what a basic supply of food includes:  it will provide about 2200 calories a day, which means you’ll probably get 1800 and your husband will get 2600.  This is less than most people are used to, especially if you're suddenly living a 'more active' lifestyle, but it will keep you alive!

300 lbs grains- includes Wheat, Rice, Rolled Oats, Dried Corn, Popcorn, Flour, Pasta Products, Dried Potatoes.  Some lists say 400 lbs per person, but the current Church site says 300.  Take your pick, according to what you can handle.  Storage-wise or hunger-wise; that extra 100 lbs provides an extra 435 calories per day.

16 lbs. powdered milk- this is just enough for cooking, about ¾ cup per day.  You can store instant, regular powder, and canned milk.  It takes about 5 (12-oz) cans to equal one pound of powdered milk

60 lbs sugar- this includes white sugar, brown sugar, powdered sugar, honey, molasses, jam/jelly, corn syrup, fruit drink mix, gelatin.  If you have honey that crystallizes, set the bottle in the sun on a warm day, or put it in a pan of water on lowest heat overnight.  It will become liquid again.  You will want more sugar than 60 lbs. if you can your own fruit.

10 quarts cooking oil (2 ½ gallons)- yes, YOU NEED FAT.  Your brain is made mostly of fat.  Guess what happens if you don’t get any fat in your diet?  Plus, it’s a lot of calories for very little storage space.  The darker & cooler you keep it, the longer it lasts.  Fats include shortening, cooking oil, butter/margarine, mayonnaise, peanut butter.

8 lbs salt per person-  this is the cheapest of them all!   In addition to the round canisters, you can buy salt in 4-lb rectangular boxes; these stack together more efficiently.  At Sams’ Club, these boxes are just under $1.  Woo-hoo!  Two bucks and you have your personal salt for the year!

60 lbs. legumes, dried- includes soybeans, pinto beans, white beans, kidney beans, lima beans, anything that ends with ‘bean’ (unless it begins with ‘jelly’), black-eyed peas, split peas, and lentils.  These are a great, inexpensive source of protein.  Store the same as wheat- dry, clean, dark and cool  if possible. It takes 4 ½ (15 oz) cans to equal one pound of dry beans.

14 gallons water per person.  This is just 2 weeks’ supply, for drinking and a tiny bit for washing; the minimum our church leaders have counseled.  You may also want a way to purify water for longer-term use.  To purify, you can boil water for 2 minutes, or use chlorine bleach (plain only, not scented!)  If the water is clear, use ½ tsp. per 5 gallons of water.  If the water is cloudy, use double; 1 tsp. per 5 gallons of water.

Children do not need a full adult’s portion.  For them, figure age 3 and under= 50%, ages 4-6= 70%, ages 7-10= 90%, ages 11 and up= 100%.

Obviously, kids' ages are always changing, so when I calculate what to have on hand ( I inventory every Conference), I project out six months to a year. For instance, if someone is 6 years old, I count that child as 7 years. That way I'm not always slightly behind when it's time to replenish.

 * * * * *

Recipes today are for a whole meal….

Roast Chicken               From Living On a Dime, Jan 2010.  
Here is a very basic but yummy recipe. You can also put this in a crock pot to slow cook all day.


1 (3 lb.) whole chicken
Salt and pepper to taste
1 Tsp. onion powder
1/4 cup butter or margarine 
1 stalk celery, leaves removed

Season the whole chicken inside and out with salt, pepper and onion powder. Place breast side down in pan placing margarine and celery into cavity. Bake at 350° for 1 hour and 15 minutes or until internal temperature is 180° (82° C). You can baste with juices or melted margarine once or twice. Remove from oven and cover with foil for 30 minutes and let it rest before cutting.

You can easily adapt this recipe to your own likes and dislikes. For example, you might use garlic powder instead of the onion powder, you could slide slices of lemons or garlic cloves or even onion slices under the skin. Try other seasonings, too.

The main thing that makes this recipe great is cooking it breast side down, which makes it extra juicy.

Cheesy Peas and Rice

2 1/4 cups rice, cooked                                              
1 (10 oz.) pkg. frozen peas, thawed

1 (6 oz.) can of mushrooms, drained                          
6 oz. Velveeta, cubed*


Combine all the ingredients in a greased 1 1/2 qt. baking dish. Cover and bake at 350° for 20 minutes.

I didn't used to buy Velveeta because it was more expensive than other cheeses, but since it is the same price or less than cheddar now, I buy it more often.


Apple Butterscotch Crisp

This recipe is good served with ice cream or, for something different, try a slice of cheese or a dollop of sour cream.

 5 large (7 small) apples, sliced and peeled               
1 tsp. cinnamon

1 cup brown sugar, depending on your apples           
1/2 cup flour

1/2 cup quick cooking oatmeal                                      
1/2 cup butter or margarine, cold                                     

1 pkg. (3.5 oz.) cook and serve  
          
butterscotch pudding


Place apples in a greased 9x13 pan. Mix everything else in a bowl, cutting in* the butter until it resembles coarse crumbs. Sprinkle over apples. Bake at 350° for 40-45 minutes or until apples are tender.

You can leave out the butterscotch pudding; it won't throw off the recipe. It will still be delicious. 

*Whenever a recipe says to cut in something, that means to take a pastry cutter and mix the butter, margarine or shortening in with the dry ingredients until the mix gets crumbly looking. (I just use my fingers. It is easier for me to wash them than a pastry cutter.)

Roast Chicken Leftovers:

Chicken Spaghetti Bake-  Make your favorite spaghetti, mixing noodles and sauce. Instead of adding hamburger to it or leaving it without meat, add some cubed leftover chicken. Put it in a 9x13 greased pan sprinkle with mozzarella cheese and grated Parmesan cheese. Bake at 350° until heated through and cheese is melted.

Make Chicken Soup with leftovers- see the recipe for turkey soup.  Use ¼ the amount of water and spices for chicken because it’s so much smaller!

Leftover Leftovers- If you have any of this soup left, thicken it with a little cornstarch or flour mixed in water. Make a batch of biscuits or use any leftover biscuits you have and pour the thickened soup (now like gravy) over it.
0 Comments

    Need a Search bar?
    One day I may upgrade my website-- but until then, use your web browser search bar. Type in my web address and what you're looking for, like this-- 
    www.theprovidenthomemaker.com  pumpkin --  and you should get results.


    Author

    I'm a disciple of Christ, a member of the Church of Jesus Christ of Latter-day Saints, a family-defending, homemaking, and homeschooling mom of eight children, two of whom sometimes can't have milk or wheat. Growing up on a farm in a high mountain valley, my parents taught me to 'make do', work hard, smile, and help others.  I love cooking, learning, growing food and flowers, picking tomatoes, and making gingerbread houses --which CAN be made allergy-friendly-- with my children.  I hope you find something to help you on my site!

    Archives

    April 2024
    July 2023
    April 2022
    September 2021
    March 2021
    December 2020
    April 2020
    March 2020
    February 2020
    January 2020
    December 2019
    November 2019
    October 2019
    September 2019
    August 2019
    July 2019
    June 2019
    May 2019
    April 2019
    January 2016
    November 2015
    October 2015
    September 2015
    March 2015
    February 2015
    November 2014
    October 2014
    September 2014
    August 2014
    July 2014
    June 2014
    May 2014
    April 2014
    March 2014
    February 2014
    January 2014
    December 2013
    November 2013
    October 2013
    September 2013
    August 2013
    July 2013
    June 2013
    May 2013
    April 2013
    March 2013
    February 2013
    January 2013
    December 2012
    November 2012
    October 2012
    September 2012
    August 2012
    July 2012
    June 2012
    May 2012
    April 2012
    March 2012
    February 2012
    January 2012
    December 2011
    November 2011
    October 2011
    September 2011
    August 2011
    July 2011
    June 2011
    May 2011
    April 2011
    March 2011
    February 2011
    January 2011
    December 2010
    November 2010
    October 2010
    September 2010

    Categories

    All
    Alcohol
    Alternate Cooking
    Appearances
    Apple
    Apricots
    April Fools
    Aprons
    Bananas
    Beans
    Beef
    Beets
    Bench
    Beverages
    Bonnet
    Bread
    Breakfast
    Budget
    Budgeting
    Cake
    Candy
    Canning
    Carrots
    Cheese
    Chicken
    Children
    Chocolate
    Christmas
    Cleaning
    Coconut
    Comfrey
    Common Core
    Constitution
    Cookbook
    Cookies
    Cooking Oil
    Crafts
    Dairy Substitutions
    Dehydrating
    Dessert
    Dried Fruit
    Earth Oven
    Earthquake
    Easter
    Edible Weeds
    Eggs
    Emergency Prep
    Essential Oils
    Faith
    Family Home Evening
    Fertilizing
    Food Storage
    Fourth Of July
    Freezer
    Frosting
    Fudge
    Garden
    Gardening
    Gingerbread
    Gluten
    Gluten Free
    Gold
    Government
    Grains
    Gratitude
    Hat
    Herbs
    Home Remedies
    Home Repairs
    Homeschool
    Home Storage
    Honey
    Hope
    Inflation
    Leftovers
    Legumes
    Lemon
    Main Dishes
    Mixes
    Mothers
    Noah
    Non Artificial Colors
    Non-artificial Colors
    Nuts
    Oats
    Oil
    Orange
    Paint
    Peaches
    Pear
    Pie
    Pizza
    Plums
    Poem
    Popcorn
    Pork
    Potatoes
    Powdered Milk
    Prayer
    Preparedness
    Projects
    Prophecy
    Pruning
    Pumpkin
    Quick Bread
    Rhubarb
    Rice
    Salad
    Salt
    Sauces
    Self Reliance
    Self-reliance
    Sewing
    Shelf Life
    Shelves
    Sky
    Smoothie
    Snacks
    Soup
    Spices Or Seasonings
    Squash
    Strawberries
    Substitutions
    Sugar
    Summer Fun
    Three Month Supply
    Time
    Tomatoes
    Trees
    Truffles
    T-shirts
    Tuna
    Ultra Gel
    Valentine\'s Day
    Vegetables
    Water
    Watermelon
    Wheat
    Work
    Year Supply
    Zucchini

    RSS Feed

Web Hosting by iPage