The Provident Homemaker
  • Recipes and Info
    • Making Bread
  • My Blog
  • Favorite Resources
  • Documents and Files
  • 52 Weeks of Building Storage

Will frost damage wipe out my tree fruit?

4/29/2011

1 Comment

 
Picture
photo credit: USU Extension
At this stage of bloom, 28 degrees will kill about 10% of your blossoms, 25 degrees will destroy about 90%.  Apples can still produce a full crop with only 10-15 % of the buds surviving.  Find out more, including how to protect your future fruit, below.

Do you have fruit trees in your yard?  Apple, pear, peach, nectarine, apricot, plum, or cherry?

Did you know that freezing temperatures won't necessarily knock out all possibility of getting a crop? 

And 32 degrees is not the death-knoll for apple blossoms.

The damaging temperature is different, too, if  your trees are almost ready to bloom versus being in full bloom.

The Utah State University Extension office recently published a chart with full-color photos of different bloom stages.  It tells what temperatures to watch out for.  It can be found here. 


So what can you do to protect your crop?  Farmers sometimes put out big propane heaters, but most homeowners don't have these on hand.

Two simpler suggestions: cover, or water.

They work on the same principle; to give some insulation to the blossoms. 

Way #1: If your tree is small, throw a sheet or blanket over it.  This should keep your tree maybe 5-10 degrees warmer than the surrounding air.

Way #2: - what my parents have always done-  turn on a sprinkler, set it so the water is hitting your tree.  Leave it on overnight.  The water will freeze, forming a layer over the blossoms.  The ice stays at 32 degrees, which means your blossoms stay at 32 degrees.  Niceice blanket.   No bloom kill.    Go easy on the water, though; you don't want to add so much (ice) weight that the branches start to break.

You can use this to extend your growing season in fall, too; protect your garden from an early freeze.

If you haven't planted your trees yet, consider putting them on a north slope.  The soil and air are cooler there, so the trees will bloom later.  When it's safer.
Just make sure they will get at least 6-8 hours of sunlight a day.  That's required for good fruit production.

1 Comment

Wheat Flour Basics

4/25/2011

1 Comment

 
Picture
Left- White Wheat
Right- Red Wheat

Picture
As you can see from the loaves, red and white wheat bake up nearly identically except for color.  They differ quite a bit in flavor.
"50%" means that the loaf is made of 50% whole grain, and 50% all-purpose flour.

Last time you made bread, was it coarse and crumbly once it sat for a while?

If it was, you had a gluten problem.  It could be that the dough wasn't kneaded enough to form good long gluten strands, or your flour may have not had enough gluten in it to begin with.   If so, use flour with a higher gluten content next time, or add gluten itself.  Cans of gluten are often sold with breadbaking supplies. 

Another thing that makes a big difference is how finely ground your flour is: if it's coarse, gluten can't form well.  Develop enough gluten, and you have small, even air bubbles in your bread, and a chewy texture.

Why is gluten so important?  

Gluten is the main protein in wheat.  It forms tiny elastic chains that allow the dough to stretch and hold together, and that matrix forms walls around the carbon dioxide bubbles produced by the yeast as it grows.   If there's not enough gluten, the cell walls break, leaving large, unevenly-shaped air bubbles.    Gluten is activated by liquid, warmth and kneading- which is why you use as little of those three when you're making pie crust.  That's one food that you want to avoid gluten forming.  Gluten makes great bread, but tough pastry.
 
Wheat comes in different colors and 'hardness', or protein content.  You can buy "soft white", "soft red", "hard white" and "hard red".   There are even distinctions among the hard wheats- it is often labeled as "spring wheat" or "winter wheat".  Winter wheat is planted in late fall, and grows using the moisture from winter snow and rain.   Spring wheat is planted in spring, and grows through the hot, dry summer.  The more water the wheat gets, the more grain it produces, but these higher yields result in lower protein content.  So hard spring wheat, growing when it's hot and dry, ends up with a higher protein content.  (This explanation is somewhat simplified- if you like scientific details, see here.)  If you buy a bag that just says "hard red wheat", assume it's winter wheat.  Being able to label wheat as "hard spring wheat" is a selling point, and the farmers get more money for higher-protein wheat. 

This also means that if you buy the cheapest 'hard' wheat, you'll most likely have lower protein content.  Which means it's gonna take a little more effort to make it into good bread.

Red Wheat, either hard or soft, has a deeper, heartier flavor, and a reddish-brown color.

White Wheat, hard or soft, has a more delicate flavor, and a light tan color.  If you're just starting with whole-wheat bread making, this is a good one, since the flavor is more subtle.  It tastes more like 'white bread', but better!  I love the taste and fragrance of freshly-ground wheat in bread.  Hard white wheats are relatively new to the market.

Hard Red or White Spring Wheat is usually between 12-15% protein (or gluten), the best-quality ones run between 14-15%.  This is what you want for good whole-wheat bread.

Hard Red or White Winter Wheat generally contains 11- 13% protein.

Soft Red or White Wheat only has about 6-10% protein. 

The protein content can be as low as 2%, or as high as 18%.  It depends on growing conditions, what variety the grain is, and even how moist the wheat is.  And not all the protein is gluten: only the amino acids "gliadin" and "glutenin" will become gluten.  That's why oats, though high in protein, will not make good yeast bread on its own.  They don't contain gliadin and glutenin as part of the amino acid profile.  This is also why celiacs can have oats.
(see here for more info on amino acids and celiac.)
----------------------------

Soft wheat is best in quickbreads and things where you DON'T want gluten forming: cookies, pastries, cakes, quickbreads. (This also means that non-gluten containing grains and seeds are good for this group of breads.)

Hard wheat is best for yeast bread, tortillas, and pasta. When I use 100% hard wheat flour in bread,  I still have to add something to increase the dough strength- crushed Vitamin C, lecithin, dough enhancer, gluten, extended soaking, or using part all-purpose flour; see Making Bread for suggested quantities. 

See here for info about baking with whole wheat flour.
1 Comment

Natural-Dyed Easter Eggs

4/20/2011

0 Comments

 
Happy Easter! and good Passover!  For a short video about our Savior's role, and what this week means to us, see His Sacred Name: An Easter Declaration.  I'm grateful to have this holiday as a reminder of His life and willingness to do our Heavenly Father's will.  Eggs remind us of the promise of life from something that looks only like lifeless, tomb-like stone.
Picture
Picture
The yellow eggs were dyed using curry powder, the orange ones used onion skins.

When you dye eggs using natural colors, put water, a little vinegar, the eggs, and your 'dye' in a pan.  Boil to both cook the eggs and set the color. (See here to get The Perfect Hardboiled Egg.)  The colors tend to be softer and often muted- you won't get stop-sign-red anywhere.  Each egg ends up a little bit unique, though.  That's part of the beauty.  The vinegar helps the dye penetrate and set.  Use about 1 Tbsp for every 2-3 cups of water.

I'd heard that eggs should be washed first, to prepare the shells to accept the dyes.  I tried it and noticed no appreciable difference between the washed and unwashed eggs.  So save yourself the time.  Use eggs straight from the carton.  Or chicken, if you're so fortunate.  (NOTE:  the older the egg is, the easier it wil peel!)

For cool effects:
Before cooking/dyeing
:
-draw on it with crayons
-wrap it with rubber bands or yarn
-dab, wipe, or drizzle on a little oil or melted wax.
-put 1 Tbsp. oil in the cooking/dyeing water.  This will make some marbled irregularities on the eggs.

After cooking/dyeing:
-sprinkle with salt while still wet
-for a more marbled or mottled egg, rub it a little while it's still warm.  Or pat/rub with paper towels. 
-let the eggs cool while still draped, wrapped, or sprinkled with what you used to dye it.  (See photos.)
-partially- or completely- submerge in another dye.  
-draw on it with markers when dry

To make it gleam, rub a little vegetable oil on the egg after it has cooled.

Ideas for dyes:
Blue to Purple- grape juice, red grapes, blueberries, red cabbage, blackberries, violets
Brown- white oak bark, juniper berry, coffe, barberry twigs, black tea
Buff- crushed walnut shells, green tea
Golden Orange- onionskins (yellow onions)
Orange- turmeric, ground cumin, onionskins plus beet juice
Mauve- grape juice
Green- spinach, kale, alfalfa, parsley, carrot tops.  Or dye an egg yellow then dip in blue dye.
Pink- beet juice- let eggs sit for 30 minutes in it (liquid from a can of beets, or from cooking them)
Reddish Purple- paprika, skins from red onions; beets- boil in the juice, shredded, sliced, or chopped Yellow- Boil with 1-3 Tbsp. turmeric or curry powder, or dye when already cooked- use 1 tsp. turmeric and 1/4 tsp. vinegar in 2/3 c. boiling water
Picture
These were dyed using 1 Tbsp. curry powder in just enough water to cover the eggs. The two lighter eggs were pulled out immediately when fully cooked. The others were cooled in the colored water, with a tray of ice cubes added to help them stop cooking.

Picture
Fill the pan with eggs, stuff it as full as you can with your dye (onionskins, here), and bring it to a boil.
If you're using a spice or a powder, use 1-3 Tbsp.

Picture
For comparison:
Clockwise, starting with upper left: (1) boiled and drained to cool; (2) boiled and covered with wet onionskins while cooling, (3) boiled and left in the hot dye until completely cool, (5) plain white store egg, (6) plain brown store egg.

Picture
Each egg ends up a little marbled, a little unique.  I  find them fascinating to look at.

Picture
Any place your fingers, spoon, pan, paper towels, or other eggs touch, the dye will be lighter. 

0 Comments

Perfect Hardboiled Eggs

4/20/2011

1 Comment

 
Picture
Alright, perfection is in the eye (or mouth!) of the beholder.  My perfect egg may not be yours, but here goes...

The goal was to get tender whites and moist yolks, with the least amount of energy possible.  I put a dozen eggs in a pan, added water just to cover, put a lid on, and turned the stove on high heat.  Eight minutes later, when they came to a boil, I turned the heat OFF, left the lid on, and started timing. 
Picture
These are the experimental eggs:

Front row, starting left: cooked for 5 minutes after the water boiled; middle front egg was cooked 6 minutes; front right got 8 minutes.
Back left was pulled out at 10 minutes; back middle at 12; back right at 15 minutes.   All eggs were put into cold water as soon as they came out of the pan, to make them stop cooking. 

The five-minute egg was very tender, very moist, but would mash densely if you wanted deviled eggs.  For eating, though, I thought it was great.  Same with the 6-minute egg.  My kids preferred them at the 8-15 min marks. 

Picture
The left egg was left in for 15 minutes.  You can see it was too long because of the grey-green layer on the yolk's exterior. The one on the right was the 5-minute egg.

So for my idea of perfect hard-boiled eggs,  do this:

1- put eggs in a pan, cover with cold water.
2- Put a lid on; heat on high until the water reaches a full rolling boil.
3-Turn heat off; leave pan on the burner, with lid on.
4- 5-6 (or up to 12) minutes later, dump hot water and cover eggs with cold water.  Cool and eat.

Your timing may be different, but this will give you a good starting point. 

For instance, your elevation will make a difference.   I live at about 3500 feet in elevation.  The boiling point of water at sea level is 212 degrees F, but is only 205 degrees at my elevation.  That means that if you're cooking these at sea level, they'll be done a little bit sooner, since the water was hotter.  For every 500 feet in altitude, the boiling point goes down about one degree.
If you have a gas stove, you might need an extra minute.  (I don't know, just guessing!)  My stove is electric, and the burners stay hot for a couple minutes.  Gas burners don't, so they, and the pan on them, would cool faster.

Leftover hardboiled eggs?

Here's a family favorite recipe:

Tuna Burgers,  serves 4              

3 hard-cooked eggs, chopped

1 (5-oz) can tuna, drained and flaked

½  c. (2 oz.) shredded sharp Cheddar

¼ c. chopped green pepper or celery

¼  c. chopped onion

1/8  tsp. garlic powder

¼ tsp. salt

¼  tsp. pepper

¼ c. mayonnaise

4 buns or Kaiser rolls, split


Heat oven to 400 degrees.  Mix everything together and spoon onto rolls.  Wrap in foil, then bake 15 minutes or until warm through.  Also good cold on lettuce as a salad.

Need more ideas?

  • Slice them into green salads (Chef Salad, if you also add your leftover ham!) Or maybe Wilted Spinach Salad with warm Bacon dressing?
  • chop them and add to white sauce; serve over buttered toast (My family calls this Creamed Eggs and eats it for breakfast.) For Goldenrod Eggs, only add the whites to the white sauce.  Push the hardboiled yolks through a sieve over top of the sauce on toast. 
  • make deviled eggs
  • sliced or chop and add to casseroles
  • make egg salad/sandwiches
  • egg-olive sandwich: chop 4 eggs with 8 stuffed olives and 2 T mayo.  Spread on bread.
  • add to potato salad
  • stir into macaroni salad
  • add to chicken salad, especially with curry powder added
  • mix with cooked hamburger and Mexican spices for empanada filling

If you need actual recipes, there's a great collection at Sparkpeople.com

1 Comment

The Early Garden; Sweet Onion Poppyseed Dressing

4/15/2011

0 Comments

 
Picture
Self-sown baby leaf lettuce. 

I'm really looking forward to eating them in a couple weeks!

Picture
Cabbage seedling.  The tiny green plants around the right side are volunteer flax. 

Right now, in USDA Zone 5, we are still having regular frosts.  The weather alternates between November-like grey skies with snow, and May-like days of bright green grass and leafing trees.  Still, some vegetables will grow happily in these conditions.
Plants that are growing in my garden now are onion, peas, kohlrabi, cabbage, beets, leaf lettuce, carrots, Swiss chard, parsley, rhubarb, horseradish.  There are lots more that will grow now; see Gardening 101 for more of them.  My garden has been pretty neglected this spring so far; the only reason the items above are growing is that 1) I let them self-seed, or 2) they overwintered. 

If you're new to gardening, start with 2-4 kinds of plants.  A great resource for both new and veteran gardeners is the "In The Garden" series  from the USU Extension Office.  This series covers 55 different garden vegetables, herbs, and fruits: from Artichoke and Asparagus, to Wasabi, Watercress, and Watermelon. (You thought I'd say Zucchini last, didn't you!  It's listed under "Summer and Winter Squash".) Each one has 1-2 pages of information on what type of soil the plant prefers, how much sun it needs, what nutrients it needs to thrive, and more.
If you wanted to start tomatoes or other plants indoors, you still can.  Remember that some things can be planted directly in the garden as seeds now (see above).  If you can avoid transplanting, it saves the plants some stress.  One of my favorite garden helpers is called a Wall-O-Water.  Frost-sensitive plants, like tomatoes, peppers, and watermelon, can go outside even now, if they're protected by them.  Most garden centers sell them, three to a package, for around $10.  Use them year after year, too.

If you're still looking for indoor seed-starting information, here's a quick summary:

Simple version of instructions for starting seeds indoors

Use any clean container with good drainage.  You can use commercial planting trays or pots, or poke holes in the bottom of yogurt containers, paper cups, eggshell halves, or whatever you have.  You can even use cardstock or a couple layers of newspaper to form little boxes or pots. Or cut 1 ½-2” lengths of toilet paper tubes to fill with dirt and plant in. Use a cookie sheet or plastic bin’s lid underneath your planting pots, to protect surfaces below. Plant the seeds in a lightweight mix, not garden soil.  Keep moist and dark, and covered, until they sprout.  Putting them on top of a freezer or furnace will warm the soil and help them germinate.

After sprouts appear, for best results, use a fluorescent shop light suspended 4-6” above the plants.  14-18 hours a day is ideal.  Plants will be tall and scraggly when they don’t have enough light.  They sometimes will fall over, damage the stem that way, and die.   Water them only after the top of the soil has dried out. If you’re not sure how often to water, poke your finger down ½” below the soil’s surface.  If it feels cool there, it is still moist. Overwatering leads to fungus and diseases.  Use a little fertilizer in the water every day. 

They can be transplanted after their second set of true leaves appear.   They’ll only be a couple inches tall if they’ve had enough light.  If the garden’s not ready for them, you can transplant them into larger pots so the roots can keep growing.  You may use plastic containers (yogurt cups, cottage cheese containers) with holes punched in the bottom.

 
For more information, see:


Starting vegetable seed indoors:
http://extension.usu.edu/saltlake/files/uploads/pdf/Starting%20Seed%20Indoors.pdf 

http://extension.usu.edu/htm/news-multimedia/articleID=12035

 
Space requirements for vegetables: 
http://extension.usu.edu/htm/publications/by=category/category=

__________________________________

Sweet Onion Poppyseed Dressing
1  Tbsp. poppyseed
1 Tbsp. prepared mustard
1 c. light olive oil (or other oil)
½  c. vinegar (I prefer apple cider vinegar here)
½  c. sugar*
1 tsp. salt
1 small onion, or a piece the size of a small egg 

Mix everything in a blender until smooth.

*If you want to reduce the sugar, cook a whole medium or large onion in 1 Tbsp. of the oil until tender.  Cover and cook on low another 10 minutes, until caramelized.  This makes it sweeter.  Mix the dressing as above.  Add 1-2 teaspoons of sugar for best flavor.  Use immediately or store in fridge. 

This recipe came from a neighbor ten years ago; (it's been modified a bit by me) and was from her grandmother.  The salad she poured it on was made with spinach, lettuce, sliced onion, crumbled bacon, sliced mushrooms, peas, Swiss cheese, and cashews.  One of my favorite salads.  Ever.

0 Comments

Homemade Marshmallow Eggs and Chicks

4/8/2011

0 Comments

 
Picture
What a fun basket to make and give!  (or eat...)

Picture
Chocolate-covered cherry marshmallow egg.

Marshmallows are one of those things that most people don't realize you can make at home.  They are simple, pretty quick, (15 minutes if you make squares,) and superior to what you can buy.  (Most homemade things are, aren't they?) 

To get the actual recipe and to see photos of the marshmallow cooking- and beating- process, see this post.
Egg- shaped marshmallows- fill a couple 9x13 pans (or one jellyroll pan) with 1- 2” of flour.  Make egg-shaped indentions in the flour using a clean egg or the back of a large spoon.   Pour, drop by spoonfuls,  or pipe marshmallow into the indentations.  When they’re set up, dust the tops with flour, cornstarch, or powdered sugar.  Great dipped in chocolate (brush extra flour off first) and decorated.

The flour can be put back in your canister and used for something else.


Chick-shaped marshmallows (‘Peeps’)- Whip the mixture until it can hold a shape.  Put the slightly-cooled whipped marshmallow mixture into a pastry bag, no tip needed.  Or put in a gallon-sized ziptop bag, with ½” of one corner snipped off.  Sprinkle a cookie sheet with a layer of granulated sugar, colored if you like.  Squeeze the marshmallow sort of into an upright ‘Z’, pulling off to form a beak.  Make them so the sides just touch; this gives them extra support.  Sprinkle with sugar.  When set, pull apart and roll in a small bowlful of sugar. Coating them with yellow-tinted macaroon coconut would be very cute, too.

Picture
The chick on the right was made when the mixture wasn't beaten quite enough.  If you're not sure, scoop some on top of itself in the mixing bowl. If it flattens, it's not ready.  If you already made them and they're flattening-- well, you weren't really going for realism anyway. 

Don't be too hard on yourself- they still taste the same!

Picture
If you want colored sugar on your chicks: put about a cup of sugar in a ziptop bag.  Add a couple drops of food color and a couple drops of water.  Shake or rub the bag until the color is evenly distributed.

Picture
Shape the chicks by putting the marshmallow mixture into a pastry bag -or a ziptop bag with 1/2" of one corner snipped off.  Pipe them by making sort of a 'Z'.  Pull away to form a beak.  (If they look more like a sleeping elephant than a bird, you can pinch of part of the 'trunk' when they've firmed.  Or just call it "charm".)

Picture
Sprinkle more sugar over the top.  This helps them not stick to you as much when you finish coating them.

How sticky are they without a coating?  As my hubby said, "Ever hear about Brer Rabbit and the Tar Baby?"

Picture
Put a chick in a bowlful of sugar, and flip it over using a fork or spoon.  After it's completely coated, do the next one.  If you want the external chewiness you get with Peeps, let them sit uncovered for several hours.  Or a couple days.

Picture
To make marshmallow eggs:

Pour flour in a 9x13 pan.  You need a layer at least 3/4" deep.  Make egg-shaped depressions using an egg or spoon.

Picture
You can get the marshmallow into your 'molds' by using a spoon...

Picture
Or with a pastry bag.  Make your own disposable pastry bag by snipping off 1/2" from one corner of a ziptop bag.  A gallon-sized bag will fit the whole batch at once.   Let the eggs sit aside at room temperature until they're firm.  This usually takes a couple hours.  Flip them over or sprinkle with more flour so they're not sticky.  Brush off any extra, then call it good or dip them in chocolate.

Picture
Dipping chocolate or confectionary coating is the easiest option for good results.  Sometimes you just don't have it, though, and a trip to the store defeats the purpose...

This is a 12-oz bag of chocolate chips, melted with 1 Tbsp. of coconut oil.  (Use between 1 tsp. and 1 Tbsp.) Heat in the microwave for one minute, stir, and heat for another minute. Stir until smooth.  Or heat over barely simmering water. 
Chocolate chips are thicker than dipping chocolate when melted.  The extra fat is to help thin them out.  One downside is that it doesn't set up firm- or stay that way- unless it's chilled.  So store in the fridge or freezer anything you coated with this.


Picture
Drop a marshmallow egg into the chocolate.  Flip it over with a fork or your clean, DRY fingers, then lift it out, onto waxed paper or plastic wrap.  If there's so much as a tiny spot not coated by chocolate, drizzle some onto it.  The whole marshmallow can dry out through a small hole in the coating.

If you get even a tiny amount of water in melted chocolate, it will 'seize'- turn lumpy and thick. 
If this happens, add a little more oil or shortening and try to get it to smooth out.

Picture
Put the dipped eggs in the fridge for 15 minutes, or in the freezer for 5-10 minutes, until the chocolate sets up.

Picture
If you have leftover chocolate,  pour it onto waxed paper, plastic wrap, or parchment, chill until mostly set, then cut into small chunks.  Use them in place of chocolate chips.

Or turn the chocolate into truffles by stirring in 1-3 Tbsp. butter.  Pour into a foil-lined pan and chill until set. Cut in 3/4" squares and roll in powdered sugar, cocoa, or nuts.

Picture
An easy nest can be made with a lunch-size brown paper bag.  Fold the top over, then scrunch it down to make a nest shape.  Add some grass, and put in your eggs or chicks. 
I saw the paper-bag idea in Family Fun magazine  They glued twigs on, but I didn't want sticks touching the marshmallows- and this way is is much quicker and simpler.

0 Comments

Homemade Marshmallows, and What's Preparedness?

4/8/2011

3 Comments

 
Picture
Light, fluffy, and springy homemade marshmallows.

Two quotes have been on my mind lately, they are:

“Preparedness, when properly pursued, is a way of life, not a sudden, spectacular program."  - Spencer W. Kimball

* * * * * * *

“ For God hath not given us the spirit of fear; but of power, and of love, and of a sound mind.” -2 Timothy 1:7

God is aware of us, and offers his love and power, as we keep trying to become the kind of person he intends us to be.  Are we adjusting our way of life to become more self-reliant? I know he blesses us as we do.

____________________________


This is a recipe my mom made every Easter; she made marshmallow eggs, dipped them in chocolate, and decorated them with a flower and our name.  We made marshmallows other times of the year, too, in just a simple square shape.  There are recipes available that use less gelatin; they are egg-white based.  This recipe, however, is as simple and quick as you can get, and doesn’t require heating sugar syrup to soft-ball.  These are also egg-free, dairy-free, and gluten-free.  There’s even a version that uses honey instead of table sugar.  To get instructions for making marshmallow  eggs or chicks (“Peeps”), seehere.


Mom’s Marshmallows

2 c. sugar                                                                  
3 envelopes (2 Tbsp.) unflavored gelatin
1 c. water
¼  tsp. salt, optional 

1 tsp. vanilla
 Powdered sugar and/or cornstarch for dusting

Combine gelatin and sugar in a small pan, stir in water and salt, if using.  Heat just until sugar is dissolved, then bring just to boiling.  Remove from heat and cool about 5 minutes.  Stir in vanilla, transfer to a large bowl.  Beat at high speed about 10 minutes or until it looks like thick marshmallow cream.  Pour into buttered 9x13 pan.  Let set a couple hours.  With clean scissors dipped in hot water or shortening, cut into squares.  Roll in powdered sugar and/or cornstarch.  Store airtight, unless you like them crunchy!


Flavored marshmallows:  Instead of the 2 c. sugar and the gelatin, use 1 c. sugar, 1 big (6-oz) box of flavored ‘Jello’, and 1 envelope (2- 2 ½ tsp.) unflavored gelatin.

Naturally flavored marshmallows:  Use fruit juice in place of water, and reduce sugar by 1-2 Tbsp.  Use vanilla or any other complementary flavor.  Almond extract is great with cherry juice; orange oil, zest, or extract is good with strawberry, lemon oil/zest/extract with raspberry, 1 tsp. ground cinnamon with apple juice….  Just don’t use oils in an egg white-based marshmallow recipe; it won’t whip.  Jell-0 brand  gelatin says that it won’t set if you use “fresh or frozen Pineapple, Kiwi, Gingerroot, Papaya, Figs, or Guava.”  So be aware those might not make marshmallows, either.

Chocolate marshmallows:  Add 1/3 c. cocoa to the mixture before whipping. Use the optional salt.

Toasted-Coconut marshmallows- toast 1 ½ cups of fine-flake coconut.  Take any shape marshmallows, after they’ve set up, and spray them with a fine mist of water or roll them on a lightly wet surface.  Roll them in the coconut.   If you don’t have fine-flake coconut, put two cups of regular sweetened shredded coconut in a food processor.  Pulse until the pieces are mostly under ¼” long.

Honey marshmallows: use 1 cup plus 2 Tbsp. honey instead of the 2 c. sugar.  Reduce water to ¾ c.  Or use a 2/3 batch: ¾ c. honey, ½ c. water, 2 packages unflavored gelatin.  These would be good with a little lemon extract/oil, or 1 c. fine flake (macaroon) coconut stirred in at the end.  Using a couple tbsp. of lemon juice in place of some of the water may work, but having a lot of Vitamin C prevents the gelatin from setting properly.  I wouldn’t use fresh lemon for sure, only bottled.  If it doesn’t set, you’ll know why.  If it does set, I’d love to know!
Picture
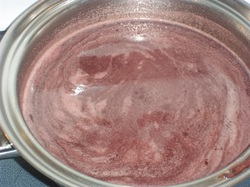
This batch was made with tart cherry juice instead of water.  Normally the mixture is off-white before beating.

After you combine the gelatin, sugar, and water, you only need to bring it to a boil.  You don't need any particular temperature, just make sure the sugar and gelatin have dissolved.

Picture
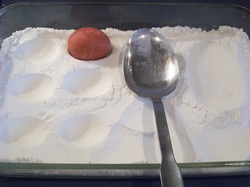
Prepare your pan while the mixture cools a few minutes.  For square marshmallows, just butter a 9x13 pan.  For eggs, fill couple pans with a 1-inch-deep layer of flour.  Make egg-shaped indentations to mold your marshmallow eggs.  A clean egg from the fridge, or a big spoon for big eggs.

Picture
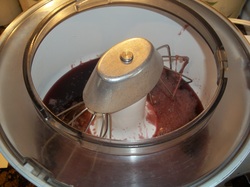
Pour gelatin mixture into a big bowl (a standing mixer is ideal), add vanilla, and start beating it on high speed.

Picture
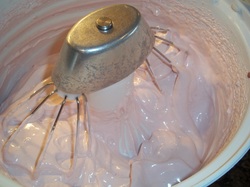
This is mostly beaten.  It will set up great at this point, but if you want puffier eggs or chicks, keep beating.


Picture
This is thick and fluffy, perfect.  It holds its shape pretty well.  Pour into your prepared pan, and let set up, at room temperature, for a couple hours, until firm.

Picture
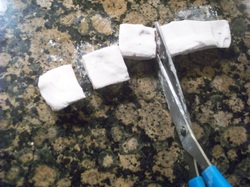
Cutting square marshmallows is easiest with  scissors.   You can dip them in hot water or grease them.  A quick way is to poke them down into a container of shortening or coconut oil.  After snipping, roll them in more powdered sugar or cornstarch.  Store tightly covered.

Picture
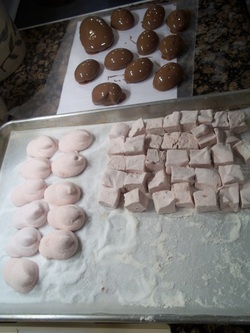
This is the yield of a whole batch of marshmallows.  Well, almost a whole batch.  We had to taste-test, you know...!

3 Comments

Building an Earth Oven

4/6/2011

4 Comments

 
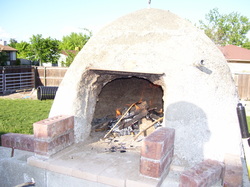
Bakeries boast if they use a brick oven for their breads.  Why? 
These ovens cook using multiple forms of heat- conduction, radiant, and direct heat.  Add some steam, and you get some seriously fabulous crust on your bread.  Pizza?  You better believe it.  You cook it at an ideal 700 degrees Fahrenheit; a thin-crust pizza is done after only 3 minutes, emerging bubbling and with a lovely smoky flavor.
Cook anything in this that you would in a regular oven.  And when it's cooled down, it can remain the ideal temperature for incubating yogurt, clear through the night.

This type of oven has the fire built on the cooking floor.  Fill the oven with wood, light it, and let it burn for 2-4 hours, until the oven walls glow white-hot.  My thermometer doesn't measure high enough to know how hot this is; it only measures to about 1400 degrees!

Scrape out the fire, quickly scrub off the oven floor, and let the heat "soak"- you're letting the temperature equalize all over the interior.  When the temperature has dropped to what you want, add some steam (for bread baking) by swabbing the oven floor with a wet cloth or mop.  Load it up with your bread, or turkey, or squash, potatoes, casserole, or whatever-- and close the oven door to bake.


It's called an earth oven because it's made using packed earth; in other words, mud.  This makes it very affordable!  I highly recommend Kiko Denzer's book, Build Your Own Earth Oven.  It was invaluable to me, and has many excellent suggestions for making do with what you have locally.  He also has a great overview on Mother Earth News, right here.
You can make a fabulous oven out of nothing but dirt, sand, chopped hay or leaves, and some bricks or tiles.  There are even simpler versions around, using just rocks and dirt. 

Since I opted for several upgrades on this oven, it cost about $200 total. 

Items I got for free:
cinderblocks (a stack was in the yard when we bought the house)
sand (huge sandbox, in the photos' background)
bricks for the oven face

Items purchased included:
bags of cement for a foundation pad
rebar for reinforcing the foundation
rebar for reinforcing the cinder blocks
cement for reinforcing cinder block construction
one used steel entry door
one circular saw blade to cut the steel entry door
about 45 firebricks
1/2 cubic yard of dirt
a couple small buckets of refractory cement
portland cement and a bag of vermiculite, for the insulation layer.
12" of 1" diameter steel electrical duct tubing
one dial-gauge thermometer
mortar, used with the oven face, and some gaps in the cinderblocks

If the pictures below seem overwhelming, here are the steps in short form- prepare an insulated base for the oven; build a sand dome on it; pack moist earth all around  the dome (thermal layer); pack insulation around the thermal layer.  Finish with a breatheable plaster, for longest-lasting results.  The doorway can be molded in as you go, or carved out afterwards.

Picture
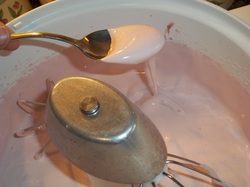
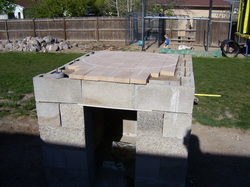
Sorry, I didn't take any photos before this point.  I poured a slightly sloped foundation pad, reinforced it with rebar, and dry-stacked cinderblocks, leaving some slots for drainage between cinderblocks at the low part (the back) of the pad.  To reinforce the cinderblock walls, I stuck rebar down every 2-3 cells, then filled those (with rebar) with cement.  (I did this because I have roughhousing boys, and live nearby a major  fault line.)  In this photo, half of it is in shadow; the oven floor is meant to be just above waist-high.  The area under the oven is to store wood.  To support the block over the opening, I found a piece of hardi-backer (cement) board.  The top course of cinderblocks were narrower than the ones below, which gave me a spot to place some kind of support for the oven floor.  I bought a used steel entry door and a special saw blade, and cut the door to fit.  On top of that went a layer of sand, for insulation, filled even with the top of the blocks (packed really well).  Firebricks were set snugly together for the oven floor, and a circle scribed in chalk.  This would be the inner diameter of the oven.

Picture
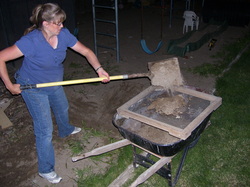
The sand was free, but it had lots of rocks- and small toys- mixed with it.  A frame with 1/2" hardware cloth stapled to it worked well for sifting.  If you notice my expanding waist in the next photos, it's because I was 8 months pregnant when I started this project, and 9 months along when it finished.

Picture
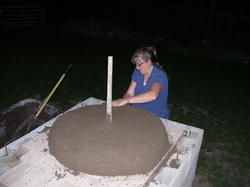
Build a dome of moist sand; this will be your oven's hollow part later.  There's a height-to-width radio that works most efficiently, but about ratio will give you an oven that cooks. 
The pipe in the middle was to show my required finished height.  Pack the sand really well, or it won't support the weight you're about to put on it.

TIP:  this takes a TON of sand, which you'll have to scoop out later.  At about this point I started added cinderblocks and other large items to the dome. That saved a lot of scooping.  And sifting.

Picture
Once the dome is as big as you want, pack and smooth it as best you can. A little water helps, and a board to press and smooth. 
If you want a layer of refractory cement, to help hold heat and protect the inside walls, add it now.  A thin layer, 1/8 - 1/4 " thick, is all you need.

Picture
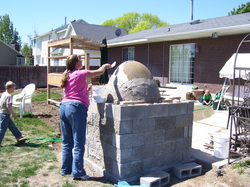
Once that's in place, mix your dirt- er, I mean 'earth'.  It needs to be moist enough to hold together, but not so wet it squishes when you pack it.  You can mix it on a tarp with your feet, or in a wheelbarrow with a shovel.  Starting at the bottom, tightly pack this earth in a layer about 4" high, and the width of your hand.  Use your closed fist to pack it, and a small bucket of the dirt to keep it handy. Spiral your way up the dome, always packing hard onto the layer below.  Don't apply any pressure to the sand dome.  Let this sit for a few days, then scoop out all the sand.

Picture
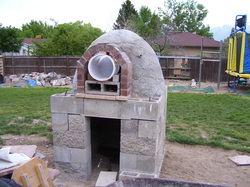
Once the earth layer is complete, add an insulation layer in the same way as the earth layer.  This makes a huge difference in how well your oven retains heat.  You can use more mud, mixed with any organic material- chopped leaves, straw, horse hair, you name it.  They will burn out when the oven heats up, leaving insulating air pockets behind.  This oven's insulation is a mixture of portland cement and vermiculite; I wanted it to be very durable.  Shape this layer with your oven door in place so it fits. 

The pipe sticking out in front of my face is a piece of metal conduit with a fitting to screw on the temperature gauge.  Next time I'll put it down close to the oven floor, which is where the bread bakes.  There's actually about 100-degree (Fahrenheit) difference between the oven floor and where the oven probe sits. 

Picture
If you want the oven to dry with as few cracks as possible, build a low fire and let it burn for several hours.


Picture
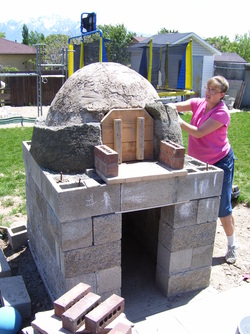
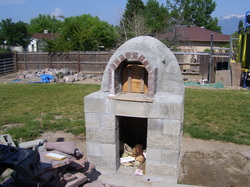
For a brick face-  a chisel and hammer yielded a really poor keystone for the arch.  Improvise to support the arch until it dries.   A bucket and cinderblock came to the rescue here.

Picture
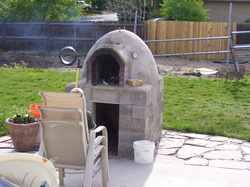
The completed oven. 

Picture
More completed, with flagstones set around it. 

When using the oven, keep a bucket of water handy. 

I still intend to make a roof for it- Utah winters are rough on it.  There are two eye bolts embedded in the top of the oven- all it will take is a piece of sheet metal, creased at the center to make a sloping roof, and two slits cut in it to slip over the eye bolts.  Twist them, and it should stay on.

4 Comments

Cookbook- Miscellaneous, Pies, Quick Breads 1

4/4/2011

0 Comments

 
Picture
Different pies and piecrusts.  The card only covers cream pie varieties, but has a few different crusts.

Picture
Did you want to see closer?

This one is chocolate-peanut butter cream pie.

Picture
Apple Cider Syrup is YUMMY.  We use the recipe to make many flavors.  Our latest favorite is made using mango juice.

Picture
Crunchy on the outside, velvety on the inside, simple Drop Biscuits.  The batch pictured uses about half whole-wheat flour.

Picture
Craggy, crisp, and hearty- use the Drop Biscuit recipe to make Drop Scones.  Here, I swapped some oats for some of the flour, and stirred in chopped figs and toasted nuts.

Miscellaneous card 1 apple cider syrup, basic syrup, easy jam, cooking grains, 5-min marmalade

Miscellaneous card 2 granola, granola bars, home remedies, seasoned salt, seasoned flour, spice chart 

Pies  cream pie filling, shortbread crust, meringue, crumb crust, pat-in-pan crust, traditional crust

Quick Breads card 1  drop biscuits, English scones, biscuit mix, soft breadsticks, rolled biscuits, shortcake, biscuit dough ideas

0 Comments

    Need a Search bar?
    One day I may upgrade my website-- but until then, use your web browser search bar. Type in my web address and what you're looking for, like this-- 
    www.theprovidenthomemaker.com  pumpkin --  and you should get results.


    Author

    I'm a disciple of Christ, a member of the Church of Jesus Christ of Latter-day Saints, a family-defending, homemaking, and homeschooling mom of eight children, two of whom sometimes can't have milk or wheat. Growing up on a farm in a high mountain valley, my parents taught me to 'make do', work hard, smile, and help others.  I love cooking, learning, growing food and flowers, picking tomatoes, and making gingerbread houses --which CAN be made allergy-friendly-- with my children.  I hope you find something to help you on my site!

    Archives

    April 2024
    July 2023
    April 2022
    September 2021
    March 2021
    December 2020
    April 2020
    March 2020
    February 2020
    January 2020
    December 2019
    November 2019
    October 2019
    September 2019
    August 2019
    July 2019
    June 2019
    May 2019
    April 2019
    January 2016
    November 2015
    October 2015
    September 2015
    March 2015
    February 2015
    November 2014
    October 2014
    September 2014
    August 2014
    July 2014
    June 2014
    May 2014
    April 2014
    March 2014
    February 2014
    January 2014
    December 2013
    November 2013
    October 2013
    September 2013
    August 2013
    July 2013
    June 2013
    May 2013
    April 2013
    March 2013
    February 2013
    January 2013
    December 2012
    November 2012
    October 2012
    September 2012
    August 2012
    July 2012
    June 2012
    May 2012
    April 2012
    March 2012
    February 2012
    January 2012
    December 2011
    November 2011
    October 2011
    September 2011
    August 2011
    July 2011
    June 2011
    May 2011
    April 2011
    March 2011
    February 2011
    January 2011
    December 2010
    November 2010
    October 2010
    September 2010

    Categories

    All
    Alcohol
    Alternate Cooking
    Appearances
    Apple
    Apricots
    April Fools
    Aprons
    Bananas
    Beans
    Beef
    Beets
    Bench
    Beverages
    Bonnet
    Bread
    Breakfast
    Budget
    Budgeting
    Cake
    Candy
    Canning
    Carrots
    Cheese
    Chicken
    Children
    Chocolate
    Christmas
    Cleaning
    Coconut
    Comfrey
    Common Core
    Constitution
    Cookbook
    Cookies
    Cooking Oil
    Crafts
    Dairy Substitutions
    Dehydrating
    Dessert
    Dried Fruit
    Earth Oven
    Earthquake
    Easter
    Edible Weeds
    Eggs
    Emergency Prep
    Essential Oils
    Faith
    Family Home Evening
    Fertilizing
    Food Storage
    Fourth Of July
    Freezer
    Frosting
    Fudge
    Garden
    Gardening
    Gingerbread
    Gluten
    Gluten Free
    Gold
    Government
    Grains
    Gratitude
    Hat
    Herbs
    Home Remedies
    Home Repairs
    Homeschool
    Home Storage
    Honey
    Hope
    Inflation
    Leftovers
    Legumes
    Lemon
    Main Dishes
    Mixes
    Mothers
    Noah
    Non Artificial Colors
    Non-artificial Colors
    Nuts
    Oats
    Oil
    Orange
    Paint
    Peaches
    Pear
    Pie
    Pizza
    Plums
    Poem
    Popcorn
    Pork
    Potatoes
    Powdered Milk
    Prayer
    Preparedness
    Projects
    Prophecy
    Pruning
    Pumpkin
    Quick Bread
    Rhubarb
    Rice
    Salad
    Salt
    Sauces
    Self Reliance
    Self-reliance
    Sewing
    Shelf Life
    Shelves
    Sky
    Smoothie
    Snacks
    Soup
    Spices Or Seasonings
    Squash
    Strawberries
    Substitutions
    Sugar
    Summer Fun
    Three Month Supply
    Time
    Tomatoes
    Trees
    Truffles
    T-shirts
    Tuna
    Ultra Gel
    Valentine\'s Day
    Vegetables
    Water
    Watermelon
    Wheat
    Work
    Year Supply
    Zucchini

    RSS Feed

Web Hosting by iPage