The Provident Homemaker
  • Recipes and Info
    • Making Bread
  • My Blog
  • Favorite Resources
  • Documents and Files
  • 52 Weeks of Building Storage

Week 47- Planning for Possible Quarantine - even (or especially) with children

3/7/2020

2 Comments

 
Picture
 We all want security, but mortal life is naturally full of unknowns and risks.
President Marion G. Romney said that the Church welfare plan was originally called the Church security plan.  “What was then meant by that title needs to be understood today; namely, that security, true security, comes only by living the principles of the gospel.  Security is the fruit of righteous living. (emphasis in original)

“…Time and time again we read of families, tribes, and whole nations keeping the Lord’s commandments and making covenants with him and being blessed by his Spirit. Because of righteousness, they prospered both spiritually and temporally. When they did not keep his commandments, they deteriorated both temporally and spiritually.

“The Book of Mormon contains principles which, if we would follow them, could bring us true security in a world wracked by wickedness, fear, and a host of economic problems. I believe our people want to achieve true security, but many of us are not following the course which leads to it.”

He said the whole plan rests on one basic premise—self-reliance. It’s properly supported by independence, work, family, and then the Church, to meet any gaps.

Every day it sounds like there’s a higher chance we’ll face a quarantine; how can we prepare to be self-reliant in that event?  And what can we DO if we’re at home for two weeks straight?  Self-reliance specialist Carolyn Nicolaysen recently published a good article answering these questions.

She suggests--

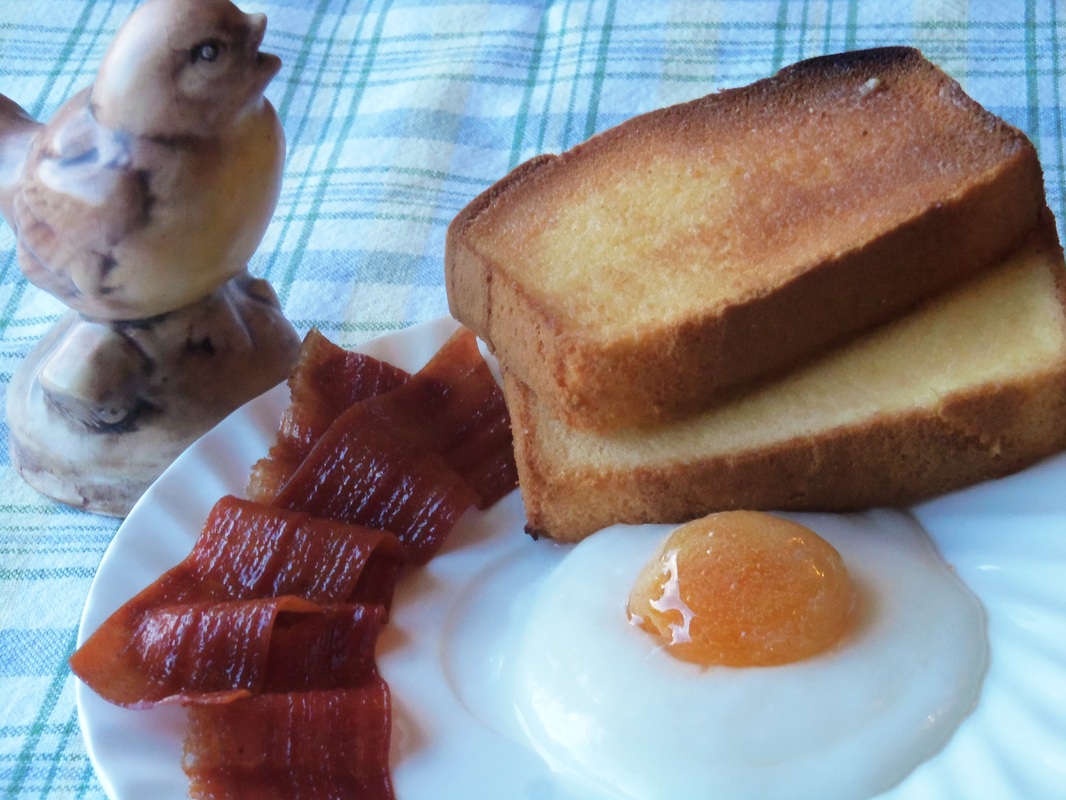
Read to yourself. Read a classic to the kids. Cook. Bake.* Try a new recipe. Do regular chores. Use Monopoly money for those chores, and set up a ‘store’ for the kids. Make a schedule. Write in your journal, or write letters. Catch up on projects around the house. Visit online with family and friends. Play games. Watch a movie, complete with popcorn and soda. 


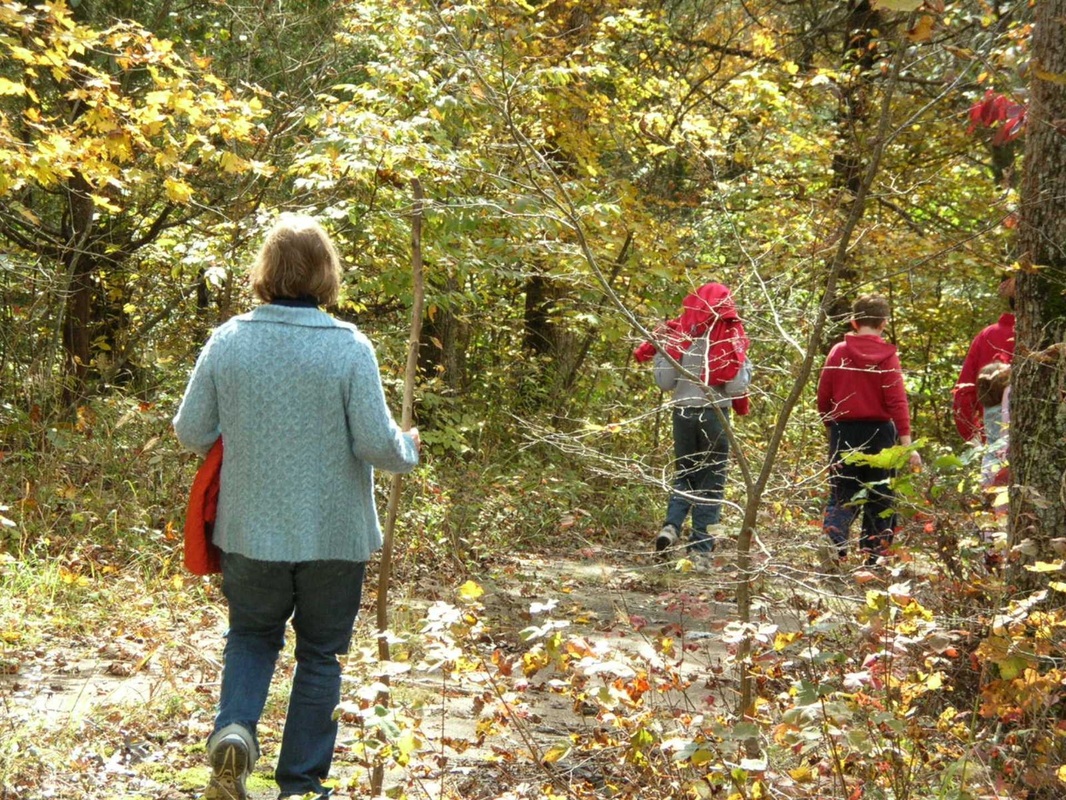
Add to that list these things-- spend time outside in your yard if you have one, or anywhere else outdoors if your 6+ feet away from others. Make crafts. Plant a garden. Build a fairy garden out of whatever you find outdoors. Write a list of things you love about these people you're stuck with. (It may help you appreciate them...) Memorize poems. Put on a play in the living room. Watch the ants outside.  Do some nature journaling, complete with sketches.  Spend an hour on your back looking for shapes in the clouds.  These are wonderful learning experiences for children-- no school building needed!

​So, prepare.  If we don’t need it for the virus that had Italy announcing today they’ll quarantine 16 million of their citizens—then that’s wonderful.  You’ll be that much more prepared for whatever else life throws at you, and be able to help your family and neighbors.

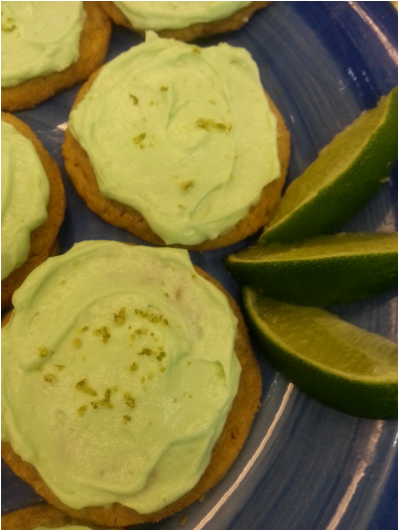
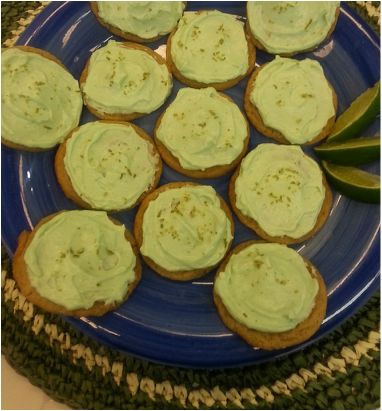
*Butter and eggs store for a long time, months past the 'best by' date.  Just FYI.  And chocolate stores even longer.  Maybe a quarantine is a great time to perfect your chocolate chip cookies!
2 Comments

Creamy Lime Pie Cookies

9/18/2015

0 Comments

 
This is my new favorite cookie.  It is for this week, anyway.  My kids and I invented cookies for a bake-off at the state fair, and this is one of the results.  One of the others we made took first place, but this one is my personal favorite.    
Contests are funny things anyway:  you'd think the best-tasting item wins, but that's not necessarily the case.  First of all, "best taste" always depends on who's doing the tasting. Or the judging, in this case.  Secondly, cookies are given a score, and in this contest, only 40% of it is from how the cookie tastes.  30% is how attractive it ('and its surroundings) are, and 30% here was 'creativity', which, like taste, is very subjective.  

This cookie was dreamed up by a daughter who loves key lime pie, and wanted a cookie that tasted like it.  You'll have extra frosting; you can make a half batch, or it can be frozen, or used to frost cupcakes, or spread on graham crackers... or eaten on a spoon!
My friend who dislikes frosting, likes this  frosting.
Picture
Creamy Lime Pie Cookies 
Makes 2- 2 ½ dozen

Graham Cracker Sugar Cookie:

¾ c. granulated sugar 
½ c. butter or shortening or coconut oil
1 egg
1 tsp. vanilla
1 sleeve graham cracker, finely crushed (about 1 ½ c.)
½ tsp. salt
½ tsp. baking soda
1 c. flour
¼ c. limeade concentrate, thawed.

Heat oven to 375 degrees. Cream shortening and sugar, add egg and vanilla.  Add cracker crumbs, salt, and baking soda; beat well. Mix in flour. Drop by heaping spoonful on lightly greased cookie sheet.  Bake 7-8 minutes.  Let cookies cool two minutes, then brush with the limeade concentrate.  All of it should be gone once all cookies are brushed.  Cool completely before frosting generously with Creamy Lime Frosting.


Creamy Lime Frosting

1 cube butter
2 c. powdered sugar
1 ½ tsp. vanilla
1/16 tsp. salt
4 drops green food color, optional
¼ c. limeade concentrate, mostly thawed
8 oz. cream cheese, still cool, cut in 1” cubes

In a medium bowl, combine butter, powdered sugar, vanilla, salt, and green food color.  Beat until fluffy.  Add limeade concentrate and whip the mixture.  Add cream cheese, a couple cubes at a time, and beat until mixed thoroughly.  Beat on high until light and fluffy, but don’t overbeat or it will go runny.
Picture


0 Comments

April Fools' Day Breakfast

3/31/2015

0 Comments

 
Picture
Mmm.... bacon, eggs, and toast!   

Or not.

Toast:
Pound cake, sliced and toasted.  Then buttered.

Eggs:
The white:  I used some quick frosting  (1 cup powdered sugar, 2 tbsp. melted coconut oil, a bit of vanilla, and enough milk-- any kind-- to let it softly hold its shape.)  Other options include nearly-melted commercial vanilla frosting, stirred sour cream, stirred vanilla yogurt, or stirred Greek yogurt.
The center is a dried apricot, plumped in hot water for about 20 minutes, then blotted dry and shaped by hand to look more round.  I stuck a whole almond inside to make the 'yolk' stand up better.
To make the 'yolk' look more wet, I brushed it with a little bit of corn syrup.

Bacon:
Today I found some natural fruit rolls that I'd not seen before.  I bought some, and found that rather than being the smooth, flat rollup I expected, it was full of different thicknesses in the stripes the machine put down.  This enabled it to pull off in strips to eat.  And it resembled bacon!  One roll yields about four  1 1/4" wide strips, which I cut using a pizza cutter.   Make them ripple a bit when you put them down.
Picture
0 Comments

Favorite Sugar Cookies

2/12/2015

0 Comments

 
Picture
To make cookie pops like the photo above, set the unbaked cookie on top of a craft stick before baking the cookies.  Be sure to cover at least 1 to 1 1/2 inches of the craft stick; press down gently on the dough.  

This recipe makes about two dozen, 3" round cookies.

Soft Sugar Cookies
1 stick butter (1/2 c.), softened
1 c. sugar
1 egg
1/3 c. buttermilk, kefir, OR sour milk (add 1 Tbsp. lemon juice to fresh milk to make 1/3 c.)
1 tsp. vanilla
1/2 tsp. baking soda
1 tsp. baking powder
1/2 tsp. salt
2 1/2 c. flour

Preheat oven to 375 degrees F.  Cream the butter with sugar; beat in the egg, buttermilk, and vanilla.  Combine baking soda, baking powder, salt, and flour; stir in to the other ingredients.  Grease or spray a cookie sheet.  

Put half the dough on a flour-sprinkled counter top.  Sprinkle a little flour on top to prevent your rolling pin from sticking, then roll about 3/8" thick.  Cut out with cookie cutters or canning jar rings.  (I used a ring from a regular-sized canning jar.)

 Bake for 7-10 minutes, depending on size and thickness, until  light golden brown on edges and underside.  Cool completely; frost with your favorite frosting if you like. 

This recipe also makes a great base for a Cookie Pizza.

Picture
To make the rose leaves, sprinkle some sugar on a flat surface, roll a gumdrop flat, a little bit at a time, flipping the gumdrop often so it stays coated with sugar as it flattens.  Trim with a knife or scissors.
0 Comments

Elsa Cape

10/24/2014

0 Comments

 
Picture
Here's a simple way to make a frosty cape for an Elsa costume.  My daughter and I are delighted with how it turned out:  so dainty and elegant!  You'll need one full-size sheet of paper, a can of white spray paint, and fabric.  For my 6-year-old's costume, I bought 1 1/3 yards of 60" wide nylon tulle, pale turquoise color.  Sheer nylon tricot or sheer chiffon would also work, and be less prone to ripping.  (No, ours has not ripped yet.)

Lay out the fabric and fold in half lengthwise, so it's 60" long and half the width you bought.  Cut 4-6" wide scallops along one narrow end.  

Fold the paper and cut out a simple six-pointed star.  Mine was about 4" across.  I reinforced the paper (now my stencil) and helped it lie flat by running 2" wide packing tape in a square around the snowflake.

  Spread the fabric on top of something clean that you don't care if paint gets on.  Darker colors under will make it easier to see the white paint.  In my case, I spread this on the lawn; we have a frosty decoration on it until next mowing!

Spray into your stencil, focusing on the center first, then spraying the points.  Continue until you have all you want, occasionally stopping to wipe excess paint off the stencil (the grass was good for this, too). 

Once the snowflakes are sprayed, 'frost' the edges and scallops of the cape by spraying along the edges.  

With some silver glitter glue or silver sparkle paint, draw on the snowflakes. Add some smaller ones made with only the silver.    Let dry completely.
0 Comments

Indoor S'Mores

7/17/2014

0 Comments

 
Picture
The fastest, simplest S'mores ever!  My 6-year-old had a blast making these nearly by herself.  If you have a toaster oven, you can make just a few and hardly heat the kitchen up at all.  Even a big batch doesn't make your whole kitchen hot, or make you smell like campfire, or have the neighbors wondering what's on fire.  
If you use GF/CF chocolate chips and GF grahams, these are also a gluten-free, dairy-free treat.

For a big batch, you will need:

1 cup chocolate chips (milk chocolate or semisweet, you choose)
one 10-oz bag regular marshmallows
1/2 cup graham cracker crumbs (I used precrushed ones) OR 4-5 crackers, crushed
Also:
A cookie sheet, an oven with a broil setting, and a sheet of parchment if you want the easiest cleanup.

Put the oven rack in the highest position.  Dump the chocolate chips into a microwaveable bowl; I used a Corelle cereal bowl.  Microwave for one minute; stir.  If it's not quite melted, microwave 30 seconds more; stir. Repeat if needed, but once you get past 2 minutes it overheats and clumps.  (You can rescue it by stirring in 1-2 tsp. oil.)

Dip the bottom half of a marshmallow into the chocolate, then dip into graham cracker crumbs.  Place on cookie sheet, at least 1/2" apart.

Turn the broiler on and put the marshmallows in.  If you have HI and LO options, here's what happened in my oven with them:

HI:  browned at 35-40 seconds.  Centers were still firm.
LO:  browned at 1 1/2- 2 minutes.  Nearly the whole marshmallow was now melted and gooey.  

Either way, watch these things closely!   Don't walk away for even a few seconds or they may be black when you get back.  Flaming marshmallows over a campfire in the dark may be entertaining, but they're not nearly as amusing in the house!

Picture
The marshmallows ready to be broiled.
0 Comments

Homemade Anna and Elsa dolls

5/3/2014

0 Comments

 
Picture
My 11-year-old daughter had decided she really, really wanted some Frozen dolls.  However, having used all her spending money previously on a couple plush My Little Pony toys, the ones we found were way out of her price range.

She flipped through a girls' sewing book, spent a couple days thinking about how to possibly make the dolls instead, and came up with this plan:  find a picture, use it for a pattern, sew two identical pieces together, color, stuff, and stitch closed.

We used plain white knit fabric from my fabric stash so the doll would be softer and a little more forgiving, stuffed it with plain old fiberfill For the Anna doll, we used this coloring page 
Elsa:  in her coronation dress, or with one hand out.  (The one hand out was pretty tricky to turn right-side out, but it worked.)

You'll need a picture, 1/3 yd of fabric (for 11" high dolls, but you'll have enough width for 4 dolls!), needle and thread, sewing machine (optional), a handful or two of fiberfill, and some non-water-soluble markers  (we used a combination of Sharpies and fabric markers).

1- Resize the picture to make the size doll you'd like. 
2- Add 3/8" all the way around the picture*, for a seam allowance, and cut this paper pattern.
3- Pin onto a double layer of fabric, and cut this out.
4- Unpin the pattern from the fabric, take ONE of the fabric pieces, put the pattern piece behind it, hold it up on a window, and, using a Sharpie or fabric marker, trace all the lines you'll need to color later.  Draw in the facial features, neck, dress design, etc. Invent what the back should look like, for the second fabric piece. :)
5- Put the right sides (drawn-on sides) together, and sew 3/8" from the edge, almost all the way around.  Be sure to backstitch when you start and stop!  Leave 2" open.
6- Turn the fabric right-side out, stuff with a handful of fiberfill.
7- Turn the raw edges of the opening inward, and stitch closed, knotting well at both ends.  
8- Color your doll with the markers, front, back, and sides.

*On the coloring pages, the necks are too narrow to pull the rest of the body through when turning the fabric right-side-out after sewing, so shoot for a finished measurement of 1" wide, and just draw the neck the width it should be.

She had a lot of fun marking these- so much that she also made Kristof and Olaf the same way.  

The only question she has left is how much of the ink will survive their first trip through the washer and dryer!

Picture
Picture
0 Comments

Chocolate Fudge Banana Muffins

4/12/2014

0 Comments

 
Picture
Warm, chocolatey, just sweet enough, high fiber, and with little pockets of gooey melted chocolate chips!   My sister-in-law posted a similar recipe on Facebook.  It sounded delicious and had very little added sugar.  The original recipe called for applesauce instead of oil, but I'm a fan using healthy fats alongside carbohydrates so that my kids and I aren't hungry again an hour after breakfast!  It helps you process the fiber in these, too.

Chocolate Fudge Banana Muffins - makes 12
(can be gluten-free and dairy-free)

3 medium bananas, very ripe, mashed (about 1 cup)
2 eggs
1/4 brown sugar
1/4 c. oil or melted butter (I like coconut oil in these)
1/3 c. cocoa powder
1 tsp. vanilla
1 1/3 c. oat flour (or you can use all-purpose flour or whole wheat flour)
1/2 tsp. baking soda
1 1/2 tsp. baking powder
1/2 tsp. salt
chocolate chips, optional (1/4- 1/2 cup)

Preheat oven to 350 degrees.  Grease a 12-cup muffin tin.  
Whisk together eggs and brown sugar.  Mix in the oil, cocoa powder, and vanilla.  Mix the dry ingredients and add to the wet.  Stir in chocolate chips.

Divide between the muffin cups; bake about 17-23 minutes, or until the top of a muffin springs back lightly when gently pressed.
0 Comments

Edible Geodes

4/4/2014

0 Comments

 
Picture
These are fun.  We made them as a little homeschool science project.  EVERYONE in the family thought these were awesome, and we had enough to give a couple to some of my son's friends who are fascinated with rocks.  My next-door-neighbor, the Webelos Scout leader, pointed to a pile of broken rocks on her sidewalk.  "This,"  she said, "was what we did so the boys could feel like they might find a geode- we gave them hammers and rocks from our yard.  We should have made these instead!"

They'd love them too.

These would make some amazing and unusual Easter eggs, too:  make a bunch the same size and wrap two halves together to form a ball.

Edible Geodes
Crystal-growing solution (Rock candy syrup)
1 ½ c. sugar
½ c. water
Mix the two, heat on high in a small saucepan, and stir until the sugar completely dissolves.  Add several drops food color if you want, along with ½ tsp. flavoring (optional). Let cool a bit while you make the rock shells.

Rock Shell (Marshmallow Fondant)
8 ounces marshmallows
2-4 Tbsp. water
1 lb. powdered sugar
¼ c. coconut oil or shortening

Mix marshmallows with 2 Tb. water in a microwave-safe bowl, heat for 30 seconds in microwave.  Stir.  Microwave 30 seconds more, stir. Repeat until it’s melted and smooth.  Add the powdered sugar and mix with a spoon and then with your hands.  Spread 1 Tbsp. coconut oil on clean counter, knead the fondant on top adding more coconut oil when needed.   When smooth and stiff, take half of it and set aside.  Take other half and knead in ¼ c. cocoa powder to make fondant brown.  Roll out ¼“ thick.  Roll out the white half to the same size and stack them on top of each other.    Line a few bowls with aluminum foil, sprayed with nonstick spray.  Cut a piece of the two-layer fondant to fit, and line a bowl with it, with the brown side touching the foil.  Repeat until you run out.   Trim off any fondant that is beyond the lip of the bowl, using scissors.  Set aside.

Pour the sugar syrup into the fondant-lined bowls.  Let them sit, undisturbed, for at least a day (or 2-3 days for bigger crystals).  When ready, break the surface and pour off the syrup. Turn the geodes upside down to drain for an hour.  They’re ready! 

Picture
0 Comments

Baggie Fudge 

3/22/2014

0 Comments

 
Picture
Bonus- this fudge can be made dairy-free and still have that creamy, melt-in-your mouth texture!

This week in Joyschool I taught the kids about the process of making chocolate.  I had a library book that had pictures of each step, from cacao tree to wrapped chocolate bars, and I brought hands-on things, as well.  They got to see, smell, and taste bits of roasted cocoa beans (didn't like them!- it's like eating unsweetened chocolate but crunchier.), see and smell cocoa powder, see, smell, and have cocoa butter rubbed into their skin, we melted and molded chocolates (cute little Easter shapes)... and then made this baggie fudge.  If you're making it yourself or have careful children, a single bag is fine, but for this group that includes a few 3-year-old boys, I double-bagged it. :)  This could be a fun Family Home Evening activity AND treat. 
Our batch was made using the coconut oil and coconut cream, since 3 of the kids can't have dairy.

I had brought walnuts in the shell to use in the fudge, but the kids had so much fun cracking the nuts first and eating the bits inside that they were all gone before the fudge was ready.  It's good fudge either way!

Baggie Fudge
1/2 c. coconut oil or butter, softened or melted
1/2 c.  cocoa powder
1/3 c. coconut cream, OR 1/4 c. water and  1/2 c. nonfat dry milk powder
a pinch of salt
1 tsp. vanilla 
1 lb. powdered sugar (about 4 cups unsifted)
1/2 c. chopped nuts (optional)

Put the ingredients in a gallon-sized ziptop bag.  Put this bag inside another bag if  it seems like a good idea.  Squish, knead, or pound the bag until everything is well mixed.  (Giving the kids 30 -second turns seemed to work the best- and gave them practice counting.)  

Once it's mixed, squish the mixture into a rectangular shape near the top, making the rectangle about an inch narrower on each side than the bag.  Put the bag on a cutting board or similar surface.  Cut down one side of the bag and across the bottom with scissors. Cut fudge into squares, or use small cookie cutters to make cute shapes.  Makes about 1 1/2 pounds.

If fudge is a little too soft, let it chill in the fridge or freezer for a few minutes to firm up.


0 Comments

No-pectin, No-refined sugar Strawberry Jam

2/26/2014

0 Comments

 
Picture
This is a great fresh jam to eat fresh. It also freezes well, so is a good freezer jam.  Since the berries are not cooked and there's not enough sugar to help preserve it, its fridge life is fairly short.  If you're keeping it in the fridge, try to use it within about a week.  If left too long, it will get moldy (you'll know if it does!)   But it's SO GOOD fresh!  My eight-year-old made a batch two nights ago; we ran out yesterday.  I made another batch this morning, and between spreading it on our pancakes at breakfast, and using it on warm bread this afternoon, it's gone again!

Pectin-free Strawberry Freezer Jam
1 pound strawberries, washed and hulled (green parts pulled off)
2 Tbsp. honey (or to taste; use any sweetener you prefer)
2 Tbsp. chia seeds, OR 1 Tbsp. ground flax seeds

Mash the berries with a fork, or chop in a blender until they're the consistency you want.  Stir in the honey (or other sweetener) and the chia.
 After this sits for about half an hour, the chia (or flax) will gel as they absorb the extra liquid.  Keep refrigerated or frozen.

Makes about 2 1/4 cups.

Come to think of it, a drop or two of orange essential oil would be really, really goo
0 Comments

Cleanliness and godliness

1/4/2014

0 Comments

 
Picture
Cleanliness is next to godliness.

It seems that most of us translate this statement as "cleanliness is a form of godliness".

Well, maybe.  Maybe not.  

CLEANLINESS, noun

1. Freedom from dirt, filth, or any foul, extraneous matter.

2. Neatness of person or dress; purity.
(1828 Noah Webster's Dictionary)


Cleanliness and order can be synonymous, and 'order' can be defined as 'priorities'.  Proper priorities are definitely a form of godliness: sometimes 'proper priorities' means leaving a mess behind so I can focus on my children, or my neighbors, or my husband (not necessarily in that order).  And usually proper priorities means cleaning the SLOW way by teaching my children to do it.  It's easier, and cleaner much sooner, if I do it myself, but one of my God-given jobs is to train them.

In other words, I often have to choose between being godly and having cleanliness; and 

cleanliness is 

NEXT TO 

godliness.


0 Comments

Suzy Snowflake costume

12/14/2013

0 Comments

 
Picture
Did you ever learn the song that starts, "Here comes Suzy Snowflake"? Our family was asked to come up with a musical number for a party... and that's what we chose.  And my girls got some great dress-up skirts out of it.  (I told them they're early Christmas presents... and now that we've performed, the skirts get wrapped and put under the tree.)
Picture
On the Youtube video below, she shows you a quick way to cut strips of netting: roll the tulle without creating wrinkles; cut the roll into 3” strips.  She used 4 colors, 1 yd each, for a 2-4-year-old’s skirt.  For that shorter skirt, she cuts each strip in half.  She says it takes about 45 minutes to make one; we spent about an hour apiece but that was with my 11-year-old doing most of the tying.
I  used her method but made longer skirts- the biggest of the two was 27" long, the small one was 24" long. So I made the strips 54" long for the first, 48" long for the second. When I got to the fabric store, I found that the more delicate-looking Illusion netting, 108" wide! so I could get twice as many strips per yard- was on sale for $1/yd, so I got that instead of the coarser netting.  I used almost 5 yard for the bigger skirt and about 4 1/2 yards for the smaller one. For the larger snowflake overlay skirt (18" long), I bought turquoise sparkle tulle, folded it in sixths cut a circle with a 22" radius (needed 1 ¼ yds); cut out a circle for the center, and cut it like a very simple snowflake.  The smaller overlay (14" long) only required 1 yard.    By the way, there's a great website that allows you to create snowflakes online and see what they'll look like before having to cut any actual paper.

The snowflake crowns were cut from the bottom of a plastic gallon-sized milk jug, then my girls colored the snowflakes blue.  See the slideshow for photos of that.
0 Comments

Free Perpetual Christmas Calendar

12/5/2013

0 Comments

 
Picture
photo credit: Alex Grichenko
This December, would you like a daily thought, song, scripture, story, and/or activity to help you feel more of the calm spirit of Christmas?  My friend Amy over at LDS Holistic Living has a Christmas Advent Calendar you can use or download for free.  It's designed specifically with members of the LDS faith in mind, but anyone can find great things in it.  If you're interested, you can get the calendar here.

Meanwhile, here's a sample:

The Real Story Behind the 12 Days of Christmas


Catholics in England were prohibited by law from practicing their faith, both in private and in public from 1558 to 1829. Being a Catholic was treated as a crime. There was no restored gospel at the time, however there were good Christians who knew without doubt the true church was not one that was mainly created merely for the convenience of King Henry the Eighth who wanted to sin and have a church justify his actions. So in secret they continued to teach their children their  religion. 

"The Twelve Days of Christmas" was written in England during this time frame. It was written to help children learn about their religion. The entire song is writing in symbolism and hidden meanings because it was illegal to have anything in writing that would indicate adherence to the Catholic faith. To be caught could mean imprisonment, hanging, or drawn and quartered.
Christmas referred to a twelve day period that starts with Christmas day. "The Twelve Days of Christmas" referred to a twelve day period that began Christmas day. While the world may have celebrated Christmas for about twelve hours, these Christians celebrated it for twelve days as a reminder that the gifts of God are with us for twelve months of the year. It also represented the idea that we should be thankful for the gifts of God and follow His teachings for all twelve months of the year and not just one day a year. 

The song begins, "On the first day of Christmas my true love gave to me..." The "true love" represents God, as our greatest love should be for Him. The word worship means that which we love the most. The "me" who receives these presents is the Christian man or woman.

1. The "partridge in a pear tree" was Jesus Christ who died on a structure made from the wood of a tree. In ancient times a partridge was often used as mythological symbol of a divine, sacred king.

2. The "two turtle doves" were the Old and New Testaments - another gift from God. Doves symbolize peace and the Gospel contained in these scriptures, when practiced, brings peace.

3. The "three French hens" were faith, hope and love - the three gifts of the Spirit that abide (I
Corinthians 13). The French hens can also represent God the Father, His Son Jesus Christ and the Holy Ghost.

4. The "four calling birds" were the four Gospels which sing the song of salvation through Jesus Christ.

5. The "five golden rings" were the first five books of the Bible also called the "Books of Moses."

6. The "six geese a-laying" were the six days of creation.

7. The "seven swans a swimming" were "seven gifts of the Holy Spirit." (I Corinthians 12:8-11, Romans 12, Ephesians 4, 1 Peter 4:10-11)

8. The "eight maids a milking" were the eight beatitudes.

9. The "nine ladies dancing" were nine fruits of the Holy Spirit.
But the fruit of the Spirit is love, joy, peace, longsuffering, gentleness, goodness, faith, meekness, temperance: against such there is no law." (Galatians 5:22)

10. The "ten lords a-leaping" were the Ten Commandments.

11. The "eleven pipers piping" were the eleven faithful disciples.

12. The "twelve drummers drumming" were the twelve points of the Apostles' Creed.
0 Comments

Turkey Clucker (Cuica)

11/27/2013

0 Comments

 
Picture
This is actually an instrument.  Or a noise maker, depending on your perspective and the personality of the child holding it.  It's a variation of the Brazilian & African cuica, used in Samba music.  (See a video of an actual musician using a higher quality cuica on the YouTube video below. 

At any rate, this one can be made to make a clucking or 'gobble'y sound.  These are entertaining by themselves, or add it in to an impromptu marching-around-the-yard band!  You could have a whole flock of chickens or turkeys.

To make one, you'll need
A disposable plastic cup, googly eyes, paper/real feathers/paper or foam beak, an 18-20” length of cotton (not nylon) yarn, something to poke a hole with, a paperclip, dollar-bill sized piece of a paper towel, water.

Using a nail or whatever works, poke a hole in the top.  Thread the string through the hole, and tie the top end of the string onto a paperclip or washer, to keep it securely on the right side of the hole!    Decorate.

If you want to see someone make one and use it, see here.  

Have fun!
Picture
To make the sound, while holding the clucker still with one hand, get a square of folded-over wet paper towel and grab the string, making quick yanks down the string.
Picture


tin can version http://www.youtube.com/watch?v=OcT1vGsx38c 

0 Comments

Thanks-giving

11/26/2013

0 Comments

 
Picture
"The First Thanksgiving at Plymouth", 1914, Jennie A. Brownscombe, public domain
First, a bit of trivia:  
Did you know? While pumpkins were certainly a part of the first feast of thanks-giving,  they were usually roasted or stewed.  And eaten very, very often!

For pottage and puddings and custards and pies
Our pumpkins and parsnips are common supplies,
We have pumpkins at morning and pumpkins at noon,
If it were not for pumpkins we should be undoon."


Pilgrim verse, circa 1633
______________________
Please take some time this week to gather your children, grandchildren, neighbors, or whomever you care about, and teach them of our nation's heritage of gratitude.  Some great resources are below, including what George Washington said in his Proclamation for a Day of Thanksgiving.  Each generation must learn this, or it dies out, leaving a gaping hole that entitlement and selfishness rush in to fill.

Gratitude is not only the greatest of virtues, but the parent of all the others.
— Marcus Tullius Cicero (106 BC-43 BC), Pro Plancio (54 BC)


The following is from the Providence Foundation's Nov. 2013 newsletter.  (Thank you to them!)

Celebrating Thanksgiving

Thanksgiving is an uniquely American holiday. We have been giving thanks to God in private and public from the foundation of the nation. In fact, governments regularly issued official days of Prayer and Thanksgiving from the planting of the first colonies up until the present. Over 1400 Days of Prayer, Thanksgiving, and Fasting were proclaimed by colonial, state, and national governments from 1620-1815, and hundreds more have been issued since then.  

A few items to help you remember and pass on our heritage of thanking God include:

Why We Celebrate Thanksgiving

You can use this article to share with your family the origins of Thanksgiving Day.

Some Early Government Thanksgiving Proclamations

1.       President George Washington, Proclamation for a Day of Thanksgiving, Thursday, November 26, 1789

2.       Governor Thomas Jefferson of Virginia, Thanksgiving Proclamation, December 9, 1779

3.       Proclamation for a Public Thanksgiving, New Hampshire, December 10, 1778

4.       Proclamation for Thanksgiving Day, Continental Congress, December 18, 1777
Issued during the American Revolutionary War by the Continental Congress, this was the first national Thanksgiving Day in America. The explanation of the proclamation is from W. DeLoss Love, The Fast and Thanksgiving Days of New England (1895). Love lists over 1400 days of prayer and fasting and prayer and thanksgiving observed by civil governments (colonial, state, and national) from 1620-1815.

5.       Proclamation for a Day of Thanksgiving and Prayer, Massachusetts, June 29, 1676
On June 20, 1676, the Council of Massachusetts appointed June 29 as a Day of Thanksgiving and Prayer, in response to the colonists’ victory in King Philip’s War. The broadside of this proclamation is the earliest printed thanksgiving broadside known. At the top is the seal of Massachusetts, which shows an Indian speaking the words, “Come Over and Help Us.”

0 Comments

Elderberry Syrup

11/15/2013

0 Comments

 
Picture
Elderberry syrup is known as a wonderful immunity booster and antiviral- which means it'll help knock down the flu or any other virus-caused illness.  It's also really, really delicious on pancakes.  Or a splash added to desserts or fruit salads.  Or brushed on a spice cake.  Or mixed with chilled sparkling water.  Or... you get the idea.
 Now that there's a jar in my fridge, I may have to watch to be sure my children don't sneak in and use up all my 'medicine'.   Just for that reason, I wax-sealed the lids on the jars I plan to share with others.  

I've already used it.  My family has had a nasty cold or flu this week; we've had missed school days and work days from it.  Yesterday it hit me hard, and felt like it was on the verge of turning into bronchitis or pneumonia.  I've been taking either elderberry infusion (tea) or the syrup at least three times a day since feeling it come on a couple days ago, and today I feel much better.  I suppose that may or may not have anything to do with the elderberries... but I'm keeping the routine up until I'm better!  Yum.

I started with 2 pounds of berries, used a steam juicer, and the first 2-3 cups of juice were nice and dark; strong enough to use without boiling to condense it.  The longer the berries steamed, though, the lighter the juice got, so I boiled down the last three cups to yield about 1 1/2 cups.

You'll notice in the photos below that some of those berries don't look exactly the same as the others... I have a young hawthorn tree.  It produces berries, but not yet enough to make a batch of anything yet.  The haw berries are said to be good for reducing inflammation (as well as normalizing blood pressure and helping strengthen and regulate the heart)- so I threw them in with my elderberries.  Honey is used in this instead of sugar because of its soothing, anti-inflammatory, and healing properties.

If you want to make a wax seal, paraffin works great.  I had a small ball of red cheese wax I'd saved, and used that.

Elderberry Syrup
Start with 2-3 cups elderberry juice (depending on strength)- if not strong, boil to reduce to 2 cups.  To the warm, NOT hot juice (if you want to preserve the enzymes if using raw honey), stir in these ingredients:
2 cups honey
5 drops ginger essential oil
3 drops cinnamon essential oil
2 drops clove essential oil


Store in the refrigerator.  Probably best used within a couple months- though I've had syrups stay nice for a year, refrigerated.  You could store them longer if you seal them in sterilized jars. 

To use medicinally, take a tablespoon straight or mixed in 6-8 oz warm water, every 3 hours if you're sick and an adult, or take once a day as a general immunity booster.  See the label below for more details.  

If you want to start with berries but don't have a steam juicer, and want to use the spices themselves instead of essential oils, combine 4 oz (2/3 c.) berries in 3 ½ c. water, a thumb-sized piece of fresh ginger, 1 tsp. cinnamon, and ½ tsp. cloves; Simmer until water is reduced by almost half; strain, pressing on the berries.  Cool until just warm, stir in honey.

On a related note, you can use jelly to make gourmet pancake syrup:  see here.
0 Comments

The Four Seasons Trees kids' craft

11/12/2013

0 Comments

 
Picture
Last week we had a lesson on the four seasons in the group of 5-and-unders that I teach in a homeschool co-op.

We started with four trees on a page; each tree gets something glued to it:

spring- popcorn
summer- tear bits of green construction paper, hole punch red paper for apples
fall- tiny brown leaves (I used honey locust) or torn brown paper bag
winter- drizzle school glue all over tree and across the base, the child uses a finger to spread it smooth; sprinkle with table salt.  

Their favorite was the winter tree! 

You  can even listen to Vivaldi's The Four Seasons while making these...

The full lesson is below, with activities and songs.  
Picture
Print this full-page size. I printed them black and white because that's all my printer does...
Four Seasons lesson/activities
Materials needed:
music: Rain is Falling All Around, Popcorn Popping, Once There Was a Snowman, In the Leafy Treetops 
Vivaldi’s Four Seasons CD, CD player
Four Season discovery bottles
Autumn sensory box
4-tree papers (1 per child)
Popcorn kernels, popcorn popper, bowl with lid, spray bottle with water
Green construction paper
Red construction paper and a hole punchSmall colored leaves or yellow/orange paper
School glue
Salt
Wipes to clean hands
Crayons

Seasons song: Rain is Falling All Around (leaves are falling, snow is falling, sun is shining, wind is blowing)

Listen to The Four Seasons with eyes closed; what season does it sound like?  What do you see?  Dance to the music, pretending to be a something in that season: an unfurling leaf, a bird, wind blowing, snow falling...

Four Seasons bottles to pass around

Four seasons artwork: divide a page into 4 sections each has a tree outline?  Older ones can write seasons

Get the popcorn popper and kernels ready, sing "Popcorn Popping". Pop the popcorn.

While working on the summer trees, sing In the Leafy Treetops.

Winter:  use fingers to spread glue on the branches and below the tree; sprinkle on salt (or could paint with salt water on tree with a black construction paper background) Sing Once there Was a Snowman

Autumn sensory box for when done: a box full of things like a “Can You See?” book- things of different textures and warmth, things to find, things to count, crocheted apples,

Mist the leftover popcorn with the spray bottle, add salt.  Put the lid on and shake to coat.  


_________

Is including this lesson useful to anyone? Or should I stick with closer-to-homemaking posts?  
0 Comments

Stars and Stripes Forever, kids, and Veterans' Day

11/11/2013

0 Comments

 
Today while looking for ways to explain more about Veterans' Day to my children, I came across a Muppets version of "Stars and Stripes Forever". 
We started watching it, but then it became apparent that the music meant nothing to them. So we started on a learning journey.  If you want just the more serious side, skip down to the last video on here.  The one that, while we watched it, my 11-year-old turned to me and asked, "Is this something real?"  Yes.  Yes, it is.  I'm not convinced that we've been truly justified in many of the wars in the last 100 years, but I recognize the intent and courage of those who were doing the actual fighting, among whom are family members  Thank you, veterans.  

First, we learned that "Stars and Stripes Forever", by John Philip Sousa,  is our official national march.  (I didn't know we had a national march...)

A little about the music: Sousa was on a tour of Europe in 1896, when he got word that his band director had suddenly died.  Here's what Sousa himself said in his autobiography, Marching Along, about this time and how the march came about:

"Here came one of the most vivid incidents of my career. As the vessel (the Teutonic) steamed out of the harbor I was pacing on the deck, absorbed in thoughts of my manager's death and the many duties and decisions which awaited me in New York. Suddenly, I began to sense a rhythmic beat of a band playing within my brain. Throughout the whole tense voyage, that imaginary band continued to unfold the same themes, echoing and re-echoing the most distinct melody. I did not transfer a note of that music to paper while I was on the steamer, but when we reached shore, I set down the measures that my brain-band had been playing for me, and not a note of it has ever changed."

Sousa later wrote words to go along with the music; in the National Band version below, they use only these words as a verse:

Hurrah for the flag of the free!
May it wave as our standard forever,
The gem of the land and the sea,
The banner of the right.
Let despots remember the day
When our fathers with mighty endeavor
Proclaimed as they marched to the fray
That by their might and by their right
It waves forever.


If you want to know all of the words, they're at the very bottom of this post.
Now my kids had some context for the Muppets' version:
Complete lyrics- written by John Philips Sousa- to "Stars and Stripes Forever":

Let martial note in triumph float
And liberty extend its mighty hand
A flag appears 'mid thunderous cheers,
The banner of the Western land.
The emblem of the brave and true
Its folds protect no tyrant crew
The red and white and starry blue
Is freedom's shield and hope.

Other nations may deem their flags the best
And cheer them with fervid elation
But the flag of the North and South and West
Is the flag of flags, the flag of Freedom's nation.

Hurrah for the flag of the free!
May it wave as our standard forever,
The gem of the land and the sea,
The banner of the right.
Let despots remember the day
When our fathers with mighty endeavor
Proclaimed as they marched to the fray
That by their might and by their right
It waves forever.

Let eagle shriek from lofty peak
The never-ending watchword of our land;
Let summer breeze waft through the trees
The echo of the chorus grand.
Sing out for liberty and light,
Sing out for freedom and the right.
Sing out for Union and its might,
O patriotic sons.

Other nations may deem their flags the best
And cheer them with fervid elation,
But the flag of the North and South and West
Is the flag of flags, the flag of Freedom's nation.

Hurrah for the flag of the free.
May it wave as our standard forever
The gem of the land and the sea,
The banner of the right
. Let despots remember the day
When our fathers with might endeavor
Proclaimed as they marched to the fray
That by their might and by their right
It waves forever.
0 Comments

[Garden-]Jungle Medicine

11/6/2013

0 Comments

 
Picture
Broadleaf plantain in my garden.
Saturday was work-in-the-yard-before-the-storm-hits day.

The garden needed prepared for the winter: potatoes dug, the now-dry corn cobs pulled from their perches on the stalks, the final beets pulled, more chard and broccoli harvested, dry and tangled tomato vines yanked from the fence they'd been trained on, carrots prepared to stay through the winter.  Tilling would have been nice, but between the garden and what was going on in the house, there wasn't enough time to get to it.  As it was, I only got halfway through the garden list.  But my kids finally got the house clean -- the weekly deeper-cleaning--  along with a post hole dug and fence repaired with my husband.  With a lot of reminders. (The kids, that is...)

While stripping corn cobs from the stalks, I felt something sharp on the pad of my ring finger. When I looked, a large drop of blood pooled up immediately; I had sliced my finger on a corn husk.  I turned back to my work, but felt something wet running down the finger.  Looking again, I saw that it was bleeding quickly, leaving small spatters of blood on the ground.  Turns out that the cut was fairly deep. I ignored it for another few minutes, but the bleeding had not slowed.  Not wanting to stop my work lest the chickens -- who were in the garden too-- would get to the corn, I looked around, found some still-growing plaintain, and tore a leaf off.  The leaves are not only known for helping stop bleeding and helping heal, but have strong fibers running through them.  I wrapped the leaf around my wound, winding the trailing fiber around an extra couple times.  

It stayed on snugly while I worked, and the tightness was soothing.  When I pulled it off ten minutes later, the bleeding had stopped completely.  It didn't restart, either, when I finally -carefully- washed off the dried blood.  This stuff works!

My husband laughed when he heard the story, and said it was "so MacGyver-ish".

I took that as a high compliment.
0 Comments
<<Previous

    Need a Search bar?
    One day I may upgrade my website-- but until then, use your web browser search bar. Type in my web address and what you're looking for, like this-- 
    www.theprovidenthomemaker.com  pumpkin --  and you should get results.


    Author

    I'm a disciple of Christ, a member of the Church of Jesus Christ of Latter-day Saints, a family-defending, homemaking, and homeschooling mom of eight children, two of whom sometimes can't have milk or wheat. Growing up on a farm in a high mountain valley, my parents taught me to 'make do', work hard, smile, and help others.  I love cooking, learning, growing food and flowers, picking tomatoes, and making gingerbread houses --which CAN be made allergy-friendly-- with my children.  I hope you find something to help you on my site!

    Archives

    April 2024
    July 2023
    April 2022
    September 2021
    March 2021
    December 2020
    April 2020
    March 2020
    February 2020
    January 2020
    December 2019
    November 2019
    October 2019
    September 2019
    August 2019
    July 2019
    June 2019
    May 2019
    April 2019
    January 2016
    November 2015
    October 2015
    September 2015
    March 2015
    February 2015
    November 2014
    October 2014
    September 2014
    August 2014
    July 2014
    June 2014
    May 2014
    April 2014
    March 2014
    February 2014
    January 2014
    December 2013
    November 2013
    October 2013
    September 2013
    August 2013
    July 2013
    June 2013
    May 2013
    April 2013
    March 2013
    February 2013
    January 2013
    December 2012
    November 2012
    October 2012
    September 2012
    August 2012
    July 2012
    June 2012
    May 2012
    April 2012
    March 2012
    February 2012
    January 2012
    December 2011
    November 2011
    October 2011
    September 2011
    August 2011
    July 2011
    June 2011
    May 2011
    April 2011
    March 2011
    February 2011
    January 2011
    December 2010
    November 2010
    October 2010
    September 2010

    Categories

    All
    Alcohol
    Alternate Cooking
    Appearances
    Apple
    Apricots
    April Fools
    Aprons
    Bananas
    Beans
    Beef
    Beets
    Bench
    Beverages
    Bonnet
    Bread
    Breakfast
    Budget
    Budgeting
    Cake
    Candy
    Canning
    Carrots
    Cheese
    Chicken
    Children
    Chocolate
    Christmas
    Cleaning
    Coconut
    Comfrey
    Common Core
    Constitution
    Cookbook
    Cookies
    Cooking Oil
    Crafts
    Dairy Substitutions
    Dehydrating
    Dessert
    Dried Fruit
    Earth Oven
    Earthquake
    Easter
    Edible Weeds
    Eggs
    Emergency Prep
    Essential Oils
    Faith
    Family Home Evening
    Fertilizing
    Food Storage
    Fourth Of July
    Freezer
    Frosting
    Fudge
    Garden
    Gardening
    Gingerbread
    Gluten
    Gluten Free
    Gold
    Government
    Grains
    Gratitude
    Hat
    Herbs
    Home Remedies
    Home Repairs
    Homeschool
    Home Storage
    Honey
    Hope
    Inflation
    Leftovers
    Legumes
    Lemon
    Main Dishes
    Mixes
    Mothers
    Noah
    Non Artificial Colors
    Non-artificial Colors
    Nuts
    Oats
    Oil
    Orange
    Paint
    Peaches
    Pear
    Pie
    Pizza
    Plums
    Poem
    Popcorn
    Pork
    Potatoes
    Powdered Milk
    Prayer
    Preparedness
    Projects
    Prophecy
    Pruning
    Pumpkin
    Quick Bread
    Rhubarb
    Rice
    Salad
    Salt
    Sauces
    Self Reliance
    Self-reliance
    Sewing
    Shelf Life
    Shelves
    Sky
    Smoothie
    Snacks
    Soup
    Spices Or Seasonings
    Squash
    Strawberries
    Substitutions
    Sugar
    Summer Fun
    Three Month Supply
    Time
    Tomatoes
    Trees
    Truffles
    T-shirts
    Tuna
    Ultra Gel
    Valentine\'s Day
    Vegetables
    Water
    Watermelon
    Wheat
    Work
    Year Supply
    Zucchini

    RSS Feed

Web Hosting by iPage