The Provident Homemaker
  • Recipes and Info
    • Making Bread
  • My Blog
  • Favorite Resources
  • Documents and Files
  • 52 Weeks of Building Storage

Homemade Vegetable Broth Powder

1/23/2014

1 Comment

 
I have the HARDEST time finding bouillon that doesn't contain MSG.  Here's a solution:  no MSG, no fillers, no preservatives.  Only what you choose to put in it.

This recipe was adapted from Traci's Transformational Health Principles by Traci J. Sellers

Vegetable Broth Powder     (makes about 1 1/2 cups)
​
1 cup Nutritional Yeast (to make your own, see here)
1/4 cup RealSalt (or Himalayan salt; something with those trace minerals)
1 Tbsp. onion powder (see how to make your own, here)
1 1/2 tsp. turmeric
1 1/2 tsp. dried parsley
1 tsp. dried dill weed
1 tsp. marjoram or oregano, optional
1 tsp. dried lemon peel, optional
1/2 tsp. celery seed
1/2 tsp. dry basil
1/2 tsp. ground thyme 

 Put everything except parsley in a blender or food processor, in the order given.  Blend until
 powdered.  Add parsley, pulse just enough to chop it a little bit (you're aiming for small bits).  Store in an airtight container indefinitely.  

To use, add a heaping 1/2 tsp. per cup of water, or 1 Tbsp. of powder  for every quart of water.
1 Comment

Caramelized Butternut Squash with Rosemary

11/23/2013

0 Comments

 
Picture
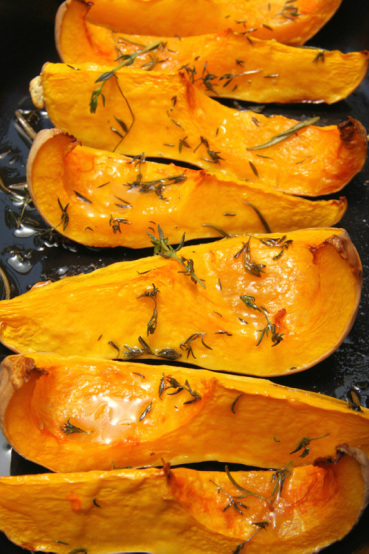
How about this for a new side dish?  I love rosemary and olive oil. Or butter.  Or both.  :)

This recipe showed up at my house this week in a save-the-farmlands newsletter, of all things.  (I'm all for saving farmlands, but how about nixing the property tax instead of government paying them subsidies?!)  And since my live rosemary died over last winter and there's a bottle of rosemary essential oil in my cupboard, I adapted it to use that.

You can substitute about any squash you have on hand that is a similar size.  Or use something large, like half a banana squash or pumpkin, or kabocha squash, etc, but if you do, then double the amount of other ingredients except rosemary oil.

Caramelized Butternut Squash with Rosemary 

1 butternut squash
1 tablespoon olive oil
1/4 teaspoon salt
3 tablespoons unsalted butter
2 sprigs rosemary or one drop of rosemary essential oil (better if you have a 1 ml bottle, then use  two of those tiny drops) on top of the butter

Preheat oven to 375 degrees F.
Cut the squash in half lengthwise; scoop out seeds.   (You can wash, roast, and salt these, just like pumpkin seeds.)  Put the squash cut-side up on a baking tray.
Drizzle with olive oil, sprinkle with salt.  In each natural 'bowl' where the seeds used to be, add 1 Tbsp. butter and a rosemary sprig.  EXCEPT:  if using rosemary oil, melt 2 Tbsp. butter and add the drop to it.  Pour half into the cavity of each squash half.  Cover tightly with foil and bake for 45 minutes, or until tender when poked with a fork.

Remove from oven and pull off the foil; let cool until you can handle it.  Scoop out the flesh.  

Heat the last 1 Tbsp. butter in a large skillet over med-hi heat.  Once melted and hot, add the cooked squash.  Gently toss until some parts become caramel-y brown.  Serve hot.

NOTE:  the photo shows the squash as it comes out of the oven, not after being scooped out and browned.  If you want it browned from the oven, do this instead:
When tender, pull off foil and brush the last tablespoon of butter over the cut edges.  Return to the oven and turn on the broiling element.   Broil, checking every minute.  (I am not kidding.  Seriously check every minute!)  If your baking tray is on the middle rack in the oven, this will probably take about 3-4 minutes.  If the tray is up high, close to the element, it might only take 1 minute, maybe 2.

0 Comments

Elderberry Syrup

11/15/2013

0 Comments

 
Picture
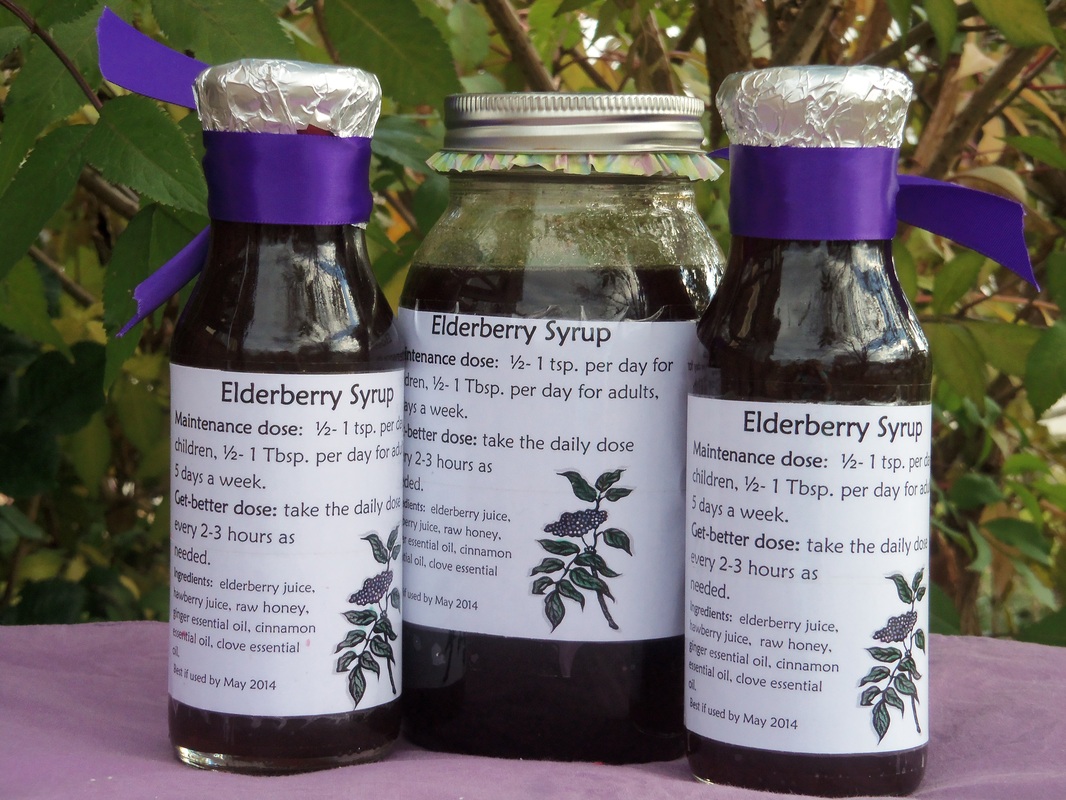
Elderberry syrup is known as a wonderful immunity booster and antiviral- which means it'll help knock down the flu or any other virus-caused illness.  It's also really, really delicious on pancakes.  Or a splash added to desserts or fruit salads.  Or brushed on a spice cake.  Or mixed with chilled sparkling water.  Or... you get the idea.
 Now that there's a jar in my fridge, I may have to watch to be sure my children don't sneak in and use up all my 'medicine'.   Just for that reason, I wax-sealed the lids on the jars I plan to share with others.  

I've already used it.  My family has had a nasty cold or flu this week; we've had missed school days and work days from it.  Yesterday it hit me hard, and felt like it was on the verge of turning into bronchitis or pneumonia.  I've been taking either elderberry infusion (tea) or the syrup at least three times a day since feeling it come on a couple days ago, and today I feel much better.  I suppose that may or may not have anything to do with the elderberries... but I'm keeping the routine up until I'm better!  Yum.

I started with 2 pounds of berries, used a steam juicer, and the first 2-3 cups of juice were nice and dark; strong enough to use without boiling to condense it.  The longer the berries steamed, though, the lighter the juice got, so I boiled down the last three cups to yield about 1 1/2 cups.

You'll notice in the photos below that some of those berries don't look exactly the same as the others... I have a young hawthorn tree.  It produces berries, but not yet enough to make a batch of anything yet.  The haw berries are said to be good for reducing inflammation (as well as normalizing blood pressure and helping strengthen and regulate the heart)- so I threw them in with my elderberries.  Honey is used in this instead of sugar because of its soothing, anti-inflammatory, and healing properties.

If you want to make a wax seal, paraffin works great.  I had a small ball of red cheese wax I'd saved, and used that.

Elderberry Syrup
Start with 2-3 cups elderberry juice (depending on strength)- if not strong, boil to reduce to 2 cups.  To the warm, NOT hot juice (if you want to preserve the enzymes if using raw honey), stir in these ingredients:
2 cups honey
5 drops ginger essential oil
3 drops cinnamon essential oil
2 drops clove essential oil


Store in the refrigerator.  Probably best used within a couple months- though I've had syrups stay nice for a year, refrigerated.  You could store them longer if you seal them in sterilized jars. 

To use medicinally, take a tablespoon straight or mixed in 6-8 oz warm water, every 3 hours if you're sick and an adult, or take once a day as a general immunity booster.  See the label below for more details.  

If you want to start with berries but don't have a steam juicer, and want to use the spices themselves instead of essential oils, combine 4 oz (2/3 c.) berries in 3 ½ c. water, a thumb-sized piece of fresh ginger, 1 tsp. cinnamon, and ½ tsp. cloves; Simmer until water is reduced by almost half; strain, pressing on the berries.  Cool until just warm, stir in honey.

On a related note, you can use jelly to make gourmet pancake syrup:  see here.
0 Comments

Free e-book! Cooking with Eggs- Omelets and Frittatas

9/20/2013

0 Comments

 
Picture
 Today I have a free e-book offer for you, a cookbook, “The Egg and I.” It has tons of recipes for making omelets and frittatas, along with great tips on mastering eggs in the kitchen.

It's just over 40 pages of recipes for all kinds of omelets plus pages of frittatas

You can get it here, and you'll get to choose from four formats: PDF, Microsoft Word, HTML, or Kindle. 

Here's what Dennis Weaver, the cookbook's author, says:

The difference between a frittata and an omelet is that the ingredients in the frittata are mixed into the eggs instead of folded into an omelet. Usually a frittata is started on the stovetop and then baked in the skillet in the oven. They are sometimes called flat omelets or farmers’ omelets. They are larger and cut into slices to serve.

This is not your ordinary e-Book!  It has 31 different scrumptious omelet recipes. Omelets you won’t find anywhere else plus more than $30 in recipe books. Plus it tells you how to make them and gives video instructions.  Start making omelets like a pro. You can 
eat them for breakfast, lunch, and dinner.  

The last time we visited my son and his family in Minnesota, we stopped at Keys Café in Saint Paul where I had “The Loon Omelet” which personifies how versatile an omelet can be. The Loon Omelet is made with wild rice, mushrooms, onions, tomatoes, Swiss cheese, turkey, and topped with a hot mushroom sauce.

You can even make a party out of omelets, or host the next family gathering with an omelet bar. You’ll learn how here.

Omelets are easy, you can make one in as little as five minutes. You can make American omelets, Italian omelets, puffy omelets, and Irish omelets; even an omelet casserole.

Breakfast at your house will never be the same.
0 Comments

Summery Fish and Vegetable Bake

9/2/2013

0 Comments

 
Picture
Can you tell it's zucchini and tomato season?  I've wondered before why so many recipes combine those two vegetables.  I now suspect that it's partly because the plain zucchini excels at tasting like whatever you cook it with, and very few things can top a fresh garden tomato in the flavor department.  This recipe also uses any mellow white fish, probably for the same reason.  The other ingredients both perk up and round out the flavor.  This one's a keeper.

Baked Fish and Vegetables

4 Tbsp. butter, softened
3 garlic cloves, minced
1 Tbsp. lemon juice
1 tsp. grated lemon zest or 2-3 drops lemon essential oil
1 lb. zucchini or summer squash,sliced 1/4" thick
1 lb. tomatoes (3 medium), sliced thin, OR cherry tomatoes, halved
1/2 c. minced fresh basil or 1 drop basil oil
salt and pepper
1 1/2 lbs. mild white fish 
2 Tbsp. white balsamic vinegar*

Preheat oven to 450 F and move an oven rack to the lowest position.  Mix together the butter, minced garlic, lemon juice, and zest.  If using basil oil, add it to this mixture.  Rub a little of the butter mixture on the bottom of a 9x13 pan.

Put the zucchini slices in the bottom of the 9x13 pan; add the tomatoes in a second layer.  Sprinkle with salt and pepper and with half of the basil (unless you used basil oil).  Pat the fish dry with paper towels, then place the fish on top of the tomatoes.  Dot the butter over the top, add the rest of the basil, and drizzle with the vinegar*.  Cover tightly with foil; bake about 20 minutes, or until the fish flakes when you twist a fork in it.  Serve immediately.

Serve over rice to pasta to soak up the delicious sauce!

*The original recipe, from America's Test Kitchen, calls for 1/4 cup dry white wine.  I don't cook with wine, so the white balsamic is what I found in my pantry to add the savory flavor.  Since it's strong, I used only half as much (2 Tbsp. instead of 1/4 c.).  If you have neither, chicken broth and a splash of soy sauce would give a similar depth.
0 Comments

Relieve Swelling with Turmeric

8/14/2013

12 Comments

 
Picture
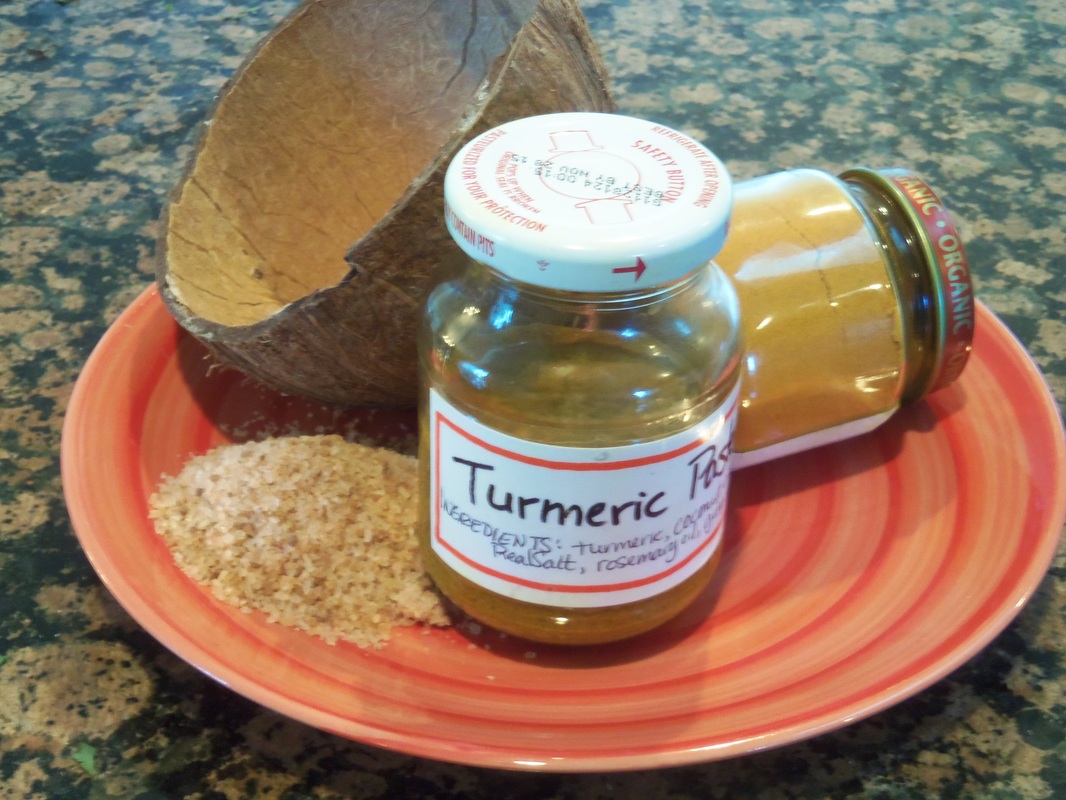
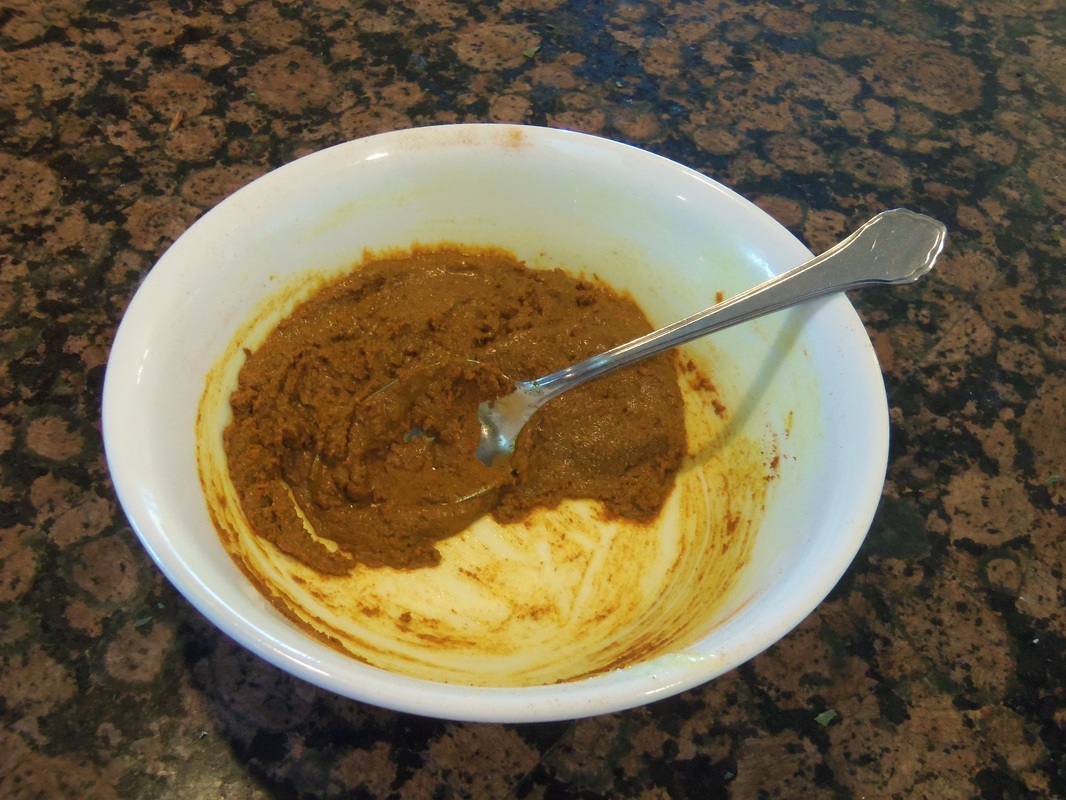
Homemade Turmeric ointment!

About a year ago my right ankle swelled up and became tender to the touch.  There was no recent injury that I knew of.  After a few days, I wrapped it with an Ace bandage.  The swelling went down under the bandage, only to pop up on the top of my foot.  After wrapping the top of my foot, the swelling moved to the other side of my ankle.  Weird.  At that point, I got online to look for how to pull down swelling.  What I found was an ancient Ayurvedic medicine: turmeric and salt.  Well, those were two ingredients I had on hand, and easy to mix.  
I tried it: applied it to a folded damp paper towel, slapped it on the ankle, and wrapped it to make it stay in place.

Lo and behold-- after a day, the ankle was less painful.  After two days, the swelling was gone.  GONE!  And it didn’t come back. My ankle was stained bright yellow for a week, but, hey, it felt great.

Turns out that turmeric contains curcumin, a powerful anti-inflammatory.  There is lots of evidence that this kitchen spice is also effective against cancer, arthritis, preventing and reversing Alzheimer's, and more.

What about the salt?  You know how it kills snails: it pulls water through cell walls, essentially dehydrating them.  This is an example of osmosis.  It works on the same principle to pull extra water out of your skin or underlying tissues.  I used RealSalt because it includes trace minerals.  The salt and turmeric reinforce aspects of each other.

The basic mixture is 2 parts turmeric to one part salt, then mix with just enough water or oil to make a paste.  If you use water, it's considered an actual paste; if you use oil, it's technically an ointment.  Water might help it penetrate your skin better, but curcumin is fat-soluble, so it might be more potent as an ointment.  I don't know for sure; it just seemed logical to use the oil, which has healing properties itself if you use either coconut oil or olive oil.  Curcumin's bioavailability is said to increase if you add something with quercetin.  Dock (sorrel) has large amounts; so does apple, broccoli, cranberries, and more.  Since I didn’t find anything in my house and yard while I was mixing that was easy to use that wouldn’t spoil in it, I skipped that part.  Maybe next time I’ll dry some dock and heat it for a couple hours with the coconut oil base.  Or add a little green drink powder.  It still works fine without it; there was no quercetin in what I used on my ankle.  

This new batch also contains a couple essential oils this time around (didn't with my ankle), to hopefully enhance the healing properties; this will go on a leg injured by falling down the stairs, made worse by a lack of circulation and movement, now suffering- months later- with fluid in the joints and pain. Rosemary is relaxing, a good tonic for nervous and circulatory systems, and helps increase vigor and energy.  Ginger relaxes blood vessels is a strong circulatory stimulant, and is often used in massage oils and to relieve aches and pains.   A standard amount of essential oils for topical use is 1 drop essential oil per 25 mL of carrier oil, or about 5 drops per ¼ cup oil.

Please remember that anyone can be allergic to foods; don't use ingredients you've had reactions to, and watch for new reactions.  When you apply this to your skin, wrap it with something that doesn't matter if it gets stained- because it will!  (Turmeric is also a great fabric dye.)

Here are the quantities I used for this batch:

4 Tbsp. turmeric (1/4 c.)
2 Tbsp. RealSalt
2 Tbsp. coconut oil or olive oil (I used coconut oil)
2 drops rosemary oil, optional
2 drops ginger oil, optional

Best stored in a small glass jar. Babyfood jars are great.
Picture
12 Comments

Summer Pink Potato Salad

8/3/2013

0 Comments

 
Picture
About twenty years ago, a group of my neighbors got together for a "Summer Salad Social".  One of the more unusual offerings there was a salad from a friend from Argentina; she said it was a fairly common salad there- cubed cooked beets with cubed cooked potatoes.  This one is not a lot like hers- which wasn't even pink-- but that was the memory that sparked this salad's creation.  My husband says it's a keeper, especially since it was made using fresh-from-the-garden beets and potatoes.  The flavor is even better the next day.

Since there are children to feed here, I called it something else for my girls' benefit: "Princess Pink Potato Salad".   :)

If you live near me, I have lots of garlic chive plants to share!

Summer Pink Potato Salad

1 lb. beet bulbs, about 4 medium
1 lb. new potatoes, cubed, or halved if small
1 lb. summer squash, cubed
2 Tbsp. Italian dressing OR 1 Tbsp. balsamic vinegar
4 oz. ham or smoked turkey, diced
6 oz. mozzarella, cubed
a few sprigs of fresh thyme, or 1 tsp. dried thyme
1/4 c. garlic chives, chopped, OR a handful of chopped green onions and a sprinkle of garlic powder
1/4 c. mayonnaise

Bring about 2" of water to boil in a medium-large saucepan and add 1 tsp. salt.  Trim beets, leaving about 1" of stem on top.  Scrub and rinse, but don't peel them.  Let them cook, covered, in the simmering water for about 45 minutes, or until the largest can be pierced easily with a fork.  Remove beets, saving the water.

Add the potatoes to the water.  Simmer, covered, for 10-15 minutes, until tender.  Remove the potatoes using a slotted spoon, and put them in a large bowl.  Add the Italian dressing or vinegar, and toss gently to coat. 

Add the squash cubes to the water; simmer, covered, for 5 minutes, or until barely tender.  Pour into a colander and rinse in cold water to stop the cooking.

Add to the potatoes.  Now that the beets are cool, slide the beet skins off, then cube the beets.  Add to the bowl, along with the ham/turkey, mozzarella, thyme, and garlic chives.  Stir to distribute evenly, then add the mayonnaise, along with salt and pepper to taste.  Stir until everything is a beautiful pink.  Store any leftovers in the fridge, covered.
0 Comments

How to get that weeding done!

5/29/2013

0 Comments

 
Picture
Pull weeds while you’re talking on the phone- better yet, while you’re on hold.  Yesterday I managed to get the above bed completely weeded, plus another one (3x50) while waiting to speak to a real human on the phone.  

 Go for a walk or a run outside; when you’re, do your stretches next to something that needs weeded.  Hey, if you’ve gotta bend over anyway, you might as well make your hands useful!

Pinch little weeds out as soon as you can identify them.  This is a bit of a change from what I used to do, pulling them out as soon as they appeared.  Years ago a wise neighbor pointed out all the volunteer perennials in her flower beds… and changed forever how I weed.  Instead of indiscriminately pulling every seedling in the bed, now I only pull when I know what it is.  This isn’t as hard as it seems; 90% of the weeds in my yard are one of the same nine or ten plants.  Figure out what your common weeds are, and learn to identify them as small as possible.  If you don’t know what it is yet, let it grow until you do.  There are only a few plants that will spread horribly if you wait- and you’ll be able to identify those pretty quickly.  Generally speaking, most plants spread only once they’ve flowered and set seeds.  You’ll get a lot of pleasant surprises by weeding this way; right now close to 1/3 of the flowers in my yard are volunteers!  I’ve even had bushes and trees free this way.

Use weeding time as one-on-one time with a child. Let them tell you about their day, or their new project, or the book they've been reading, or whatever else.  I have great memories of fixing barb-wire fences on our farm because of this- it meant time to talk with my dad.

Spend time in your yard, in all parts of the yard.  You’ll better notice what needs done.  And you’ll enjoy it much more than from indoors!  Another neighbor told me to have a place to sit somewhere on each side of the house.  Sit and read, or watch the kids, watch the sky, watch the bugs, whatever brings you joy.  Gather a bunch of fresh flowers for a vase every couple days.  Enjoy those efforts!

0 Comments

Natural Herbal Insect Repellents

6/15/2011

0 Comments

 
Picture
Daisies, in the chrysanthemum family. They contain a chemical bugs hate.


Have you been looking for an alternative to DEET bug sprays?  I use the conventional sprays on occasion, but they give me a headache, and remind me way too much of the agricultural pesticides  you’re supposed to cover up before using.  Are there other options?

I have seen natural repellents at about any store that sells herbs- in my area, that includes Dave's Herbs, Herbs for Health, Whole Foods Market (the store that used to be "Wild Oats"), Sunflower Markets, Smith's Marketplace.  It seems like several of their repellents have Neem oil as their base.  Neem oil is an extract of the seeds and fruit of a semitropical evergreen, Azadirachta indica.  It's shown to be quite effective against insects, both for people to use, as well as for growing crops, but there are some cautions to be aware of.  On testing with rats, it caused abortion of fetuses when ingested within a few days of conception.  So don't use neem oil if you're pregnant or trying to conceive.   See here for one source of more information.l

 The Chrysanthemum family of plants contain pyrethrum or pyrethrin, which is a natural repellent.  (Permethrin is the synthetic version of this.) It's also been used for hundreds of years.  You can crush the plant and rub it on you, or dry it, powder it, and mix it with water.  (DON"T DRINK IT!!!).  Some of the plants in this family include the white daisies with yellow centers, mums, and Gerbera daisies.  

You can use essential oils as repellents- dilute with a carrier oil first- a little goes a long way!.  Ones that turned up in my search include lavender oil, lemon balm, catnip, tea tree oil (also called melaleuca), neem oil (again), basil, garlic, geranium, tansy, thyme.  A carrier oil is just a plain vegetable oil- olive oil, canola oil, coconut oil, whatever you want to use. 

Several years ago, I read that lemon thyme had repellent properties.  I planted a mat of it underfoot my garden swing.  We brushed our feet on it as we would swing in the evening.  It smelled wonderful to us, and I hardly ever was bothered by mosquitoes.  We even had a large pond  (perfect mosquito breeding ground) nearby.  My recent reading indicates that lemon thyme’s effect lasts only about 20 minutes when rubbed on your skin, so be aware you may need to do some personal experimenting here.  (Use common sense!)

Here are two sites with some instructions on making your own repellent, if that's what you're after:

http://www.buzzle.com/articles/homemade-natural-insecticide-and-repellent-recipes.html 


http://www.anniesremedy.com/remedy_use137.php 


And a recipe, from Mother Earth News (disclaimer- though they have some great information, they are very pro- ‘save the planet’-forget those invasive humans).  They adapted this one from The Green Pharmacy.  

Herbal Insect Repellent

2 ½  teaspoons  total of any combination of the following essential oils (available at health food stores): basil, cedarwood, citronella, juniper, lemon, myrrh, palmarosa, pine, rose geranium and/or rosemary

1 cup 190-proof grain alcohol (available in liquor stores)

Put everything in a jar with a tight-fitting lid and shake it hard. Store in small bottles; glass is best. To use, rub a small amount on any exposed skin (test first to be sure you're not allergic to the repellent!) or dab it on clothing. You might put it in a small spray bottle.


Experiment a little to find which essential oils work best with your body chemistry. If you're lucky, you also will like the way they smell; otherwise, add a few drops of peppermint oil to fine-tune the fragrance.

recipe from http://www.motherearthnews.com/Nature-Community/2003-08-01/Outsmarting-Mosquitoes.aspx?page=5  

0 Comments

Start thinking GARDEN!

3/10/2011

1 Comment

 
Picture
courtesy photos8.com

 It felt like spring today!  I love the warmth of the sunshine, the smell of the moist dirt, the sight of daffodils and tulips popping out of the earth, the plump firmness of leaf buds swelling.  If you’re thinking about gardening this year, the stores (and catalogs!) have the seeds and bareroot plants you may want.  For instance, this week’s CAL-Ranch ad features packets of seeds 10/$1.  (No, that wasn’t a typo.)  They also have onion sets, a bag of 100, for $1.99.  (Onion sets are baby onions, you plant them to harvest onion bulbs this year.  You could plant onion seed, but it’d likely be two years before bulb harvest.)  Smith’s Marketplace had bareroot raspberries and blackberries a month ago, and have their roses and fruit trees now.  I assume everyone else does, too.

 When you buy seeds, keep any you don't use.  They will be good next year if you take good care of them- keep them cool. dry ,and  dark.  They will last at least a few years if you store them properly.   I usually get a good four or five years out of my packets.   After that, not as many of the seeds germinate.  You can use seeds from your pantry, too: the dry beans you buy will grow in your garden.   Other seeds you may have in your kitchen are flax, mustard seed, celery seed (this one is NOT celery plant, you grow this for the celery-flavored seeds), coriander seeds (the plant is cilantro, the seeds are harvested as ‘coriander’), fennel seeds, aniseed, raw unsalted sunflower seeds, popcorn, raw peanuts, other raw nuts (if you want a tree!)….  If you have any onions, potatoes, or garlic that are starting to sprout, plant them instead of throwing them away.

Edibles look good in your flower beds!  Planting a few of those in existing beds is an easy way to get started. Leave a few carrots or parsnips in the ground for year #2, or plant carrots from the grocery store. They'll send up beautiful, lacy white flowers in the summer. (I love them in flower arrangements.) And then the next year, you'll have volunteer carrots 'naturalized' into your flower bed! Onions and carrots have some of my favorite flowers. 

Fresh herbs make nice companions in a flower bed, too. The foliage is great, and most have pretty flowers as well. My 'kitchen garden' is just off the front porch; hardly anybody even notices that it's food. It's only 6x22 but in the bed are LOTS of edibles. To get the whole mixed picture, here's what's in it: lots of spring bulbs (NOT edible), rock cress/aubrietta, pansies (edible leaves and flowers) a couple strawberry plants, a young crabapple tree, a really gorgeous yellow rose bush, garlic chives (white 'firework' flowers), chives (purple ball-shaped flowers), a trailing mini red rose, shasta daisies, lavender, catmint, oregano, parsley, lemon thyme, regular thyme, marjoram, purple-leaf sage, green-leaf sage, a few annuals, one ornamental grass (Miscanthus), sedum and aster for fall color. Even better, I can use the herbs in the dead of winter- I just plunge my hand down in the right place through the snow, and come up with a handful of parsley or thyme for the soup pot. Yummy.

Sunchokes (Jerusalem Artichokes) are beautiful, too; they look like small sunflowers. They're pretty pricy to mail-order the roots, though. I just bought a 1-lb bag from the grocery store, though, for $3. Much better. I also got my horseradish start from the grocery store, and I'm thinking of growing some ginger that way
.


There’s quite a bit of gardening, or ’pre-gardening’, that can be done right now.  For instance:

 -If you have fruit trees, now is the time to prune and fertilize them. 

-If you’re up for a bigger challenge, you can graft fruit trees right now. 

-You can till when your garden soil doesn’t stick to your shoes.  (Another test is to make a ball of it; if it compacts densely, it’s too wet.)  You COULD till it before that, but your garden will end up compacted and clumpy.  Your plants would not appreciate it.

 
There is a month-by-month gardening guide on our local Glover Nursery’s website.  Here’s a piece of it:

MARCH

• Early March is a great time to plan your garden layout.

• Make corrections and amendments to your garden if the soil has dried out enough.

• Start eggplant, peppers and tomatoes INDOORS. (6-8 weeks before setting plants out)

• Plant bare root raspberries and strawberries.

• Plant kohlrabi, lettuce, parsnip, potatoes, rhubarb asparagus, cabbage, cauliflower, broccoli, parsley, swiss chard, spinach, turnips,

onion, peas from mid-March until the first part of May.

• Plant carrots, beets and endive from mid-March until mid-June.

• Plant radishes from mid-March until September.

• Use floating row cover to help warm the soil for faster plant growth.

For info on how to start a garden, or improve the one you have, see Gardening 101  The how-to-start–it is the first page.  The other pages have the chart for last average frost dates in Utah, links to good gardening websites, ideas for gardening cheaply, etc.  Have fun!

1 Comment

    Need a Search bar?
    One day I may upgrade my website-- but until then, use your web browser search bar. Type in my web address and what you're looking for, like this-- 
    www.theprovidenthomemaker.com  pumpkin --  and you should get results.


    Author

    I'm a disciple of Christ, a member of the Church of Jesus Christ of Latter-day Saints, a family-defending, homemaking, and homeschooling mom of eight children, two of whom sometimes can't have milk or wheat. Growing up on a farm in a high mountain valley, my parents taught me to 'make do', work hard, smile, and help others.  I love cooking, learning, growing food and flowers, picking tomatoes, and making gingerbread houses --which CAN be made allergy-friendly-- with my children.  I hope you find something to help you on my site!

    Archives

    April 2024
    July 2023
    April 2022
    September 2021
    March 2021
    December 2020
    April 2020
    March 2020
    February 2020
    January 2020
    December 2019
    November 2019
    October 2019
    September 2019
    August 2019
    July 2019
    June 2019
    May 2019
    April 2019
    January 2016
    November 2015
    October 2015
    September 2015
    March 2015
    February 2015
    November 2014
    October 2014
    September 2014
    August 2014
    July 2014
    June 2014
    May 2014
    April 2014
    March 2014
    February 2014
    January 2014
    December 2013
    November 2013
    October 2013
    September 2013
    August 2013
    July 2013
    June 2013
    May 2013
    April 2013
    March 2013
    February 2013
    January 2013
    December 2012
    November 2012
    October 2012
    September 2012
    August 2012
    July 2012
    June 2012
    May 2012
    April 2012
    March 2012
    February 2012
    January 2012
    December 2011
    November 2011
    October 2011
    September 2011
    August 2011
    July 2011
    June 2011
    May 2011
    April 2011
    March 2011
    February 2011
    January 2011
    December 2010
    November 2010
    October 2010
    September 2010

    Categories

    All
    Alcohol
    Alternate Cooking
    Appearances
    Apple
    Apricots
    April Fools
    Aprons
    Bananas
    Beans
    Beef
    Beets
    Bench
    Beverages
    Bonnet
    Bread
    Breakfast
    Budget
    Budgeting
    Cake
    Candy
    Canning
    Carrots
    Cheese
    Chicken
    Children
    Chocolate
    Christmas
    Cleaning
    Coconut
    Comfrey
    Common Core
    Constitution
    Cookbook
    Cookies
    Cooking Oil
    Crafts
    Dairy Substitutions
    Dehydrating
    Dessert
    Dried Fruit
    Earth Oven
    Earthquake
    Easter
    Edible Weeds
    Eggs
    Emergency Prep
    Essential Oils
    Faith
    Family Home Evening
    Fertilizing
    Food Storage
    Fourth Of July
    Freezer
    Frosting
    Fudge
    Garden
    Gardening
    Gingerbread
    Gluten
    Gluten Free
    Gold
    Government
    Grains
    Gratitude
    Hat
    Herbs
    Home Remedies
    Home Repairs
    Homeschool
    Home Storage
    Honey
    Hope
    Inflation
    Leftovers
    Legumes
    Lemon
    Main Dishes
    Mixes
    Mothers
    Noah
    Non Artificial Colors
    Non-artificial Colors
    Nuts
    Oats
    Oil
    Orange
    Paint
    Peaches
    Pear
    Pie
    Pizza
    Plums
    Poem
    Popcorn
    Pork
    Potatoes
    Powdered Milk
    Prayer
    Preparedness
    Projects
    Prophecy
    Pruning
    Pumpkin
    Quick Bread
    Rhubarb
    Rice
    Salad
    Salt
    Sauces
    Self Reliance
    Self-reliance
    Sewing
    Shelf Life
    Shelves
    Sky
    Smoothie
    Snacks
    Soup
    Spices Or Seasonings
    Squash
    Strawberries
    Substitutions
    Sugar
    Summer Fun
    Three Month Supply
    Time
    Tomatoes
    Trees
    Truffles
    T-shirts
    Tuna
    Ultra Gel
    Valentine\'s Day
    Vegetables
    Water
    Watermelon
    Wheat
    Work
    Year Supply
    Zucchini

    RSS Feed

Web Hosting by iPage