The Provident Homemaker
  • Recipes and Info
    • Making Bread
  • My Blog
  • Favorite Resources
  • Documents and Files
  • 52 Weeks of Building Storage

Week 36- Two Minute Fudge - and Make Your Own Sweetened Condensed Milk

12/21/2019

0 Comments

 
Picture
To help with building your year's supply (this is Week 10 of 26), see this chart. 

Have you ever been to a store that sells fudge?  They display pan after pan of luscious flavors.  Well, now you can make them in mere minutes!  This recipe includes not only the basic semisweet chocolate fudge, but eighteen other flavors. 

Fudge can be made in advance, kept airtight in the refrigerator for a month, or wrapped well and frozen for 2-3 months. This recipe is super simple, and can be turned into lots of flavors.  My family’s favorites are Orange Crème Fudge and Cookies and Cremesicle Fudge. (Yes, that’s not the normal spelling, but ‘creamsicle’- regular spelling- is trademarked.)  My favorites include Caramel Swirl Fudge- in either vanilla or chocolate- Strawberry-Truffle-Layer Fudge. With pecans, please.

See here for more classic candy recipes-- toffee, penuche, truffles, fondant, and more base fudge recipes.
Picture
When making a batch of fudge, if it’s too firm or too soft, it can be fixed.

If it’s too soft, there are at least two approaches.

1- you can refrigerate or freeze it and serve it cold.  Once it’s chilled, you can eat it plain in the traditional squares, or scoop into tablespoon-sized balls.  Roll in powdered sugar or unsweetened cocoa powder, and serve as truffles.
2- make it even softer and turn it into hot fudge sauce. To do this, scrape the fudge into a microwave-safe bowl, add ¼ cup milk, cream, or evaporated milk, and heat for a minute or two, until you can stir it.  Stir until smooth.  If it’s still too thick for sauce, add more milk or cream.
 
If the fudge is too firm, scrape the fudge into a microwave-safe bowl, add 1-2 Tbsp. milk, cream, or evaporated milk, and heat for a minute or two, until you can stir it.  Stir until smooth.  Pour into a newly buttered pan.
 
If you want a healthier version of fudge, try Clean Eating Fudge. It’s Paleo! -and even works for those who can’t have dairy.


The fudge below can be made with a regular can of sweetened condensed milk, a homemade version, or even with a homemade dairy-free version. If you don't have any of those 3 options available, you can boil 7 ounces of cream, evaporated milk or (naturally dairy-free) coconut cream with 1 cup of sugar. Stir to dissolve the sugar, and you have a great substitute for sweetened condensed milk.

Two-Minute Fudge* 

3 cups semisweet chocolate chips (1 ½ 12-oz bags)
1 (14 oz.) can sweetened condensed milk (make your own here)
1 tsp. vanilla, optional
pinch of salt, optional
1 c. toasted and chopped nuts, optional
 
*Approximately two minutes of cooking time. 
 
Line an 8x8 pan with aluminum foil, waxed paper, or plastic wrap.  Spray with nonstick spray, or butter it. Set aside.
Stir together chips and milk.  Heat in microwave for one minute. Stop and stir. Repeat until the mixture is melted, stirring every minute. Stir in vanilla and salt.
 
Pour into lined and buttered 8x8 pan. Chill until firm- this will take about 2 hours in the refrigerator or 20 minutes in the freezer.
 
Makes 2 lbs. without the nuts.
 
To cut the recipe in half, 7 oz. of sweetened condensed milk is just over 1 ¼ cups.
 

Milk Chocolate Fudge
Increase chocolate to 4 cups (2 12-oz. bags). Makes almost 2 ½ lbs. without nuts.

Peanut Butter or Butterscotch Fudge
Use 4 c. peanut butter chips or butterscotch chips.

Vanilla Fudge
Use white chocolate chips, increasing to 4 cups.

Cherry Vanilla Fudge
Stir in 1 c. quartered candied cherries, replace half the vanilla with
almond extract, use almonds for the nuts.


Cookies and Creme Fudge
Break each of 16 chocolate sandwich cookies into fourths; stir into Vanilla Fudge. (see below)

Cremesicle Fudge (Orange Creme Fudge)
Make a batch of vanilla fudge, pour 3/4 of it into prepared pan. To remaining fudge, add 3 drops yellow food color, 2 drops red, and 1 tsp. orange extract.
Drop by spoonfuls onto top, swirl in.


Caramel Swirl Fudge
Melt 4 oz (about 18 squares) of caramel with 1-2 tsp. of water, drop by spoonfuls onto top, then swirl.

Candy Bar Fudge
Melt 4 oz caramel with 1-2 tsp. water, stir in 3/4 c. peanuts. Drop on top and either swirl in or cover the top with 1 c. chocolate chips, melted.

Chocolate-Peanut Butter Fudge
Add 2 Tbsp. peanut butter to hot mixture, before powdered sugar is added. Top with chopped peanuts if you like, pressing them in slightly.

Mint Layer Fudge
Make chocolate fudge; spread in pan. Melt together 1 c. white chips, 2 Tbsp. milk, 1/4-1/2 tsp. mint extract, and 1/8 tsp. green food color. Mix well, spread on top.

Orange-Pecan Fudge
Make vanilla fudge, stir in 1 Tbsp. orange zest, finely chopped, and 1 c. pecans.

Peanut Butter Swirl Fudge
Make chocolate fudge, melt ½ c. peanut butter, drop on top of fudge; swirl.

Rocky Road Fudge
Use nuts, and stir 2 c. mini marshmallows into fudge before spreading into the pan.

S’mores Fudge
Leave out nuts, stir in 1 c. mini marshmallows and 4 whole grahams, broken.

Strawberry Fudge
Replace half the condensed milk with 1 1/4 c. strawberry jam. Swirl about 2
Tbsp. jam on top. Especially good with pecans or walnuts.


Strawberry ‘Truffle Layer’ Fudge
Spread regular fudge in pan, melt together 1 c. (6 oz.)semisweet chips with 2 Tbsp. butter. Stir in 1/4 c. strawberry jam. Spread on top.

Toasted Coconut Fudge
For either chocolate or white fudge, toast 1 c. coconut, stir in 3/4 c, along with 1 c. chopped toasted pecans. Sprinkle remaining 1/4 c. coconut on top, press in. If using a fudge recipe that calls for milk or evaporated milk, you may also substitute an equal amount of coconut milk.

Wonka Bar Fudge
substitute 4 whole graham crackers, broken into small chunks, for the nuts.


Picture
Cremesicle Fudge.  
0 Comments

'Clean Eating' Paleo Fudge

12/10/2013

1 Comment

 
Picture
Are you trying to eat healthier but really, really crave fudge?  This one uses healthy fats and honey.   It's also dairy-free and gluten-free for those who need to avoid those.  

Avocados are high in three amazing fats: both phytosterols and PFAs (polyhydroxylated fatty alcohols) are documented to be anti-inflammatory, and oleic acid, which helps our digestive tract absorb fat-soluble nutrients.  Coconut oil is healthy for many reasons, including being anti-inflammatory and having a high lauric acid  and medium-chain fatty acids content.  
But enough about that.

The big question is, doesn't avocado totally mess up the flavor here?

No.  I have a pretty discriminating set of tastebuds, and the only way I can detect the avocado is by a faint fruity flavor.  Because of that, some of my favorite variations of this fudge include fruit:  orange zest or oil, chopped dried cherries (and toasted almonds!), and the like.  This fudge is really only a slightly thicker version of my ChocolateTruffle Pie.

The recipe below includes both orange and pecans; if you don't want them, just omit the pecans and orange zest or orange oil.

You can also use this recipe to make truffles; cut into squares, then quickly roll each square into a ball; roll in cocoa powder or chopped nuts to coat.

Orange-Pecan Fudge            makes about 3/4 of a pound 

1 ripe avocado, peel and pit removed
1/4 c. coconut oil
1/4 c. honey
1/4 c. unsweetened cocoa powder
2 Tbsp. water
zest from half of an orange (about 1/2 Tbsp.), or 2 drops orange essential oil
3/4 tsp. vanilla
pinch of salt (1/16 tsp.)
1/4 c. toasted chopped pecans

Line a 5 1/2 x 3 loaf pan (or 2-cup rectangular or square container) with foil; spray with nonstick cooking spray.   Set aside.
Put the water, zest (should be about 1 Tbsp), honey, coconut oil, cocoa, avocado, vanilla, and salt in a blender or food processor.  Run on high for 1-2 minutes, until smooth.  Pour into prepared pan.  Cover and refrigerate 2-3 hours until set.   

Store in the refrigerator or freezer.  If freezing this, let pieces thaw about 10 minutes before serving.  I don't know how long it will keep in the fridge because it gets eaten so quickly.   But the one piece that survived us for a week and a half was still good.  Any longer than a week, though, it'd be better preserved in the freezer.  Wrap tightly.

1 Comment

White Chocolate Buttercream Frosting

10/11/2013

0 Comments

 
Picture
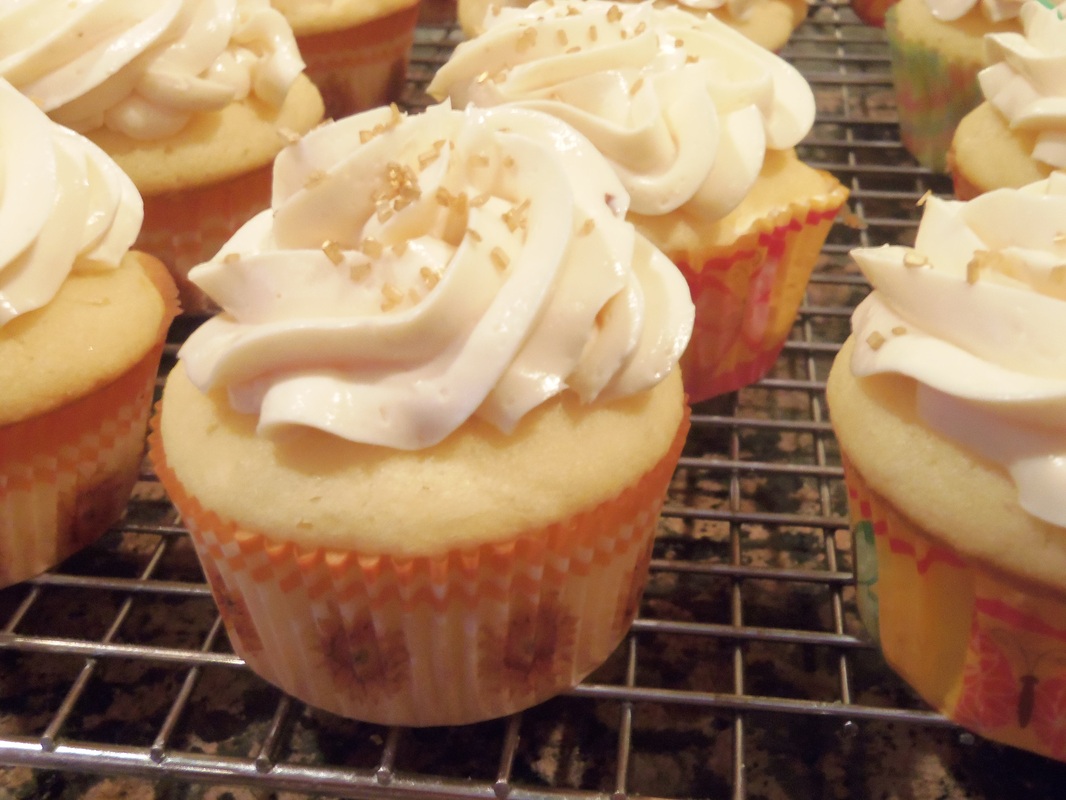
This is seriously amazing frosting, one you'll want to take your time eating, to capture every nuance of the flavor.

Why is it so good?  

Well, look at the name.  White chocolate.  Butter.  Cream.  Need I say more?  
Yeah, it wouldn't be smart to eat it every day.  But- boy, is it delicious!  Even better, it's really easy.

I found this in a magazine when my now-16-year-old was a newborn.  Really newborn; a magazine at my hospital bedside.  There were several intriguing recipes in there; I wrote them on a slip of paper, then tucked them in my recipe binder once at home.  The paper is still there, and three of those recipes are now favorites of mine:  Lattice Pineapple Pie, Orange-Coconut Muffins, and this frosting.  

It's one to savor.  You can also refrigerate or freeze this and shape it into truffles. Roll in chopped almonds, powdered sugar, sprinkles, or fine cookie crumbs, or dip in melted white or milk chocolate.  

My favorite white chocolate for this recipe is Guittard white chocolate chips.  To me, the Nestle white chips have a overly-cooked-and-sweet flavor, so I avoid those.   Chips are cheaper than baking squares, and the good ones have a great dairy-and-vanilla taste.  And I almost always use evaporated milk in this recipe; since it's a pantry item, I always have some on hand, unlike fresh cream.

White Chocolate Buttercream Frosting (about 2 cups frosting)

1 cup (6 oz.) white chocolate, melted and cooled-  or 6-(1 oz) squares white chocolate
1/4 cup cream or evaporated milk, or regular milk if you must (not as rich- but passable)
1 cup cold butter, cut into 1" cubes
1 cup powdered sugar

Beat together the white chocolate and cream.  When smooth, with the mixer running, beat in 1 cube of butter at a time.  Add powdered sugar; beat about 2 minutes, until smooth and fluffy.

If you have essential oils, one drop of orange oil would add subtle dimension.


0 Comments

Black Bean Brownies (or, Chocolate Truffle Brownies)

3/6/2013

0 Comments

 
Picture
Apparently these have been popular in the food world for about a year... but I first saw them last week.  My oldest son, the pickiest eater in the house, had noticed the printed recipe sitting on the counter for several days, grimacing everytime he walked past it.  So when a batch of brownies appeared out of the oven, he cocked an eyebrow at me, asking "Are these what I think they are?", then declared he would NOT eat them.
After everyone else begged for seconds, though, he decided he'd try just one bite.  Then a whole brownie.  Then he had seconds too.
(YEAH!)

Black Bean Brownies

1 1/4 c. cooked black beans, rinsed (about a 15-oz can or 1/2 c. dry beans- cook first)
3 eggs
1/4 c. melted coconut oil or vegetable oil
1/2- 2/3 cup honey OR 3/4-1 cup sugar (brownies with the higher amounts are sweeter and more moist)
½ cup unsweetened cocoa powder
1 tsp. vanilla extract
½ cup whole wheat flour, OR 1/2 c.gluten-free flour plus 1 tsp. xanthan gum
½ teaspoon almond extract or orange extract, optional
½ teaspoon baking powder
1/4 tsp. salt
½ cup chopped walnuts, optional
¼ cup semisweet chocolate chips, optional


Preheat oven to 350 degrees. Butter or spray a 9x13 pan.  Combine beans, eggs, oil, sugar, cocoa powder, vanilla, and almond/orange extract (if using) in a food processor or blender.  Puree until very smooth.  In a medium bowl, combine flour, baking powder and salt.   Pour the puree over top, then mix both together.  Stir in walnuts if using.  Sprinkle chocolate chips on top.  Bake about 25 minutes or until center tests done with a toothpick.  
Cool.  
To make these into Chocolate Truffle Brownies, omit the chocolate chips and frost with my favorite-ever chocolate frosting: creamy, soft, oh-so-smooth Chocolate Blender Frosting!
0 Comments

Using Dried Fruit; Cherry Chocolate Bliss Bites

5/20/2011

2 Comments

 
Picture
Dried tart cherries: my favorite cherry for recipes.

Photo from Nutty Guys

Next week’s post will have several ideas for using dried fruit.
_____________________

Why buy, or make, dehydrated fruits?  My favorite reasons are that it preserves fruit without needing electricity (as in freezing), and it stores in a smaller space when compared to canning.  It also intensifies the flavors, allowing me to use it as a sweetener.  


If you’re buying them, how do you know what a good price is?  The simplest way is to judge by serving size.  One ounce of dried fruit is a serving, about equal in size to one medium fresh apple or peach.  If a one-pound can of dried apples costs
$5.75/lb (which it does at the Home Storage Center), that means you’re paying about 35 cents per apple.   If you want to figure how that compares with price per pound fresh, 25 lbs of fresh apples reduce down to about 4 lbs.    4/25 of 1 lb @$5.75= .92/lb fresh apple price.    

For other fruits, a fairly good estimate is 1 lb very-dried fruit = 5 lbs fresh; most fruits are somewhere around 80% water to begin with.  1 lb moist-dried fruit = 3 lbs. fresh, figuring about 2/3 of the water has been evaporated away.   This isn’t exact, but is close, and is simple enough to remember and use.  Dried blueberries (moist) at $ 12.30/lb are like paying $ 4.04/lb for fresh, or about $ 1.53 for a 6-oz clamshell.  It costs around four dollars a pound to buy frozen blueberries, plus then I pay to run the freezer at home. Twelve bucks a pound sounds expensive, but it’s about half  the price of fresh around here.  They’re definitely worth having some on hand.  Just keep them out of reach of the kids, or you won’t have any left!

If you live anywhere around Salt Lake City, you can get ‘returns’ at Nutty Guys’ warehouse for $1.50 per one-pound bag (of anything they sell).  Returns are anything that didn’t sell within their 6-7-month “sell by” date; they get returned to the warehouse.  Returns are unpredictable, you never know what will be there on the shelf, but they make for incredible bargains.  Dried fruit is considered at its peak for one year.  You can extend this by keeping it sealed, dark, and cool.  This is something at its best when rotated regularly.
_____________________

Here’s one way to use dried tart cherries;  I always get them cheapest from Nutty Guys. (Returns shelf, hooray!)  I created this recipe for a bake-off at the state fair a few years ago.  The ingredients sound strange together, but, boy, are they good.  The balsamic vinegar accentuates the chocolate and adds brightness to the cherry.    (The recipe took 1st place.)  These are like a very dark, intense truffle, with bits of sweet-tart, chewy cherry.  They take only five minutes to mix.

CHERRY-CHOCOLATE BLISS BITES

1/4 cup dried tart cherries, coarsely chopped
1 Tbsp balsamic vinegar
1/4 tsp almond extract
1/3 cup sweetened condensed milk
1 (4 oz) bar Ghirardelli 60% cocoa bittersweet chocolate, broken*

Place dried cherries in a small microwavable bowl; pour in balsamic vinegar and almond extract. Microwave 30 seconds to help plump the cherries; set aside.

Microwave condensed milk 45 seconds or until hot but not boiling. Add chocolate and stir until mostly smooth. Add cherry mixture. Stir until well combined.

Pour into a loaf pan or other 2 cup container, bottom lined with parchment. Chill in freezer for 15 minutes or in refrigerator for 45 minutes until set.

Cut into squares or roll into balls.    This recipe can be doubled or tripled.

*Any semisweet or bittersweet chocolate (bar or chips) can be substituted.  Try to get something around 60% cocoa solids.  I used Ghirardelli’s because that was who sponsored the contest.  If you quadruple the batch, you’ll use the whole can of sweetened condensed milk (1 1/3 c.) and one whole pound of chocolate.


2 Comments

Classic Candymaking

12/4/2010

0 Comments

 
Picture
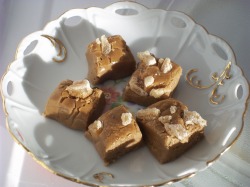
Fresh fudge, made whatever flavor you feel like.  This one is Gingerbread Fudge.

Picture
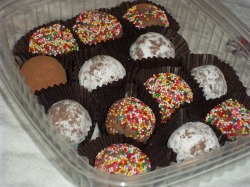
Truffles, the same on the inside but rolled in cocoa, powdered sugar, and sprinkles.

I love making treats; it makes me very popular with my children and the neighbors!

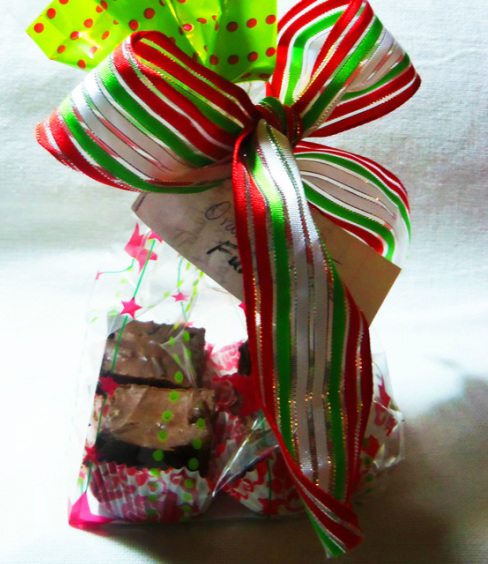
Every Christmas season I make 'goodie plates' with my family, and take them to neighbors, teachers, and friends. We try to get them done by the first or second week of December.  This way mine are distributed before anyone has overindulged and decreased in their appreciation for sugar.  So far we've made lots of bread, caramels, truffles, and fudge.   See here for 
the candy recipes.

Below the list are photos and instructions for making a fun layered and swirled Chocolate Peanut Butter Fudge.

True to form, this includes basic recipes, then how to tweak them to get new flavors.  Here's what's in that file:

Buttercream Fondant
Fondant centers
Pecan logs
English Toffee

Fudge
Two-Minute Fudge
Milk Chocolate Fudge
Peanut Butter or Butterscotch Fudge
Vanilla Fudge
Cherry Vanilla Fudge
Cookies and Creme Fudge
Orange Creme Fudge (Creamsicle)
Caramel Swirl Fudge
Candy Bar Fudge
Chocolate-Peanut Butter Fudge
Mint Layer Fudge
Orange-Pecan Fudge
Peanut Butter Swirl Fudge
Rocky Road Fudge
S’mores Fudge
Strawberry Fudge
Strawberry ‘Truffle Layer’ Fudge
Toasted Coconut Fudge
Wonka Bar Fudge
Five Minute Fudge
Easy Fudge
Old-Time Fudge
Blue Ribbon Fudge

Quick Penuche
Maple-nut Fudge
Maple-nut Goodies
Molasses Fudge/Gingerbread Fudge
Quick Centers for Pecan Logs
​

Truffles
Milk Chocolate Truffles
White Chocolate Truffles
Whipped Truffles
Picture
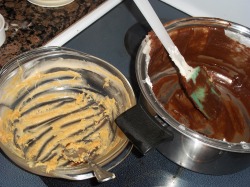
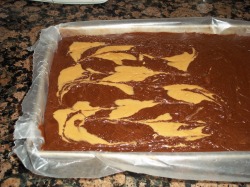
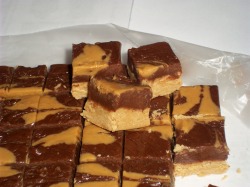
For this batch of chocolate-peanut butter fudge, I used the Five Minute Fudge recipe but split the batch in half after adding the marshmallow.  Half of it got peanut butter, half of it got chocolate chips.  I spread the peanut butter layer into a lined pan, then topped it with the chocolate mixture.

Picture
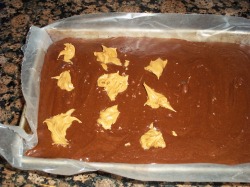
Lining the pan with waxed paper or foil, buttered, makes it much easier to cut the fudge when finished. 

To make the peanut butter swirl, drop several small spoonfuls of plain peanut butter on top.

Picture
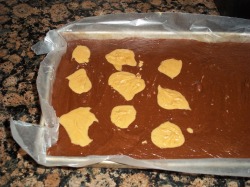
Tap the pan on the counter to get the peanut butter to flatten into the fudge.

Picture
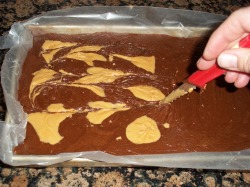
Drag a knife or spoon back and forth through it to swirl a bit.

Picture
It's best to not break it up too much.  Tap the pan on the counter again to flatten the top.

Picture
Chill until it's firm, then lift the whole batch out.  Put it on a cutting board, and cut into squares. 

0 Comments

    Need a Search bar?
    One day I may upgrade my website-- but until then, use your web browser search bar. Type in my web address and what you're looking for, like this-- 
    www.theprovidenthomemaker.com  pumpkin --  and you should get results.


    Author

    I'm a disciple of Christ, a member of the Church of Jesus Christ of Latter-day Saints, a family-defending, homemaking, and homeschooling mom of eight children, two of whom sometimes can't have milk or wheat. Growing up on a farm in a high mountain valley, my parents taught me to 'make do', work hard, smile, and help others.  I love cooking, learning, growing food and flowers, picking tomatoes, and making gingerbread houses --which CAN be made allergy-friendly-- with my children.  I hope you find something to help you on my site!

    Archives

    April 2024
    July 2023
    April 2022
    September 2021
    March 2021
    December 2020
    April 2020
    March 2020
    February 2020
    January 2020
    December 2019
    November 2019
    October 2019
    September 2019
    August 2019
    July 2019
    June 2019
    May 2019
    April 2019
    January 2016
    November 2015
    October 2015
    September 2015
    March 2015
    February 2015
    November 2014
    October 2014
    September 2014
    August 2014
    July 2014
    June 2014
    May 2014
    April 2014
    March 2014
    February 2014
    January 2014
    December 2013
    November 2013
    October 2013
    September 2013
    August 2013
    July 2013
    June 2013
    May 2013
    April 2013
    March 2013
    February 2013
    January 2013
    December 2012
    November 2012
    October 2012
    September 2012
    August 2012
    July 2012
    June 2012
    May 2012
    April 2012
    March 2012
    February 2012
    January 2012
    December 2011
    November 2011
    October 2011
    September 2011
    August 2011
    July 2011
    June 2011
    May 2011
    April 2011
    March 2011
    February 2011
    January 2011
    December 2010
    November 2010
    October 2010
    September 2010

    Categories

    All
    Alcohol
    Alternate Cooking
    Appearances
    Apple
    Apricots
    April Fools
    Aprons
    Bananas
    Beans
    Beef
    Beets
    Bench
    Beverages
    Bonnet
    Bread
    Breakfast
    Budget
    Budgeting
    Cake
    Candy
    Canning
    Carrots
    Cheese
    Chicken
    Children
    Chocolate
    Christmas
    Cleaning
    Coconut
    Comfrey
    Common Core
    Constitution
    Cookbook
    Cookies
    Cooking Oil
    Crafts
    Dairy Substitutions
    Dehydrating
    Dessert
    Dried Fruit
    Earth Oven
    Earthquake
    Easter
    Edible Weeds
    Eggs
    Emergency Prep
    Essential Oils
    Faith
    Family Home Evening
    Fertilizing
    Food Storage
    Fourth Of July
    Freezer
    Frosting
    Fudge
    Garden
    Gardening
    Gingerbread
    Gluten
    Gluten Free
    Gold
    Government
    Grains
    Gratitude
    Hat
    Herbs
    Home Remedies
    Home Repairs
    Homeschool
    Home Storage
    Honey
    Hope
    Inflation
    Leftovers
    Legumes
    Lemon
    Main Dishes
    Mixes
    Mothers
    Noah
    Non Artificial Colors
    Non-artificial Colors
    Nuts
    Oats
    Oil
    Orange
    Paint
    Peaches
    Pear
    Pie
    Pizza
    Plums
    Poem
    Popcorn
    Pork
    Potatoes
    Powdered Milk
    Prayer
    Preparedness
    Projects
    Prophecy
    Pruning
    Pumpkin
    Quick Bread
    Rhubarb
    Rice
    Salad
    Salt
    Sauces
    Self Reliance
    Self-reliance
    Sewing
    Shelf Life
    Shelves
    Sky
    Smoothie
    Snacks
    Soup
    Spices Or Seasonings
    Squash
    Strawberries
    Substitutions
    Sugar
    Summer Fun
    Three Month Supply
    Time
    Tomatoes
    Trees
    Truffles
    T-shirts
    Tuna
    Ultra Gel
    Valentine\'s Day
    Vegetables
    Water
    Watermelon
    Wheat
    Work
    Year Supply
    Zucchini

    RSS Feed

Web Hosting by iPage