The Provident Homemaker
  • Recipes and Info
    • Making Bread
  • My Blog
  • Favorite Resources
  • Documents and Files
  • 52 Weeks of Building Storage

Inflation!  Rush to the Store?

4/15/2022

0 Comments

 
Inflation has done some crazy things to food prices.  

What's a girl to do?

Don’t rush to the store!

That tends to make the problem worse, if you panic while others are panic-buying. Instead, be calm, watchful, resourceful, and grateful.

A couple of weeks ago, while chatting on the couch with a dear friend, she asked me, "With prices rising so quickly, are you beefing up your food storage?  

An online definition says "beefing up" means “To make markedly greater in measure or degree.”

Am I doing that?

No, not really. The way I store food is centered on stocking up on what we use when it is inexpensive. Buying or gleaning what most don’t want right then.

For example, look at what has happened with wheat. The retail price of a 50-pound bag jumped from $24.99 two years ago to $39.99 two weeks ago. (Oat groats -- the whole grain--- jumped even more, to $100 for a 50-pound bag.) Even so, every store in my area appeared to be completely sold out of wheat by the first weekend in April.  Now is NOT the time for me to replenish a wheat supply. What I have is just fine. And if it wasn’t, I’d use more of some other grain in my rotation.

I did buy one bag of all-purpose flour at Sam’s Club two or three months ago—but that was before war broke out between two of the world’s biggest suppliers of wheat.  I just knew that my flour quantity was a little lower than optimal, and the flour was a good price.
 
Good food storage habits not only allow you to buy at low prices, but to help moderate supply and demand. You HELP the supply chain! -by absorbing excess when there is too much of something—by purchasing then—and help the limited quantities go to more people when there’s more demand than supply.

In other words, good food storage purchases help even out the supply-and-demand cycle.

-They help reduce excess --by preserving it for later when supply is low-
-And reduce demand – by using reserves rather than purchasing.

Not only that, but doing this allows you eat at or near the lowest prices available within the food’s shelf life.
_____________
Now, if that friend had asked “have you added anything to your family storehouse lately?” the answer would be yes.  I’ve been doing what I always do.  Shopping for my family, keeping an eye out for anything that a store has too much of, that would be helpful to my family.

Want some examples?  My two biggest food storage additions since inflation and war have combined forces are dried bananas (click for details on that) and flour. Not the single bag of flour I mentioned before.  This was after prices went nuts. But remember that in 2020-21 it was hard to find flour?  Apparently the flour had been produced, but had been sitting in warehouses waiting for trucks, or people who could drive those trucks. The overstock grocery store I frequent had just received multiple pallets of 25-pound bags of flour that had barely hit the “best by” date (see here for why that's not bad). They wanted the flour out, quickly.  It was $2.99 for one bag, or $5.49 for two of them. 

Our family goes through about 25 pounds of wheat and/or flour per month. (That's six loaves of bread every 7 days; there are currently 8 of us here, with more on Sundays). In my dark, cool basement, flour can stay fresh for about 3-4 years.  I bought 8 bags, put the flour in buckets, labelled them, and rearranged the storage room a bit to get the oldest buckets in front, newest ones behind.  It's not 'markedly greater' than what I usually have.  The buckets they went in were already sitting empty, waiting for refill. Food storage is meant to be a cushion. There's plenty of flexibility in it.

And I'm feeling pretty grateful and amazed.  Blessings are all around. 

What have you found in your area?
Picture
0 Comments

How many dried bananas from a whole box?

4/15/2022

1 Comment

 
Picture
For details on how I dry these, see Chewy Dried Bananas. 
...and by "whole box" I mean the 40-pound boxes you see the produce guy emptying to restock the banana shelf. 

In other words, 40 pounds of fresh bananas will shrink down to what total space after dehydrating them?  The short answer is 7-9 quarts. Around the volume of two gallons, give or take a quart. 

It's hard to tell exactly because of a few factors.  The first is that a box is rarely exactly 40 pounds.  It's usually a little bit more, and sometimes a few pounds more.  
The second is that it depends on how many bananas get eaten before they're tucked away for later.  That could mean some were eaten fresh, some were made into banana bread, some were used in smoothies, and-- the easiest way to have a bunch disappear-- some (or many) were eaten after drying but before you whisked them away.  

In my case, my family started with three boxes.  

Yes, that's one hundred-twenty pounds. Or a few more. 

Why?  

Simple.  

We love them-- they're great for snacks, car trips, and packed lunches; they store well for a year (or a few); I hadn't seen any cases at a good price for a long time; and our dried banana stash was getting low. Low-ish. AND-- this is important-- my neighbor who ran across them called from the store asking if I wanted any slightly-overripe bananas. For $3 per box.  (No, that's not a typo.) Since my family was leaving town the next day, I said yes, to two boxes.  One for me-- we could get them sliced and on trays that night, and dried just in time to leave town-- and one for my sister in Idaho, which is where we were going. (She dehydrates, too.)

The next week, I was at that store again -- with my kids begging to look for more because those fresh dried bananas were SO GOOD. Sure enough, they still had lots. The now more-overripe bananas were $1 per box.  

Perfect.  Buy food when the store wants it OUT, and FAST. And use or preserve it quickly. 

From that 3 boxes, here's what our yield was:
  • 18 quart jars tucked away, plus at least a jar or two’s worth eaten by my kids as they helped,
  • 2 (12x18) trays of banana bars (one regular, with caramel icing, the other were chocolate banana bars, with chocolate icing)
  • one 11x15 pan of gluten-free banana bars  (all the bars were for a youth dance)
  • three loaves of banana bread,
  • two loaves of gluten-free banana bread
  • 1-2 pounds of bananas frozen in ziplock bags, for future smoothies

How can the bananas get dried before they get too ripe?  Well, not all of them did.  That's why there was so much banana baking going on. When we got to that last box, if something was too ripe, or bruised, it got tossed into the bake-with-it bowl, to be mashed. 

In addition, I have two large dehydrators, with 12 trays each. (They were much cheaper when I bought them!) 
A 40-pound box of bananas, sliced, fits nearly perfectly on those 24 trays.  It takes the dehydrators about a full day to dry them.

How did I get 12 trays each, when they come with only 8?  You can buy extra trays, but they’re about $12 apiece (sold in packs of 2). 

That's not how I got them. 

My first dehydrator was the same type and size. That one was purchased through the local classifieds for $25. It still works, but the new ones are a little more powerful, so the old base is in the basement, on standby just in case it’s needed. 

Also notice, in the photo at the top of this post, that when I say "quart jars," it doesn't necessarily mean canning jars.  Oh no.  These jars just need to be airtight.  I use cleaned-out mayonnaise jars and pasta sauce jars too.  If you're a canner, you've likely learned that if the rim of a jar gets chipped, that often prevents the canning lid from sealing properly.  My solution now is to write a big X on the jar with a Sharpie, and use that jar ever after only for dehydrated foods.  Waste not, want not.  
​
Or at least 'want less.'
Picture
1 Comment

Week 19- Weekly assignment, and making vegetable powders

8/18/2019

0 Comments

 
Picture
Your weekly assignment is B4-3. Did you do your nonfood inventory last week? If not, now is a great time.  

My dehydrator has been running nearly nonstop for a couple weeks now, with a couple of batches of canning interspersed.  I much prefer dehydrating whenever it's an option.  (But I will bottle a whole number of other things-- meat for quick meals, jam/jelly, juices, syrups, ghee, peaches, ...)  Peaches are better canned, but apricots?  They must be an acquired taste-- I acquired it years ago, but my kids haven't.  So we bottle peaches, and dry apricots.  Mostly we turn the apricots into fruit leather.  With the bumper crop we've had this year on our THREE mature apricot trees, that's a whole lot of leather, despite our best efforts to give away as many apricots as possible.  

But that's not all the dehydrator has been used for these last weeks. Dried cherry tomatoes are practically candy... but we've kept up on eating them fresh, with some sharing, so I haven't dried any yet this year.  What I have done is the full 12+ trays loaded with sliced yellow summer squash. It doesn't matter which one.  This year it's a combination of yellow zucchini, yellow straightneck squash, and pattypan squash that got just a little too big.

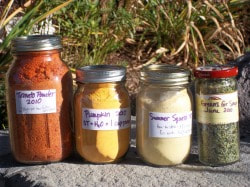
What do I do with summer squash powder?  Everything I do with the shredded or pureed fresh ones, plus some extras.  Zucchini bread. Zucchini brownies.  Smoothies. Chili, where it's great to help thicken it-- especially if I'm also using tomato powder and onion powder! Soups, where using a little becomes invisible and without any telltale flavor.  Added to regular wheat bread dough. Or muffins. Or pancakes.  

Tomato powder is even better.  I use it in place of tomato sauce, tomato paste, tomato juice, diced tomatoes. Here is a chart that tells you how much tomato powder to use in place of each of those. Tonight I added a bunch to a batch of too-runny salsa. It makes a wonderful base for marinara sauce or pizza sauce, and is used in making my own taco seasoning.  And when added to bread dough along with spices, it makes the bread taste like pizza. 

Pumpkin powder is also great.  It makes pumpkin pie, pumpkin shake, pumpkin roll... anything that you'd use pureed pumpkin in.  And again, I throw it in soup and chili to thicken them and add nutrition, and add to bread to help it stay moist longer.

I once made banana powder out of commercially-dried bananas; a neighbor had bought a 5-lb bag, found that nobody at home would eat them, and brought them to me to see if I could find a use for them.  (The powder was good in banana muffins, banana bread, and smoothies.)

​I've also made mushroom powder, carrot powder, beet powder, and dried crumbled greens. (The greens were a freebie in my yard, an edible weed known as 'redroot pigweed'. A very nutritious member of the amaranth family.) Mushroom powder adds a savory, almost meaty flavor to soups and sauces.  (I made the mushroom powder by starting with a big bag of dried mushrooms found at a Asian market.  If you're local, the place is Ocean Mart in Sandy.) The beet powder is the perfect thing to make from beets that got too big and tough for good eating.  And my favorite use for it is as a natural food color-- though it is also good in smoothies and recovery drinks. (Read what I have on beet powder, near the end of this post.)

All of these powders are made pretty much the same way.  You clean the vegetable,  (Pumpkin is steamed first. The others are handled raw.) slice it an even thickness (1/4- 3/8" is ideal), and dry until crispy.  Add them to a blender or food processor, and run until powdery.  Store airtight; even better if you can remove oxygen and seal the jar or other container.

Are you intrigued?  You can read more about each other these here, along with some recipes and tips:

Zucchini

Summer squash (Ok, zucchini is also a summer squash)

Tomato

Pumpkin

​What will you try?  

0 Comments

Week 5 assignment and DIY Instant Oatmeal Packets

5/11/2019

0 Comments

 
Picture
Your assignment this week is to look through the grocery ad for things on your inventory list that you need. With the budgeted amount of money you have (ballpark figure is $14 per week, per person) buy your three months' worth of however much you can on your list.

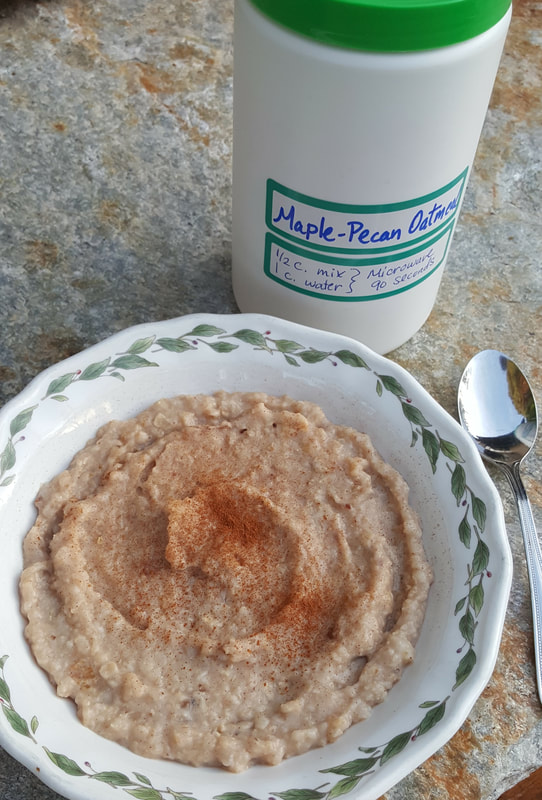
Do you like to use instant oatmeal?  You can save money (and know exactly what you're eating) by making your own. It's so quick and handy to have it all made up!
 
Homemade Instant Oatmeal 
4 cups quick oats (oatmeal), gluten-free if you need them
1-3 tsp. cinnamon
½ - 2/3 cup brown sugar*
½ - 1 tsp. salt
optional: 1/2 cup dry milk powder
optional: 1 c. chopped dried fruit or toasted nuts

Put 1 ½ c. of the oats in a blender; blend on high until almost powdery.  Dump this into a medium-sized mixing bowl; stir in cinnamon, brown sugar, salt, and milk powder and fruit/nuts if you’re using them.
 
After making it for the first time, see if it needs adjusted for your family’s tastes-- take 1/4 c. of this mix, combine in a bowl with ½ cup water, and microwave for 60 seconds. Taste it.
Is it great? Does it need more cinnamon? Sugar? Salt?  Add as needed, then cook another bowlful to see.  Take notes so you don’t have to do this next time.  😊 
 
Store in a canister, a quart-sized ziptop bag, or pre-portioned into snack-sized ziptop bags.
This batch can easily be doubled or tripled.
 
You can pre-portion these into snack-size baggies (then reuse baggies!), or just keep a measuring cup in the canister or bag. If you want individual servings measured out ahead of time, place either 1/2 c. or 1/3 c. mix in each baggie.

TO USE:
One large serving:  use ½ c. mix and 1 c. water.  Microwave 90 seconds; let stand. 
One small serving: use 1/3 c. mix and 2/3 c. water.  Microwave 60 seconds; let stand.
For four large servings (or 6-8 small ones), use four cups boiling water and add 2 to 2 ½  cups oatmeal mix.
Adjust water and/or mix to make it as thin or thick as you like.  

    
* For children who aren't yet accustomed to sugary oatmeal, use 1/2 cup brown sugar.  For those sugar-addicted husbands, you may need to add more. Regular sugar, evaporated cane juice, or an appropriate amount of stevia may be used. 
If your brown sugar is lumpy, it can be added to the blender with the 1 ½ c. of oats and blended with them.
 
Here are some flavor combinations; the sky's the limit!

Apple Cinnamon- Use the higher amount of cinnamon; you might even go up to 1 ½ to 2 Tbsp. Stir in 1 c. chopped dried apples.

Apricot Almond- Add 1 tsp. almond extract to the oats being blended.  At the end, stir in ½ c. finely chopped dried apricots and ½ c. chopped toasted almonds.

Banana Maple- Add ½ tsp. maple extract and ½ to 1 c. banana chips to the oats when they’re blended.

Chai Spice- Use 2 tsp. cinnamon, 1 tsp. ginger, ½ tsp. cardamom, and ¼ tsp. cloves. (If you like, you can also add ¼ tsp. ground black pepper and ½ tsp. allspice.)  For Vanilla Chai, add 1 Tbsp. vanilla to the oats when they're blended, or use vanilla powder.
 
Date Nut- Use the higher amount of cinnamon. At the end, stir in ½ c. finely chopped dates and ½ c. toasted chopped walnuts or other nut.  TIP- if you chop the dates and the nuts together, the dates won’t stick to your knife as badly.
 
Dinosaur- Use the higher amount of cinnamon. Stir in ¼ c. dinosaur-shaped sprinkles.
 
Maple Brown Sugar- Add ½ tsp. maple extract to the oats being blended. Use the higher amount of brown sugar (dark brown if you have it), and the lower amount of cinnamon.

Pumpkin Spice- Use 2 tsp. cinnamon, plus 2 tsp. ginger, 1 tsp. nutmeg, and 1/2 to 1 c. pumpkin powder. Best if you also use the 1/2 c. dry milk powder.

Raisin, Apple & Walnut- Use the higher amount of cinnamon.  At the very end, stir in ½ c. chopped raisins, ½ c. chopped dried apple, and ½ c. chopped toasted walnuts.

Strawberries and Cream- Use either ½ c. dry milk powder, or ½ c. powdered creamer. Stir in 1 c. chopped dried or freeze-dried strawberries. You can also make Raspberries and Cream, Blueberries and Cream, or Peaches and Cream this way.
 
Very Berry- Add 1 tsp. vanilla to the oats being blended. Use the lower amount of cinnamon.  Omit brown sugar, and use 1 c. of the berry drink mix from the Home Storage Center. Stir in 1 c. chopped dried cranberries or other dried berry.
0 Comments

Healthy Peanut Butter-Chocolate Banana Bars

3/23/2013

1 Comment

 
Picture
These have fiber, protein, and are much lower in sugar than almost any baked treat!  And they really are good.  My family snarfed down this batch. 

Besides all that, they're also wheat-free and dairy-free.

Healthy Peanut Butter-Chocolate-Banana Bars

1 1/2 cups cooked white beans (one can, drained and rinsed)
2 eggs
2 ripe medium bananas
1/2 c. peanut butter
1/4 c. brown sugar or honey (or 1/2 c sugar, if you like things on the sweeter side)
2 tsp. vanilla
1 tsp. baking powder
1/2 tsp. salt
1/2 cup quick-cooking oats
1/3 c. chocolate chips (the darker the better)

Preheat oven to 350 F.  Put the beans, eggs, bananas, peanut butter, brown sugar, and vanilla in a food processor or high-powered blender.  Run until very smooth.  Stir in the baking powder, salt and oats.  Spread in a greased 8x8 pan then sprinkle with chocolate chips.  Bake 30 minutes or til test done with a toothpick.  Cool at least 15 minutes before cutting.  These are even better the next day.

For a variation on this, substitute pumpkin puree for the banana, increase sugar/honey to 1/2 c., replace almond or cashew butter for the peanut butter, then add 1-2 tsp. pumpkin pie spice.
1 Comment

Creamy Fruit Salad- CF

2/1/2013

0 Comments

 
Picture
One of my children is needing to avoid dairy for a while, but I found strawberries on sale and wanted a creamy salad using them.  Add some pudding?  Not an option.  Yogurt?  Nope. Whipped cream?   No, but... I had coconut cream.  The thick, creamy, good stuff you find at the top when you open a can of coconut milk.  So I used that.  It worked beautifully.  Everyone was happy.

It's super fast, too.  If you feel like making it fancier, you can whip chilled coconut cream (yes, it whips, just like dairy cream, but goes flat faster if it warms up).

Creamy (Dairy-free) Fruit Salad
1/2 pint fresh strawberries, hulled and sliced
2 bananas, peeled and sliced
1 apple, cored and chopped (I leave the peel on)
3 Tablespoons coconut cream
3 drops lime or orange essential oil, optional
2 Tablespoons shredded sweetened coconut

Combine fruit in a medium bowl.  In a small bowl, stir together the coconut cream and essential oil, until smooth.  Pour over fruit and stir gently to coat.  Sprinkle with coconut.
(If you like things sweet or if your strawberries are sour, add 1 Tbsp. honey to the coconut cream mixture
Serves 4-6


0 Comments

Chewy Dried Bananas

8/25/2012

4 Comments

 
Picture
If you've only had 'banana chips' from the store- you have missed out.  Those cardboard-like sorry excuses for fruit are NOTHING like home-dried bananas.  Banana chips are fried  (very high in fat) and bland; on the other hand, home-dried ones are sweet and chewy.

Sometimes you can buy a case of bananas for a steep discount- a friend of mine has an arrangement with one of the local grocery stores.  She calls them once a week or so, and if they have too many bananas, they sell her the 40-lb. case for $8.  That's $ .20/lb.   This week I found some at NPS for $4/case! 

To dehydrate them, you can, of course, use any dehydrator available, or even dry them on clean window screens on a hot roof or in a hot car...

Mine, so that you can get a size comparison, is an American Harvest (now Nesco) 'GardenMaster'.   (I got it used through the local Classified ads, 15 years ago, for $40.)  I have the extra trays, for a total of 8.  Each tray can hold almost 2 lbs. of sliced bananas, 15 lbs. total.  So the 40-lb box fills the trays twice, with enough left over for a double batch of banana bread (to freeze) and eating a bunch fresh. 

I dry them on about medium heat- 120 degrees F or so, and it takes about 18-20 hours.  They'll be a little bit more dry if you let them cool before packing into jars.

If you want the dried product to be a little lighter in color, you can coat or dip them in a lemon-honey mixture.  Combine 1/4 c. honey, 1/4 c. water, and 2 Tbsp. lemon juice.  Mix well.  The easiest way to use it is put it in a clean spray bottle and mist the slices once they're on the tray.   The photos below are of untreated slices.

Dehydrate, enjoy!
4 Comments

    Need a Search bar?
    One day I may upgrade my website-- but until then, use your web browser search bar. Type in my web address and what you're looking for, like this-- 
    www.theprovidenthomemaker.com  pumpkin --  and you should get results.


    Author

    I'm a disciple of Christ, a member of the Church of Jesus Christ of Latter-day Saints, a family-defending, homemaking, and homeschooling mom of eight children, two of whom sometimes can't have milk or wheat. Growing up on a farm in a high mountain valley, my parents taught me to 'make do', work hard, smile, and help others.  I love cooking, learning, growing food and flowers, picking tomatoes, and making gingerbread houses --which CAN be made allergy-friendly-- with my children.  I hope you find something to help you on my site!

    Archives

    April 2024
    July 2023
    April 2022
    September 2021
    March 2021
    December 2020
    April 2020
    March 2020
    February 2020
    January 2020
    December 2019
    November 2019
    October 2019
    September 2019
    August 2019
    July 2019
    June 2019
    May 2019
    April 2019
    January 2016
    November 2015
    October 2015
    September 2015
    March 2015
    February 2015
    November 2014
    October 2014
    September 2014
    August 2014
    July 2014
    June 2014
    May 2014
    April 2014
    March 2014
    February 2014
    January 2014
    December 2013
    November 2013
    October 2013
    September 2013
    August 2013
    July 2013
    June 2013
    May 2013
    April 2013
    March 2013
    February 2013
    January 2013
    December 2012
    November 2012
    October 2012
    September 2012
    August 2012
    July 2012
    June 2012
    May 2012
    April 2012
    March 2012
    February 2012
    January 2012
    December 2011
    November 2011
    October 2011
    September 2011
    August 2011
    July 2011
    June 2011
    May 2011
    April 2011
    March 2011
    February 2011
    January 2011
    December 2010
    November 2010
    October 2010
    September 2010

    Categories

    All
    Alcohol
    Alternate Cooking
    Appearances
    Apple
    Apricots
    April Fools
    Aprons
    Bananas
    Beans
    Beef
    Beets
    Bench
    Beverages
    Bonnet
    Bread
    Breakfast
    Budget
    Budgeting
    Cake
    Candy
    Canning
    Carrots
    Cheese
    Chicken
    Children
    Chocolate
    Christmas
    Cleaning
    Coconut
    Comfrey
    Common Core
    Constitution
    Cookbook
    Cookies
    Cooking Oil
    Crafts
    Dairy Substitutions
    Dehydrating
    Dessert
    Dried Fruit
    Earth Oven
    Earthquake
    Easter
    Edible Weeds
    Eggs
    Emergency Prep
    Essential Oils
    Faith
    Family Home Evening
    Fertilizing
    Food Storage
    Fourth Of July
    Freezer
    Frosting
    Fudge
    Garden
    Gardening
    Gingerbread
    Gluten
    Gluten Free
    Gold
    Government
    Grains
    Gratitude
    Hat
    Herbs
    Home Remedies
    Home Repairs
    Homeschool
    Home Storage
    Honey
    Hope
    Inflation
    Leftovers
    Legumes
    Lemon
    Main Dishes
    Mixes
    Mothers
    Noah
    Non Artificial Colors
    Non-artificial Colors
    Nuts
    Oats
    Oil
    Orange
    Paint
    Peaches
    Pear
    Pie
    Pizza
    Plums
    Poem
    Popcorn
    Pork
    Potatoes
    Powdered Milk
    Prayer
    Preparedness
    Projects
    Prophecy
    Pruning
    Pumpkin
    Quick Bread
    Rhubarb
    Rice
    Salad
    Salt
    Sauces
    Self Reliance
    Self-reliance
    Sewing
    Shelf Life
    Shelves
    Sky
    Smoothie
    Snacks
    Soup
    Spices Or Seasonings
    Squash
    Strawberries
    Substitutions
    Sugar
    Summer Fun
    Three Month Supply
    Time
    Tomatoes
    Trees
    Truffles
    T-shirts
    Tuna
    Ultra Gel
    Valentine\'s Day
    Vegetables
    Water
    Watermelon
    Wheat
    Work
    Year Supply
    Zucchini

    RSS Feed

Web Hosting by iPage