The Provident Homemaker
  • Recipes and Info
    • Making Bread
  • My Blog
  • Favorite Resources
  • Documents and Files
  • 52 Weeks of Building Storage

Week 41- Walnut Meat(less)Loaf

1/25/2020

1 Comment

 
Picture
To help with building your year's supply (this is Week 15 of 26), see this chart. 

This month’s focus has been powdered milk, but I tried an unusual and economical recipe I’d like to share this week.  Next week I’ll show you how to make either cottage cheese or Queso Fresco. The process is the same until the final steps.

Last week I pulled out a small recipe collection from 1931. It was a supplement to the Millennial Star, and was titled, “Word of Wisdom Menus and Recipes”. (You can find in on pages 17-38  of this pdf, or here if you want to view on a phone without downloading.) 

There were some familiar-sounding recipes— Egg Toast. Lentil Soup. Cheese Toast. Macaroni and Cheese. Eggs Goldenrod.  There were others I’d never heard of, let alone tried-- Rice Renown. Tomato Surprise. Haricot Beans and Parsley Sauce. Scotch Stew. Ruby Salad (beet-onion-banana-parlsey, topped with lemon vinaigrette).  Walnut Roast.

It turns out that ‘haricot beans’ is an old name for regular white beans.
The walnut roast was something baked in a “buttered basin”. What was this food?  So I made it for dinner, to find out. I made the Scotch stew as well, since there were several vegetables in my fridge needing used.

The stew was a fairly straightforward vegetable soup. And the walnut loaf?  It was surprisingly good. My children all thought it was meatloaf and ate every last bit of it. I even told them what it really was, right off the bat. I didn’t think to take a photo of the finished loaf, but maybe I’ll remember to do it next time.

Here’s the modernized recipe, with measurements and pan sizes you’ll recognize.
Picture
Walnut Meat(less)Loaf
Makes about a 1-pound loaf.

1 Tbsp. butter
1 tsp. flour
1/3 c. dry bread crumbs or dry oatmeal
1 cup milk
½ c. walnuts
Half an onion, or one small onion
2 eggs
½ tsp. salt
 
Heat the oven to 350
°F. Melt the butter; add flour, crumbs, and milk.  Bring to a boil. (I microwaved it for about 1 ½ minutes.) It should be about the consistency of pudding. Set aside to cool.  Butter or spray a small loaf pan.* Meanwhile, mince the onion and chop the walnuts fairly small.  Beat the eggs well in the measuring cup you used for milk (why dirty an extra dish?), then mix in the walnuts, onion, salt, and any extra seasoning you like. (I added ½ tsp. oregano.) Pour the milk-crumbs mixture over the top, and stir well.  Scoop this into the buttered pan, and bake until set, about 40 minutes. 

*Mine was baked in an 8x4” loaf pan, but was only about 2” thick when done.  If you want more of a thicker loaf shape, bake this in a 6x3” loaf pan or any other 2-cup ovenproof baking dish. You could also bake this in 4-6 greased muffin cups, for individual servings of a meatless main dish.  
 
This meaty-tasting loaf was delicious plain, and will be making it again! It would be good with a little ketchup, barbecue sauce, or with a baked-on ketchup-brown sugar glaze, or with chili sauce. Next time I want to try it with a little bit of Liquid Smoke added. 


Another version of walnut roast, from 1915, uses more crumbs, less onion, one egg, and says the egg may be left out.  I haven't tried it that way yet.
Picture
This chili sauce recipe is from the same little 1931 recipe brochure. 
1 Comment

Week 27- Beginning a Year's Supply, Recipe for Old-Fashioned Egg Toast

10/12/2019

0 Comments

 
We're on to the next phase of the 52 weeks of building your food storage!  The next 26 weeks we'll focus on getting and storing basic foods that last a long time.  These include wheat and other grains, beans and other legumes, powdered milk (if you're not allergic), cooking oils and other fats, salt, and sugar.  Click here for a list of how much of each you will be aiming for per person, and what foods work in each category. Did you know that you can store less when children at home are small?  It makes sense, right?  Quantities for them are listed on the link, too.
​
Your assignment this week-- Buy all the salt you'll need, according to that list.

​See how easy that was?
Picture
This is an inexpensive, filling, easy, pioneer-era recipe.  It makes a great breakfast, or a lighter late supper.   And it's much cheaper than eating cold cereal for breakfast-- especially if you make your own bread-- so you'll have some budget money left over for your other foods.

Poach an egg in a little milk. (See below for instructions.) Meanwhile, toast two or three slices of bread.  Put the egg into a cereal bowl (save the milk), and chop up the egg.  Tear one or two slices of the toast into 1/2 - 1" pieces and put on top of the egg.  Pour the hot milk over all.  Add a nice big dab of butter on top, sprinkle with salt and pepper.  Stir a little bit, serve with the last slice of toast.

Poaching is essentially hardboiling an egg, but doing this after taking it out of the shell.  Eggs can be poached in water, milk, broth, or soup. In this recipe, we use milk because it's part of the finished dish.

Poaching option one:  Microwave.  
Fill a mug 1/2 to 3/4 full with milk.  Crack an egg into it, poke the yolk so it breaks (so it won't explode during cooking).  Microwave just until the egg is firm.  Let it rest a couple minutes while you make the toast. 
When I used 1/2 c. milk and 1 large egg, it was done enough in 1 minute 20 seconds.  The times I tried cooking longer than that, the milk bubbled out of the mug and went all over.  The white was a little bit jelly-ish on the outside, but after sitting for a couple of minutes in the hot milk, everything firmed up, and the yolk was perfectly cooked.

Poaching option two: Stovetop.  
Pour 3/4-1 c. milk in a small saucepan and heat to a simmer over medium-high heat.  Once simmering, crack an egg and gently slide it into the milk by tipping the shell right next to the milk.  Cook until as firm as you like, about 2-4 minutes.
Picture
Picture
Picture
0 Comments

Pineapple Coconut Bread Pudding

1/23/2016

1 Comment

 
Picture


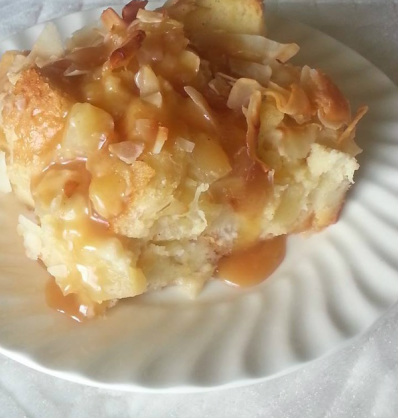
Pineapple-Coconut Bread Pudding 
1 (20-oz) can crushed pineapple
¾ cup sugar, divided
2 c. cream or coconut cream*
½ tsp. salt, divided
1 loaf stale French bread, cut in 1" cubes, or a pound of other bread, cubed
1/2 tsp. cardamom
3-4 eggs 
1 c. whole milk or coconut milk
2 tsp. vanilla
1/2 c. shredded coconut

If your bread isn't already stale and dry, put the bread cubes in the oven at 375 until they're dried out.  
Make a caramel sauce- combine 2 Tbsp. juice from the canned pineapple with 1/2 c. sugar in a saucepan.  Heat on high until brown, stirring often.  Add 3/4 c. cream; stir until the caramel chunk has dissolved.  Add 1/4 tsp. salt.  Pour about half of this into the bottom of a greased 9x13 pan.  Save the rest.
Mix together bread, undrained pineapple and cardamom.  Dump into a 9x13 pan.  Using the same bowl as before, beat the eggs, then stir in 1/4 c. sugar, the remaining cream, milk, vanilla, and 1/4 tsp. salt.  Mix until  sugar dissolves.  Pour all of this over the bread and let sit for 5-20 minutes to soak.  Sprinkle the coconut over the top.                                          

Bake at 375 degrees for 30-35 minutes, until center is set.  Serve warm, with a little of the remaining caramel sauce drizzled on top.

*If you don't have cream, use milk instead, for a total of 3 cups.  Also melt 1/4 c. butter and beat it in with the eggs.


1 Comment

April Fools' Day Breakfast

3/31/2015

0 Comments

 
Picture
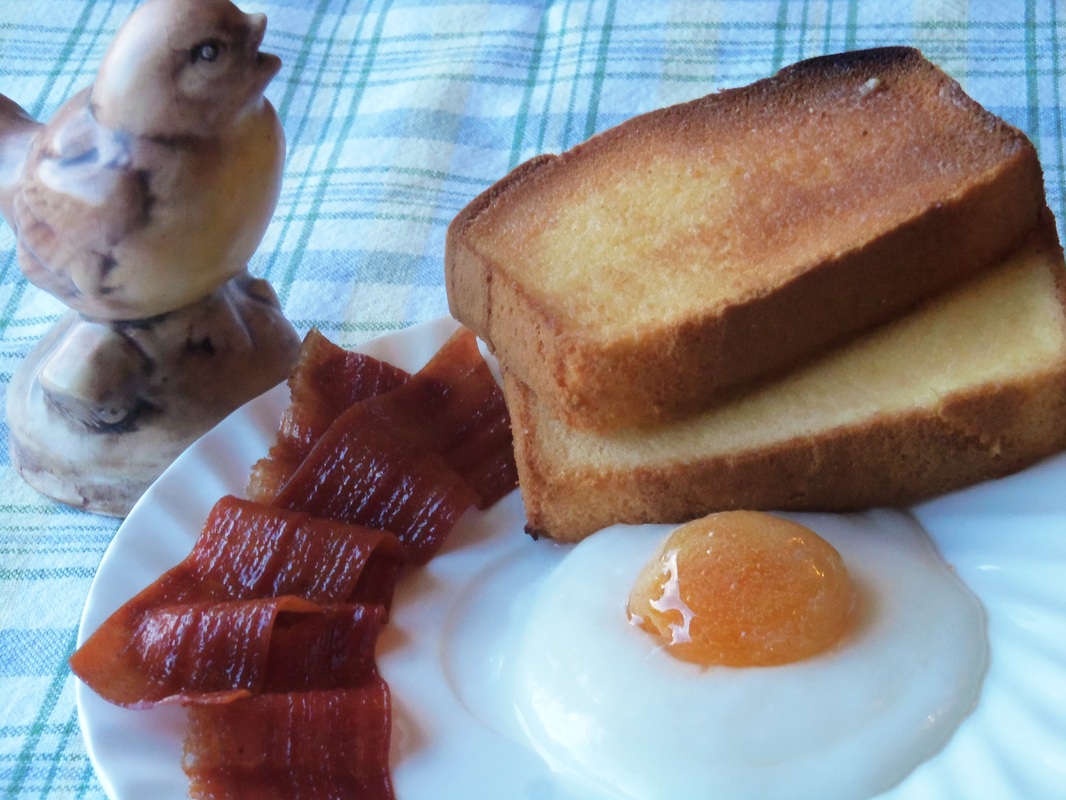
Mmm.... bacon, eggs, and toast!   

Or not.

Toast:
Pound cake, sliced and toasted.  Then buttered.

Eggs:
The white:  I used some quick frosting  (1 cup powdered sugar, 2 tbsp. melted coconut oil, a bit of vanilla, and enough milk-- any kind-- to let it softly hold its shape.)  Other options include nearly-melted commercial vanilla frosting, stirred sour cream, stirred vanilla yogurt, or stirred Greek yogurt.
The center is a dried apricot, plumped in hot water for about 20 minutes, then blotted dry and shaped by hand to look more round.  I stuck a whole almond inside to make the 'yolk' stand up better.
To make the 'yolk' look more wet, I brushed it with a little bit of corn syrup.

Bacon:
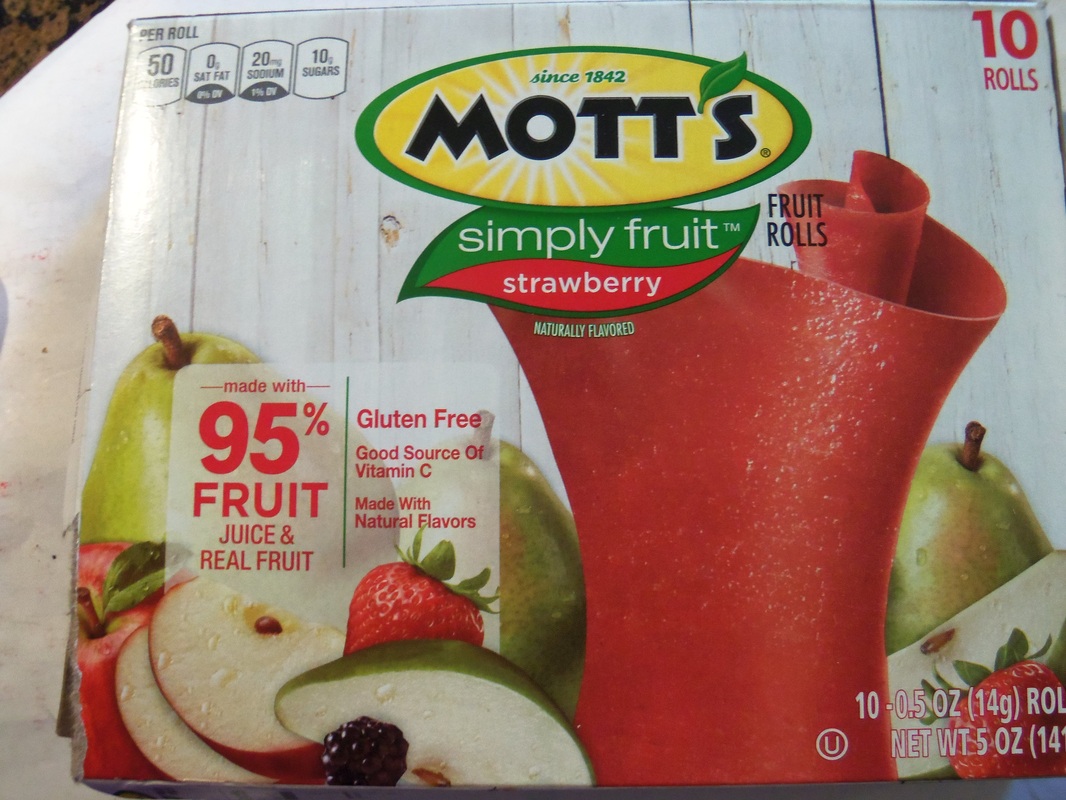
Today I found some natural fruit rolls that I'd not seen before.  I bought some, and found that rather than being the smooth, flat rollup I expected, it was full of different thicknesses in the stripes the machine put down.  This enabled it to pull off in strips to eat.  And it resembled bacon!  One roll yields about four  1 1/4" wide strips, which I cut using a pizza cutter.   Make them ripple a bit when you put them down.
Picture
0 Comments

Pumpkin Cake Roll

11/17/2014

0 Comments

 
Picture
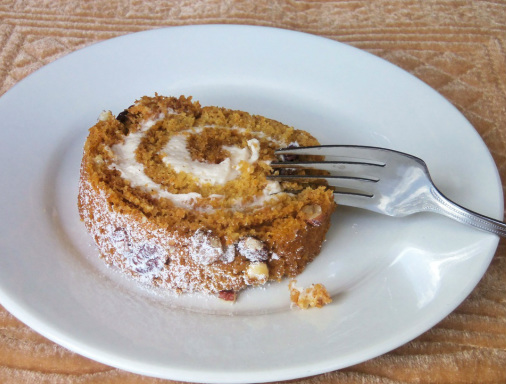
Pumpkin Roll
Makes 18, 1" slices.  

4 eggs                                                                          
1 1/3 c. sugar
1 c. pumpkin                                                             
1 c. flour                                                                    
1 tsp. baking powder
1 Tbsp. cinnamon                                                            
1 1/2 tsp. ginger
3/4 tsp. nutmeg                                                              
½ tsp. salt
1 c. chopped nuts, optional

Beat eggs until well mixed.  Gradually add sugar; this should take about two minutes.  Beat on high for another two minutes, until sugar is mostly dissolved and the mixture is thick and pale lemon-colored..  Stir in pumpkin.  Fold in flour, baking powder, spices, and nuts.  Grease and flour a 12x18" cookie sheet with 1" high sides, OR line it with parchment and grease the pan sides..  Spread batter in pan and sprinkle with nuts.  Bake at 375 for about 15 minutes, or til the cake springs back when pressed gently in the center.  Remove from oven.  While cake is hot, flip cake over onto a kitchen towel sprinkled liberally with powdered sugar.  Holding one of the wide sides of the cake, very carefully roll it up with the towel, cinnamon roll style. When cool, 2 to 4 hours later, unroll slowly and spread with cream cheese frosting.  Roll the cake again, without the towel!  Slice and serve. 

You can make this ahead of time and freeze it for later use.
If you don't have a 12x18" pan, but have a 10x15 pan, cut the recipe in half.  The batter will not be as deep in the pan, so bake a few minutes less.  (Mine took 12 minutes.)  Roll as above, but hold a narrow side as you roll it up.  This will give you one 10" wide roll.

Fluffy Cream Cheese Frosting
(the 1-1-1-1-1 recipe)

1 stick butter (1/2 c.), softened
1 c. powdered sugar                                                     
1 Tbsp. lemon juice OR water or milk (lemon accents the zing of the cream cheese)
1 tsp. vanilla
1 (8 oz.) pkg. cream cheese, chilled and cut into 8 cubes                                          

Combine butter with powdered sugar, lemon juice, and vanilla.  Beat until smooth.  Add cream cheese, one cube at a time, beating until smooth after each.  Once they're all incorporated, beat another minute or until frosting is fluffy.
0 Comments

Santa Rosa Plum Gelato

8/16/2014

1 Comment

 
Picture
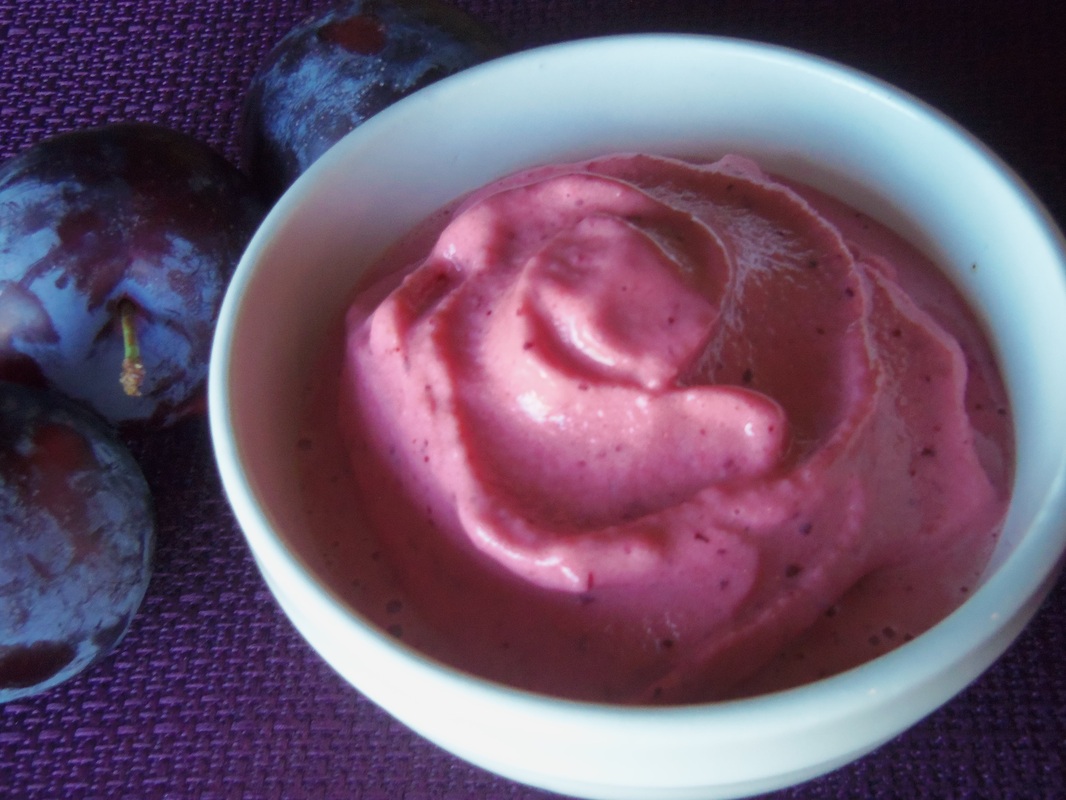
Santa Rosa plums are dark on the outside, often with a bluish hue that rubs off, ruby-colored inside, and explode with sweet juice when you bite into a fully ripe one.  They are apparently highly prized, which is nice for me, because my 3-in-1 plum tree is about half Santa Rosa.  They tend to ripen pretty much at once, which means we have only about a two-week window for eating them fresh, and need to be quick about canning, drying, making jam, or otherwise using them.  

Gelato usually uses milk instead of cream, and sometimes fewer egg yolks, as well.  If you use whipping cream in place of the milk, you'll have plum ice cream instead.  You can triple this batch if you really, really want to pull out your ice cream maker, but this smaller batch can be made using a high-speed blender. It's lightly sweet, with just enough brightness from the fruit, and full of flavor.  And yes, you may use other types of plums.  The color may or may not be the same, though, depending on the variety you use.  If you can't have eggs, you could thicken the milk with 1 Tbsp. cornstarch instead, but it won't be as creamy.

One pound of plums can mean anything from 4-10 plums, depending on their size.  If yours are small, ping-pong-ball sized, you'll need about ten.  If they're big ones, 2 1/2" across or so, you'll likely need only 4-5.  Either way, the goal is to end up with about 1 3/4 c. puree.

Santa Rosa Plum Gelato
Makes about one quart

1 lb. Santa Rosa plums
1/8 tsp. almond extract, optional but delicious!
1/2 tsp. vanilla extract
1 c. whole milk, divided (dairy-free options include almond milk, rice milk, or coconut milk)
2 egg yolks
pinch of salt
1/2 c. sugar

Wash plums and remove stems.  Remove pits; you'll to cut them out.  Drop the pitted plums into a high-speed blender, add almond and vanilla extracts, and blend until smooth.   Pour into two empty ice cube trays.  Pour 1/3 c. of the milk into the blender and swish it around to get more of the puree; pour this into the ice cube trays as well.  Put them in the freezer.

Combine the two egg yolks, salt, and the sugar in the unwashed blender.  Heat the remaining 2/3 cup milk in the microwave for 1 minute, until steaming.  Meanwhile, turn the blender on to beat the yolks and sugar.  With the motor running, pour the hot milk in a thin stream into the yolks.  Once it's all in, increase speed to high, and run about two minutes, until the custard thickens slightly.  It will begin to coat the blender sides with a slightly thicker, opaque coating, and the mixture will steam quite a lot.  

Pour the custard into a container with a lid; refrigerate. Wash the blender; there's not much more unpleasant to wash off than dried egg yolk!

3-4 hours later, pull both the now-frozen puree and the now-chilled custard out.  Pour the custard into the (washed!) blender, add the puree cubes, and blend, using the plunger handle to get them to mix.

The gelato will be a soft-serve consistency.  If you want to be able to form round scoops, pour in a container and return to the freezer for another 1-3 hours.

1 Comment

Moist, refined sugar free, grain-and-gluten-free Chocolate Quinoa Cupcakes

3/14/2014

0 Comments

 
Picture
A friend recently shared this delicious recipe with me.  Since I wanted to make cupcakes for a friend who can only handle sweeteners like honey and agave, it was time to tweak the recipe.  You can find the original, sugar-sweetened, recipe here, if you want to compare it to my version. As cupcakes, they needed more moisture than the original, plus a couple things needed adjusted to allow for honey.  And I discovered that the amount of water your quinoa was cooked in makes a huge difference in whether they're dry, moist, or collapse when baking.   (Not to worry, the problem should be solved now!)   Quinoa is technically a seed and not a grain.

I tried really hard to find a way to use just the blender to make the batter, and not need both it and a bowl, but the batter puffs up so much once the leavening is added, that it just didn't work out that way .  Oh well.

Everyone who has tried these loves them.

Moist Chocolate Quinoa Cupcakes

1/2 c. uncooked quinoa*
1 1/4 c. water 
1/3 c. any kind of milk (dairy, almond or coconut are fine)
4 large eggs
1 tsp. vanilla
3/4 c. melted coconut oil or other liquid vegetable oil
2/3 c. honey
a few drops of orange essential oil, or the washed peel of one clementine, optional
1 c. unsweetened cocoa powder
1 1/2  tsp. baking powder
1/2 tsp. salt

Cook the quinoa, covered, in the 1 1/4 cups water:  either combine in the microwave or stovetop.  To microwave,  put them in a microwave-safe bowl, cover, then cook for 5 minutes at full power, then 5 minutes at 50% power.  For stovetop:  combine in a pan that has a tight-fitting lid.  (If the lid isn't, use 1 1/2 cups water to compensate for what will evaporate.)  Bring to a boil, reduce to a simmer, and let simmer for 20 minutes, until water is all absorbed.
*or use 2 cups cooked quinoa and omit the water.

Preheat oven to 375 degrees.  Put liners in 18-24 cupcake tins, depending on how high you want the cupcakes.

Combine in a blender the cooked quinoa, milk, eggs, vanilla, oil, honey, and orange oil/peel if using it.  Blend until smooth.   Mix the cocoa powder, baking powder, and salt in a medium bowl.   Pour the quinoa mixture over the top, and stir until well-combined.  Spoon into cupcake liners, or use a spring-loaded ice cream scoop instead to portion out the batter.

For an easy, sweet topping, sprinkle each cupcake before baking with a few semisweet chocolate chips and chopped pecans or other nut.

Bake for about 20 minutes, until the top of a cupcake springs back when lightly pressed with a finger.

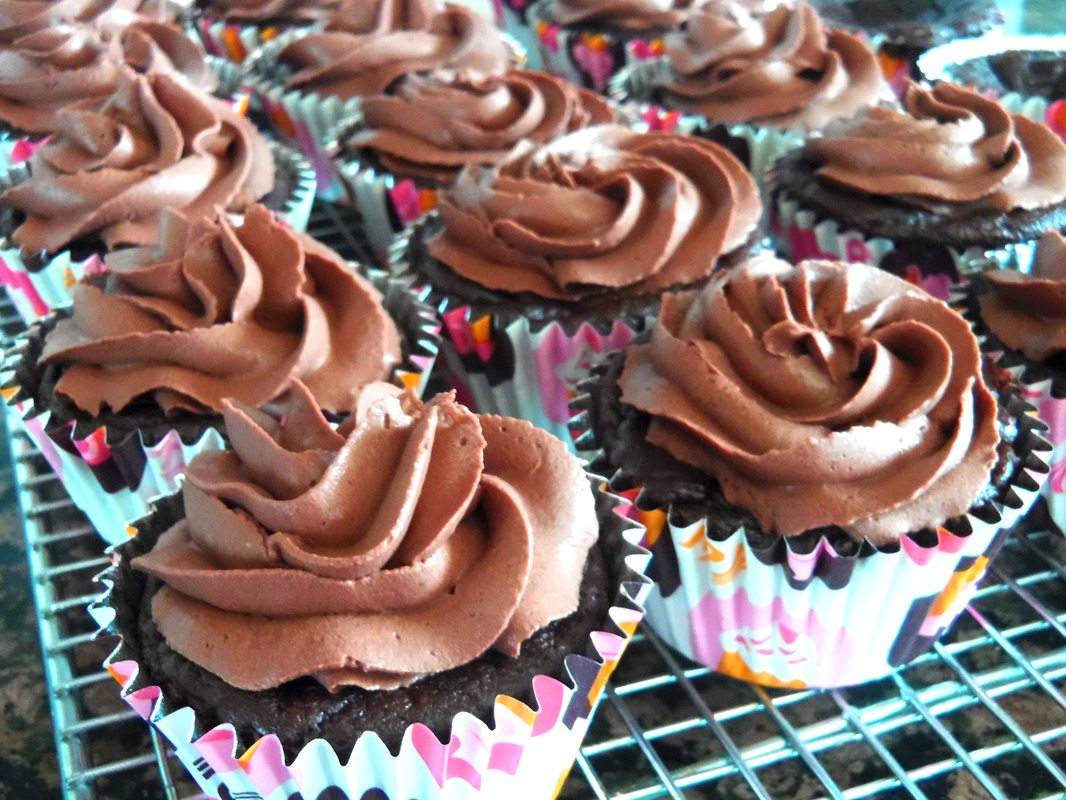
Frost with your favorite frosting if you like, or  try any of these.   The cupcakes above are frosted with whipped coconut cream with melted chocolate beaten in:  use 1 cup of chilled coconut cream and 1 cup melted semisweet chocolate.  Whip the cream until it starts to hold soft peaks, then add in the chocolate plus a teaspoon of vanilla and a pinch of salt.  Beat until fluffy and smooth.


0 Comments

Two-minute Egg and Cheese Breakfast Sandwich

10/23/2013

0 Comments

 
Picture
Today I read a research article about how having breakfast as your biggest meal of the day  rather than dinner can lead to both better insulin sensitivity and increased fertility.  In the study, they had women consume about 980 calories at breakfast, which was just over half the amount for the whole day.  If you use two slices of homemade or other good-quality whole-wheat bread (about 120 calories apiece), one large egg  (80 cal), and a one-ounce slice of real cheese (about 100 cal), you're almost halfway there.  I love to eat this with a fresh apple (a medium-large apple is about 100 calories).  

OK, so that's still not up to the numbers in the study.  But it's a great breakfast anyway.  Maybe make two?  

In less time than it takes to go through the drive-through, you can have a breakfast sandwich you made yourself.  At the bargain-hunting prices I pay for food (including making the bread), a two-slice sandwich costs just under $ .30.  (The bread costs me about $ .50 for a 1 1/2 pound loaf.  See the recipe here.)  
Dress it up with anything you want on it, or leave it simple.  I don't add salt to the egg because the cheese and bread are salty enough for me. For more flavor, add a sprinkle of oregano or other seasoning.  You can make it as healthy as you like; I use homemade whole-wheat bread for a breakfast that sticks with me for more than an hour.

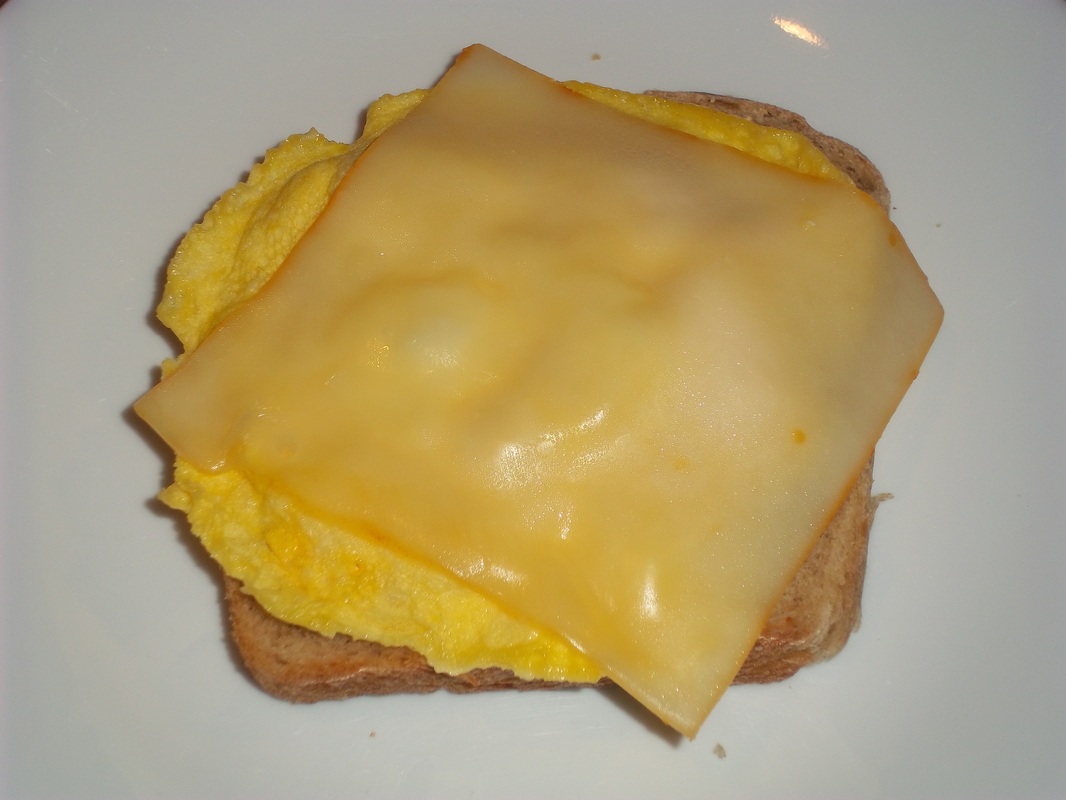
Here are the quick instructions:  microwave one beaten egg for about 45 seconds, top it with a slice of cheese, put this on top of a slice of toast.
If you want a sausage-and-egg sandwich, before cooking your egg, put one precooked sausage link into the cereal bowl, chop it up with the fork, then add the egg and beat it. 

The photos below have more detailed instructions.
0 Comments

Free e-book! Cooking with Eggs- Omelets and Frittatas

9/20/2013

0 Comments

 
Picture
 Today I have a free e-book offer for you, a cookbook, “The Egg and I.” It has tons of recipes for making omelets and frittatas, along with great tips on mastering eggs in the kitchen.

It's just over 40 pages of recipes for all kinds of omelets plus pages of frittatas

You can get it here, and you'll get to choose from four formats: PDF, Microsoft Word, HTML, or Kindle. 

Here's what Dennis Weaver, the cookbook's author, says:

The difference between a frittata and an omelet is that the ingredients in the frittata are mixed into the eggs instead of folded into an omelet. Usually a frittata is started on the stovetop and then baked in the skillet in the oven. They are sometimes called flat omelets or farmers’ omelets. They are larger and cut into slices to serve.

This is not your ordinary e-Book!  It has 31 different scrumptious omelet recipes. Omelets you won’t find anywhere else plus more than $30 in recipe books. Plus it tells you how to make them and gives video instructions.  Start making omelets like a pro. You can 
eat them for breakfast, lunch, and dinner.  

The last time we visited my son and his family in Minnesota, we stopped at Keys Café in Saint Paul where I had “The Loon Omelet” which personifies how versatile an omelet can be. The Loon Omelet is made with wild rice, mushrooms, onions, tomatoes, Swiss cheese, turkey, and topped with a hot mushroom sauce.

You can even make a party out of omelets, or host the next family gathering with an omelet bar. You’ll learn how here.

Omelets are easy, you can make one in as little as five minutes. You can make American omelets, Italian omelets, puffy omelets, and Irish omelets; even an omelet casserole.

Breakfast at your house will never be the same.
0 Comments

Lemon-Summer-Squash Bread

8/1/2013

0 Comments

 
Picture
Everyone knows you can make bread with zucchini- but what if you have a giant yellow summer squash hiding in the garden?

Both zucchini and yellow squash-- either straightneck or crookneck-- are summer squash, with a similar flavor and texture, and CAN be interchanged in recipes.

My family's favorite quickbread is Lemon Zucchini Bread- so today we got Lemon-SummerSquash Bread.  I no longer shred zucchini -or this squash- for recipes, but puree it instead.  No more strings.  As a bonus, if I'm freezing some for later use, the texture does not change when thawed, unlike shredded squash.  

AND, if you're pureeing it, you can have the blender (or food processor) mix all the wet ingredients for you.

This bread is great for breakfast.

The recipe is found over here, though the blender method is below. 
0 Comments

Five-Minute Individual German Pancake

6/12/2013

0 Comments

 
Picture
Do you love German Pancake but don't have enough time in the morning to bake one?

Try the microwave!   The five minutes, above, includes the time to mix the batter; it takes under one minute to cook.

It won't get brown and crispy on the edges, but it tastes pretty close to the same, especially if you happen to have some browned butter or ghee to use at the bottom of the cup.

This version makes 4 individual servings, or cut everything to 1/3 and have one little bit larger serving.

Five-Minute German Pancake

1 cup milk
1 cup flour
3 eggs
4 tsp. melted butter, ghee, or browned butter

Whisk together milk, flour, and eggs until smooth.

Pull out 4 (6 oz.) microwave-safe cups/bowls/mugs.  Place 1 tsp. melted butter in bottom of each.  Pour 1/2 cup batter in each; microwave until puffy and almost dry on the center top, about 45 seconds.  Drizzle with lemon juice and sprinkle with powdered sugar, or use whatever toppings you prefer.
0 Comments

Foolproof Omelet in Five Minutes

5/14/2013

0 Comments

 
Picture
By Dennis Weaver, preparedpantryblog.com,  May 13, 2013

This is the omelet for the omelet challenged.  Never make an ugly omelet again.  It’s nearly foolproof, it’s simple, and it’s quick.

We set off to make the best and easiest omelet, something that even a beginning cook could master.  We bought ten dozen eggs and started testing methods.  At the end, we were making five minute omelets—a little unorthodox but very good and nearly foolproof.

We called them “five minute omelets.”  You really can cook them in five minutes.  And the method is easy.

If you’ve ever made an omelet that didn’t fold well or broke apart or had a tough skin, consider this method.

The Method
Getting the omelet to cook through without over cooking the skin is a challenge. You can lift the edges of the omelet as it cooks to let the uncooked egg flow under the omelet and onto the pan surface. You can put a lid on top to trap heat coming from the hot pan.
But for some omelets, that isn’t enough. A surer method is start scrambling the eggs when they hit the hot pan, stopping when the eggs are partially cooked. Then pat the eggs into a smooth layer and let them finish cooking without a lid. It works. It’s quick and easy.
Instead of folding the omelet in the pan, simply tip the pan and let the omelet slide onto a plate. As the omelet slips onto the plate, twist of the wrist, and fold the omelet onto itself on the plate. (It’s easy to do; in two or three tries, you’ll have the method mastered.)
This method worked so well that we declared a victory. We recorded our methods, developed a couple of recipes, and described the method in an email.
Later we started placing a plate over pan for just a couple minutes once we stopped scrambling and then removing the plate before the omelet was cooked. That accelerated the cooking a little and gave us warm plate on which to serve the omelet but we didn’t leave it on long enough to hide when the omelet was done.

We had perfect omelets in five minutes.  Step-by-step instructions below.

WHAT'S THE KEY TO SUCCESS?  IT'S THE PAN.  IT HAS TO BE THE RIGHT SIZE-- AN EIGHT-INCH PAN FOR A THREE-EGG OMELET-- AND ABSOLUTELY NONSTICK OR THE OMELET WON'T SLIDE FROM THE PAN.
Picture
How to Cook an Omelet Using This Method

  1. Choose the right size pan.  A three-egg omelet requires an eight-inch pan.  The pan should be nonstick.
  2. Whisk the eggs together in a bowl.
  3. Put a pat of butter in your nonstick pan.  Place it on medium-high heat.  On our stovetop, a high BTU gas burner, that’s 6 out of ten.  Heat the butter to just short of brown and swirl it around the pan.
  4. Pour the eggs into the hot pan.  Salt and pepper the eggs.
  5. Scramble the eggs with a soft silicone spatula scraping the bottom of the pan and the sides.  The eggs will cook quickly and curds will form.
  6. When the eggs approach the consistency of cottage cheese with mostly solids but some liquid egg, stop stirring.  Use the spatula as a paddle to pat the eggs down into an even layer.  Place a plate over the top of the pan.  The plate will trap heat and help cook the top of the omelet.  It also warms the plate so that you can serve the omelet on a warm pan.
  7.  Let the eggs continue cooking until the liquids are set and the top of the omelet is cooked.
  8. Place the fillings in a row across the omelet just off to one side.  For most fillings, you will want them cooked.The omelet should slip around in the pan without a hint of sticking.  Move the pan to a plate, tip the pan on angle over the plate, and gently shake the omelet onto the plate filling side first.
  9. When the omelet is about half way onto the plate, twist the pan with your wrist folding the remaining omelet over that on the plate.  The omelet should be folded over with the bottom edge protruding about one-half inch.
What You’ll Need: Unless you’re going to make larger omelets, you’ll need an eight-inch skillet which is the perfect size for a three-egg omelet.  It needs to have a good nonstick surface so that it will slide out of the pan easily.  If you are making larger omelets, you will need larger pans.

You’ll also need a good silicone spatula to stir the eggs as they begin to cook and to slide under the omelet and loosen it if it starts to stick.  (Note from Rhonda- I've seen a Betty Crocker brand of silicon spatula at Dollar Tree for the last year.  The label does not specify that they're heat-resistant, but I called the company, and they're good to at least 400 degrees Fahrenheit!)

Get an eight-inch pan and start making foolproof omelets. 
0 Comments

Easter Story Cookies

3/27/2013

0 Comments

 
Picture
A friend sent me instructions for making Easter Story Cookies.  I tweaked the ingredients, tweaked the instructions, and changed some of the scriptures to ones I thought my younger ones would relate to.  (In other words, I don't know whose idea this originally was, but should no longer be considered plagiarism.:) 
This is a sweet way to bring some of the real meaning of Easter into your home!  For more Easter ideas, click on the "Easter" category on the right.

Mix these cookies the evening before Easter, they sit in the oven overnight, as an Easter morning surprise.

You will need:
  • 1 tsp. vinegar
  • 3 large egg whites
  • Pinch of salt
  • 3/4 cup sugar
  • 1 cup pecan pieces
Wooden spoon
Waxed paper or parchment
Masking tape
Bible

Preheat the oven to 325 degrees. (This is important, so don’t wait until you’re half-way done with the recipe).

Smell the vinegar. Put 1 tsp. into the mixing bowl. Explain that when Jesus was thirsty on the cross, He was given vinegar to drink. Read John 19:28-30 or Psalms 69:21

Add egg whites to the vinegar.
Explain that eggs represent life. Jesus gave His life to give us life. Read John 10:9-11.

Sprinkle a little salt into each hand. Taste it and brush the rest into the bowl.
Explain that this represents the salty tears shed by Jesus’ followers, and bitterness of our sins.  Show the wooden spoon, it represents the cross he carried and was nailed to.
Read Luke 23:27.

With a mixer, beat on high speed until soft peaks form.
Explain that the color white represents the purity of those whose sins have been cleansed by Jesus. Read Isaiah 1:18 and John 3:1-3.

So far the ingredients are not very appetizing. Add 3/4 cup sugar, a tablespoon at a time, as you continue to whip.  Keep mixing until they reach stiff peaks.
Explain that the sweetest part of the story is that Jesus died because He loves us. It wasn’t the nails that kept Him on the cross because nothing earthly could have. It was His love for us! Read Ps. 34:8 and John 3:16.

Fold in the nuts using the wooden spoon. Drop by teaspoons onto wax paper covered cookie sheet. Explain that each mound represents the rocky tomb where Jesus’ body was laid. Read Matthew 27:57-60.

Put the cookie sheet in the oven and close the door and turn the oven OFF! Each person places a piece of masking tape and seals the oven door. Read Matthew 27:62-66

Explain that they may feel sad to leave the cookies in the oven overnight. Jesus’ followers were in despair when the tomb was sealed. Read John 16:20, 22.

On Easter morning, watch the 4-minute video “He is Risen”, then open the oven and give everyone a cookie.

Notice the cracked surface and take a bite. The cookies are hollow!

Explain that on the first Easter, Jesus’ followers were amazed to find the tomb open and empty.  Suggested scriptures to read: John chapter 20 (5 minutes), 1 Corinthians 15:22 (two lines), Mosiah 16:6-9 (one minute).

Happy Easter, Everyone! Christ Lives & Loves Us!

0 Comments

Leftover Cheese Ball?

1/10/2013

1 Comment

 
You know how they say "great minds think alike"?   Three neighbors gave me cheeseballs as a Christmas gift.  One of them (Juliette's) was so good I made a batch of Juliette's Green Chili Cheese Ball to give out (and eat too).  The result was that I had a tad too much cheeseball in the fridge.  Granted, it will last a couple weeks if wrapped well- 

but I also had some leftover smashed potatoes.

And the two leftovers turned out to make a beautiful couple.  What's a cheeseball?  Cream cheese, shredded cheese, seasonings... all stuff that goes well with potatoes.

Maybe you'll find a cheeseball on clearance at the grocery store, or maybe get handed the leftovers at a party, or maybe you'll make one...

At any rate, here's a new favorite side dish.  I cooked some leftover-from New-Year's-Eve sliced summer sausage to go along with it, and served with a salad and sliced apples.  I'd even eat it as a main dish; we often cook meatless meals.  (It's cheaper.  And probably healthier.)

Leftover Cheese Ball Potatoes
4-6 cups mashed potatoes
1/2 cup (4 oz) leftover cheese ball
2 eggs (these make the casserole puff as it cooks, plus adds protein)

Mash everything together and spread in an 8x8 pan.  Bake uncovered at 350 degrees for 45 minutes.
OR, to make it faster, reheat the mashed potatoes in the microwave before adding everything, bake at 375 degrees for 20 minutes, then move it to the top rack in the oven.  Broil for 2-4 minutes (check at two minutes!!), until browned on top.
Picture
1 Comment

Three-Ingredient Macaroons

6/15/2012

0 Comments

 
Picture
A little while ago I went to a local specialty store, Against The Grain, which is specifically for those who can't have wheat or gluten, to pick up some Expandex.  While there, I saw some individually wrapped, big mound-looking macaroons.  They were 2 ounces apiece, about 3" across,  and cost $1.29.   The ONLY ingredients on the list were coconut, egg whites, and honey.  It sounded healthy and yummy, so I bought one to figure out how to make them.  They are not the light, crunchy, meringue-type macaroons, but instead a dense, more lightly sweet confection. 

The coconut provides a high amount of fiber (75% of the carbs in coconut are fiber!- coconut fiber has been shown to control blood sugar especially well), as well as some healthy fats (medium-chain fatty acids, including lauric acid).  Read an article here, or a website on coconut research here.

The egg white helps bind it, and contributes protein.

The honey, of course, sweetens it, as well as helping moisten and bind.

Here's what I ended up with after a couple experiments:

Three-Ingredient Macaroons

2 egg whites
1/2 c. honey
3 cups unsweetened, fine-flake coconut

Preheat the oven to 350 degrees.  Line a baking sheet with parchment, or grease it.  Beat the egg whites until just foamy, then whisk in the honey.  Stir in the coconut until well mixed.  If it won't hold its shape yet, let it sit for 15-30 minutes to let the moisture absorb into the coconut. 

Use 1/4 cup packed (1.7 oz prebaked weight) for 1 1/2 oz macaroons, or a scant 1/3 c. scoop for 2 oz (2.2 oz. prebaked weight), bake  17-18 minutes, until just turning brown on the tops.  Let cookies cool on the baking sheet for 5-10 minutes before you take them off; otherwise they'll fall apart.

This makes 12 (1 1/2 ounce) macaroons, or 9-10 (2 ounce) ones.
0 Comments

Why use vinegar when dyeing eggs?

4/4/2012

3 Comments

 
Picture
My kids hate the smell of vinegar.  One option is to skip the dye entirely, and just decorate eggs with ribbon (as in this photo), markers, paint, string, decoupage, or whatever...

...but there's something about dyeing eggs that takes me back to childhood memories of sitting on tall stools around the kitchen counter, dunking eggs with those flimsy metal dippers. 

So I just have to dye eggs.

(If you want to color eggs using natural dyes, there's a link at the bottom to a previous post.)

Why, though, do all instructions seem to call for using vinegar?  Some of the newer kits have the vinegar built in to the tablets, but it's still there.  What does it do? 

I ran some searches, did some experimenting, and here's what I've learned:

Several people online said it's to make the dye darker.  Someone else said you could use salt instead.  So I started looking into the science of why.

Vinegar is acidic.  Egg shells are mostly calcium carbonate, which is alkaline.  Put them together, and they react, dissolving some of the egg shell.  I put a hardboiled egg into straight vinegar and left it overnight.  In the morning, only a thin layer of shell remained, and by late afternoon, there was no more shell; only the flexible inner membrane was left.

Adding vinegar to the dye bath helps etch the shell, roughening the surface (increasing surface area) and thus allowing it to receive more dye.

Picture
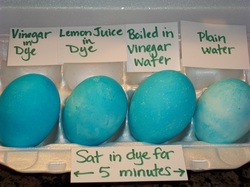
If that was the case, then, shouldn't other acidic ingredients work?  What if I don't have vinegar on hand?  And would it work as well to just add vinegar to the water the eggs are hardboiled in, and not need vinegar in the dye bath?   Here's how the experiments turned out:

The deepest, most even color was from vinegar in the dye, followed closely by the eggs boiled in vinegar water.  Lemon juice did pretty well but yielded more color marbling.  The dye using plain water (no acid) gave me a much paler and less evenly colored egg.

Picture
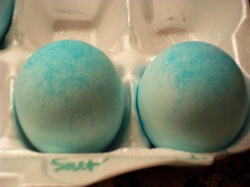
The salt water dye (using 2 tsp. salt in 1 cup water, producing the egg on the left) was slightly better than plain water, but not much.  Salt is a mordant, which means it physically or chemically helps the dye bind to the surface, but it did not work well here. 

So I'll go back to vinegar when I want deeply colored eggs.  Here are the amounts I used:

1 cup water
10 drops liquid food color (you can use less)
1 Tbsp. vinegar (or lemon juice)

Or, to restrict the smell of vinegar to a one-time boil, add 1/4 c. vinegar in 1 quart of water, hardboil as usual.  I'll tell my kids they can either stay inside where the smell is, or go outside and pull weeds...

Happy coloring!

Picture
Perfect Hardboiled Eggs

Picture
Natural-dyed Easter Eggs


Picture
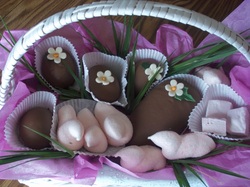
Homemade Marshmallow Eggs and Chicks

Picture
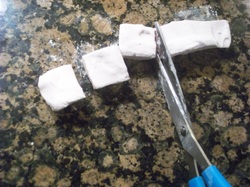
Homemade Marshmallows


Are you ready for some kitchen fun now?
3 Comments

Bavarian Mousse

3/14/2012

0 Comments

 
Picture
This stuff is like whipped satin....

and you only need two ingredients!

SO- my son is going to Prom this week, is short on cash, and decided he wouldn't be too mortified to have dinner with his date at our house.  Originally they were planning on eating at The Cheesecake Factory, so he and I looked through their online menu to get some good dinner ideas.   He had asked her ahead of time what any favorite foods or allergies she has, wrote down a few options, illustrated it (the dessert section, anyway), and gave it to his date to make her selections.   One of the desserts that sounded good is a chocolate mousse cheesecake; a chocolate cheesecake topped with something called "Bavarian Mousse".  I was intrigued.  Bavarian cream is something I've eaten, but mousse?  I searched online and found a recipe that is at least from Europe.  I converted it from grams to standard measurements and made a trial batch.  It was so good I ate half of it, then gave the other half to a favorite friend, who thought it was incredible.  You can use any type of chocolate chips; my batch was made with semisweet.  Hershey's chips are a little grainy; my favorites are Guittard and Ghirardelli. 
I think a white chocolate version would be beautiful with a little drizzle of melted raspberry preserves on it.

Bavarian Mousse
3/4 c. chocolate chips (or about 3 1/2 ounces chocolate)
4 eggs, separated

Melt the chocolate chips in a medium bowl or in a double boiler.  Beat in the egg yolks and a pinch of salt.  Set aside.

In a completely grease-free bowl, whip egg whites to stiff peaks.  Fold about a third of the whites into the chocolate mixture to lighten it, then fold the remaining whites in.  Refrigerate two hours to set up.  You can spoon or pipe this into serving dishes either before or after chilling, but it will hold its shape better after setting up.  Makes about 3 cups.


YES, this is made with raw eggs, which can be safe, or on occasion can have salmonella.  The way to prepare this safely is to use perfect eggs without even hairline cracks.  Wash and dry them, then use in this recipe. 

The reason behind this is that the inside of an egg is a sterile environment.  The salmonella, if present, is on the outside of the shell.  If there is any sort of crack, however, the bacteria can enter the egg and grow if conditions are right.  So- use raw if the eggs have no cracks- even minor ones- and have been washed.    I learned this from Alice Waters' mousse recipe; she says they've served raw egg mousse for years in her restaurant (Chez Panisse), with nary a sickness from it.
0 Comments

Lemon Chess and other custard pies

11/11/2011

2 Comments

 
Picture

This is a smooth, lemony, egg-based baked pie.  Use a fresh lemon for the best flavor, one is all you'll need.  If you only have bottled lemon juice, be sure to use the lemon zest, or about 1 tsp. lemon extract, or 4-6 drops lemon oil.  The zest gives more flavor than the juice does.

Lemon Chess Pie

5 eggs
1 3/4 c. sugar
3 Tbsp. fresh lemon juice
1 Tbsp. lemon zest
2 Tbsp. cornmeal
1/4 tsp. salt
1/2 c. (1 stick) melted butter

Preheat oven to 450 degrees.  Beat the eggs in a medium bowl, then add sugar, juice, zest, cornmeal, salt, and butter.  Pour into a parbaked crust, put on the lowest rack so the heat will set the crust.  Immediately reduce temperature to 325 or 350 degrees.  Bake for 50-60 minutes, until all but about 1” of the center is set. Jiggle the pie to check that- it will jiggle like Jello instead of like water.  (If 1" of the center still seems like liquid, that's OK;  the center will continue to cook as it cools.)  Cool on a rack.  Store covered in the fridge.


Pat-in-Pan Crust
Looks and tastes just like a rolled-out crust, but is much easier, and does not get tough from handling it.

1 stick butter (1/2 c.) softened but cool
2 oz. cream cheese, softened but cool
1 ¼ c. flour
2 Tbsp. sugar
¼ tsp. salt

Coat a 9” pie pan with cooking spray.  Beat together butter and cream cheese until very smooth.  Add all else, beat 20-40 seconds more until it looks like coarse cornmeal.  Scrape sides of bowl, beat until large clumps form.  Set aside 3 Tbsp of dough for top edge.  Evenly press remaining dough onto bottom and up sides of the pie pan.  On a floured surface, roll each Tbsp reserved dough into a 9” rope, put around top edge of pan; flute edge.  Wrap and chill 1 hour, preheat oven to 325 degrees.  Roll out and prick with a fork; bake until golden, 35-40 minutes.  Cool on rack.

To "parbake" this crust, you're going to "par"tly "bake" it: cook 20-25 minutes, until the crust looks dry but not browned.  Pour the filling in while crust is still warm.

If you’re making multiples of this, it’s easiest to use an upright mixer and wire beaters.  You’ll use about two cups of the dough, loosely packed, for each crust.
 

This recipe is from  this week's Custard Pies and Pie Crust class- the two-page handout is on the link. It includes recipes for several custard pies: Pumpkin Pie, Pecan Pie, Poor Man's Pecan Pie (Pecan Pie recipe, but using toasted rolled oats INSTEAD of pecans), Rhubarb Custard Pie, and Cranberry Pie. 
2 Comments

Almost-Instant Brownie

7/7/2011

11 Comments

 
Picture
Do you have instant hot chocolate mix?  You can make a brownie in two minutes, counting cooking time.  You don’t even need a bunch of ingredients.

It will cost you about $ .30-40, depending on how much you paid for the packets.  The packets have about 3 Tbsp of mix in them: about 1 Tbsp. each of sugar, cocoa powder, and whey/creamer/milk powder.  If you have the kind of cocoa mix that you have to add to milk (instead of water), it's basically half cocoa powder and half sugar (i.e., 1/4 c. mix= 2 Tbsp. cocoa powder, 2 Tbsp. sugar).  You can use mix in any recipe that calls for both cocoa powder and sugar, as part of the ingredients.

I made these brownies three different ways, just to see what would happen when substituting different ingredients.  I've tried it with raspberry-chocolate mix, it's delicious.  Use whatever you have, play around with it if you feel like it, and if it’s not perfect, put a little more ice cream on top!

Version 1:  Cakey Brownie

2 packets of instant hot chocolate mix (I used Nestle Rich Chocolate because I found it in the back of the pantry)
2 Tbsp. sugar (use honey if you don’t have sugar)
1 Tbsp. softened butter, or use vegetable oil
1 egg
3 Tbsp. flour, or 1/3 c. quick oats (if you use a packet of sweetened instant oatmeal, reduce the sugar by 1 Tbsp.)

            In a microwave-safe bowl, beat together the mix, sugar, butter, and egg.  Stir in the flour.  Microwave for 60-90 seconds, until mostly cooked.  There should be a shiny, uncooked spot about the size of a dime or quarter.  It will finish cooking as it cools.  Serve with ice cream, and/or hot fudge sauce, chopped nuts, or whatever you have.


Version 2: More Chewy brownie

Use ingredients for Version 1, but beat the egg first by itself, and only use half of it in the batter.


Version 3: No Eggs (or oil/butter) in the House

Hey, this sounds weird, but what is mayonnaise made out of? Oil, and egg.  Mostly.  Look up “Chocolate Mayonnaise Cake; you’ll find some great recipes.

 2 packets of instant hot chocolate mix (I used Nestle Rich Chocolate because I found it in the back of the pantry)
2 Tbsp. sugar (use honey if you don’t have sugar)
1 ½  oz. Mayonnaise (use condiment packets, or use 3 Tbsp. from a jar)
3 Tbsp. flour, or 1/3 c. quick oats

Mix, stir, microwave for 60-90 seconds, until cooked.


Picture
This is what the batter using a whole egg looks like.

Picture
This is the same batter with only 1/2 egg in it.

Picture
The brownie after cooking: see that small shiny spot close to the center?  It's still a little doughy, but will finish cooking as it sits.

11 Comments

Natural-Dyed Easter Eggs

4/20/2011

0 Comments

 
Happy Easter! and good Passover!  For a short video about our Savior's role, and what this week means to us, see His Sacred Name: An Easter Declaration.  I'm grateful to have this holiday as a reminder of His life and willingness to do our Heavenly Father's will.  Eggs remind us of the promise of life from something that looks only like lifeless, tomb-like stone.
Picture
Picture
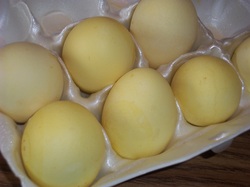
The yellow eggs were dyed using curry powder, the orange ones used onion skins.

When you dye eggs using natural colors, put water, a little vinegar, the eggs, and your 'dye' in a pan.  Boil to both cook the eggs and set the color. (See here to get The Perfect Hardboiled Egg.)  The colors tend to be softer and often muted- you won't get stop-sign-red anywhere.  Each egg ends up a little bit unique, though.  That's part of the beauty.  The vinegar helps the dye penetrate and set.  Use about 1 Tbsp for every 2-3 cups of water.

I'd heard that eggs should be washed first, to prepare the shells to accept the dyes.  I tried it and noticed no appreciable difference between the washed and unwashed eggs.  So save yourself the time.  Use eggs straight from the carton.  Or chicken, if you're so fortunate.  (NOTE:  the older the egg is, the easier it wil peel!)

For cool effects:
Before cooking/dyeing
:
-draw on it with crayons
-wrap it with rubber bands or yarn
-dab, wipe, or drizzle on a little oil or melted wax.
-put 1 Tbsp. oil in the cooking/dyeing water.  This will make some marbled irregularities on the eggs.

After cooking/dyeing:
-sprinkle with salt while still wet
-for a more marbled or mottled egg, rub it a little while it's still warm.  Or pat/rub with paper towels. 
-let the eggs cool while still draped, wrapped, or sprinkled with what you used to dye it.  (See photos.)
-partially- or completely- submerge in another dye.  
-draw on it with markers when dry

To make it gleam, rub a little vegetable oil on the egg after it has cooled.

Ideas for dyes:
Blue to Purple- grape juice, red grapes, blueberries, red cabbage, blackberries, violets
Brown- white oak bark, juniper berry, coffe, barberry twigs, black tea
Buff- crushed walnut shells, green tea
Golden Orange- onionskins (yellow onions)
Orange- turmeric, ground cumin, onionskins plus beet juice
Mauve- grape juice
Green- spinach, kale, alfalfa, parsley, carrot tops.  Or dye an egg yellow then dip in blue dye.
Pink- beet juice- let eggs sit for 30 minutes in it (liquid from a can of beets, or from cooking them)
Reddish Purple- paprika, skins from red onions; beets- boil in the juice, shredded, sliced, or chopped Yellow- Boil with 1-3 Tbsp. turmeric or curry powder, or dye when already cooked- use 1 tsp. turmeric and 1/4 tsp. vinegar in 2/3 c. boiling water
Picture
These were dyed using 1 Tbsp. curry powder in just enough water to cover the eggs. The two lighter eggs were pulled out immediately when fully cooked. The others were cooled in the colored water, with a tray of ice cubes added to help them stop cooking.

Picture
Fill the pan with eggs, stuff it as full as you can with your dye (onionskins, here), and bring it to a boil.
If you're using a spice or a powder, use 1-3 Tbsp.

Picture
For comparison:
Clockwise, starting with upper left: (1) boiled and drained to cool; (2) boiled and covered with wet onionskins while cooling, (3) boiled and left in the hot dye until completely cool, (5) plain white store egg, (6) plain brown store egg.

Picture
Each egg ends up a little marbled, a little unique.  I  find them fascinating to look at.

Picture
Any place your fingers, spoon, pan, paper towels, or other eggs touch, the dye will be lighter. 

0 Comments
<<Previous

    Need a Search bar?
    One day I may upgrade my website-- but until then, use your web browser search bar. Type in my web address and what you're looking for, like this-- 
    www.theprovidenthomemaker.com  pumpkin --  and you should get results.


    Author

    I'm a disciple of Christ, a member of the Church of Jesus Christ of Latter-day Saints, a family-defending, homemaking, and homeschooling mom of eight children, two of whom sometimes can't have milk or wheat. Growing up on a farm in a high mountain valley, my parents taught me to 'make do', work hard, smile, and help others.  I love cooking, learning, growing food and flowers, picking tomatoes, and making gingerbread houses --which CAN be made allergy-friendly-- with my children.  I hope you find something to help you on my site!

    Archives

    April 2024
    July 2023
    April 2022
    September 2021
    March 2021
    December 2020
    April 2020
    March 2020
    February 2020
    January 2020
    December 2019
    November 2019
    October 2019
    September 2019
    August 2019
    July 2019
    June 2019
    May 2019
    April 2019
    January 2016
    November 2015
    October 2015
    September 2015
    March 2015
    February 2015
    November 2014
    October 2014
    September 2014
    August 2014
    July 2014
    June 2014
    May 2014
    April 2014
    March 2014
    February 2014
    January 2014
    December 2013
    November 2013
    October 2013
    September 2013
    August 2013
    July 2013
    June 2013
    May 2013
    April 2013
    March 2013
    February 2013
    January 2013
    December 2012
    November 2012
    October 2012
    September 2012
    August 2012
    July 2012
    June 2012
    May 2012
    April 2012
    March 2012
    February 2012
    January 2012
    December 2011
    November 2011
    October 2011
    September 2011
    August 2011
    July 2011
    June 2011
    May 2011
    April 2011
    March 2011
    February 2011
    January 2011
    December 2010
    November 2010
    October 2010
    September 2010

    Categories

    All
    Alcohol
    Alternate Cooking
    Appearances
    Apple
    Apricots
    April Fools
    Aprons
    Bananas
    Beans
    Beef
    Beets
    Bench
    Beverages
    Bonnet
    Bread
    Breakfast
    Budget
    Budgeting
    Cake
    Candy
    Canning
    Carrots
    Cheese
    Chicken
    Children
    Chocolate
    Christmas
    Cleaning
    Coconut
    Comfrey
    Common Core
    Constitution
    Cookbook
    Cookies
    Cooking Oil
    Crafts
    Dairy Substitutions
    Dehydrating
    Dessert
    Dried Fruit
    Earth Oven
    Earthquake
    Easter
    Edible Weeds
    Eggs
    Emergency Prep
    Essential Oils
    Faith
    Family Home Evening
    Fertilizing
    Food Storage
    Fourth Of July
    Freezer
    Frosting
    Fudge
    Garden
    Gardening
    Gingerbread
    Gluten
    Gluten Free
    Gold
    Government
    Grains
    Gratitude
    Hat
    Herbs
    Home Remedies
    Home Repairs
    Homeschool
    Home Storage
    Honey
    Hope
    Inflation
    Leftovers
    Legumes
    Lemon
    Main Dishes
    Mixes
    Mothers
    Noah
    Non Artificial Colors
    Non-artificial Colors
    Nuts
    Oats
    Oil
    Orange
    Paint
    Peaches
    Pear
    Pie
    Pizza
    Plums
    Poem
    Popcorn
    Pork
    Potatoes
    Powdered Milk
    Prayer
    Preparedness
    Projects
    Prophecy
    Pruning
    Pumpkin
    Quick Bread
    Rhubarb
    Rice
    Salad
    Salt
    Sauces
    Self Reliance
    Self-reliance
    Sewing
    Shelf Life
    Shelves
    Sky
    Smoothie
    Snacks
    Soup
    Spices Or Seasonings
    Squash
    Strawberries
    Substitutions
    Sugar
    Summer Fun
    Three Month Supply
    Time
    Tomatoes
    Trees
    Truffles
    T-shirts
    Tuna
    Ultra Gel
    Valentine\'s Day
    Vegetables
    Water
    Watermelon
    Wheat
    Work
    Year Supply
    Zucchini

    RSS Feed

Web Hosting by iPage