The Provident Homemaker
  • Recipes and Info
    • Making Bread
  • My Blog
  • Favorite Resources
  • Documents and Files
  • 52 Weeks of Building Storage

Week 36- Two Minute Fudge - and Make Your Own Sweetened Condensed Milk

12/21/2019

0 Comments

 
Picture
To help with building your year's supply (this is Week 10 of 26), see this chart. 

Have you ever been to a store that sells fudge?  They display pan after pan of luscious flavors.  Well, now you can make them in mere minutes!  This recipe includes not only the basic semisweet chocolate fudge, but eighteen other flavors. 

Fudge can be made in advance, kept airtight in the refrigerator for a month, or wrapped well and frozen for 2-3 months. This recipe is super simple, and can be turned into lots of flavors.  My family’s favorites are Orange Crème Fudge and Cookies and Cremesicle Fudge. (Yes, that’s not the normal spelling, but ‘creamsicle’- regular spelling- is trademarked.)  My favorites include Caramel Swirl Fudge- in either vanilla or chocolate- Strawberry-Truffle-Layer Fudge. With pecans, please.

See here for more classic candy recipes-- toffee, penuche, truffles, fondant, and more base fudge recipes.
Picture
When making a batch of fudge, if it’s too firm or too soft, it can be fixed.

If it’s too soft, there are at least two approaches.

1- you can refrigerate or freeze it and serve it cold.  Once it’s chilled, you can eat it plain in the traditional squares, or scoop into tablespoon-sized balls.  Roll in powdered sugar or unsweetened cocoa powder, and serve as truffles.
2- make it even softer and turn it into hot fudge sauce. To do this, scrape the fudge into a microwave-safe bowl, add ¼ cup milk, cream, or evaporated milk, and heat for a minute or two, until you can stir it.  Stir until smooth.  If it’s still too thick for sauce, add more milk or cream.
 
If the fudge is too firm, scrape the fudge into a microwave-safe bowl, add 1-2 Tbsp. milk, cream, or evaporated milk, and heat for a minute or two, until you can stir it.  Stir until smooth.  Pour into a newly buttered pan.
 
If you want a healthier version of fudge, try Clean Eating Fudge. It’s Paleo! -and even works for those who can’t have dairy.


The fudge below can be made with a regular can of sweetened condensed milk, a homemade version, or even with a homemade dairy-free version. If you don't have any of those 3 options available, you can boil 7 ounces of cream, evaporated milk or (naturally dairy-free) coconut cream with 1 cup of sugar. Stir to dissolve the sugar, and you have a great substitute for sweetened condensed milk.

Two-Minute Fudge* 

3 cups semisweet chocolate chips (1 ½ 12-oz bags)
1 (14 oz.) can sweetened condensed milk (make your own here)
1 tsp. vanilla, optional
pinch of salt, optional
1 c. toasted and chopped nuts, optional
 
*Approximately two minutes of cooking time. 
 
Line an 8x8 pan with aluminum foil, waxed paper, or plastic wrap.  Spray with nonstick spray, or butter it. Set aside.
Stir together chips and milk.  Heat in microwave for one minute. Stop and stir. Repeat until the mixture is melted, stirring every minute. Stir in vanilla and salt.
 
Pour into lined and buttered 8x8 pan. Chill until firm- this will take about 2 hours in the refrigerator or 20 minutes in the freezer.
 
Makes 2 lbs. without the nuts.
 
To cut the recipe in half, 7 oz. of sweetened condensed milk is just over 1 ¼ cups.
 

Milk Chocolate Fudge
Increase chocolate to 4 cups (2 12-oz. bags). Makes almost 2 ½ lbs. without nuts.

Peanut Butter or Butterscotch Fudge
Use 4 c. peanut butter chips or butterscotch chips.

Vanilla Fudge
Use white chocolate chips, increasing to 4 cups.

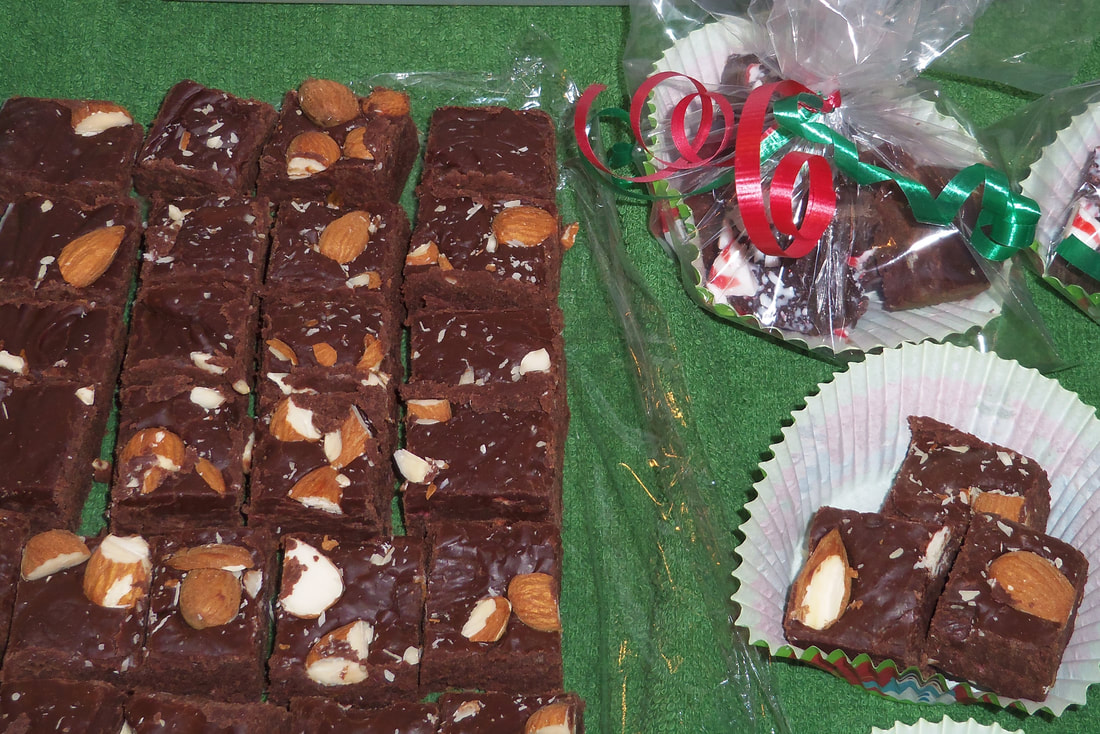
Cherry Vanilla Fudge
Stir in 1 c. quartered candied cherries, replace half the vanilla with
almond extract, use almonds for the nuts.


Cookies and Creme Fudge
Break each of 16 chocolate sandwich cookies into fourths; stir into Vanilla Fudge. (see below)

Cremesicle Fudge (Orange Creme Fudge)
Make a batch of vanilla fudge, pour 3/4 of it into prepared pan. To remaining fudge, add 3 drops yellow food color, 2 drops red, and 1 tsp. orange extract.
Drop by spoonfuls onto top, swirl in.


Caramel Swirl Fudge
Melt 4 oz (about 18 squares) of caramel with 1-2 tsp. of water, drop by spoonfuls onto top, then swirl.

Candy Bar Fudge
Melt 4 oz caramel with 1-2 tsp. water, stir in 3/4 c. peanuts. Drop on top and either swirl in or cover the top with 1 c. chocolate chips, melted.

Chocolate-Peanut Butter Fudge
Add 2 Tbsp. peanut butter to hot mixture, before powdered sugar is added. Top with chopped peanuts if you like, pressing them in slightly.

Mint Layer Fudge
Make chocolate fudge; spread in pan. Melt together 1 c. white chips, 2 Tbsp. milk, 1/4-1/2 tsp. mint extract, and 1/8 tsp. green food color. Mix well, spread on top.

Orange-Pecan Fudge
Make vanilla fudge, stir in 1 Tbsp. orange zest, finely chopped, and 1 c. pecans.

Peanut Butter Swirl Fudge
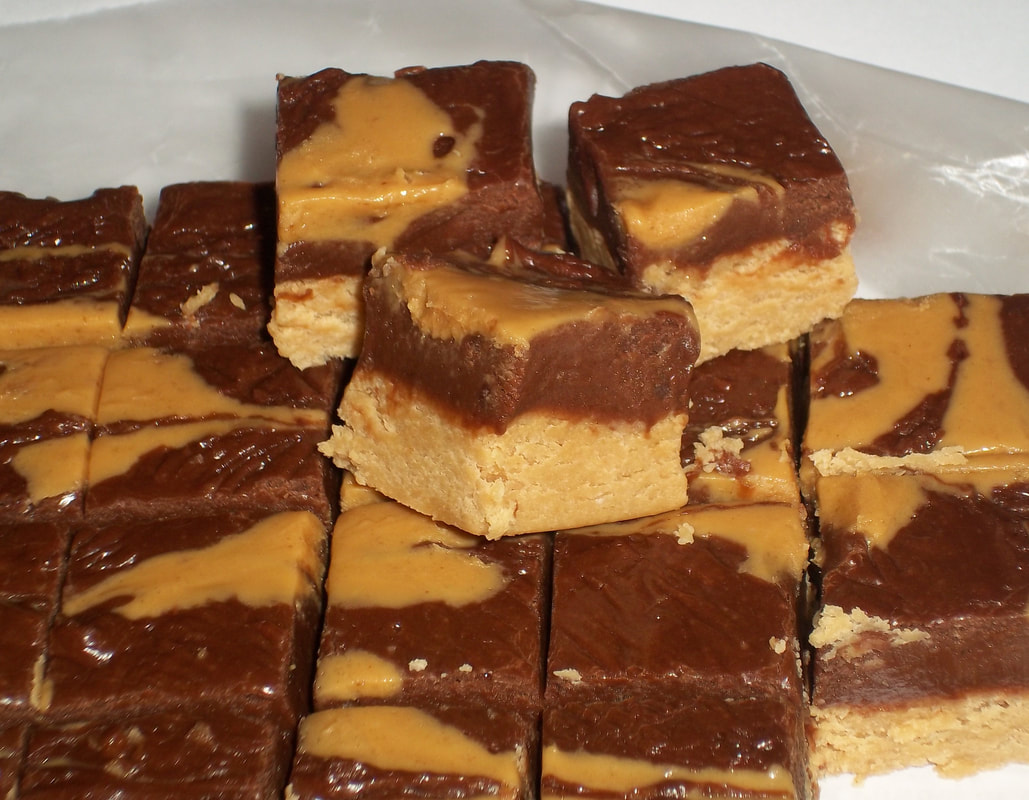
Make chocolate fudge, melt ½ c. peanut butter, drop on top of fudge; swirl.

Rocky Road Fudge
Use nuts, and stir 2 c. mini marshmallows into fudge before spreading into the pan.

S’mores Fudge
Leave out nuts, stir in 1 c. mini marshmallows and 4 whole grahams, broken.

Strawberry Fudge
Replace half the condensed milk with 1 1/4 c. strawberry jam. Swirl about 2
Tbsp. jam on top. Especially good with pecans or walnuts.


Strawberry ‘Truffle Layer’ Fudge
Spread regular fudge in pan, melt together 1 c. (6 oz.)semisweet chips with 2 Tbsp. butter. Stir in 1/4 c. strawberry jam. Spread on top.

Toasted Coconut Fudge
For either chocolate or white fudge, toast 1 c. coconut, stir in 3/4 c, along with 1 c. chopped toasted pecans. Sprinkle remaining 1/4 c. coconut on top, press in. If using a fudge recipe that calls for milk or evaporated milk, you may also substitute an equal amount of coconut milk.

Wonka Bar Fudge
substitute 4 whole graham crackers, broken into small chunks, for the nuts.
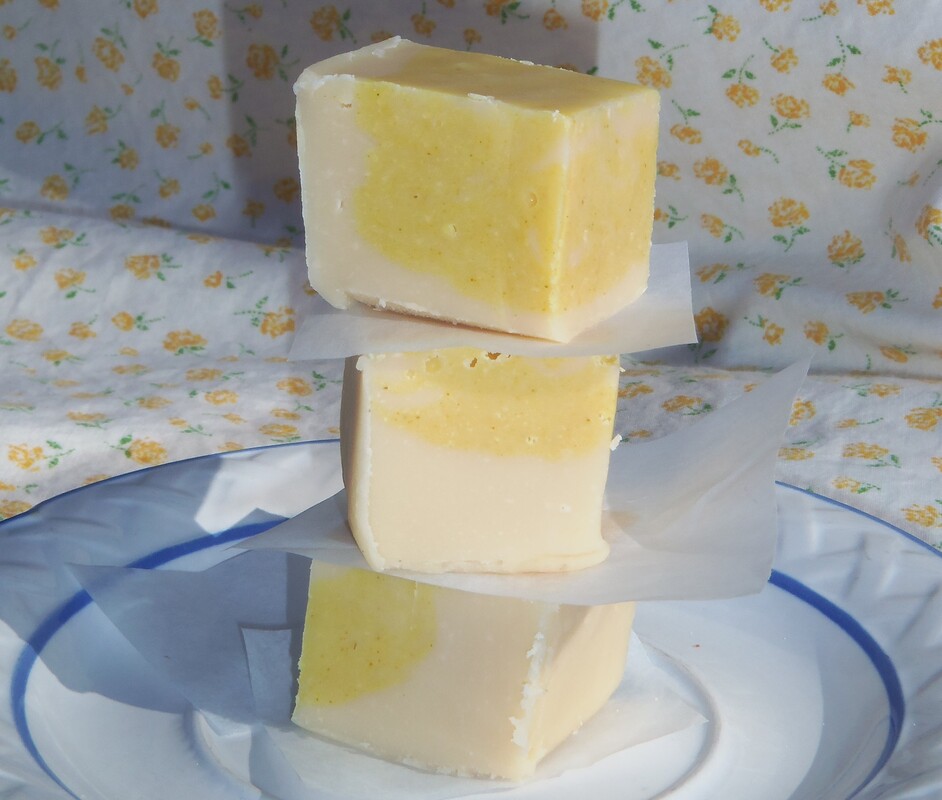

Picture
Cremesicle Fudge.  
0 Comments

Reducing Food Waste-- What to do with Sour Milk -- Make Cheese and More!

5/18/2019

0 Comments

 
Week 6 assignment-- Going off your  Inventory Shopping List and this week’s sales, buy the 3 months’ worth of as many different items as you can (= Buy For 3) as your new budget allows.    You'll do this through Week 21.
_______________

A big part of food management at home is reducing waste.  There are many ways to do this. 

Serve only what you’ll eat.  Refrigerate, freeze, or re-purpose leftovers. Or share with a neighbor.  A friend of mine regularly fixes a plate of leftovers immediately after dinner, and takes it across the street to an elderly widow.

You can use a lot of your food prep trim - lemon peels can be used to flavor things, clean kitchen disposals, make homemade lemon extract and lemon sugar. Shriveled lemons, orange, grapefruit, or limes are good for making marmalade. Tops and bottoms of celery can be frozen and saved to make broth or to add flavor when you cook dry beans. Broccoli stems can be trimmed and cooked along with florets, or chopped and added to salad for a nutritious crunch.  Things you can't re-purpose or eat can be fed to chickens, and many can be added to the compost pile.

If you wonder how much improvement you could make-- and how much money you could save on food!-- remember this:
“What’s measured gets managed.”

For one week, notice, measure, and take notes on what gets thrown out. 
 Aramark, a food service contractor, began doing this, and has reduced their food waste by nearly half (44%). For them, that was 479 tons of food saved from being sent to landfills. 

This is an interesting article on what some restaurants have done to reduce waste. Most of what they've tried works in homes, also.

You may have heard that in the US we waste 40% of our food-- 63 million tons of it per WEEK. But do you know where that waste is happening?

The largest share of it (43%) is happening in our homes-- 27.1 million tons of it per year. That's about 51 ounces per person, per week, or 3.17 pounds. If my family was average, that would mean the 8 of us currently at home would be throwing out 25 pounds of food every week. Shocking!
​
That would count food trimmings when I'm cooking, vegetables and fruits that went bad before getting used, whatever is wasted on a plate, leftovers that didn't get eaten in time, and anything that got burned too badly to eat. :)

We waste much less than average, though, and truthfully throw out very little. We belong to the "Clean Your Plate Club" that my grandma and mom talked about; all but the tiniest kids have learned to only serve up what they are willing to eat. We serve the 2- and 4-year-olds their food, and only in small amounts. If they want more, they get it after the other food on their plate is gone. Usable trimmings get saved for soup or broth. Unusable ones go to the chickens. Produce that went bad gets washed and trimmed; any good parts are used, bad parts go to the chickens. (We call these, "chicken treats"!) Bananas and apples that are getting mushy get put in smoothies or in baked goods. We understand what "expiration" dates mean on food, and so use our senses of smell, sight, and taste to know if they're still fine. (And they ARE, for much, much past those dates.)   When I miss a container of leftovers in the back of the fridge and find it after a week, that goes to the chickens too. Somehow we had THREE gallons of milk go sour this week, so they were turned into quick cheese; the whey went in muffins and bread. 

Let’s look at how to reduce waste with one item- MILK.

What can you do when milk goes sour?  This applies whether it happens before the ‘sell by’ date or after. Why does milk go sour? Does that mean it will make you sick?


Milk is high in lactose, which is the natural sugar found in milk.  When bacteria are introduced to the milk, they eat the sugars and convert them into lactic acid (=fermentation).   This means the milk has less sweetness, and more sourness.   This is the process used and controlled when making yogurt, cultured buttermilk, cottage cheese, and more.  

Some bacteria can make you sick, others are perfectly safe.  Because you don’t know which bacteria made your milk go sour, using uncooked sour milk has a possibility of making you sick.  Cooking with it, however, kills the bacteria, and is therefore safe.

Ways to use sour milk
 

-use it in place of buttermilk in pancakes, biscuits, chocolate cake, cornbread, wheat   bread, or any other recipe. 
-freeze it for using in recipes next time.

-pour a cup around your garden plants- it’s good fertilizer!  Milk is used to help grow     giant pumpkins, and helps prevent blossom end rot in tomatoes.  
- feed to chickens, pigs, or dogs (boil it first if you’re concerned for your dogs)
- make CHEESE! 


That’s right, you can take sour milk and turn it into cheese.  The fastest, easiest ones to make are cottage cheese and Queso Fresco, a mild fresh cheese. The method for both is the same until after the cheese curds are drained.

One gallon of milk will make about one pound of cheese.
 

Cheese from Sour Milk
You will need:

Sour milk
Salt
Vinegar or lemon juice—maybe.
 
Spray the inside bottom of a heavy saucepan with nonstick cooking spray.  Heat over low for about a minute to form a coating-- this helps the milk proteins NOT stick to the bottom of your pan.(You can skip the spray and still be fine.  Just stir more.)  Add your sour milk, and heat over medium-high until the milk starts to steam, stirring often.  If your milk is sour enough, it will start to curdle-- separating into curds and whey.  (Remember "Little Miss Muffet"?  Curds are the white clumps, whey is the yellowish liquid left behind.)  If your milk isn’t separating on its own, add up to ¼ c. of vinegar or lemon juice, a few DRIPS at a time, stirring after each addition.  The milk will immediately start to curdle.  Remove from heat and let it rest for one minute. 

Put a fine-mesh sieve over a large bowl and pour the curds and whey into the sieve.  Move the sieve to the sink, and rinse with hot water to get the acid out.  Rinse with cold water for about a minute, until no more whey is in it.  Add salt, ½ tsp. per cup of curds.

Cottage Cheese-
For each cup of curds, stir in 2-4 Tbsp. of yogurt or sour cream.  Cover and refrigerate.  This works great in recipes like lasagna.  I can make a batch of cottage cheese (using dry milk powder) faster than I can drive to the store and purchase it. (That’s saying something; the store is about a mile away.)
 
Queso Fresco-
After draining, rinsing, and salting the curds, put them in a couple layers of cheesecloth or on a flat (non-terrycloth!) dish towel.  Twist the top of the fabric closed, and tightly squeeze the cheese over the sink.  More liquid will come out.  Attach the twisted part of the towel (your ‘bag’) to a cupboard handle, and set a bowl under it to catch any more drips.  Let hang overnight.

If you want a nice flat, round shape, instead of hanging the bag, set it inside something round—a clean, empty 29 oz peach can, a food storage container, or whatever you have.  Set something on top of the cheese, and put something heavy on top of it to press it down.  Let that sit overnight. 
In the morning, wrap and refrigerate the cheese.  Use within a week or two; this one doesn’t have a long shelf life.  Here are ways to use it. https://www.thekitchn.com/queso-fresco-the-cheesemonger-91408
 
 ---------------------------------------
Now you have leftover whey - a yellowish, clear liquid that contains protein, carbs, calcium, phosphorus, and several B vitamins.
 
The resulting whey in this recipe is ‘acid whey’ (versus ‘sweet whey’) because it is a little acidic.  How to use it?  Very much as you would sour milk or buttermilk.  Use in most recipes that call for water or milk.  Use it as a tenderizing marinade for meat; add flavors and spices as you like.  Use it to make whey lemonade, feed it to animals (chickens love it!), or as a last resort, pour in your compost bin.  It’s also reportedly used as a great hair rinse, but I haven’t tried it yet.

What else have you done with sour milk, or with whey?
0 Comments

Make your own Pumpkin Pie Spice

11/22/2013

0 Comments

 
Have you ever started a recipe only to discover that it called for "pumpkin pie spice"?  And there was no such thing in your cupboard?  

You can make your own very easily.  Mix a big batch and fill a jar, or just use the ratios below to put directly in your recipe.  For instance, if your recipe calls for 2 tsp. pumpkin pie spice, use double the amounts below.  No need to stir them together first, either, just drop them in.  If you have cinnamon but not all three of the others, you can leave one of them out and still be fine.  (Just don't leave out the cinnamon!)


Pumpkin Pie Spice Makes 1 teaspoon. 

1/2 tsp. ground cinnamon 
1/4 tsp. ground nutmeg
1/8 tsp. ground ginger
1/8 tsp. ground cloves

Mix ingredients well. 

Bigger batch, for filling a spice jar:  
Makes 1/4 c (4 Tbsp or 12 tsp.)
2 Tbsp. ground cinnamon
1 Tbsp. ground nutmeg
1 1/2 tsp. ground ginger
1 1/2 tsp. ground cloves


0 Comments

Gluten free, dairy free pumpkin cheesecake

11/9/2013

3 Comments

 
Picture
See the bottom of this post for photos on making the heart-swirl pattern.

A friend of mine has to avoid dairy, wheat, and oats- and we were going to be together at a potluck lunch on Thursday.  The pumpkin cheesecake last week (for a different group) was such a hit I decided to adapt it so she could enjoy it too.  But with a bit of chocolate.  Like pumpkin-chocolate chip cookies.

I wanted it to be relatively inexpensive- no quart of coconut yogurt! -that stuff's pricey. Coconut milk and coconut cream, sure.  I have that on hand.  
No recipes using those appeared to be online anywhere, though I found the chocolate-version crust here.  There were some cashew-puree based ones- but not only did I not have time to soak nuts, but wanted this to be a recipe even the nut-allergic could use. So I started with my tried-and-true 'normal' recipe, and adapted. And I was willing to buy one 6-oz cup of coconut yogurt to put in the (optional) topping. 
You won't taste the apple cider vinegar, but it adds both the tartness and savoriness you'd get from cream cheese. If you have 2 (14-oz) cans coconut milk and a 19-oz can of coconut cream, that will be exactly enough for the filling, the topping, and the ganache.

If you want to use honey in the filling instead of sugar, use just 1 cup honey plus 1 Tbsp.  Since this also adds about 1/4 cup of water, add about a tablespoon additional pumpkin powder OR a tablespoon oat or coconut flour so the cheesecake won't be too soft.

Gluten free, dairy free Pumpkin Cheesecake
Crust:
1 c. fine-shred coconut, toasted
1 Tbsp. coconut oil, melted
1 ½ Tbsp. honey
1 tsp. vanilla
1 ½ Tbsp. cocoa powder 

Stir together and press firmly onto the bottom of a 9” springform pan.  Set aside.  
For a fall-spice crust instead of chocolate, omit cocoa powder, and instead use                 ½ tsp. cinnamon + ¼ tsp. cloves + ½ tsp. ginger

Filling:
1 1/3 c. sugar
1 tsp. cinnamon
3/4  tsp. ginger
¼ tsp. nutmeg
¼ tsp. cloves
½ tsp. salt
6 Tbsp. (slightly heaped 1/3 c.) pumpkin powder
2 (14-oz) cans coconut milk
3 Tbsp. apple cider vinegar
1 Tbsp. vanilla
5 large eggs, room temperature
1 c. coconut cream

Mix all together, in order.  Don’t overmix or whip air into it, or it may crack while baking.  Bake at 350 F for  75-90 minutes in a water bath, until center jiggles like Jello and internal temperature is 145-150 F.  Cool in oven or on counter, then chill, covered, in fridge 4 hours or more.

Rum-flavor Topping:
1 cup coconut cream, well chilled
½ cup coconut yogurt
½ cup brown sugar
1/8 tsp. salt
1 ½ tsp. rum extract

Whip cream until just beginning to thicken; add all else and whip.  Spread over chilled cheesecake.

Chocolate Ganache drizzle:
¼ c. (1 ½ oz) dairy-free chocolate chips
3 Tbsp. coconut cream or coconut milk

Heat gently to melt chocolate chips; whisk until smooth.  Drizzle on cheesecake.
3 Comments

Summery Fish and Vegetable Bake

9/2/2013

0 Comments

 
Picture
Can you tell it's zucchini and tomato season?  I've wondered before why so many recipes combine those two vegetables.  I now suspect that it's partly because the plain zucchini excels at tasting like whatever you cook it with, and very few things can top a fresh garden tomato in the flavor department.  This recipe also uses any mellow white fish, probably for the same reason.  The other ingredients both perk up and round out the flavor.  This one's a keeper.

Baked Fish and Vegetables

4 Tbsp. butter, softened
3 garlic cloves, minced
1 Tbsp. lemon juice
1 tsp. grated lemon zest or 2-3 drops lemon essential oil
1 lb. zucchini or summer squash,sliced 1/4" thick
1 lb. tomatoes (3 medium), sliced thin, OR cherry tomatoes, halved
1/2 c. minced fresh basil or 1 drop basil oil
salt and pepper
1 1/2 lbs. mild white fish 
2 Tbsp. white balsamic vinegar*

Preheat oven to 450 F and move an oven rack to the lowest position.  Mix together the butter, minced garlic, lemon juice, and zest.  If using basil oil, add it to this mixture.  Rub a little of the butter mixture on the bottom of a 9x13 pan.

Put the zucchini slices in the bottom of the 9x13 pan; add the tomatoes in a second layer.  Sprinkle with salt and pepper and with half of the basil (unless you used basil oil).  Pat the fish dry with paper towels, then place the fish on top of the tomatoes.  Dot the butter over the top, add the rest of the basil, and drizzle with the vinegar*.  Cover tightly with foil; bake about 20 minutes, or until the fish flakes when you twist a fork in it.  Serve immediately.

Serve over rice to pasta to soak up the delicious sauce!

*The original recipe, from America's Test Kitchen, calls for 1/4 cup dry white wine.  I don't cook with wine, so the white balsamic is what I found in my pantry to add the savory flavor.  Since it's strong, I used only half as much (2 Tbsp. instead of 1/4 c.).  If you have neither, chicken broth and a splash of soy sauce would give a similar depth.
0 Comments

Homemade Dairy-free Spreadable Butter

2/9/2013

12 Comments

 
Picture
Picture
My no-butter spread still tastes like butter plus is made with healthy fats. The spread is in the container; dairy butter is on the left for comparison.
I am so excited!

But first- if you've noticed a shift towards gluten-free and dairy-free recipes lately, good noticing!  I. Love. Dairy.  I even milked a cow every day as a teenager so I had the fresh great stuff.  But sometimes people have health problems with certain foods.  So far we've discovered that two of my children get stomach aches when they drink milk.  One of my daughters has excema on her arms that just has not cleared up.  It usually comes and goes, especially in the winter, but she's had it for two months straight.  So I've taken all dairy and wheat items out of her diet to see if those common allergens could be a reason for it.  I'm still cooking normally for everyone else, but have necessarily been experimenting with this other way of cooking.  And here's the latest and greatest:

Butter.  Sort of.  It tastes like it, anyway.  And spreads beautifully.  It even cooks like butter.  I've creamed it with sugar and made a cake, made brownies, melted it on muffins, spread on toast, made honeybutter, and made dairy-free cream of broccoli soup with it.  Yum.

The idea was sparked by reading a label on a small tub of honey butter.  Turns out there was no butter in it at all, but tasted as though it did.  Reading through the list- hydrogenated soybean oil, honey, citric acid, soy lecithin, artificial colors and flavors- it occurred to me that if THEY could make something taste and spread like butter, then maybe I could, too.  So I started researching what the flavor components were in butter and what other foods contain them too.  It was fun to read about- ketones, diacetyl, acetoin, reactions between aldehyde and niacin.  (But, dang it, how come if I was setting a good example of work, study, and loving to learn, I had to remind my daughter every 20 minutes to get back to her schoolwork?!)

Anyway, I found some foods that naturally have some of the same flavor components as butter, and used one that covered the bases.  It's the ingredient that makes ALL the difference in flavor here.  Liquid aminos.  Or just use soy sauce, which is about the same thing.  If you prefer to avoid soy completely, nutritional yeast flakes will give a similar flavor.  Vinegar also works, in the same tiny amount.  The cornstarch, coconut flour, or xantham gum thicken the water so it will better stay mixed with the oils.

This is spreadable when used straight from the fridge.  It’s fantastic on toast, muffins, and waffles.   It has about the same fat-to-water ratio as dairy butter (80:20).  You can cook with it just like real butter, too.  It can be creamed with sugar for cakes and cookies.  Use it cold from the fridge to do this, and don’t beat it longer than about 45 seconds or it begins to melt a little.  This spread can be mixed with an equal amount of honey to make honey butter.

If you’d like a firmer consistency, like sticks of butter, increase coconut oil to ¾ cup and reduce liquid oil to ¼ cup.

Turmeric and paprika give it a nice color without  affecting the flavor.  Turmeric adds bright yellow so a little goes a long way, and paprika lends a warm pinkish orange.  Both will deepen after a day. Combine a pinch of each (just under 1/16 tsp) for the best color.  If you make this using olive oil, the buttery spread has a greenish hint to it which paprika helps eliminate.

Dairy-free Buttery Spread

2 Tbsp. water
1 tsp.  cornstarch OR coconut flour OR 1/4 tsp. xantham gum
1/8 tsp. liquid aminos or soy sauce or vinegar OR scant ½ tsp. nutritional yeast
½ tsp. salt
A pinch each turmeric and paprika, optional (for color)
½ c. coconut oil, softened just til creamy and stirrable
½ c. olive oil or other liquid oil like canola

In a glass 1-cup measuring cup, stir together water and coconut flour.  Microwave until it boils, stir until smooth.  (You’ll need 3 T water if boiling this in a pan on the stove.) Mix in the liquid aminos, salt, turmeric and paprika.  Set aside to cool. 

After it’s cooled to nearly room temperature, mix in the coconut oil, then whisk in olive oil until smooth.  Put mixture in the fridge to chill.  Stir after it starts to thicken, about 15-30 minutes. 

Store covered in the refrigerator.  Makes just over 1 cup. (9 ½ oz, or 3 T. more than 2 sticks of butter)

If you want a firmer consistency to form “sticks” of butter, after it’s just started thickening in the fridge and you’ve stirred it, pack it into whatever molds you have.  I use mini loaf pans, filling them on a scale so each stick weighs 4 ounces.  Put in the freezer to solidify. After they’re hard, pop them out of the molds and store in ziptop bags or wrapped in plastic.  Label and keep in the freezer for longer storage, or keep in the fridge for shorter-term use.

Picture
12 Comments

Dairy-Free, No-Cook Sweetened Condensed Milk

11/27/2012

0 Comments

 
Picture
This is a dairy-free version of sweetened condensed milk, using honey as the sweetener.  For some other ways to make a substitute for sweetened condensed milk, including some with dairy, see here. 
It doesn't need cooked, which not only makes it super fast to make, but is great if you want to use raw honey and keep the enzymes.
Due to the fiber in this recipe, it won't be as smooth as the store product, but it is still thick, creamy, and sweet. 

This has one rather obscure ingredient: coconut butter.  That, however, is super easy to make, and will store at room temperature for a long time.  Months, at least.  
Coconut butter is plain, unsweetened coconut ('macaroon coconut') that has been pureed in a blender or food processor for several minutes, until it becomes liquid and creamy.  It, like coconut oil, will solidify at temperatures under about 75 F, but can be gently heated to liquefy again.  If you make your own, use at least 2 cups of coconut to begin with so there's enough in the blender or bowl to puree.  This much will give you about 1 cup of coconut butter.  If you want other ideas on using this coconut butter, see here or the Tropical Traditions recipe blog, where they call it Coconut Cream Concentrate.

No-cook Honey-Sweetened Condensed (coconut) Milk
Makes about 14 ounces

2/3 c. honey (7 oz. by weight)
1/4 c. plus 1 Tbsp. water, warm but not hot
1/2 c. coconut butter (also known as coconut cream concentrate), warmed


Add the warm water and coconut cream to the liquid measuring cup you have the honey in. Whisk together.

Mixture will thicken as it cools to room temperature, but can be used right away.

To thicken faster, cover and put it in the fridge.

This can be used any way that you'd use regular sweetened condensed milk, EXCEPT in the no-bake cheesecakes that call for lemon juice.  It won't thicken up properly there, because the condensed (dairy) milk thickens by the lemon juice curdling it.  Coconut milk doesn't.

Try it with the Two-Minute Fudge recipe!
___________________
One tablespoon of this sweetened condensed milk contains 1g of fiber, 1g of protein, 7g fat, and 19g sugars.  The regular canned stuff has no fiber, 3g protein, 3g fat, and 22g sugar.

So this recipe is higher in fat, but it's a healthy fat.  It's lower in sugar, plus contains coconut fiber, which has shown an ability to reduce the glycemic load of foods by slowing glucose release.
0 Comments

Cooking with Watermelon Rind

8/14/2012

0 Comments

 
Picture
Crab Salad - with watermelon rind!
To go along with last week's post on cutting a watermelon, here's something to take it a little farther!

 Most everyone has seen recipes for watermelon rind pickles- but is the rind edible for anything else? 

YES!  And since it can make up 25-45% of the total melon weight, eating it makes your money go further.

You can even eat the green part, though it's tough.  I prefer removing it.  If you use it, at least make sure it's been washed.  It is, after all, the part that was sitting on the ground and then handled by everyone else. 

The lighter green part can be eaten fresh, or cooked.  It has a high water content, a good fiber content, and a little Vitamin C and Vitamin B-6.  It also has a compound that converts to the amino acid arginine, and current research indicates it may help relax blood vessels.   When fresh, it's somewhat like a really firm cucumber.  You can use it in place of cucumbers, chopped apples, fresh zucchini, or celery.  It doesn't have as much flavor, so if that matters, you might want to increase any flavorings or spices in the recipe.  For instant, if you use watermelon rind in place of celery, it would be tasty to add a little celery seed or celery salt.  If you use it in place of apple, you might want to add a little honey and lemon juice. 

When it's cooked, it resembles (cooked) zucchini or apples.  There's a recipe for a watermelon rind stir-fry at Allrecipes.  Or maybe try Watermelon Boats on the Grill (substitute a slab of rind for a half zucchini.) What else could you use it in?  Think about all the recipes you use zucchini or yellow summer squash, apples, celery, cucumber, or other bland vegetables.   There is actually an entire website devoted to watermelon rind recipes!  It's -what else?- WatermelonRind.com   A friend of mine made the Watermelon Rind KimChee and loved it.  (seehere for a follow-up post on it.)

Meanwhile, here's something from my house the other day- I didn't have celery for my pasta salad, so instead threw in some diced watermelon rind!  I weighed the melon and its parts: out of a 16-lb watermelon, 4.5 lbs of its weight was rind.  Just so you know.

Crab/Krab Salad

1 lb. seashell pasta
2-3 Tbsp. pickle juice or cider vinegar
2 Tbsp. vegetable oil (I prefer olive oil or coconut oil)
1 lb. crab or imitation, flaked
1/2 onion, chopped or pureed (for kids!)
1-2 c. grapes
1-2 c. chopped watermelon rind (OR use cucumbers or celery)
3/4 tsp. salt
pepper to taste


Cook and drain the pasta.  Add pickle juice or vinegar, along with the oil, to the hot pasta (it soaks in better, resulting in better flavor.)  Add crab, onion, grapes, watermelon rind, and salt.  Stir well, add pepper to taste, and add more salt if you want it.

Cover and chill.
0 Comments

    Need a Search bar?
    One day I may upgrade my website-- but until then, use your web browser search bar. Type in my web address and what you're looking for, like this-- 
    www.theprovidenthomemaker.com  pumpkin --  and you should get results.


    Author

    I'm a disciple of Christ, a member of the Church of Jesus Christ of Latter-day Saints, a family-defending, homemaking, and homeschooling mom of eight children, two of whom sometimes can't have milk or wheat. Growing up on a farm in a high mountain valley, my parents taught me to 'make do', work hard, smile, and help others.  I love cooking, learning, growing food and flowers, picking tomatoes, and making gingerbread houses --which CAN be made allergy-friendly-- with my children.  I hope you find something to help you on my site!

    Archives

    April 2024
    July 2023
    April 2022
    September 2021
    March 2021
    December 2020
    April 2020
    March 2020
    February 2020
    January 2020
    December 2019
    November 2019
    October 2019
    September 2019
    August 2019
    July 2019
    June 2019
    May 2019
    April 2019
    January 2016
    November 2015
    October 2015
    September 2015
    March 2015
    February 2015
    November 2014
    October 2014
    September 2014
    August 2014
    July 2014
    June 2014
    May 2014
    April 2014
    March 2014
    February 2014
    January 2014
    December 2013
    November 2013
    October 2013
    September 2013
    August 2013
    July 2013
    June 2013
    May 2013
    April 2013
    March 2013
    February 2013
    January 2013
    December 2012
    November 2012
    October 2012
    September 2012
    August 2012
    July 2012
    June 2012
    May 2012
    April 2012
    March 2012
    February 2012
    January 2012
    December 2011
    November 2011
    October 2011
    September 2011
    August 2011
    July 2011
    June 2011
    May 2011
    April 2011
    March 2011
    February 2011
    January 2011
    December 2010
    November 2010
    October 2010
    September 2010

    Categories

    All
    Alcohol
    Alternate Cooking
    Appearances
    Apple
    Apricots
    April Fools
    Aprons
    Bananas
    Beans
    Beef
    Beets
    Bench
    Beverages
    Bonnet
    Bread
    Breakfast
    Budget
    Budgeting
    Cake
    Candy
    Canning
    Carrots
    Cheese
    Chicken
    Children
    Chocolate
    Christmas
    Cleaning
    Coconut
    Comfrey
    Common Core
    Constitution
    Cookbook
    Cookies
    Cooking Oil
    Crafts
    Dairy Substitutions
    Dehydrating
    Dessert
    Dried Fruit
    Earth Oven
    Earthquake
    Easter
    Edible Weeds
    Eggs
    Emergency Prep
    Essential Oils
    Faith
    Family Home Evening
    Fertilizing
    Food Storage
    Fourth Of July
    Freezer
    Frosting
    Fudge
    Garden
    Gardening
    Gingerbread
    Gluten
    Gluten Free
    Gold
    Government
    Grains
    Gratitude
    Hat
    Herbs
    Home Remedies
    Home Repairs
    Homeschool
    Home Storage
    Honey
    Hope
    Inflation
    Leftovers
    Legumes
    Lemon
    Main Dishes
    Mixes
    Mothers
    Noah
    Non Artificial Colors
    Non-artificial Colors
    Nuts
    Oats
    Oil
    Orange
    Paint
    Peaches
    Pear
    Pie
    Pizza
    Plums
    Poem
    Popcorn
    Pork
    Potatoes
    Powdered Milk
    Prayer
    Preparedness
    Projects
    Prophecy
    Pruning
    Pumpkin
    Quick Bread
    Rhubarb
    Rice
    Salad
    Salt
    Sauces
    Self Reliance
    Self-reliance
    Sewing
    Shelf Life
    Shelves
    Sky
    Smoothie
    Snacks
    Soup
    Spices Or Seasonings
    Squash
    Strawberries
    Substitutions
    Sugar
    Summer Fun
    Three Month Supply
    Time
    Tomatoes
    Trees
    Truffles
    T-shirts
    Tuna
    Ultra Gel
    Valentine\'s Day
    Vegetables
    Water
    Watermelon
    Wheat
    Work
    Year Supply
    Zucchini

    RSS Feed

Web Hosting by iPage