The Provident Homemaker
  • Recipes and Info
    • Making Bread
  • My Blog
  • Favorite Resources
  • Documents and Files
  • 52 Weeks of Building Storage

Meal Ideas for Menu Planning

3/28/2020

0 Comments

 
Picture
 Easy everyday main dishes or meals—ideas for your 3 month supply menus

Here is a menu plan for my family
​
Taco Soup  (Homemade Taco Seasoning here)                                         
Spaghetti
"Leftovers" Soup 

Baked Potato with Broccoli and Cheese 
Hawaiian Haystacks  
Pigs in a Blanket (hotdogs baked inside of bread dough or biscuit dough)                                    
Chicken Nuggets (or fish sticks) and French Fries
Orange Chicken (or cauliflower) and rice                               
BBQ Chicken and rice pilaf or biscuits
Pot Pies- made with canned biscuit dough   
Chicken Noodle Soup
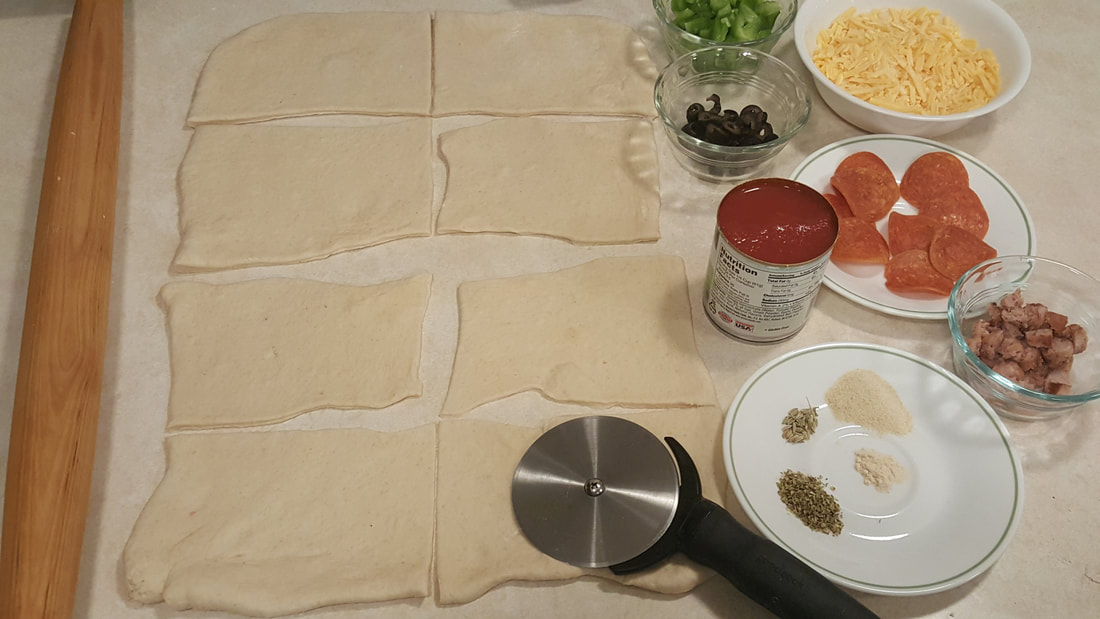
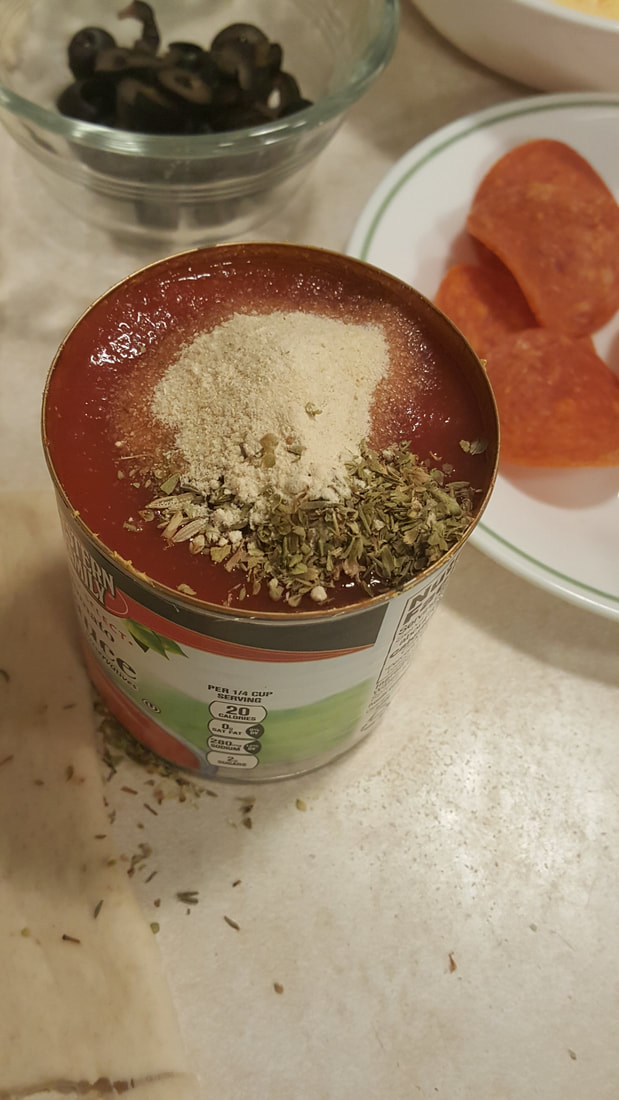
Pizza Pockets (Homemade version here)
Taco Salad   
Tacos- beef, fish, chicken, shredded pork, or shrimp
Tamale Pies (mini)   
Mango-Berry Salad, with a sandwich if needed
​Swiss Steak and Tomato Gravy over rice
Hamburgers
Tuna Burgers
Bean Burgers
Red Beans and Rice   
Crockpot (or Instant Pot) Rosemary Pork Roast and Vegetables                
Grilled Cheese sandwiches with Tomato Soup
Spanish Rice with chopped meat stirred in   
Chef Salad with homemade croutons
Chicken Caesar Salad
Sweet Potato Curry with Turkey/Chicken
Ramen       
Ramen-Chicken/Turkey Salad         
​Weeknight BBQ Beef                                          
Individual pizzas- on tortillas or English muffins
​Pizza on Zucchini Crust 
Quesadillas- beans inside or to the side       
French bread pizzas- split lengthwise, add toppings
Chicken Strips and rice or tator tots              
Canned soup with bread and butter
Macaroni and cheese 
Fend for Yourself Night    
Beans, warm homemade bread, cottage cheese, and tomatoes or salsa (sounds weird, but it was my mom's staple on bread baking day)    
Black Beans and Southwestern Zucchini Cakes                           
Breakfast for dinner:
   French Toast                                            
   Pancakes or Waffles with fruit puree or jam
   V8 and nuts and toast                                                
   Hardboiled or scrambled eggs with muffins
   Eggs with fried potatoes or hashbrowns                                                   Muffins and yogurt, cut fruit
   Omelet
   Frittata
   Sausage and Gravy (or sausage gravy!) over Biscuits
   Fruit and Yogurt Parfaits
   German Pancake (try this microwaved version)
Curry over rice
theprovidenthomemaker.com/my-blog/two-minute-egg-and-cheese-breakfast-sandwichBurritos
Enchiladas
Chicken and Ramen salad 
Cheesy drop biscuits and soup                                 
Navajo Tacos    
Spanish Rice – add diced meat or cheese               
Clean out the Fridge night                             
Ham or Spam Fried Rice                               
Sour Cream Chicken Enchiladas
Vegetable Fried Rice                                     
Potato Bar (clean out the fridge for toppings)
Goldenrod Eggs                                             
Meatloaf and baked potatoes
Chicken Gravy over Rice     
​Egg Toast                         
Bread in Milk (basically Egg Toast without the eggs)
Beef stroganoff over noodles                         
Lentil Soup
13-Bean Soup                                                
White Chicken Chili
Chili                                                                
Two-Minute Egg and Cheese Sandwich  
Tuna sandwiches
Chicken salad sandwiches                            
Egg salad sandwiches
Potato salad with eggs, cheese, ham           
Crab salad on bread or lettuce leaves
Teriyaki stir-fried vegetables over rice          
Porcupine Meatballs (made from rice and hamburger, not porcupine!)
 
What else should I add? 
0 Comments

Week 12- Homemade Pizza Pockets

6/29/2019

0 Comments

 
Picture

Week 12 assignment-- Going off your  Inventory Shopping List and this week’s sales, buy the 3 months’ worth of as many different items as you can (= Buy For 3) as your new budget allows.    You'll do this through Week 21.

Have you ever made pizza from scratch?  It's delicious. To get directions on making pizza, go to the basic bread recipe, and scroll down until you see “Pizza”.  Directions are there, including for making enough of a super-simple red sauce for your pizza.  You'll want the sauce for pizza pockets, too.

Pizza pockets are fun, portable, completely customizable, AND they freeze well.  You can make them to suit food allergies; nondairy cheese can be used in these if you like. This recipe can be doubled, tripled, quadrupled  make whatever quantity you want to make for dinner plus extras for packable lunches. 

To make 8 regular pizza pockets or 6 large ones, you'll need:

-One loaf’s worth of bread dough

-8 oz. shredded cheese

-One 8-oz. can of tomato sauce (you'll only use half)

-Dried or fresh herbs- oregano, basil, thyme, garlic powder, onion powder, ground black pepper, rosemary, fennel (use whatever you have and like.  I often use only oregano, garlic and onion powder)

-Toppings-- crumbled bacon, pepperoni, cooked sausage, leftover chopped cooked chicken or hamburger, mushrooms, zucchini (shredded and squeezed dry), chopped bell peppers, spinach leaves, diced tomato, olives… Plan on ¼- ½ c. of each topping, for each 8 pockets you make.
 
Roll dough out as you would for pizza crust, a rectangle about 8x15”.  While the dough relaxes after rolling, pull out your sauce, cheese, and other toppings.  Oil a 12x18" baking sheet, sprinkle with cornmeal for extra crunch, OR line with parchment. After your toppings are ready, roll the dough larger, to make it measure about 13x19". 

With a pizza cutter or knife, cut the rolled dough down the center the long way, then in fourths the other direction. (See photo, below.) This will give you eight rectangles, each about 4x6”.

Picture
Picture
Spread pizza sauce on one long side of each rectangle, leaving a 1” clean border around those edges. Sprinkle with any toppings and about 2 Tbsp. of cheese. Brush the edges of the bare half with water; this will help the pockets seal better around the edges after crimping.

Fold each pocket in half the long way, lining up edges.  Crimp (pinch) the edges with your fingers or by flattening with the tines of a fork.  Set on the oiled baking sheet. Cover with a kitchen towel and let rise for 15 minutes. While they rise, preheat the oven to 400° F.  Remove the kitchen towel. 

For shiny rolls, brush with beaten egg (whites, yolks, or both) before baking, or brush with milk or butter for better browning. Bake about 20 minutes, or until browned on the bottom. Remove to a cooling rack.  Let cool at least 10 minutes before eating; they continue baking internally in those first several minutes. 


Refrigerate or freeze any that you didn't eat right away.

If you’re going to freeze them, first cool them completely.  Freeze them on a baking sheet, and then transfer to a ziptop freezer bag, labeled and dated.

Picture
Picture
Picture
Picture
Picture
0 Comments

Week 9 - Make Your Own Frozen Bread Dough

6/8/2019

0 Comments

 
Have you ever used frozen bread dough- whether rolls or loaves?  Did you know you can make your own? Fleishman Yeast company came up with the first make-at-home frozen dough recipe.  The earliest version I've found is from a booklet they published in 1987. In cooking terms, that's pretty new! 

It's simple; make as much as you want to have on hand.  The same batch can be shaped into loaves or rolls-- even into oven-rise pizza crusts, cinnamon rolls, caramel nut rolls, pizza pockets, breadsticks, and more.  There are lots of ways to use it; see some of them here.
​

Freezer White Bread Dough

Makes 4 loaves (8"x4"),
OR 5 dozen "Texas size" (2-ounce) rolls,
OR about 7 dozen regular (1.3 oz) dinner rolls. 
Or any combination you like.


INGREDIENTS
12 1/2 to 13 1/2 cups flour 
1/2 cup sugar
2 tablespoons salt
2/3 cup dry milk (optional)
4 packages active dry yeast*  
1/4 cup butter, softened, or olive oil
4 cups warm water (120 to 130°F)

In a large bowl thoroughly mix 4 cups flour, sugar, salt, dry milk, and active dry yeast. Add butter or oil. Add the warm water to dry ingredients and beat for two minutes at medium speed of electric mixer, scraping bowl occasionally. Add 1 1/2 cups flour. Beat at high speed two minutes, scraping bowl occasionally. The dough will start to become stretchy. Stir in enough additional flour to make a stiff dough, for a total of 12 1/2 to 13 1/2 cups of flour. (This can vary because of the humidity level in the air, how you measured your flour, and how accurately you measured the water.) Sprinkle flour onto a clean surface (countertop or table), dump the dough on top, and knead until smooth and elastic. This will take about 10-15 minutes. Cover with a towel so it doesn't dry out; let rest 15 minutes.

For loaves, divide dough into 4 equal pieces. Form each into a smooth loaf about 7-8" long.  Place on greased baking sheets. Cover with plastic wrap. Freeze until firm. Transfer to plastic bags, or wrap in plastic wrap and then in foil. Try to use within 2-3 months. The dough won't 'go bad', but will get freezer burned if not wrapped well, and the yeast may weaken, with the bread not rising as high.  My worst experience was with dough that was about a year and a half old. It simply didn't rise much at all. Dough that won't rise is still great for making into fried scones!

To bake the loaves- remove from freezer and rub oil all over the loaf. (This keeps it from drying out as it thaws and rises.)  Place in greased 8 1/2-inch by 4 1/2-inch loaf pans. Let rise in warm place, free from draft, until doubled in size, about 4-6 hours.

Bake at 350°F about 35 minutes, or until done. (Sides of loaves will have browned.) Remove from pans and let cool on wire racks. 

To freeze in dinner roll sized pieces (these will thaw much more quickly), divide the batch into 4 equal pieces.  For "Texas" rolls, divide each piece into four more equal pieces.  Divide each of these into four equal pieces.  (Each original fourth becomes 16 this way.)  Smooth each one and place on a greased baking sheet. Cover with plastic wrap and freeze. Transfer to freezer storage bags.

To make regular rolls,  divide the batch into 4 equal pieces.  Divide each into four more equal pieces.  Divide these smaller ones into 5 equal pieces, giving you 20 from each original fourth.  Smooth each one, place on a greased baking sheet, cover with plastic wrap and freeze. Transfer to freezer storage bags.

To bake, pull from freezer, place on greased baking sheet, cover, and let rise in a warm place until doubled, about 2 hours.  Bake at 350
°F about 15-20 minutes, or until lightly brown on bottoms.


For more freezer-dough baking tips, see here.

*Instead of using packets, the equivalent amount of active dry yeast is 3 Tbsp.+ 1 tsp. active dry yeast.  To use instant yeast instead, use 3 packets or 2 1/2 Tbsp. 

The photo below is the 1987 book the original recipe came from.  (I modified it some.)


Picture
0 Comments

Pizza and Pina Colada Smoothie

12/5/2012

0 Comments

 
Picture
Between helping a sick 7-year-old catch up on homework, driving the carpool today, running kids to appointments, and half of them needing to be at their church youth activities an hour later, I needed an easy and quick dinner tonight.  I had a batch of bread dough rising, so I heated the oven to 450 F, took a loaf's worth of dough, rolled it out to fit a greased cookie sheet, and baked it for ten minutes.  While it cooked, I pulled out shredded cheese, opened a can of olives and one of pineapple, and stirred together some red sauce: 1/3 c. tomato powder, 2/3 c. hot water, and 1/4 tsp. salt (or use one 8-oz can of tomato sauce), then spices to taste: a few good shakes of oregano, basil, black pepper, onion powder, a pinch of fennel... whatever you have and smells good with it. 
Spread the sauce on the hot pizza crust, sprinkle on the toppings, then put under the broiler for two minutes, until bubbling.  If you want a few more mixing/cooking details, see this other post.

Since I'd only used part of the can of pineapple and also had some coconut milk in the fridge, I made Pina Colada:   

1 (20 oz.) can of pineapple (or almost a can, in this case)
1/2 cup coconut milk (or use 2-3 Tbsp. shredded coconut and 1/3 c. water)
Half a tray of ice cubes or one handful
1 Tbsp. mild molasses
1 drop lime essential oil or 1/4 tsp. lime zest (optional but adds just the right touch)

Combine in a blender; turn on high until smooth.  Add a little sugar or honey if it's not sweet enough.

I didn't use any more sugar; the lime boosted the flavor enough that the drink didn't really need anything else.

To the pizza and drink, add a salad or other vegetable, and there's supper!

0 Comments

'extras' in your home storage, Zucchini PIzza and Zucchini Cream Pie

9/25/2010

0 Comments

 
Picture
Picture
  This week has been an exciting one for our end of the Salt Lake valley, with the large fire in Herriman and the evacuations there.   It really makes us stop and think about what we would do if a catastrophe occurred in our own homes.   (Nice timing, September is National Preparedness Month.) 

Could you grab all your important documents if you only had five minutes?  Could you list, at the drop of a hat, what physical things are most important to you?   I recommend spending some time making a list of what to grab if you only have a few minutes.  What would you get if you had an hour or two?  It’s better to figure it out ahead of time and never actually have that emergency, than to forget something in your rush.

 I dropped in at the Red Cross evacuation center (an LDS stake center), and learned a couple things.  When I was there on Tuesday, one family had been there since Sunday.  They’d gone three days without a shower or a change of clothes, and the children were expected to be back in school.   I rounded up clothes for the family (thanks to those who donated!), which they appreciated.  The thing that really surprised me, though, was what I brought that they got EXCITED about….    The 8-yr-old was ecstatic about having pajamas to wear at bedtime, but the mom and 11-yr-old  were happiest about Chapstick, fingernail clippers, and hair elastics.   Those are such simple, inexpensive things.  

 Do you have extras of these in your home storage? Would you be ‘up a creek’ if you couldn’t get to a store?  Think about what little things would make a difference to you, and store some.  A great inventory list to help you expand your storage, if you’re at the year’s supply stage, is found in the back of the  Church booklet, “Essentials of Home Production and Storage”. If you’re not that far yet, that’s okay, keep moving toward it.

 “Maintain a year's supply. The Lord has urged that his people save for the rainy days, prepare for the difficult times, and put away for emergencies, a year's supply or more of bare necessities so that when comes the flood, the earthquake, the famine, the hurricane, the storms of life, our families can be sustained through the dark days. How many of us have complied with this? We strive with the Lord, finding many excuses: We do not have room for storage. The food spoils. We do not have the funds to do it. We do not like these common foods. It is not needed -- there will always be someone to help in trouble. The government will come to the rescue. And some intend to obey but procrastinate.” -The Teachings of Spencer W. Kimball, p.375


Now the recipes- dinner and dessert, all using zucchini.  One of the beauties of zucchini is that it doesn’t really taste like anything.  This means you can put it in recipes and taste the OTHER ingredients instead of the squash.  The zucchini pizza may sound strange, but my mom (who invented this recipe) fed it to 150 college students recently, and all but one liked it a lot.  Pretty good odds.  My kids and husband liked it, too.  The photos above show the finished pizza and the just-cooked crust before adding toppings.  I used yellow squash in mine.


Zucchini Pizza


3 eggs
3 cups shredded zucchini or yellow squash
1 cup biscuit mix (or pancake mix or flour with 1 1/2 tsp baking powder mixed in)
1/4 cup of chopped onion (or more if you like onion a lot)
salt and pepper to taste-few sprinkles of each

 Mix the biscuit mix into the shredded zucchini and chopped onion. Beat the eggs in a separate bowl with the salt and pepper, then mix into the zucchini.  Spread batter onto a 12 inch pizza pan that has been sprayed with vegetable oil spray.  Bake at 375 until edges are slightly brown and center is firm and springs back nicely. Spread about 8 ounces of pizza sauce on top, then top with favorite cheese and meat, just like any pizza.  For pizza sauce, I use a can of tomato sauce and add a little each of: garlic, pepper, oregano, basil, and thyme.
It does still stick a bit to the pizza pan,unless you use a pizza stone or parchment, but it's allright if you use a pancake turner and are careful.


ZUCCHINI CREAM PIE

 1 ½ cups peeled, seeded and grated zucchini (yellow squash works too)
1 can (12 oz) evaporated milk
¾ cup – 1 cup sugar (adjust to taste)
2 eggs
3 T. flour
1t. vanilla extract
1/8 t. salt
2-4 Tbsp. butter, optional.
1 unbaked 9 – 10" pie crust
½ t. ground cinnamon
½ t. ground nutmeg

 Steam or microwave grated zucchini on a microwave safe dish until very soft,
about 2-3 minutes. Drain off any excess liquid and cool. Preheat the oven to 425
F. Place the evaporated milk, sugar, eggs, flour, vanilla and salt in a
blender and blend, adding the butter if you’re using it.  Add the cooled zucchini and blend again until smooth. Pour custard into unbaked pie crust and sprinkle with cinnamon and nutmeg. Place on
a baking sheet and bake for 5 minutes. Reduce the heat to 325 F. and bake for
another 30 minutes or until a sharp knife inserted into the center comes out clean.

Makes 8 servings.
0 Comments

Our divinely inspired Constitution, easy homemade pizza

9/17/2010

0 Comments

 
 Happy Constitution Day!   It was signed on September 17 in 1787. For a wonderful article on it, see “The Divinely Inspired Constitution”, Dallin H. Oaks, at http://lds.org/ldsorg/v/index.jsp?locale=0&sourceId=729d94bf3938b010VgnVCM1000004d82620a____&vgnextoid=2354fccf2b7db010VgnVCM1000004d82620aRCRD     It has three main sections: its amazing creation and ratification, inspiration (what parts in it are divinely inspired?), and citizen responsibilities.  You’ll finish it with a renewed sense of appreciation and wonder.

 Shifting over to food now, are you finding enough things to do with all the wonderful produce right now?  I had to laugh when I saw a big, abandoned zucchini right in the middle of the road last week.  All those urban legends came to mind about people’s desperation to get rid of the squash.  (Freeze it!  Dry it!  Slice it and pretend it’s pasta in recipes!)

 I have two main recipes I make when I need to use up odds and ends:  soup, and pizza.  You can make pizza just about as fast as running down to Little Caesar’s, and it’s much better.  I make a batch of bread every week (the six-loaf batch holds us, and fills the oven), and as often as not, bread-baking day is Pizza Day.  This way I already have the dough, so it’s a no-brainer for dinner.  If you make the dough in the morning, you can keep a chunk in the fridge until almost dinner time.  If you’re making the dough that afternoon, you can let it rise, punch it down, let it rise, punch it down,….repeat until you’re ready for it!  Or even just use it without letting it rise first.   One loaf’s worth of dough (1 to 1 ½ lbs) is a good amount to fill a 12x18 cookie sheet.  To keep it from sticking to the pan, either grease or oil it, or sprinkle it with cornmeal or Cream of Wheat (coarsely ground wheat).  If you like a crispy crust, preheat the cookie sheet with 2-3 Tbsp. olive oil on it.  Or bake it on a  pizza stone.  Roll the dough out, and bake it at 425 degrees (really, any temperature between 325 and 450) until it’s just set (no longer doughy), then add toppings and bake or broil until the cheese is melted.  You can even bake some crusts ahead of time; bake for 5-10 minutes at 425, cool, wrap, and freeze.  The Basic Bread recipe is also posted on this site.
 

My basic pizza sauce is:  

one (8 oz) can tomato sauce

garlic powder (1/2 tsp.) or minced garlic (1-2 cloves)

a couple shakes of black pepper

spices: total of around 1 tsp. of whatever sounds good- oregano, basil, thyme, fennel seeds (great but go LIGHT on this one), rosemary

 
But what it really looks like, when I cook, is: open one can of tomato sauce, and to the top of the can add a couple shakes each of garlic powder and black pepper (if I feel like it), and then a few shakes each of 2-3 kinds of my ‘green spices’ (the ones listed, above).  Stir it, kind of, then spread it on the baked crust.  Sometimes I have part of a jar of spaghetti sauce sitting in the fridge.  That makes a good pizza sauce, too. So does barbecue sauce.  Or Alfredo.  Whatever you have that needs used.

 
If you have a bunch of tomatoes, you can use a bunch of them on the pizza, sliced or diced,  and skip the sauce.  You already know the standard toppings; other topping ideas are:

-       Shredded zucchini (yes, really.  Especially if it’s hidden under the cheese)

-       Shredded carrots (hides  especially well under Cheddar)

-       Chopped up spinach or chard leaves

-       Onions or green onions,  bell peppers

-       Leftover bits of meat  (whatever lonely thing is sitting around gets added to our pizzas)- ham, deli meat, bacon, summer sausage from last Christmas (those things last forever!), crumbled hamburger patties, chicken, etc.

 
And of course you can always look at your favorite pizza chain’s menu to get more topping ideas.

                                               
You can also make breadsticks or dessert sticks/pizza out of the dough.   To make simple breadsticks, roll out the dough, cut into strips with your pizza cutter.  Bake, then brush with melted butter, sprinkle with Parmesan and garlic powder.  Dip in spaghetti sauce or pizza sauce.  For dessert sticks, roll and cut them the same, but roll in melted butter and then in a mix of cinnamon and sugar.  Then bake.  Dip in applesauce or drizzle with glaze (1 cup powdered sugar, 1 tsp. vanilla, and 1-2 Tbsp. milk or water)


m

Sep
0 Comments

    Need a Search bar?
    One day I may upgrade my website-- but until then, use your web browser search bar. Type in my web address and what you're looking for, like this-- 
    www.theprovidenthomemaker.com  pumpkin --  and you should get results.


    Author

    I'm a disciple of Christ, a member of the Church of Jesus Christ of Latter-day Saints, a family-defending, homemaking, and homeschooling mom of eight children, two of whom sometimes can't have milk or wheat. Growing up on a farm in a high mountain valley, my parents taught me to 'make do', work hard, smile, and help others.  I love cooking, learning, growing food and flowers, picking tomatoes, and making gingerbread houses --which CAN be made allergy-friendly-- with my children.  I hope you find something to help you on my site!

    Archives

    April 2024
    July 2023
    April 2022
    September 2021
    March 2021
    December 2020
    April 2020
    March 2020
    February 2020
    January 2020
    December 2019
    November 2019
    October 2019
    September 2019
    August 2019
    July 2019
    June 2019
    May 2019
    April 2019
    January 2016
    November 2015
    October 2015
    September 2015
    March 2015
    February 2015
    November 2014
    October 2014
    September 2014
    August 2014
    July 2014
    June 2014
    May 2014
    April 2014
    March 2014
    February 2014
    January 2014
    December 2013
    November 2013
    October 2013
    September 2013
    August 2013
    July 2013
    June 2013
    May 2013
    April 2013
    March 2013
    February 2013
    January 2013
    December 2012
    November 2012
    October 2012
    September 2012
    August 2012
    July 2012
    June 2012
    May 2012
    April 2012
    March 2012
    February 2012
    January 2012
    December 2011
    November 2011
    October 2011
    September 2011
    August 2011
    July 2011
    June 2011
    May 2011
    April 2011
    March 2011
    February 2011
    January 2011
    December 2010
    November 2010
    October 2010
    September 2010

    Categories

    All
    Alcohol
    Alternate Cooking
    Appearances
    Apple
    Apricots
    April Fools
    Aprons
    Bananas
    Beans
    Beef
    Beets
    Bench
    Beverages
    Bonnet
    Bread
    Breakfast
    Budget
    Budgeting
    Cake
    Candy
    Canning
    Carrots
    Cheese
    Chicken
    Children
    Chocolate
    Christmas
    Cleaning
    Coconut
    Comfrey
    Common Core
    Constitution
    Cookbook
    Cookies
    Cooking Oil
    Crafts
    Dairy Substitutions
    Dehydrating
    Dessert
    Dried Fruit
    Earth Oven
    Earthquake
    Easter
    Edible Weeds
    Eggs
    Emergency Prep
    Essential Oils
    Faith
    Family Home Evening
    Fertilizing
    Food Storage
    Fourth Of July
    Freezer
    Frosting
    Fudge
    Garden
    Gardening
    Gingerbread
    Gluten
    Gluten Free
    Gold
    Government
    Grains
    Gratitude
    Hat
    Herbs
    Home Remedies
    Home Repairs
    Homeschool
    Home Storage
    Honey
    Hope
    Inflation
    Leftovers
    Legumes
    Lemon
    Main Dishes
    Mixes
    Mothers
    Noah
    Non Artificial Colors
    Non-artificial Colors
    Nuts
    Oats
    Oil
    Orange
    Paint
    Peaches
    Pear
    Pie
    Pizza
    Plums
    Poem
    Popcorn
    Pork
    Potatoes
    Powdered Milk
    Prayer
    Preparedness
    Projects
    Prophecy
    Pruning
    Pumpkin
    Quick Bread
    Rhubarb
    Rice
    Salad
    Salt
    Sauces
    Self Reliance
    Self-reliance
    Sewing
    Shelf Life
    Shelves
    Sky
    Smoothie
    Snacks
    Soup
    Spices Or Seasonings
    Squash
    Strawberries
    Substitutions
    Sugar
    Summer Fun
    Three Month Supply
    Time
    Tomatoes
    Trees
    Truffles
    T-shirts
    Tuna
    Ultra Gel
    Valentine\'s Day
    Vegetables
    Water
    Watermelon
    Wheat
    Work
    Year Supply
    Zucchini

    RSS Feed

Web Hosting by iPage