The Provident Homemaker
  • Recipes and Info
    • Making Bread
  • My Blog
  • Favorite Resources
  • Documents and Files
  • 52 Weeks of Building Storage

Refreshing Watermelon Salad

6/21/2014

0 Comments

 
Picture
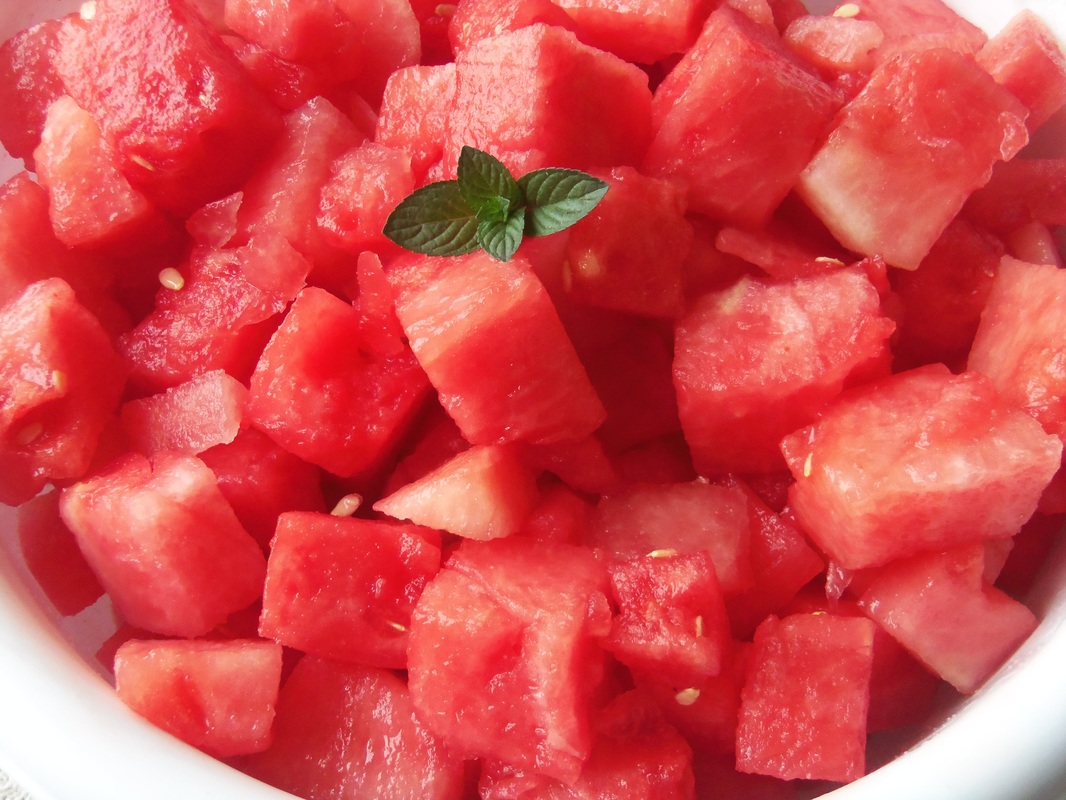
Sometimes you pick a perfect watermelon:  firm, juicy, sweetness dripping from every piece.  Sometimes the melon could use a little bit of help.  Or sometimes you just want a little variety in the flavor department.

Several years ago I found a recipe for a lemon-and-mint-infused syrup to pour over watermelon, or over a mixture of watermelon, cantaloupe, and honeydew.  It took a few hours to make the syrup, though.  Now that I have essential oils on hand, the flavor base takes almost no time at all!

Citrus-Mint Watermelon Salad
(enough syrup for 4-8 lbs melon while weighed with the rinds still on)

1/4 c. sugar (OR 3 Tbsp. honey)
2 Tbsp. lemon juice
1-3 drops mint essential oil (1 for subtle flavor, 3 for very noticeable)
6 drops any combination of citrus oils (lime, orange, lemon, grapefruit... I used 3 drops lime oil, 3 drops grapefruit oil)

Stir together the sugar and lemon juice; bring to a boil, stirring just until sugar is dissolved.  If using honey, there is no need to heat it; just stir the honey and lemon together.
Let the syrup cool slightly (if the sugar version), then add mint and citrus oils.

Pour over cut-up melon- plain watermelon or a combination of melons- and stir well to coat.

This would make a fun Fourth of July salad if you added some fresh blueberries to the watermelon.  

BONUS:  the juice left in the bottom is delicious plain (you might prefer it diluted with some water) or added to smoothies.

0 Comments

Coconut Cake- using coconut flour and agave

4/1/2014

0 Comments

 
Picture
This gluten-free cake is high in fiber, but you'd never know it when eating it.  It just tastes like a moist coconut cake.  It also has a delicious cream cheese frosting that you can sweeten using agave or honey, and a lemon-cream cheese filling between the layers.  This makes a small cake, 6" round if two layers, or a single 8" layer:  a much better size for most people!

Coconut Cake:

4 large eggs
1/2 c. melted coconut oil
1/2 c. agave nectar
1 Tbsp. vanilla
1 tsp. coconut extract
1/2 c. coconut flour
1 tsp. baking soda (this is too much, I can taste it and the cake overbrowned)
1/4 tsp. salt
1/8 tsp. xanthan gum
1/2 c. shredded coconut, either sweetened or unsweetened
Cream Cheese Agave Frosting (recipe below)
1 1/2 Tbsp. orange or lemon marmalade
1 cup sweetened shredded coconut 

Preheat oven to 350 degrees.  Grease sides and line bottom of a 6" round pan* with a circle of parchment paper.  Set aside.

Whisk eggs until light in color and a little foamy, about 2 minutes.  Add the coconut oil, agave, vanilla, and coconut extract; mix well.  Add coconut flour, then put the baking soda, salt, and xanthan gum on top of the coconut flour, and mix all together.  The batter will be very thin at first, but will thicken within minutes as the coconut flour begins absorbing liquid.  Stir in the 1/2 c. shredded coconut.

Pour into the prepared pan.  Bake until center no longer jiggles and toothpick inserted in center comes out clean, about 45 minutes.  Run a knife around the outside edge of the cake to loosen it.  Cool cake, in the pan, on a cooling rack for 10 minutes.  Remove from pan/s and cool completely.

When cool, split the 6" cake into two layers.  Frost the first half with lemon-cream cheese filling.  Place the other layer on top of the filling, then frost the entire cake.   Pat coconut onto the sides of the cake, then sprinkle it all over the top.
  
*If you don't have a 6" round, you may use either one 8" round (reduce baking time to about  30- 35 minutes), a 9x5 loaf pan (about the same baking time), 12-15 cupcakes (about 30-35 min. of baking), or four 4" round pans (reduce baking time to  18-20 minutes each).

Cream Cheese Agave Frosting:  use the recipe for Fluffy Honey-Cheesecake Frosting, except substitute agave for the honey.

To make the lemon-cream cheese filling (or orange-cream cheese filling), take  3/4 cup of the Cream Cheese Agave Frosting and put it in a small bowl.  Add 1 1/2 Tbsp. marmalade and stir.  
0 Comments

Moist, refined sugar free, grain-and-gluten-free Chocolate Quinoa Cupcakes

3/14/2014

0 Comments

 
Picture
A friend recently shared this delicious recipe with me.  Since I wanted to make cupcakes for a friend who can only handle sweeteners like honey and agave, it was time to tweak the recipe.  You can find the original, sugar-sweetened, recipe here, if you want to compare it to my version. As cupcakes, they needed more moisture than the original, plus a couple things needed adjusted to allow for honey.  And I discovered that the amount of water your quinoa was cooked in makes a huge difference in whether they're dry, moist, or collapse when baking.   (Not to worry, the problem should be solved now!)   Quinoa is technically a seed and not a grain.

I tried really hard to find a way to use just the blender to make the batter, and not need both it and a bowl, but the batter puffs up so much once the leavening is added, that it just didn't work out that way .  Oh well.

Everyone who has tried these loves them.

Moist Chocolate Quinoa Cupcakes

1/2 c. uncooked quinoa*
1 1/4 c. water 
1/3 c. any kind of milk (dairy, almond or coconut are fine)
4 large eggs
1 tsp. vanilla
3/4 c. melted coconut oil or other liquid vegetable oil
2/3 c. honey
a few drops of orange essential oil, or the washed peel of one clementine, optional
1 c. unsweetened cocoa powder
1 1/2  tsp. baking powder
1/2 tsp. salt

Cook the quinoa, covered, in the 1 1/4 cups water:  either combine in the microwave or stovetop.  To microwave,  put them in a microwave-safe bowl, cover, then cook for 5 minutes at full power, then 5 minutes at 50% power.  For stovetop:  combine in a pan that has a tight-fitting lid.  (If the lid isn't, use 1 1/2 cups water to compensate for what will evaporate.)  Bring to a boil, reduce to a simmer, and let simmer for 20 minutes, until water is all absorbed.
*or use 2 cups cooked quinoa and omit the water.

Preheat oven to 375 degrees.  Put liners in 18-24 cupcake tins, depending on how high you want the cupcakes.

Combine in a blender the cooked quinoa, milk, eggs, vanilla, oil, honey, and orange oil/peel if using it.  Blend until smooth.   Mix the cocoa powder, baking powder, and salt in a medium bowl.   Pour the quinoa mixture over the top, and stir until well-combined.  Spoon into cupcake liners, or use a spring-loaded ice cream scoop instead to portion out the batter.

For an easy, sweet topping, sprinkle each cupcake before baking with a few semisweet chocolate chips and chopped pecans or other nut.

Bake for about 20 minutes, until the top of a cupcake springs back when lightly pressed with a finger.

Frost with your favorite frosting if you like, or  try any of these.   The cupcakes above are frosted with whipped coconut cream with melted chocolate beaten in:  use 1 cup of chilled coconut cream and 1 cup melted semisweet chocolate.  Whip the cream until it starts to hold soft peaks, then add in the chocolate plus a teaspoon of vanilla and a pinch of salt.  Beat until fluffy and smooth.


0 Comments

No-pectin, No-refined sugar Strawberry Jam

2/26/2014

0 Comments

 
Picture
This is a great fresh jam to eat fresh. It also freezes well, so is a good freezer jam.  Since the berries are not cooked and there's not enough sugar to help preserve it, its fridge life is fairly short.  If you're keeping it in the fridge, try to use it within about a week.  If left too long, it will get moldy (you'll know if it does!)   But it's SO GOOD fresh!  My eight-year-old made a batch two nights ago; we ran out yesterday.  I made another batch this morning, and between spreading it on our pancakes at breakfast, and using it on warm bread this afternoon, it's gone again!

Pectin-free Strawberry Freezer Jam
1 pound strawberries, washed and hulled (green parts pulled off)
2 Tbsp. honey (or to taste; use any sweetener you prefer)
2 Tbsp. chia seeds, OR 1 Tbsp. ground flax seeds

Mash the berries with a fork, or chop in a blender until they're the consistency you want.  Stir in the honey (or other sweetener) and the chia.
 After this sits for about half an hour, the chia (or flax) will gel as they absorb the extra liquid.  Keep refrigerated or frozen.

Makes about 2 1/4 cups.

Come to think of it, a drop or two of orange essential oil would be really, really goo
0 Comments

Honey-orange dressing

12/7/2013

0 Comments

 
Picture

Yesterday I got to have lunch with some friends at a neighbor's house.  We each brought something; Emily, whose house we met at, made Apple Butternut Squash Soup; this link goes to the recipe on her website.

I had lots and lots of Romaine lettuce on hand, thanks to another friend...  so a salad seemed in order.  I started out intending to make honey-mustard dressing, but it lacked something... so I looked around the kitchen to see what to use.  In went some orange peel and the white parts of some green onions.  

Oh.

That was good!

Next about a pound of lettuce and the green parts of three green onions were mixed with around half of the dressing; just enough]to lightly coat.  Then four or five sliced hardboiled eggs went on top, 4 oz. of cubed cheese, and a big handful of toasted pecan pieces.  
Everyone loved it, except the person who didn't try it because she's allergic to eggs and nuts. :/

This would be delicious brushed onto chicken a few minutes before done baking.

Honey-Orange Dressing  Makes about 1 cup

1/4-1/3 c. honey (depends if you want this more sweet or more tangy)
1/4 c. apple cider vinegar
1/4 c. olive oil
1 tsp. prepared mustard
1/4 tsp. salt
1/4 tsp. pepper (I used 2 drops of essential oil)
2 Tbsp. onion (I used the bottom 1 1/2" from 3 green onions)
1 1/2 tsp. orange zest (I used about half the peel from a clementine)

Throw everything into a blender; puree until smooth.  


0 Comments

Elderberry Syrup

11/15/2013

0 Comments

 
Picture
Elderberry syrup is known as a wonderful immunity booster and antiviral- which means it'll help knock down the flu or any other virus-caused illness.  It's also really, really delicious on pancakes.  Or a splash added to desserts or fruit salads.  Or brushed on a spice cake.  Or mixed with chilled sparkling water.  Or... you get the idea.
 Now that there's a jar in my fridge, I may have to watch to be sure my children don't sneak in and use up all my 'medicine'.   Just for that reason, I wax-sealed the lids on the jars I plan to share with others.  

I've already used it.  My family has had a nasty cold or flu this week; we've had missed school days and work days from it.  Yesterday it hit me hard, and felt like it was on the verge of turning into bronchitis or pneumonia.  I've been taking either elderberry infusion (tea) or the syrup at least three times a day since feeling it come on a couple days ago, and today I feel much better.  I suppose that may or may not have anything to do with the elderberries... but I'm keeping the routine up until I'm better!  Yum.

I started with 2 pounds of berries, used a steam juicer, and the first 2-3 cups of juice were nice and dark; strong enough to use without boiling to condense it.  The longer the berries steamed, though, the lighter the juice got, so I boiled down the last three cups to yield about 1 1/2 cups.

You'll notice in the photos below that some of those berries don't look exactly the same as the others... I have a young hawthorn tree.  It produces berries, but not yet enough to make a batch of anything yet.  The haw berries are said to be good for reducing inflammation (as well as normalizing blood pressure and helping strengthen and regulate the heart)- so I threw them in with my elderberries.  Honey is used in this instead of sugar because of its soothing, anti-inflammatory, and healing properties.

If you want to make a wax seal, paraffin works great.  I had a small ball of red cheese wax I'd saved, and used that.

Elderberry Syrup
Start with 2-3 cups elderberry juice (depending on strength)- if not strong, boil to reduce to 2 cups.  To the warm, NOT hot juice (if you want to preserve the enzymes if using raw honey), stir in these ingredients:
2 cups honey
5 drops ginger essential oil
3 drops cinnamon essential oil
2 drops clove essential oil


Store in the refrigerator.  Probably best used within a couple months- though I've had syrups stay nice for a year, refrigerated.  You could store them longer if you seal them in sterilized jars. 

To use medicinally, take a tablespoon straight or mixed in 6-8 oz warm water, every 3 hours if you're sick and an adult, or take once a day as a general immunity booster.  See the label below for more details.  

If you want to start with berries but don't have a steam juicer, and want to use the spices themselves instead of essential oils, combine 4 oz (2/3 c.) berries in 3 ½ c. water, a thumb-sized piece of fresh ginger, 1 tsp. cinnamon, and ½ tsp. cloves; Simmer until water is reduced by almost half; strain, pressing on the berries.  Cool until just warm, stir in honey.

On a related note, you can use jelly to make gourmet pancake syrup:  see here.
0 Comments

Baked Peaches with Raspberries

7/23/2013

0 Comments

 
Picture
There's nothing like fresh fruit in the summer, warm off a tree, juice dripping down your chin.  
However, if you want a little variety with summer's luscious bounty, here's something simple yet delicious.  It's best with fruit from the farmers' market or your own trees, but supermarket fruit will do in a pinch, though you'll want to add about 5 minutes to the baking time and maybe add an extra tablespoon of brown sugar.

Baked Peaches with Fresh Raspberries
4 ripe peaches or nectarines
1-2 Tbsp. brown sugar (1 Tbsp. for very sweet, ripe peaches)- or use 1 Tbsp. honey
1 Tbsp. sour cream, vanilla yogurt, or good-quality balsamic vinegar
a handful of fresh raspberries (about 1 1/2 ounces, or 1/4 cup)

Turn on oven to 400 degrees F.  Spend the next five minutes washing, drying, then halving and removing the pits from the peaches or nectarines.  Set the peach halves on a baking sheet, then sprinkle with brown sugar.  Pop them into the still-heating oven and set a timer for 15 minutes.  You want them to be warmed through, just starting to soften a little, and for the brown sugar to be melted.  Set the oven to broil, and put the peaches on the highest rack in the oven for ONE minute.   Remove from the oven.

Stir the sour cream or yogurt with just enough water to make it a drizzling consistency, or use the balsamic straight.  Drizzle over the top, then add raspberries.  Eat while warm, spooning the juices from the bottom of the baking dish over the topl
0 Comments

Never-flat Whipped Cream 

4/26/2013

0 Comments

 
Picture
Do you love whipped cream but wished it would stay fluffy like whipped topping does?  
Cool-Whip, move over; your superior is here!  Airy, melt-in-your-mouth, delicately sweet, no hard-to-pronounce ingredients- what could be better?

Use this for topping pies, gelatin, cakes or cupcakes, or anything else you like!  Stir in a little caramel sauce and it's either an amazing dip for apples or an incredible cake filling.  Fold in some melted and cooled chocolate for a mousse-like topping.  White chocolate is delicious mixed in.

The version below that uses gelatin gives the most firmness.  I've kept it in the fridge for two weeks before, without the faintest hint
Yes, you can use this to decorate cakes!  (Just don't let it get too warm, it will melt if it gets above about 90 degrees F, just like butter does.)  This picture is my niece's wedding cake.

If you can't have dairy, use 8 ounces of chilled coconut cream to replace the dairy cream.  Not cream of coconut, that's different.  Coconut cream is the thick layer you find on top of canned coconut milk; Asian markets sell cans of straight coconut cream.

Stabilized whipped cream
½ pint whipping cream (8 oz)
½ tsp. vanilla
2 Tbsp. sugar or ¼ c. powdered sugar
1 Tbsp. Ultra Gel OR 1 tsp. unflavored gelatin*

If using Ultra Gel, stir it with the sugar, then add cream and vanilla and whip until stiff.  

If using gelatin, put it with a tablespoon of water, let it sit a minute to soften, then microwave for 12 seconds to dissolve it. You could heat gently on a stove, if needed.   Don't let it boil.  Whip cream, sugar, and vanilla until they start to thicken a little, then slowly pour gelatin in while still beating. Whip until stiff.  Chill it if you need it a little thicker.

Store any extra in the refrigerator.
__________________________________________________________
*Other ways to stabilize whipped cream:
(you can skip the Ultra Gel and gelatin if you use these)

-fold in 4-8 ounces melted and cooled chocolate (the more you use, the more truffle-like the frosting/mousse will be.  Also, the darker the chocolate, the less you need.)

-Beat in 2-4 ounces of cream cheese.

-Before whipping, sprinkle in half a package of instant pudding powder.  (This is really adding  Ultra Gel, which is part of the pudding mix.)

-Substitute 1 1/2 -2 Tbsp honey or corn syrup in place of the sugar, or 3 Tbsp. any flavor jam or jelly.  This will only lightly stabilize it, but works for things you'll eat in the next couple hours.
0 Comments

Healthy Peanut Butter-Chocolate Banana Bars

3/23/2013

1 Comment

 
Picture
These have fiber, protein, and are much lower in sugar than almost any baked treat!  And they really are good.  My family snarfed down this batch. 

Besides all that, they're also wheat-free and dairy-free.

Healthy Peanut Butter-Chocolate-Banana Bars

1 1/2 cups cooked white beans (one can, drained and rinsed)
2 eggs
2 ripe medium bananas
1/2 c. peanut butter
1/4 c. brown sugar or honey (or 1/2 c sugar, if you like things on the sweeter side)
2 tsp. vanilla
1 tsp. baking powder
1/2 tsp. salt
1/2 cup quick-cooking oats
1/3 c. chocolate chips (the darker the better)

Preheat oven to 350 F.  Put the beans, eggs, bananas, peanut butter, brown sugar, and vanilla in a food processor or high-powered blender.  Run until very smooth.  Stir in the baking powder, salt and oats.  Spread in a greased 8x8 pan then sprinkle with chocolate chips.  Bake 30 minutes or til test done with a toothpick.  Cool at least 15 minutes before cutting.  These are even better the next day.

For a variation on this, substitute pumpkin puree for the banana, increase sugar/honey to 1/2 c., replace almond or cashew butter for the peanut butter, then add 1-2 tsp. pumpkin pie spice.
1 Comment

Black Bean Brownies (or, Chocolate Truffle Brownies)

3/6/2013

0 Comments

 
Picture
Apparently these have been popular in the food world for about a year... but I first saw them last week.  My oldest son, the pickiest eater in the house, had noticed the printed recipe sitting on the counter for several days, grimacing everytime he walked past it.  So when a batch of brownies appeared out of the oven, he cocked an eyebrow at me, asking "Are these what I think they are?", then declared he would NOT eat them.
After everyone else begged for seconds, though, he decided he'd try just one bite.  Then a whole brownie.  Then he had seconds too.
(YEAH!)

Black Bean Brownies

1 1/4 c. cooked black beans, rinsed (about a 15-oz can or 1/2 c. dry beans- cook first)
3 eggs
1/4 c. melted coconut oil or vegetable oil
1/2- 2/3 cup honey OR 3/4-1 cup sugar (brownies with the higher amounts are sweeter and more moist)
½ cup unsweetened cocoa powder
1 tsp. vanilla extract
½ cup whole wheat flour, OR 1/2 c.gluten-free flour plus 1 tsp. xanthan gum
½ teaspoon almond extract or orange extract, optional
½ teaspoon baking powder
1/4 tsp. salt
½ cup chopped walnuts, optional
¼ cup semisweet chocolate chips, optional


Preheat oven to 350 degrees. Butter or spray a 9x13 pan.  Combine beans, eggs, oil, sugar, cocoa powder, vanilla, and almond/orange extract (if using) in a food processor or blender.  Puree until very smooth.  In a medium bowl, combine flour, baking powder and salt.   Pour the puree over top, then mix both together.  Stir in walnuts if using.  Sprinkle chocolate chips on top.  Bake about 25 minutes or until center tests done with a toothpick.  
Cool.  
To make these into Chocolate Truffle Brownies, omit the chocolate chips and frost with my favorite-ever chocolate frosting: creamy, soft, oh-so-smooth Chocolate Blender Frosting!
0 Comments

Homemade Dairy-free Spreadable Butter

2/9/2013

12 Comments

 
Picture
Picture
My no-butter spread still tastes like butter plus is made with healthy fats. The spread is in the container; dairy butter is on the left for comparison.
I am so excited!

But first- if you've noticed a shift towards gluten-free and dairy-free recipes lately, good noticing!  I. Love. Dairy.  I even milked a cow every day as a teenager so I had the fresh great stuff.  But sometimes people have health problems with certain foods.  So far we've discovered that two of my children get stomach aches when they drink milk.  One of my daughters has excema on her arms that just has not cleared up.  It usually comes and goes, especially in the winter, but she's had it for two months straight.  So I've taken all dairy and wheat items out of her diet to see if those common allergens could be a reason for it.  I'm still cooking normally for everyone else, but have necessarily been experimenting with this other way of cooking.  And here's the latest and greatest:

Butter.  Sort of.  It tastes like it, anyway.  And spreads beautifully.  It even cooks like butter.  I've creamed it with sugar and made a cake, made brownies, melted it on muffins, spread on toast, made honeybutter, and made dairy-free cream of broccoli soup with it.  Yum.

The idea was sparked by reading a label on a small tub of honey butter.  Turns out there was no butter in it at all, but tasted as though it did.  Reading through the list- hydrogenated soybean oil, honey, citric acid, soy lecithin, artificial colors and flavors- it occurred to me that if THEY could make something taste and spread like butter, then maybe I could, too.  So I started researching what the flavor components were in butter and what other foods contain them too.  It was fun to read about- ketones, diacetyl, acetoin, reactions between aldehyde and niacin.  (But, dang it, how come if I was setting a good example of work, study, and loving to learn, I had to remind my daughter every 20 minutes to get back to her schoolwork?!)

Anyway, I found some foods that naturally have some of the same flavor components as butter, and used one that covered the bases.  It's the ingredient that makes ALL the difference in flavor here.  Liquid aminos.  Or just use soy sauce, which is about the same thing.  If you prefer to avoid soy completely, nutritional yeast flakes will give a similar flavor.  Vinegar also works, in the same tiny amount.  The cornstarch, coconut flour, or xantham gum thicken the water so it will better stay mixed with the oils.

This is spreadable when used straight from the fridge.  It’s fantastic on toast, muffins, and waffles.   It has about the same fat-to-water ratio as dairy butter (80:20).  You can cook with it just like real butter, too.  It can be creamed with sugar for cakes and cookies.  Use it cold from the fridge to do this, and don’t beat it longer than about 45 seconds or it begins to melt a little.  This spread can be mixed with an equal amount of honey to make honey butter.

If you’d like a firmer consistency, like sticks of butter, increase coconut oil to ¾ cup and reduce liquid oil to ¼ cup.

Turmeric and paprika give it a nice color without  affecting the flavor.  Turmeric adds bright yellow so a little goes a long way, and paprika lends a warm pinkish orange.  Both will deepen after a day. Combine a pinch of each (just under 1/16 tsp) for the best color.  If you make this using olive oil, the buttery spread has a greenish hint to it which paprika helps eliminate.

Dairy-free Buttery Spread

2 Tbsp. water
1 tsp.  cornstarch OR coconut flour OR 1/4 tsp. xantham gum
1/8 tsp. liquid aminos or soy sauce or vinegar OR scant ½ tsp. nutritional yeast
½ tsp. salt
A pinch each turmeric and paprika, optional (for color)
½ c. coconut oil, softened just til creamy and stirrable
½ c. olive oil or other liquid oil like canola

In a glass 1-cup measuring cup, stir together water and coconut flour.  Microwave until it boils, stir until smooth.  (You’ll need 3 T water if boiling this in a pan on the stove.) Mix in the liquid aminos, salt, turmeric and paprika.  Set aside to cool. 

After it’s cooled to nearly room temperature, mix in the coconut oil, then whisk in olive oil until smooth.  Put mixture in the fridge to chill.  Stir after it starts to thicken, about 15-30 minutes. 

Store covered in the refrigerator.  Makes just over 1 cup. (9 ½ oz, or 3 T. more than 2 sticks of butter)

If you want a firmer consistency to form “sticks” of butter, after it’s just started thickening in the fridge and you’ve stirred it, pack it into whatever molds you have.  I use mini loaf pans, filling them on a scale so each stick weighs 4 ounces.  Put in the freezer to solidify. After they’re hard, pop them out of the molds and store in ziptop bags or wrapped in plastic.  Label and keep in the freezer for longer storage, or keep in the fridge for shorter-term use.

Picture
12 Comments

Just-The-Best-Breakfast Cookies

1/18/2013

0 Comments

 
Picture
A few years ago, I opened up the Foods section of my local newspaper and spotted a recipe called "Just-the-Best Cookies".  The version there was intended to be a healthier one, having reduced the nuts, coconut, and switching to oil instead of butter.  Well, I've reduced the sugar and changed it to use honey, then added back the bigger amount of coconut and nuts, since we know now that healthy fats are, well, healthy!  In moderation. And I love the crunch and flavor of coconut and nuts.

We have two breakfast times at my house- one for my highschoolers and husband, who have to be out the door by 6:45, and one for the rest of us, because some of them leave at 8:00 for the elementary school and Jr-High.  These cookies make a fantastic, no-work breakfast for that earlier group- I make a batch, put them in a big ziplock bag after cooling, and pop them into the freezer. Then my early group can even grab and go, when needed.

These cookies are high in fiber as well, and lower in sugar than most.  Two cookies are about the same nutritionally as one homemade, normal-sized muffin, and much better for you than commercially-made muffins!  Two made without raisins contain 16 grams of sugar, which is less than you'd get in a bowl of cereal with milk. Especially if you count the size bowl my teenagers think is a serving.  (I keep hiding the bigger bowls...)

Enjoy!

Just-the-Best Breakfast Cookies
1/2 c. coconut oil or butter
1/2 c. honey
1/2 c. brown sugar
1 large egg
1 1/2 tsp. vanilla
1/4 c. water
2 c. whole wheat flour
2 c. quick-cooking oats
1 tsp. baking soda
1/2 tsp. salt
1 c. shredded sweetened coconut
1/2 c. chopped pecans or other nuts, optional
1/2 c. chopped raisins, optional

Preheat oven to 350 degrees. Lightly grease or spray two cookie sheets.  In a large bowl, beat together coconut oil and honey, then mix in egg, vanilla, and water.  Add the flour, oats, baking soda, and salt and mix well.  Stir in coconut, nuts, and raisins.
Roll into 1 1/2" balls, a little larger than a ping-pong ball.  Place on cookie sheet, flatten slightly, and bake for about 12 minutes.  Let the cookies cool 2 minutes on the cookie sheet before removing to a cooling rack. Makes about 36.

To make breakfast bars instead, spread all the dough onto one well-greased cookie sheet.  Bake at 350 for probably 25 minutes.  I don't know for sure because the idea popped into my head just now...    Cool and cut into whatever size bars you like.                                


0 Comments

Homemade Electrolytes- sub for Pedialyte or Gatorade

12/11/2012

1 Comment

 
Picture
Do you ever use Pedialyte or sports drinks for sick children?  Below are some homemade, very inexpensive, and fully functional substitutes.

 We've had an impressive virus at our house lately; my 7-year-old ran a fever for an entire week (with an ear infection on top of it), and now the 4-year-old has the fever-causing virus.  Younger children get dehydrated so easily, so mine get a water bottle to keep with them at all times while sick- but it's "lemonade" water.  It really is lemonade, a little on the weak side and with salt.  I add a couple things to their water bottle, and it helps replenish the minerals and salts they lose while fevering. It tastes better to them than plain water, which helps, too.

I prefer the lemon- if you have fresh it's fantastic-, and lemon seems a little easier on upset tummies than the orange juice.  Lemon is also supposed to help alkalinize your body and cleanse the liver, both of which may help you recover faster.  The salt really is important*.  If you use unrefined coarse or sea salt, you'll also be adding critical trace minerals. (If you only have refined salt, I understand, it's OK, just not as good for our purposes here.)    For the sweetener, I use raw honey because that's what I have in my pantry.  Don't use honey if you're making this for a child under 1 year old because of possibility for botulism.  Sugar can be substituted, but doesn't have the trace minerals that honey does.  If your child likes the flavor of molasses, that's even more nutritious than honey.  My next batch will use blackstrap molasses- the amount of minerals in there are amazing!  And, after all, nutrition is the name of the game when someone's sick! This drink can also be frozen to make ice cubs or popsicles.
Note:  blackstrap molasses is not very sweet at all, and is somewhat of an acquired taste.  If I make some for myself, I tolerate the flavor, but for my children, I use no more than 1 Tbsp. blackstrap and 1 Tbsp. honey.  Using regular molasses is much more palatable to children, and even then I recommend using half molasses and half honey.

Lemon Electrolytes

16-oz  bottle of  water
3 Tbsp lemon juice or juice from 1 lemon (grapefruit juice works too)
1/8 tsp. unrefined salt
2 Tbsp. honey and/or molasses 

Pour about 1/2 cup of water out of the bottle (you're drinking it, not dumping it, right? :)  Add the lemon juice, salt, and honey or molasses. Put the lid on and shake hard.

If you want to mix up a bigger batch to keep in the fridge, use 1 quart of water, 1/2 c. lemon juice, 1/4- 12 tsp. unrefined salt, and 1-6 Tbsp. honey or molasses.  Makes a little more than a quart.

Orange Electrolytes

One 16-oz water bottle, half  full
1/8 tsp. unrefined salt
1 tsp to 1 Tbsp. honey or molasses
about 1 cup orange juice

Add salt and honey/molasses to the bottle, put the lid on and shake hard until mixed well.  Fill the bottle up the rest of the way with orange juice.

Bigger batch: 2 c. water, 2 c. orange juice, ¼- ½ tsp. unrefined salt, 1 Tbsp. honey or molasses.


*The recommended salt amount varies from 1/4 per quart to 1 tsp. per quart. Since I'm feeding this to children, I use the lower amount.  Recipe sources I looked at include the University of Connecticut Health Center, The Rehydration Project, Southern Utah University, LiveStrong.com, and http://www.cheekybumsblog.com/2012/04/living-naturally-homemade-electrolyte-drink-move-over-pedialyte/

Nutrition facts:
lemon juice: http://nutritiondata.self.com/facts/fruits-and-fruit-juices/1939/2 
orange juice: http://nutritiondata.self.com/facts/fruits-and-fruit-juices/1973/2
honey: http://nutritiondata.self.com/facts/sweets/5568/2
molasses: http://nutritiondata.self.com/facts/sweets/5573/2  
blackstrap molasses: http://www.whfoods.com/genpage.php?dbid=118&tname=foodspice


1 Comment

Dairy-Free, No-Cook Sweetened Condensed Milk

11/27/2012

0 Comments

 
Picture
This is a dairy-free version of sweetened condensed milk, using honey as the sweetener.  For some other ways to make a substitute for sweetened condensed milk, including some with dairy, see here. 
It doesn't need cooked, which not only makes it super fast to make, but is great if you want to use raw honey and keep the enzymes.
Due to the fiber in this recipe, it won't be as smooth as the store product, but it is still thick, creamy, and sweet. 

This has one rather obscure ingredient: coconut butter.  That, however, is super easy to make, and will store at room temperature for a long time.  Months, at least.  
Coconut butter is plain, unsweetened coconut ('macaroon coconut') that has been pureed in a blender or food processor for several minutes, until it becomes liquid and creamy.  It, like coconut oil, will solidify at temperatures under about 75 F, but can be gently heated to liquefy again.  If you make your own, use at least 2 cups of coconut to begin with so there's enough in the blender or bowl to puree.  This much will give you about 1 cup of coconut butter.  If you want other ideas on using this coconut butter, see here or the Tropical Traditions recipe blog, where they call it Coconut Cream Concentrate.

No-cook Honey-Sweetened Condensed (coconut) Milk
Makes about 14 ounces

2/3 c. honey (7 oz. by weight)
1/4 c. plus 1 Tbsp. water, warm but not hot
1/2 c. coconut butter (also known as coconut cream concentrate), warmed


Add the warm water and coconut cream to the liquid measuring cup you have the honey in. Whisk together.

Mixture will thicken as it cools to room temperature, but can be used right away.

To thicken faster, cover and put it in the fridge.

This can be used any way that you'd use regular sweetened condensed milk, EXCEPT in the no-bake cheesecakes that call for lemon juice.  It won't thicken up properly there, because the condensed (dairy) milk thickens by the lemon juice curdling it.  Coconut milk doesn't.

Try it with the Two-Minute Fudge recipe!
___________________
One tablespoon of this sweetened condensed milk contains 1g of fiber, 1g of protein, 7g fat, and 19g sugars.  The regular canned stuff has no fiber, 3g protein, 3g fat, and 22g sugar.

So this recipe is higher in fat, but it's a healthy fat.  It's lower in sugar, plus contains coconut fiber, which has shown an ability to reduce the glycemic load of foods by slowing glucose release.
0 Comments

Pumpkin Shake

10/29/2012

0 Comments

 
Picture
Pumpkins are one of the most inexpensive, nutritious vegetables around... right now they're under 20 cents per pound where I live.  One cup (8 oz.) of pumpkin has more than 700% of your daily Vitamin A needs, 7g fiber, 3g protein, 19% RDA for iron, 17% RDA for Vitamin C, and 6% RDA for calcium.  All this for 83 calories and about 10 cents.

We grew a few, but the garden was pretty sad in general and we ended up buying a couple for our annual pumpkin-carving party at Grandma's house.  (To tell you how bad the garden was... the only pumpkins that survived were in the SANDBOX, where one son had spilled some pumpkin guts in late spring.  Yeah.  Go figure.  They even survived our free-roaming chickens.)

So now we have several carved jack-o-lanterns to set on the front porch for Trick-or-Treating.  The day after Halloween they'll get cleaned, sliced, and either cooked or dehydrated and turned to powder. My kids are excited at the possibilities.  Their favorite is pumpkin pie, but this shake tastes just like it, in a fraction of the time!

Pumpkin Shake
1 pint vanilla ice cream (about 4 heaping ice cream scoopsful)
1 1/2  c. milk
1 1/2 Tbsp. pumpkin powder*
1/4 tsp. pumpkin pie spice OR 1/8 tsp. cinnamon plus a dash (to taste) each ground cloves,     ginger, and/or nutmeg
2 Tbsp. brown sugar, OR molasses, OR honey

Put all ingredients in a blender and mix on high until smooth.  Makes about 3 1/2 cups.

*If you don't have pumpkin powder, use 1/2 cup plain pumpkin puree, and reduce the milk to 1 cup instead of 1 1/2 cups.

Optional mix-ins:
2 Tbsp. raisins (add before pureeing so they get finely chopped)
2-3 oz. cream cheese
2-4 Tbsp. chocolate chips

Get this recipe and many more ways to use pumpkin, free, from The Great Pumpkin Cookbook.


0 Comments

Autumn Harvest Bread

9/11/2012

2 Comments

 
Picture

 This bread has a thin, chewy crust with an exceptionally tender and moist interior, flavored with pumpkin and honey, scented with cinnamon, ginger, cloves,  with a toasty crunch from pecans.  (See a photo of the inside here.) It is one of my all-time favorite recipes.  It all started with an artisan bread cookbook, Amy's Bread.

My brother had just finished a two-year mission to Spain, and came back with a whole new perspective on bread.  He described how fresh, hearty, deeply flavored, and moist those European breads were, with their beautiful, flavorful crusts.  

That's it, I thought, I MUST learn to make bread like that.  

So I bought a book.  (I still have, it, use it, and love it.  Her Country Sourdough loaf is perfect, and the thin, crunchy, seeded breadsticks are addicting!)

The recipe below began as one from her cookbook.  I've tweaked it over the years, until it can be claimed as my own.  We usually just slice and butter it, or toast and spread with cream cheese.  It would make incredible French Toast, especially if you stuff it with lightly sweetened cream cheese and top with fruit syrup or homemade maple-flavored syrup.   For a sandwich filling that goes spectacularly well with it, see my next post!

See here for a post on making pumpkin puree, or see this one on making pumpkin powder.  I actually used the pumpkin powder & added water in my batch for the fair.

Autumn Harvest Bread
(Pumpkin-Pecan Yeast Bread)

1 Tbsp. Instant or RapidRise yeast               4 ½ c. bread flour
1/2 c. warm water                                           ½ c. butter, melted
½ c. (6 oz.) honey                                            1 tsp. cinnamon
1 c. pumpkin puree                                          ½ tsp. ginger
1/4 c. cornmeal                                                ½ tsp. ground cloves
2 large egg yolks                                             1 ½ tsp. salt
2 Tbsp. dry milk powder                                 1 c. pecan pieces, toasted                                                                                

Combine yeast and warm water, stir to dissolve.  Let stand 3 minutes.  Mix in honey, pumpkin, cornmeal, egg yolks, milk powder, and 2 cups of the flour. Add butter, then the remaining 2 cups flour, the cinnamon, ginger, cloves, and salt.  Knead until smooth and elastic, about 5-10 minutes.  Let rest 20 minutes.  Knead in pecans.   Cover and let rise until doubled, about 1 ½ -2 hours.  

While it’s rising, make a wash with 1/4  c. cold water and 1/2  tsp. cornstarch:

Combine the two, bring to a boil, and stir until thickened.  Cover it so it doesn’t form a skin, and let it cool.

Divide dough into two pieces. Shape into 16-20” long logs, and tie each into a knot.  (Or shape into a ball, seam-side down, or shape into two 8x4 loaves.)  Cover and let rise until nearly doubled, 1-1 ½ hours.  Using a pastry brush, gently coat each loaf with the glaze.  Bake at 375 degrees for 25-35 minutes, until golden brown and the surface is firm.  Brush again with the glaze.  This helps it have a nice shine and a thin, soft crust.  Cool before cutting into 1/2" slices. 
2 Comments

Pear-Mint Cooler

7/28/2012

0 Comments

 
Picture
No, this one doesn't have any wine in it; it's not THAT kind of cooler.   It just... makes you cooler.  Both ways.  (Right?)

This is great for using overripe fruit, which is what I happened to have sitting on my countertop.  The pear needed a couple bruises cut off, then it was ready to become part of a cold, refreshing, lightly sweet drink with a hint of mint.

1 pear
1 banana, the darker the better
one 4" sprig of fresh mint
1 tray of ice cubes
2 cups water
1-2 Tbsp. honey, optional

Put all in a blender, run on high until smooth.  Makes about 4 cups.
0 Comments

Three-Ingredient Macaroons

6/15/2012

0 Comments

 
Picture
A little while ago I went to a local specialty store, Against The Grain, which is specifically for those who can't have wheat or gluten, to pick up some Expandex.  While there, I saw some individually wrapped, big mound-looking macaroons.  They were 2 ounces apiece, about 3" across,  and cost $1.29.   The ONLY ingredients on the list were coconut, egg whites, and honey.  It sounded healthy and yummy, so I bought one to figure out how to make them.  They are not the light, crunchy, meringue-type macaroons, but instead a dense, more lightly sweet confection. 

The coconut provides a high amount of fiber (75% of the carbs in coconut are fiber!- coconut fiber has been shown to control blood sugar especially well), as well as some healthy fats (medium-chain fatty acids, including lauric acid).  Read an article here, or a website on coconut research here.

The egg white helps bind it, and contributes protein.

The honey, of course, sweetens it, as well as helping moisten and bind.

Here's what I ended up with after a couple experiments:

Three-Ingredient Macaroons

2 egg whites
1/2 c. honey
3 cups unsweetened, fine-flake coconut

Preheat the oven to 350 degrees.  Line a baking sheet with parchment, or grease it.  Beat the egg whites until just foamy, then whisk in the honey.  Stir in the coconut until well mixed.  If it won't hold its shape yet, let it sit for 15-30 minutes to let the moisture absorb into the coconut. 

Use 1/4 cup packed (1.7 oz prebaked weight) for 1 1/2 oz macaroons, or a scant 1/3 c. scoop for 2 oz (2.2 oz. prebaked weight), bake  17-18 minutes, until just turning brown on the tops.  Let cookies cool on the baking sheet for 5-10 minutes before you take them off; otherwise they'll fall apart.

This makes 12 (1 1/2 ounce) macaroons, or 9-10 (2 ounce) ones.
0 Comments

Coco-Cocoa Velvet Dessert, and, Is Coconut Bad For You?

1/27/2012

0 Comments

 
Picture
Cool, creamy, and delicious! 

This recipe, adapted to use coconut cream concentrate,  was also selected for the Tropical Traditions recipe blog today!

Recipe is at the bottom of this post.

I’ve been cooking with coconut oil for about two years now.  I also use vegetable oil, olive oil, and butter, but not shortening.  The coconut oil has replaced shortening for me.  It works beautifully in pie crusts, although not so well in frosting, due to its low melting point.

If you’re worried about what you’ve heard about coconut oil, or coconut in general, being a possible health hazard, here’s what I’ve read:

The original studies on the health effects of coconut oil used partially hydrogenated coconut oil, which contains trans fats.  Natural coconut oil does not contain any trans fats.  Most of its natural fats are saturated, but don’t shrink in fear quite yet:  some of these saturated fats are in the form of  lauric acid, which raises HDL (“good”) cholesterol.  In addition to this, saturated fats in general can be broken into at least two subcategories: medium-chain fatty acids, and long-chain fatty acids.  Though they’re both solid at room temperature, they are very different from each other.  Medium-chain fatty acids serve to increase metabolism, and they seem to not recombine easily as fat in the body.  In addition to this, coconut oil helps increase thyroid function.

Several government-run nutrition bureaus strongly recommend against using large amounts of coconut oil, due to the high saturated fat content and fears that it would thus increase heart disease.   In response to this, studies done in high-coconut-oil-use populations actually show more heart disease occurring as they REDUCE the amount of coconut consumption.  The fears seem to be unfounded.

Coconut is also an excellent source of fiber.  One ounce unsweetened dried coconut (about a handful) has 5 grams of fiber  (Four times as much fiber per serving than oat bran!)  About ¾ of the total carbohydrates in coconut are fiber.  Most of this is insoluble fiber, the stuff that helps prevent blood-sugar spikes, slows down your digestion (helping your body extract more nutrients from it, and helping you feel full longer, reducing cravings), helping scrub your intestines, lowering your risk of cancer and several diseases, and providing a good environment for beneficial bacteria (probiotics).  Coconut fiber lowers the glycemic index of the food it’s in.  Some people swear by eating two coconut macaroons a day to treat Crohn’s disease, or Irritable Bowel Syndrome.  

Read more:

http://www.coconutoil.com/research.htm  - a list of the latest research on coconut and coconut oil

http://nutritiondata.self.com/facts/nut-and-seed-products/3107/2- nutrition for several forms of coconut

http://www.livestrong.com/article/98083-coconut-fiber-diabetics/#ixzz1jrVJQkrr- effects of coconut fiber on blood sugar

http://www.earthincommon.com/coconut_02-article.htmlcoconut macaroons to treat IBS and Crohn’s!  Plus, traditional use of coconut to expel parasitic worms; for this, see also http://www.thevirgincoconutoil.com/articleitem.php?articleid=269

http://www.nutraingredients-usa.com/Product-Categories/Fibers-and-carbohydrates/Fiber-may-boost-pancreatic-health-Study/?c=JXuXZ2C%2B3ccDH1LSCcVFdFR3NQxnAszG&utm_source=Newsletter_Product&utm_medium=email&utm_campaign=Newsletter%2BProduct  - report on the latest findings on fiber in general and its effect in preventing pancreatic cancer.


Coco-cocoa Velvet Dessert 

1 1/2 c. coconut milk, divided
1 packet unflavored gelatin (2 1/2 tsp.)
1/3 c. unsweetened cocoa powder
1/3 c. honey
1/8 tsp. salt
1/2 tsp. vanilla
2 drops of orange essential oil, optional  (use food grade or better!)- OR use 1 drop lavender oil
1/2 tray's worth ice cubes (7-8 ice cubes, should be 4 oz.)

Pour 1/2 cup of the milk into a blender.  Add the gelatin, and let sit to soften.  Meanwhile, heat the remaining milk to boiling in a saucepan or microwave.  Pour the hot milk over the gelatin mixture; turn on low  to mix and dissolve.  Add  cocoa powder, honey, salt, vanilla, and essential oil.  Increase blender speed to high.  While motor is running, drop in ice cubes, one at a time.  Blend until smooth.  Pour into four or five (6-oz) ramekins, or in one (2-cup) mold.  Refrigerate until set, 3-4 hours. Serve in the containers, or dip the bottoms in hot water for 20 seconds, then invert to unmold.

If you want to unmold it, I recommend you double the amount of gelatin; I like it extra-firm anyway.

The recipe will work if you use regular milk instead; that's how I grew up eating it, but the version above is great for dairy-intolerant people.  Plus it tastes great!  You can also use chocolate chips instead of cocoa; use 1 cup of chips, and reduce honey to 3 Tbsp. 
Picture
Chocolate and lavender taste very good together, as long as you use a very light hand with the lavender!

Picture
Chocolate-orange...

0 Comments

Fluffy Frostings That Are Not Too Sweet, non-artificial colors

6/23/2011

1 Comment

 
Picture
Do you have to go colorless when avoiding artificial colors?
 
The NYTimes recently ran an article called "Colorless Food?  We Blanch", claiming nobody would want to eat food anymore if manufacturers didn't use artificial colors.   It was a little ridiculous.   One response to it is found here.

Yesterday I needed to make a pink and purple unicorn cake for my daughter.  And one extra issue- use no artificial colors, or one son couldn’t have any of the cake.  At least not with any frosting.

Picture
My husband now has a new favorite frosting, as does a neighbour who stopped by:  Fluffy Blueberry Cheesecake Frosting, which was my answer to needing a purple mane, tail, and border. 

(If you just want the frosting recipe, go to the bottom of this post.  To read about making a non-artificial pink-and-purple unicorn, read on.)


To make the basic pony part, I greased a pony-shaped cake pan, mixed up 4 cups of liquid with enough gelatin, and let it set up in the fridge.  I use unflavored gelatin; Knox comes that way in packets, but I buy it in the bulk section of a local health food store.  To make the pony pink, I used fruit punch as 3 cups of the liquid, and 1 cup sour cream (or plain yogurt; I used kefir ‘cause that’s what was in the fridge!) to make it opaque pink instead of transparent red.  Use twice as much gelatin as you would normally; otherwise it will fall apart when you flip it out of the pan. (Mine did, thus the recommendation to double the gelatin!)  It might anyway, but at least you’ll be upping the chance for success.

I baked a rectangular cake big enough for the pony to fit on and frosted it with Fluffy Cheesecake Frosting.   I set the pony pan in a sink of hot water for just a couple seconds, then flipped the pan over the cake so the pony landed in the right place.  Then I decorated with the purple frosting, and carved a horn out of a stick of jicama.  (I was going to use the tip of an ice cream cone, but we were having jicama for dinner.)  Voile!  Everyone’s happy!

Fluffy Blueberry Cheesecake Frosting- makes about 2 1/2 cups
(See here for Strawberry Cheesecake Frosting)
1 cup fresh or frozen blueberries (or 6 oz. other berries)
½ c. sugar
1 Tbsp. Ultra Gel
8 oz. cream cheese, softened
4 oz butter, softened
½ tsp. vanilla 

Combine blueberries and sugar; either puree them in a blender until smooth, OR cook and stir until boiling; cool.   Beat cream cheese until smooth, add butter, sugar, blueberry mixture (cooled if you cooked it),  Ultra Gel, and vanilla.  Beat until smooth and fluffy.  Let stand 5 minutes. 

_____
Ultra Gel needs five minutes to fully absorb liquid; that’s why I’ve added the 5-minute wait time.  These frostings are easy to adjust- if too thick or pasty, add a little (1-2 tsp.) water, or as needed.  If too thin, sprinkle on another 1 tsp. Ultra Gel and beat it in. 


The cream cheese frosting recipe I tweaked to get this, above, as well as the white base layer:

No-cook “cooked”
Fluffy Cheesecake Frosting
½ c. sugar

1 Tbsp. Ultra Gel
8 oz. cream cheese
4 oz butter (1 stick), softened
¼ c. milk
½ tsp. vanilla

Stir together sugar and Ultra Gel, set aside.  Beat cream cheese until smooth, add butter, milk, vanilla, and sugar mixture.  Beat until smooth and fluffy, about 2 minutes.  Let stand 5 minutes.


Another variation I’ve come up with, in case you don't use table sugar at your house:

Fluffy Honey –Cheesecake Frosting

8 oz. cream cheese
4 oz. butter, softened
1/3 cup honey
3 T. water, milk, or cream
½ tsp. vanilla
2 Tbsp. Ultra Gel

Beat cream cheese until smooth; add butter, honey, water, and vanilla.  Sprinkle the Ultra Gel  on top, then beat all until smooth and fluffy, about 2 minutes.  Let stand 5 minutes.

1 Comment
<<Previous

    Need a Search bar?
    One day I may upgrade my website-- but until then, use your web browser search bar. Type in my web address and what you're looking for, like this-- 
    www.theprovidenthomemaker.com  pumpkin --  and you should get results.


    Author

    I'm a disciple of Christ, a member of the Church of Jesus Christ of Latter-day Saints, a family-defending, homemaking, and homeschooling mom of eight children, two of whom sometimes can't have milk or wheat. Growing up on a farm in a high mountain valley, my parents taught me to 'make do', work hard, smile, and help others.  I love cooking, learning, growing food and flowers, picking tomatoes, and making gingerbread houses --which CAN be made allergy-friendly-- with my children.  I hope you find something to help you on my site!

    Archives

    April 2024
    July 2023
    April 2022
    September 2021
    March 2021
    December 2020
    April 2020
    March 2020
    February 2020
    January 2020
    December 2019
    November 2019
    October 2019
    September 2019
    August 2019
    July 2019
    June 2019
    May 2019
    April 2019
    January 2016
    November 2015
    October 2015
    September 2015
    March 2015
    February 2015
    November 2014
    October 2014
    September 2014
    August 2014
    July 2014
    June 2014
    May 2014
    April 2014
    March 2014
    February 2014
    January 2014
    December 2013
    November 2013
    October 2013
    September 2013
    August 2013
    July 2013
    June 2013
    May 2013
    April 2013
    March 2013
    February 2013
    January 2013
    December 2012
    November 2012
    October 2012
    September 2012
    August 2012
    July 2012
    June 2012
    May 2012
    April 2012
    March 2012
    February 2012
    January 2012
    December 2011
    November 2011
    October 2011
    September 2011
    August 2011
    July 2011
    June 2011
    May 2011
    April 2011
    March 2011
    February 2011
    January 2011
    December 2010
    November 2010
    October 2010
    September 2010

    Categories

    All
    Alcohol
    Alternate Cooking
    Appearances
    Apple
    Apricots
    April Fools
    Aprons
    Bananas
    Beans
    Beef
    Beets
    Bench
    Beverages
    Bonnet
    Bread
    Breakfast
    Budget
    Budgeting
    Cake
    Candy
    Canning
    Carrots
    Cheese
    Chicken
    Children
    Chocolate
    Christmas
    Cleaning
    Coconut
    Comfrey
    Common Core
    Constitution
    Cookbook
    Cookies
    Cooking Oil
    Crafts
    Dairy Substitutions
    Dehydrating
    Dessert
    Dried Fruit
    Earth Oven
    Earthquake
    Easter
    Edible Weeds
    Eggs
    Emergency Prep
    Essential Oils
    Faith
    Family Home Evening
    Fertilizing
    Food Storage
    Fourth Of July
    Freezer
    Frosting
    Fudge
    Garden
    Gardening
    Gingerbread
    Gluten
    Gluten Free
    Gold
    Government
    Grains
    Gratitude
    Hat
    Herbs
    Home Remedies
    Home Repairs
    Homeschool
    Home Storage
    Honey
    Hope
    Inflation
    Leftovers
    Legumes
    Lemon
    Main Dishes
    Mixes
    Mothers
    Noah
    Non Artificial Colors
    Non-artificial Colors
    Nuts
    Oats
    Oil
    Orange
    Paint
    Peaches
    Pear
    Pie
    Pizza
    Plums
    Poem
    Popcorn
    Pork
    Potatoes
    Powdered Milk
    Prayer
    Preparedness
    Projects
    Prophecy
    Pruning
    Pumpkin
    Quick Bread
    Rhubarb
    Rice
    Salad
    Salt
    Sauces
    Self Reliance
    Self-reliance
    Sewing
    Shelf Life
    Shelves
    Sky
    Smoothie
    Snacks
    Soup
    Spices Or Seasonings
    Squash
    Strawberries
    Substitutions
    Sugar
    Summer Fun
    Three Month Supply
    Time
    Tomatoes
    Trees
    Truffles
    T-shirts
    Tuna
    Ultra Gel
    Valentine\'s Day
    Vegetables
    Water
    Watermelon
    Wheat
    Work
    Year Supply
    Zucchini

    RSS Feed

Web Hosting by iPage