The Provident Homemaker
  • Recipes and Info
    • Making Bread
  • My Blog
  • Favorite Resources
  • Documents and Files
  • 52 Weeks of Building Storage

Week 26- storing winter vegetables, and weekly assignment

10/5/2019

0 Comments

 
Picture
This week, B for 3 of nonfood items. If you’re not sure what quantities you need, see the week 22 post.
This is the LAST week in the get-3-months'-supply program! Next week we'll begin the long-term-storage foods.

Did you know that many fresh vegetables can be stored for months at a time?  The USU Extension Office has multiple articles and helps.  This particular article addresses what to do at the end of the garden season for tomatoes, winter squash, onions, and potatoes

"With the first frost just around the corner, many people harvest and store their produce for later use. Many fruits and vegetables can be canned, pickled, dried or frozen. Another option is to store them fresh. Consider this information."  See here for the details. 
 
"...Other crops such as apples, pears, cabbage, celery, carrots and parsnips can be stored for an extended period of time. The following fact sheets can be accessed online, and both provide useful information. For a brief overview, visit http://www.ext.colostate.edu/Pubs/Garden/07601.html. For a more complete look at home food storage, see the USU bulletin at http://extension.usu.edu/files/publications/publication/FN_502.pdf"
0 Comments

Week 19- Weekly assignment, and making vegetable powders

8/18/2019

0 Comments

 
Picture
Your weekly assignment is B4-3. Did you do your nonfood inventory last week? If not, now is a great time.  

My dehydrator has been running nearly nonstop for a couple weeks now, with a couple of batches of canning interspersed.  I much prefer dehydrating whenever it's an option.  (But I will bottle a whole number of other things-- meat for quick meals, jam/jelly, juices, syrups, ghee, peaches, ...)  Peaches are better canned, but apricots?  They must be an acquired taste-- I acquired it years ago, but my kids haven't.  So we bottle peaches, and dry apricots.  Mostly we turn the apricots into fruit leather.  With the bumper crop we've had this year on our THREE mature apricot trees, that's a whole lot of leather, despite our best efforts to give away as many apricots as possible.  

But that's not all the dehydrator has been used for these last weeks. Dried cherry tomatoes are practically candy... but we've kept up on eating them fresh, with some sharing, so I haven't dried any yet this year.  What I have done is the full 12+ trays loaded with sliced yellow summer squash. It doesn't matter which one.  This year it's a combination of yellow zucchini, yellow straightneck squash, and pattypan squash that got just a little too big.

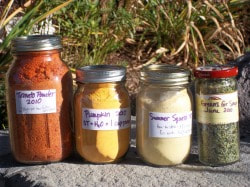
What do I do with summer squash powder?  Everything I do with the shredded or pureed fresh ones, plus some extras.  Zucchini bread. Zucchini brownies.  Smoothies. Chili, where it's great to help thicken it-- especially if I'm also using tomato powder and onion powder! Soups, where using a little becomes invisible and without any telltale flavor.  Added to regular wheat bread dough. Or muffins. Or pancakes.  

Tomato powder is even better.  I use it in place of tomato sauce, tomato paste, tomato juice, diced tomatoes. Here is a chart that tells you how much tomato powder to use in place of each of those. Tonight I added a bunch to a batch of too-runny salsa. It makes a wonderful base for marinara sauce or pizza sauce, and is used in making my own taco seasoning.  And when added to bread dough along with spices, it makes the bread taste like pizza. 

Pumpkin powder is also great.  It makes pumpkin pie, pumpkin shake, pumpkin roll... anything that you'd use pureed pumpkin in.  And again, I throw it in soup and chili to thicken them and add nutrition, and add to bread to help it stay moist longer.

I once made banana powder out of commercially-dried bananas; a neighbor had bought a 5-lb bag, found that nobody at home would eat them, and brought them to me to see if I could find a use for them.  (The powder was good in banana muffins, banana bread, and smoothies.)

​I've also made mushroom powder, carrot powder, beet powder, and dried crumbled greens. (The greens were a freebie in my yard, an edible weed known as 'redroot pigweed'. A very nutritious member of the amaranth family.) Mushroom powder adds a savory, almost meaty flavor to soups and sauces.  (I made the mushroom powder by starting with a big bag of dried mushrooms found at a Asian market.  If you're local, the place is Ocean Mart in Sandy.) The beet powder is the perfect thing to make from beets that got too big and tough for good eating.  And my favorite use for it is as a natural food color-- though it is also good in smoothies and recovery drinks. (Read what I have on beet powder, near the end of this post.)

All of these powders are made pretty much the same way.  You clean the vegetable,  (Pumpkin is steamed first. The others are handled raw.) slice it an even thickness (1/4- 3/8" is ideal), and dry until crispy.  Add them to a blender or food processor, and run until powdery.  Store airtight; even better if you can remove oxygen and seal the jar or other container.

Are you intrigued?  You can read more about each other these here, along with some recipes and tips:

Zucchini

Summer squash (Ok, zucchini is also a summer squash)

Tomato

Pumpkin

​What will you try?  

0 Comments

Week 8- Canning meat, beans, and vegetables

5/30/2019

0 Comments

 
Your ​Week 8 assignment-- Going off your  Inventory Shopping List and this week’s sales, buy the 3 months’ worth of as many different food items as you can (= Buy For 3) as your new budget allows.  Only 10 more weeks of this step!

This week's skill:
Did you know that you can bottle meat, beans, stew, and chili at home?  When you find a great sale price on meat, you can buy a bunch and save yourself a lot of money in future months!  For instance, a couple months ago I found boneless skinless chicken for $1/lb. I bought a case (40 lbs), froze about 10 lbs in meal-sized quantities, and bottled the rest.  The bottled chicken makes for quick meals, and I know exactly what was added to it.  In this case, that meant chicken and salt.  Other times I’ve put sliced carrots, celery, onions, and herbs in the jars with the meat, to have a great base for a quick, wholesome chicken noodle soup or pot pie. My food storage includes home-bottled chicken, beef, salmon, pork broth, chicken broth, black beans, pinto beans…

Did you watch the video at the top, on making bottled stew?  Do you have some of the dehydrated diced carrots from the Home Storage Center?  They're great for adding to canned foods.  It helps to soak them in hot water for at least 10-20 minutes first, so they don't soak up all the water in your jar while it cooks.

Meat, beans, and vegetables (except tomatoes) are in the category called ‘low acid’, compared to things like tomatoes and fruits, which are ‘high acid’, or contain higher acidity.  Higher acid foods may be processed using a big pot with boiling water to heat the jars and food, but low acid foods have to be heated to a higher temperature.  This means the only way to safely bottle them is with a pressure canner—a pressure cooker made to hold 7 or more jars at a time.  They start around $65 and go up from there, but you may have a friend who is willing to let you try it out at her house, or borrow it if you’re the confident type.  (I have one. It's very similar to the one in the video above. Come on over!)

Where can you find instructions on pressure canning?  Most pressure canners come with an instruction book and charts, and there are great resources online.
 
The first place to know is your local Extension Office.  In Utah, that’s the Utah State University Extension office, and somebody there knows the answer to just about any question you come up with on the topics of food, kitchens, preserving, budgeting, gardening, yard care, house and garden pests, and more. They’ll even test your pressure cooker gauge every year for $2.

https://nchfp.uga.edu/ has lots of canning information; one of its pages is this one.  It has instructions on canning
Chicken, Rabbit, Chicken or Turkey Broth, Chili, Meat (ground or chopped), Meat (strips, cubes, or chunks), Meat Stock, Meat and Vegetable Soup, Mincemeat Pie Filling, Clams, Crab, Fish (fresh or smoked), Oysters, and Tuna!

This page has info on how canning preserves food, how to make sure your food is safe, what jars, lids, and canners to use, how to know if the jars sealed correctly, canning food for special diets (including baby foods), and more.
 
Other good resources are The Ball Blue Book  and its online counterpart, https://www.freshpreserving.com/home

The Ball Complete Book of Home Preserving

So Easy to Preserve    (388 pages of instructions and recipes from the Extension Office in Georgia)

There are lots more.  Look for USDA-tested recipes.
​_____________ 

Are you ready to try this?? It's great!
0 Comments

Storing Food through the Winter

11/27/2015

0 Comments

 
There are lots of fresh foods you can store without needing a freezer, canner, or fridge.  I haven't built a root cellar, but discovered that different places in my yard, garage, and house have the right conditions for several of these foods.
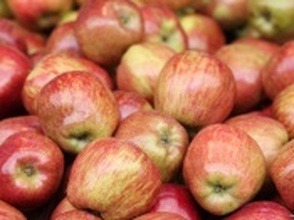
Potatoes are happy on my bare garage floor until late January. After January they have to be moved up 1-2 feet, onto the cement stairs, to avoid freezing. Same with onions. Apples are better in the garage on the workbench, which is a couple feet off the ground and a few degrees warmer (but still cold). Pumpkins are happy in the basement or in a dark closet, off the floor so they avoid moisture. Carrots and parsnips are fine to leave in the ground, covered with a pile of dead leaves or a thick layer of straw if I want any hope of digging them during the winter. Otherwise they can be dug in spring, after the winter cold has made them sweeter.The link below is a 5-page handout from the University of Wisconsin which lists types of foods, their ideal storing temperature and any necessary humidity, expected length of storage, and plans for creating your own root cellar.

http://nchfp.uga.edu/how/store/wisc_vegetables.pdf

What will you store this year?


Picture
0 Comments

Roasted Cauliflower and Chicken

1/16/2014

0 Comments

 
Picture
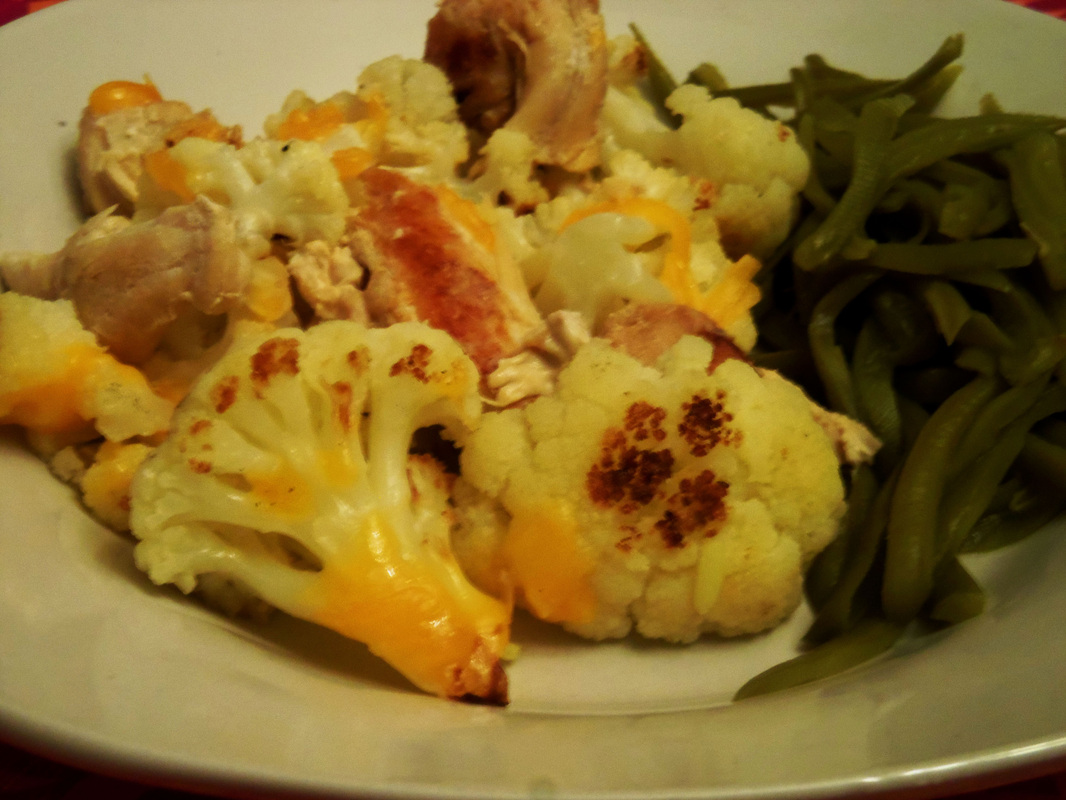
We discovered roasting vegetables about three years ago.  Now when I buy broccoli or cauliflower, they are almost always served roasted.  Even my kids who  "don't prefer"  (the PC term at our table) broccoli, like it roasted. 

 Roasted Cauliflower and Chicken    - serves 6-8
1 head cauliflower, cut into florets
1-2 Tbsp. olive oil
1/2 tsp. salt
2 cups cooked chicken 

Preheat oven to 475, adjust the oven rack to the lowest position about 20 minutes.  Put the cauliflower on a baking sheet, drizzle with oil, then sprinkle with salt.  Roast about 20 minutes, stirring once about after about 15 minutes.  Cauliflower is done when parts of it turn a deep golden brown.  Stir in the chicken .

 We ate this with rice and chicken gravy (see below) on the side; conveniently enough, it also takes about the same amount of time to cook.  If you start the rice first, then cut up the cauliflower, the rice should be done about the same time if you're using regular white rice and cooking on a stove top.

Since I didn't have any leftover chicken,  I put 1 lb of chicken in my pressure cooker along with two medium-small onions (or use one med-large) and about 1/2 tsp. salt.  My pressure cooker does not lose water when it cooks, so I didn't add any.  (If your pressure cooker does, please add water!  Probably 1/2 cup, as the chicken and onions release moisture as they cook.)  It was done after 15 minutes of high pressure. 

Clear Chicken Gravy
1 Tbsp. water
1 Tbsp. cornstarch
1 cup juices from cooking the chicken and onion

(microwave instructions)  
In a  1-cup glass measuring cup, stir together the water and cornstarch until smooth.  Stir in a little of the cooking juices, then stir in enough that you have 1 cup total.  Microwave for 1 minute; stir.  If it hasn't thickened yet, microwave another minute and stir again.  Add salt if needed.  (Mine didn't need it.)

0 Comments

Turkey Ramen Cabbage Salad

11/30/2013

0 Comments

 
Picture
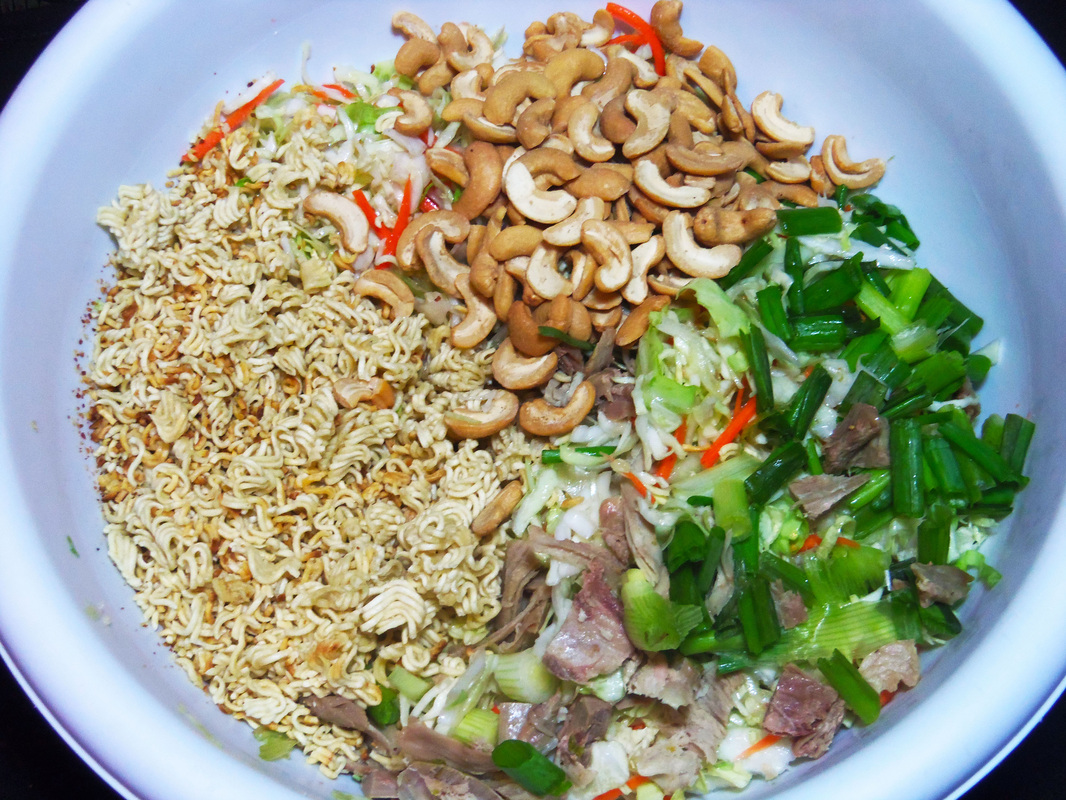
Most salads like this use so much dressing that there's a pool of it at the bottom of the bowl.  And the dressing is about all you taste.  
Not this one.  There's enough oil in the salad to help you unlock those fat-soluble vitamins; both cabbage and cashews are very high in Vitamin K.  And you can actually taste the cabbage, in a way that accents only its best features.  

If you have any left over, even though the noodles will not stay crunchy by the next day, the cabbage does.

Cabbage Ramen Salad        Serves 4-6.  Or two who really, really like it.

1 tsp. olive oil
1 package Ramen noodles
2 Tbsp. olive oil
1 Tbsp. rice wine vinegar or apple cider vinegar
1 Tbsp. honey or sugar
1/2 tsp. salt
1/4 - 1/2 tsp. black pepper
1/2 tsp. ginger OR 1 1/2 tsp. chopped crystallized ginger OR 1 drop ginger essential oil
1 small cabbage, shredded, OR a 14-16 oz package coleslaw mix (cabbage and carrots)
2 green onions, chopped
1 c. cooked turkey or chicken, diced
1/2 c. cashews, optional

Heat 1 tsp. olive oil in a large skillet on high heat.  Break the Ramen noodles into small pieces and add to the hot oil.  (You won't need the flavor packet for this recipe.)  Stir dry noodles constantly for about 2 minutes, until some of the noodles start turning a toasty brown.  Remove from heat and set aside. 

In a medium bowl, combine remaining 2 tbsp. olive oil, vinegar, honey/sugar, salt, pepper, and ginger. Stir well to combine.  Add the cabbage or coleslaw mix, green onions, turkey/chicken, and cashews.  Stir thoroughly, until no puddle of dressing remains on the bowl's bottom.  Serve right away for the crunchiest noodles.  

0 Comments

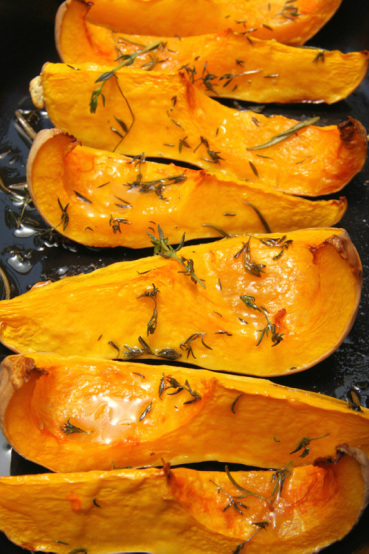
Caramelized Butternut Squash with Rosemary

11/23/2013

0 Comments

 
Picture
How about this for a new side dish?  I love rosemary and olive oil. Or butter.  Or both.  :)

This recipe showed up at my house this week in a save-the-farmlands newsletter, of all things.  (I'm all for saving farmlands, but how about nixing the property tax instead of government paying them subsidies?!)  And since my live rosemary died over last winter and there's a bottle of rosemary essential oil in my cupboard, I adapted it to use that.

You can substitute about any squash you have on hand that is a similar size.  Or use something large, like half a banana squash or pumpkin, or kabocha squash, etc, but if you do, then double the amount of other ingredients except rosemary oil.

Caramelized Butternut Squash with Rosemary 

1 butternut squash
1 tablespoon olive oil
1/4 teaspoon salt
3 tablespoons unsalted butter
2 sprigs rosemary or one drop of rosemary essential oil (better if you have a 1 ml bottle, then use  two of those tiny drops) on top of the butter

Preheat oven to 375 degrees F.
Cut the squash in half lengthwise; scoop out seeds.   (You can wash, roast, and salt these, just like pumpkin seeds.)  Put the squash cut-side up on a baking tray.
Drizzle with olive oil, sprinkle with salt.  In each natural 'bowl' where the seeds used to be, add 1 Tbsp. butter and a rosemary sprig.  EXCEPT:  if using rosemary oil, melt 2 Tbsp. butter and add the drop to it.  Pour half into the cavity of each squash half.  Cover tightly with foil and bake for 45 minutes, or until tender when poked with a fork.

Remove from oven and pull off the foil; let cool until you can handle it.  Scoop out the flesh.  

Heat the last 1 Tbsp. butter in a large skillet over med-hi heat.  Once melted and hot, add the cooked squash.  Gently toss until some parts become caramel-y brown.  Serve hot.

NOTE:  the photo shows the squash as it comes out of the oven, not after being scooped out and browned.  If you want it browned from the oven, do this instead:
When tender, pull off foil and brush the last tablespoon of butter over the cut edges.  Return to the oven and turn on the broiling element.   Broil, checking every minute.  (I am not kidding.  Seriously check every minute!)  If your baking tray is on the middle rack in the oven, this will probably take about 3-4 minutes.  If the tray is up high, close to the element, it might only take 1 minute, maybe 2.

0 Comments

Free e-book! Cooking with Eggs- Omelets and Frittatas

9/20/2013

0 Comments

 
Picture
 Today I have a free e-book offer for you, a cookbook, “The Egg and I.” It has tons of recipes for making omelets and frittatas, along with great tips on mastering eggs in the kitchen.

It's just over 40 pages of recipes for all kinds of omelets plus pages of frittatas

You can get it here, and you'll get to choose from four formats: PDF, Microsoft Word, HTML, or Kindle. 

Here's what Dennis Weaver, the cookbook's author, says:

The difference between a frittata and an omelet is that the ingredients in the frittata are mixed into the eggs instead of folded into an omelet. Usually a frittata is started on the stovetop and then baked in the skillet in the oven. They are sometimes called flat omelets or farmers’ omelets. They are larger and cut into slices to serve.

This is not your ordinary e-Book!  It has 31 different scrumptious omelet recipes. Omelets you won’t find anywhere else plus more than $30 in recipe books. Plus it tells you how to make them and gives video instructions.  Start making omelets like a pro. You can 
eat them for breakfast, lunch, and dinner.  

The last time we visited my son and his family in Minnesota, we stopped at Keys Café in Saint Paul where I had “The Loon Omelet” which personifies how versatile an omelet can be. The Loon Omelet is made with wild rice, mushrooms, onions, tomatoes, Swiss cheese, turkey, and topped with a hot mushroom sauce.

You can even make a party out of omelets, or host the next family gathering with an omelet bar. You’ll learn how here.

Omelets are easy, you can make one in as little as five minutes. You can make American omelets, Italian omelets, puffy omelets, and Irish omelets; even an omelet casserole.

Breakfast at your house will never be the same.
0 Comments

Summery Fish and Vegetable Bake

9/2/2013

0 Comments

 
Picture
Can you tell it's zucchini and tomato season?  I've wondered before why so many recipes combine those two vegetables.  I now suspect that it's partly because the plain zucchini excels at tasting like whatever you cook it with, and very few things can top a fresh garden tomato in the flavor department.  This recipe also uses any mellow white fish, probably for the same reason.  The other ingredients both perk up and round out the flavor.  This one's a keeper.

Baked Fish and Vegetables

4 Tbsp. butter, softened
3 garlic cloves, minced
1 Tbsp. lemon juice
1 tsp. grated lemon zest or 2-3 drops lemon essential oil
1 lb. zucchini or summer squash,sliced 1/4" thick
1 lb. tomatoes (3 medium), sliced thin, OR cherry tomatoes, halved
1/2 c. minced fresh basil or 1 drop basil oil
salt and pepper
1 1/2 lbs. mild white fish 
2 Tbsp. white balsamic vinegar*

Preheat oven to 450 F and move an oven rack to the lowest position.  Mix together the butter, minced garlic, lemon juice, and zest.  If using basil oil, add it to this mixture.  Rub a little of the butter mixture on the bottom of a 9x13 pan.

Put the zucchini slices in the bottom of the 9x13 pan; add the tomatoes in a second layer.  Sprinkle with salt and pepper and with half of the basil (unless you used basil oil).  Pat the fish dry with paper towels, then place the fish on top of the tomatoes.  Dot the butter over the top, add the rest of the basil, and drizzle with the vinegar*.  Cover tightly with foil; bake about 20 minutes, or until the fish flakes when you twist a fork in it.  Serve immediately.

Serve over rice to pasta to soak up the delicious sauce!

*The original recipe, from America's Test Kitchen, calls for 1/4 cup dry white wine.  I don't cook with wine, so the white balsamic is what I found in my pantry to add the savory flavor.  Since it's strong, I used only half as much (2 Tbsp. instead of 1/4 c.).  If you have neither, chicken broth and a splash of soy sauce would give a similar depth.
0 Comments

Great-tasting Beet Greens

8/17/2013

0 Comments

 
Picture
The last time I cooked beet greens for my family was about three years ago.  I grew up eating them because I 'had to', and continued it because their nutrition content reads like a fantastic multi-vitamin:  protein, fiber, folic acid, phosphorus, zinc, calcium, iron, magnesium, copper, manganese, potassium, Vitamins A, C, E, K, and three different B vitamins.
But I'll tell you what- after that last time cooking and eating those soggy, bitter greens (I might have burnt them a bit too) all by myself-- sort of plugging my nose as I did-- cuz, dang it, they're good for me!  I thought that'd be the last time I cooked them.

When I pulled the first beets out of the soil this year, though, the old "you oughtta" came back.  This time I was prepared with The Best Vegetable Recipes cookbook from the America's Test Kitchen people.  They had a recipe that could be completed in under ten minutes and sounded like it might not be as terrible as my last attempt.

It was so good I ate seconds.  My husband ate seconds.  My kids at least ate firsts.  And I shared this and Pink Potato Salad with a couple 'foodie' neighbors, who also loved them.  

Not that anyone'd choose this over chocolate; maybe it was just that the greens were much better than anyone's latest memory of them, especially with the crunchy, fragrant nuts and the bit of sweet from the currants.

The amounts and technique will work on any moderately thick green like kale or chard.  (The chard's up next in my yard.)  The original recipe called for cutting out the stems, but they're also good, just take a bit of extra cooking to tenderize.  They can be a little bitter, but the currants countered any of that.

The quantities I used were approximately
1-2 lbs. beet greens
1-2 Tbsp. olive oil
2 cloves garlic (or 1/2 tsp. garlic powder)
1/4 c. pine nuts, chopped  (or other nut you like)
2 Tbsp. currants (chopped raisins work too)

See the slide show for instructions.
0 Comments

Summer Pink Potato Salad

8/3/2013

0 Comments

 
Picture
About twenty years ago, a group of my neighbors got together for a "Summer Salad Social".  One of the more unusual offerings there was a salad from a friend from Argentina; she said it was a fairly common salad there- cubed cooked beets with cubed cooked potatoes.  This one is not a lot like hers- which wasn't even pink-- but that was the memory that sparked this salad's creation.  My husband says it's a keeper, especially since it was made using fresh-from-the-garden beets and potatoes.  The flavor is even better the next day.

Since there are children to feed here, I called it something else for my girls' benefit: "Princess Pink Potato Salad".   :)

If you live near me, I have lots of garlic chive plants to share!

Summer Pink Potato Salad

1 lb. beet bulbs, about 4 medium
1 lb. new potatoes, cubed, or halved if small
1 lb. summer squash, cubed
2 Tbsp. Italian dressing OR 1 Tbsp. balsamic vinegar
4 oz. ham or smoked turkey, diced
6 oz. mozzarella, cubed
a few sprigs of fresh thyme, or 1 tsp. dried thyme
1/4 c. garlic chives, chopped, OR a handful of chopped green onions and a sprinkle of garlic powder
1/4 c. mayonnaise

Bring about 2" of water to boil in a medium-large saucepan and add 1 tsp. salt.  Trim beets, leaving about 1" of stem on top.  Scrub and rinse, but don't peel them.  Let them cook, covered, in the simmering water for about 45 minutes, or until the largest can be pierced easily with a fork.  Remove beets, saving the water.

Add the potatoes to the water.  Simmer, covered, for 10-15 minutes, until tender.  Remove the potatoes using a slotted spoon, and put them in a large bowl.  Add the Italian dressing or vinegar, and toss gently to coat. 

Add the squash cubes to the water; simmer, covered, for 5 minutes, or until barely tender.  Pour into a colander and rinse in cold water to stop the cooking.

Add to the potatoes.  Now that the beets are cool, slide the beet skins off, then cube the beets.  Add to the bowl, along with the ham/turkey, mozzarella, thyme, and garlic chives.  Stir to distribute evenly, then add the mayonnaise, along with salt and pepper to taste.  Stir until everything is a beautiful pink.  Store any leftovers in the fridge, covered.
0 Comments

Lemon-Summer-Squash Bread

8/1/2013

0 Comments

 
Picture
Everyone knows you can make bread with zucchini- but what if you have a giant yellow summer squash hiding in the garden?

Both zucchini and yellow squash-- either straightneck or crookneck-- are summer squash, with a similar flavor and texture, and CAN be interchanged in recipes.

My family's favorite quickbread is Lemon Zucchini Bread- so today we got Lemon-SummerSquash Bread.  I no longer shred zucchini -or this squash- for recipes, but puree it instead.  No more strings.  As a bonus, if I'm freezing some for later use, the texture does not change when thawed, unlike shredded squash.  

AND, if you're pureeing it, you can have the blender (or food processor) mix all the wet ingredients for you.

This bread is great for breakfast.

The recipe is found over here, though the blender method is below. 
0 Comments

Foolproof Omelet in Five Minutes

5/14/2013

0 Comments

 
Picture
By Dennis Weaver, preparedpantryblog.com,  May 13, 2013

This is the omelet for the omelet challenged.  Never make an ugly omelet again.  It’s nearly foolproof, it’s simple, and it’s quick.

We set off to make the best and easiest omelet, something that even a beginning cook could master.  We bought ten dozen eggs and started testing methods.  At the end, we were making five minute omelets—a little unorthodox but very good and nearly foolproof.

We called them “five minute omelets.”  You really can cook them in five minutes.  And the method is easy.

If you’ve ever made an omelet that didn’t fold well or broke apart or had a tough skin, consider this method.

The Method
Getting the omelet to cook through without over cooking the skin is a challenge. You can lift the edges of the omelet as it cooks to let the uncooked egg flow under the omelet and onto the pan surface. You can put a lid on top to trap heat coming from the hot pan.
But for some omelets, that isn’t enough. A surer method is start scrambling the eggs when they hit the hot pan, stopping when the eggs are partially cooked. Then pat the eggs into a smooth layer and let them finish cooking without a lid. It works. It’s quick and easy.
Instead of folding the omelet in the pan, simply tip the pan and let the omelet slide onto a plate. As the omelet slips onto the plate, twist of the wrist, and fold the omelet onto itself on the plate. (It’s easy to do; in two or three tries, you’ll have the method mastered.)
This method worked so well that we declared a victory. We recorded our methods, developed a couple of recipes, and described the method in an email.
Later we started placing a plate over pan for just a couple minutes once we stopped scrambling and then removing the plate before the omelet was cooked. That accelerated the cooking a little and gave us warm plate on which to serve the omelet but we didn’t leave it on long enough to hide when the omelet was done.

We had perfect omelets in five minutes.  Step-by-step instructions below.

WHAT'S THE KEY TO SUCCESS?  IT'S THE PAN.  IT HAS TO BE THE RIGHT SIZE-- AN EIGHT-INCH PAN FOR A THREE-EGG OMELET-- AND ABSOLUTELY NONSTICK OR THE OMELET WON'T SLIDE FROM THE PAN.
Picture
How to Cook an Omelet Using This Method

  1. Choose the right size pan.  A three-egg omelet requires an eight-inch pan.  The pan should be nonstick.
  2. Whisk the eggs together in a bowl.
  3. Put a pat of butter in your nonstick pan.  Place it on medium-high heat.  On our stovetop, a high BTU gas burner, that’s 6 out of ten.  Heat the butter to just short of brown and swirl it around the pan.
  4. Pour the eggs into the hot pan.  Salt and pepper the eggs.
  5. Scramble the eggs with a soft silicone spatula scraping the bottom of the pan and the sides.  The eggs will cook quickly and curds will form.
  6. When the eggs approach the consistency of cottage cheese with mostly solids but some liquid egg, stop stirring.  Use the spatula as a paddle to pat the eggs down into an even layer.  Place a plate over the top of the pan.  The plate will trap heat and help cook the top of the omelet.  It also warms the plate so that you can serve the omelet on a warm pan.
  7.  Let the eggs continue cooking until the liquids are set and the top of the omelet is cooked.
  8. Place the fillings in a row across the omelet just off to one side.  For most fillings, you will want them cooked.The omelet should slip around in the pan without a hint of sticking.  Move the pan to a plate, tip the pan on angle over the plate, and gently shake the omelet onto the plate filling side first.
  9. When the omelet is about half way onto the plate, twist the pan with your wrist folding the remaining omelet over that on the plate.  The omelet should be folded over with the bottom edge protruding about one-half inch.
What You’ll Need: Unless you’re going to make larger omelets, you’ll need an eight-inch skillet which is the perfect size for a three-egg omelet.  It needs to have a good nonstick surface so that it will slide out of the pan easily.  If you are making larger omelets, you will need larger pans.

You’ll also need a good silicone spatula to stir the eggs as they begin to cook and to slide under the omelet and loosen it if it starts to stick.  (Note from Rhonda- I've seen a Betty Crocker brand of silicon spatula at Dollar Tree for the last year.  The label does not specify that they're heat-resistant, but I called the company, and they're good to at least 400 degrees Fahrenheit!)

Get an eight-inch pan and start making foolproof omelets. 
0 Comments

Rosemary Pork Roast and vegetables

10/17/2012

0 Comments

 
Picture
This roast was was tender, juicy, and bursting with savory flavor.
You can use the same ingredients with a beef roast, or even with a whole chicken.

 It was great for our Sunday evening dinner- it happily cooked itself while we were at church. I used a 6-quart slow cooker. This made enough for all 8 of us, plus some leftovers to pack in lunches.

So... I've listed the ingredients I used- but I rarely make this kind of food exactly the same way twice.  Use whatever vegetables you have- potatoes would be really good, but we had mashed potatoes on the side  this time.  With this roast, the mushrooms add to the savory flavor, and the small bit of tomato adds a boost- but you can leave them out anyway if you like.  Adding a tablespoon or two of tomato paste or tomato powder would have the same result. And if you leave out the mushrooms, consider adding a couple splashes of soy sauce or Worchestershire sauce to keep that meaty flavor high.  

Rosemary Pork Roast with Vegetables
2 onions, quartered
3 lb. pork roast
4 tsp. salt, divided
6" sprig fresh rosemary OR 1 1/2- 2 Tbsp. dried rosemary
1/4 c. minced garlic chives OR use 2-4 minced garlic cloves
2 lbs. carrots
1 lb. mushrooms, quartered
1 tomato, cut in 8 wedges

Add the carrots, mushrooms, and tomato and sprinkle them with the remaining 2 tsp. salt. Put the onions in the bottom of a slow cooker, then add the roast (mine was frozen SOLID).  Top the roast with garlic chives, rosemary, and 2 tsp. salt.  Add the carrots, mushrooms, and tomato and sprinkle them with the remaining 2 tsp. salt.  Put the lid on, then cook on high 6 hours or until everything is tender.  If your roast wasn't frozen, it may only need 4-5 hours on high, or 6-8 on low.

Use the juices to make gravy, or just ladle them over the meat and vegetable as they're served.
0 Comments

Zucchini Cakes

9/4/2012

0 Comments

 
Picture

Who couldn't use another recipe for zucchini right about now?

This year I really HAVE seen cardboard boxes with a "FREE ZUCCHINI" sign written in permanent marker, along the side of the road.
As you can see, this we're not talking about zucchini CAKE... these are tender, flavorful pan-fried morsels, related to crab cakes.  Without the crab.  There's an endless variety of ways to make these, this particular batch has a Southwestern flair, served with a creamy cilantro-scented Lime Chipotle sauce.    We had them for dinner last night and had leftovers.  They would make a nice accompaniment to grilled chicken or beef, but I served them as a meatless main dish.  
This afternoon about 4:00 I suddenly remembered them again- and promptly finished off the last couple of them for a snack.  YUM! (Actually, I took a couple over to a neighbor, who immediately asked for the recipe.)

This is a pretty big batch, I think it made about eighteen 3-inch cakes.  Feel free to cut the recipe in half.  You can always make the full batch, though, and freeze extras.  Bake at 350 for 10-15 minutes to reheat and recrisp, or toast in a toaster oven.  See below for the recipe.

I got a plainer version originally from JustPutzing.com, though her version was tweaked from one on TheLife'sAmbrosia.com    
Neither one of those used corn.  I like it for the sweet flavor it adds, along with some non-squishy texture, but you can certainly leave it out.  If you do, you'll only need 2 eggs.
Feel free to add in different spices, use different kinds of cheese (the original used Parmesan, in half the amount), or serve with different sauces.  Ranch dip would be delicious.  So would honey mustard.    I intend the next batch to resemble crab cakes even more- I'll add Old Bay to them, a little finely-grated onion, add maybe a teaspoon of honey for a hint of sweetness, and serve with tartar sauce.
Picture
Southwestern Zucchini Cakes


1 lb. zucchini (3 small)
1 cup corn kernels (I used canned, then drained them well)
1 c. shredded mild white cheese (I used Havarti 'cause I found it for $2/lb)
2 Tbsp. salsa if you have it around  (OK without but good for color)
1 cup panko bread crumbs (or other crumbs- bread, cracker, gluten-free, etc)
1/2 tsp. salt
2-3 tsp. chili powder (to taste)
3 medium to large eggs, beaten
3-4 Tbsp. cooking oil 


Shred the zucchini on fine or medium holes.  Grab a handful, hold it over a plate or bowl, and squeeze hard to remove excess liquid.  Put the squeezed zucchini in a mixing bowl, and repeat with all the zucchini.
Stir in the corn, cheese, salsa, bread crumbs, salt, and chili powder.  Taste and add more of whatever you think it needs.  Stir in the eggs, cover, and refrigerate for 20-30 minutes.   (You can skip this step, but this gives the mixture time to bind together, as the egg soaks into the crumbs.  This makes them much easier to form and flip.  While it chills, make the sauce below.)
Heat a skillet over medium heat.  Add 1 Tbsp. oil to it.  When oil is nearly smoking, scoop 3-4 Tbsp of the zucchini mixture into the pan, then flatten to about three inches across.  Repeat with as many as will fit in the pan with about 1" between them.  Cook for 4-5 minutes, then flip over.  Cook for another 2-3 minutes, until golden.  
Add another tablespoon of oil to the pan before starting the next panful.

Makes about 18.   Serve warm or room temperature.

Creamy Chipotle Sauce (adapted from America's Test Kitchen)

Note: Chipotle is smoked jalapeno pepper.  I don't have any on hand, so I came up with a similar flavor  with what I DID have, though it wasn't nearly as hot.  If you like more heat, add a little cayenne or red pepper flakes.  If you happen to have canned chipotle around, use 1-2 tsp., minced, in place of chili powder and Liquid Smoke)

2 Tbsp. mayonnaise
2 Tbsp. sour cream (I didn't have this, either- use plain yogurt, or like I did, thick kefir)
1-2 tsp. chili powder (to taste- my kids were happy with just 1 tsp.)
1/4 tsp. garlic powder, or one minced clove fresh garlic
2 drops Liquid Smoke
2 tsp. minced fresh cilantro
1 tsp. fresh lime juice
2 drops lime essential oil if you have it

Stir together.  Cover and refrigerate about 30 minutes to blend the flavors.
Makes about 1/4 cup.

If you double the recipe, you can have leftovers to change into a fabulous salad dressing: Thin down with a little water or lime juice.  Salt and pepper to taste.
0 Comments

Black Beans and Sausage

4/14/2012

0 Comments

 
Beans and sausage have probably been around since sausage was first invented.  Take some bland beans, add flavorful ingredients, and -presto- a nearly-one-dish-meal.  We ate ours with homemade bread and a fruit smoothie.

Picture
You can use any kind of beans you like, and any kind of sausage or similar meat.  I used kielbasa because that's what was cheap this time.  Sometimes I use hotdogs.  Or link sausage.  Or I shape bulk sausage into meatballs.  Ham Spam, or bacon would also work; the point is to add something savory and meaty. 
You can leave out the kale if you prefer; I only added it because it was calling to me from the fridge (so it wouldn't die lonely in the vegetable crisper).  It also added to the nutritional content; my mom taught me the budget trick of using half as much meat and twice as many vegetables as most recipes call for.  The onions and celery are pretty important for flavor, but if you don't like them, fine, leave them out.  Add something you do like.  Carrots or peppers would be good.
I used onion powder because some of my kids think they don't like onions.  It's really the texture they revolt against; if I use onion powder or puree the onions, nobody notices them.  The tomato and chicken bouillon enhance the meaty flavor.  

This makes a big batch; you can freeze some for later!

Black Beans and Sausage

1 lb. black beans, or 3  14-oz. cans
2 medium onions, diced, or 1/3 c. onion powder or 2/3 c. dried minced onion
1 lb. sausage (or hotdogs), cut in coins
2-3 stalks celery, chopped
4 cloves garlic, minced, or 1-2 tsp. garlic powder
1 bunch kale, chopped
1 Tbsp. chicken bouillon, or 3 cubes, or one 14-oz. can chicken broth
1 Tbsp. tomato powder, or use 1 Tbsp. tomato paste or 2 Tbsp. tomato sauce
2-4 tiny drops thyme essential oil, or 1 tsp. powdered thyme, or 1-2 Tbsp. fresh leaves

Salt and pepper to taste

Serves 8-10

If starting with dry beans, sort through to find any bits of rock or dirt, rinse, then put in a large pot with 2 quarts of water and the onions.  Bring to a boil, then cover and simmer for 4 hours.  I used a pressure cooker (a Kuhn Rikon, it's quick!) and needed only 1 ½ quarts water,  cooked on high pressure for 25 minutes.  Drain and reserve water.  If using canned beans, also drain and reserve.

Picture
In a 12” skillet, cook sausage and celery over medium-high heat until partly browned.  This really deepens the meat's flavor.  In case you like science-type stuff, this is because of the Maillard Reaction- simplified, it's the combination of amino acids (proteins) reacting under heat with the sugars (carbohydrates) to form completely new flavor compounds.  Anyway, yeah, you want to brown the sausage, even if it IS precooked.

Picture
Add garlic and stir 30 seconds, then put the kale on top, cover, and reduce heat to medium.  Check after about 5 minutes to see if you need to add a little liquid.  If so, use the bean water.  Cook until kale is tender, about 10 minutes. 


Add the meat and vegetables to the bean pot.  Stir in chicken bouillon or broth, tomato powder, thyme, 1 tsp. salt, ¼ - ½ tsp. pepper.  Taste and add more salt and pepper if needed.  Heat through if it’s not warm enough.  The flavor will be better after sitting covered for 20-30 minutes.  If it's too thick, add more of the bean water. 

0 Comments

Roasted Broccoli

2/13/2012

1 Comment

 
Picture
What are you going to have for dinner on Valentine's Day? 

How about broccoli?  No, really..

If you've never had roasted broccoli, you're in for a great surprise.  Some of my kids like regular cooked broccoli, and some don't, but ALL of them like it when roasted. 

The high heat, cooking it close to the bottom heat, along with a touch of sugar, help bring out the caramelized sweetness that otherwise is locked away, far from my tastebuds!
The photo shows the Cuban version, below.

Roasted Broccoli

1 ½ lbs. trimmed broccoli
2 Tbsp. oil
½ tsp. salt
1/8-1/4 tsp. pepper
¼ tsp. sugar (honey works as well)

Preheat oven to 475 degrees (no, not 375!), put the oven rack in the lowest spot.  Cut the broccoli into florets.  Save the stems; peel off the tough outer layer, and cut about ¼” thick.  Drizzle with oil, sprinkle with salt, pepper, and sugar.  Toss to coat.  Spread on a cookie sheet and put it on the lowest rack.  Cook for 14-18 minutes, until some parts are deeply browned.

This basic recipe can be made a thousand different ways, using different vegetables, combinations, and/or spices.  Here are a few ideas, still using broccoli.

Cuban Broccoli:
Use 1 lb. broccoli and 2 onions, cut into 8 wedges each.
Into the oil, mix 2 drops lime essential oil, or 1 tsp. lime zest.  Use the same amount of salt, pepper, and sugar, but also add ½ tsp. cumin.  Roast the same as above; when done, toss with 1 Tbsp. lime juice. 

Italian Broccoli:
Before roasting, add ¼ c. pine nuts, 4 medium cloves garlic, sliced in half.  When roasted, sprinkle with ¼ c. Parmesan cheese, and fresh basil leaves, chopped.

Broccoli, Sausage, & Pasta
On that lowest rack, at 475, roast 4 oz. Italian sausage for 5-6 minutes, until sizzling.  Add 1 lb. broccoli, cut smaller, 4-6 cloves garlic, sliced, and 1 or 2 red bell peppers.  Toss and roast.  Meanwhile, bring 1 lb. pasta to a boil; cook til al dente, then drain.  Stir in the roasted mixture and serve immediately.

1 Comment

Roasted Vegetable Gratin, Fresh Tomato Salad

9/7/2011

1 Comment

 
Picture
Do you have summer squash and tomatoes coming out your ears?  This is a delicious way to use quite a bit of that summertime produce- zucchini and yellow squash baked with caramelized onions and sweet roasted tomatoes.  You can use 2 lbs of any summer squash, but the green and yellow here are pretty together.

Normally a dish like this would be soupy, since these high-water-content vegetables lose moisture as they cook.  These are salted while raw; the salt draws out water.  This makes a big difference.

Two 6-8" long zucchini equal about one pound.

Vegetable Gratin
1 lb. zucchini, sliced 1/4" thick
1 lb.  yellow summer squash, sliced 1/4" thick
2 tsp. salt
1 1/2 lbs. ripe tomatoes (3-4 large ones), sliced 1/4" thick
2 medium onions, halved then sliced thin pole to pole
3/4 tsp. black pepper
5 Tbsp. olive oil
2 cloves garlic, minced (or 1/2 tsp. garlic powder)
1 Tbsp. fresh thyme leaves (1 tsp. dried)
1/4 c. chopped fresh basil

Toss zucchini with 1 tsp. of the salt; put them in a colander over a bowl.  Let stand 45 minutes or until at least 3 Tbsp. liquid drains off.   Put the tomato slices on paper towels or a dish towel, sprinkle with 1/2 tsp. salt; let stand for 30 minutes.  Put another towel or paper towels on top of the tomatoes to press them dry.  Pat squash dry with a dish towel or paper towel. While the vegetables are all draining, brush a 9x13 pan with 1 Tbsp. of the olive oil, set aside.  Heat oven to 400 degrees.  Heat 1 Tbsp. oil in a 12" skillet over medium heat.  Add onions, 1/2 tsp. salt, 1/4 tsp. pepper.  Cook, stirring once in a while, until onions are caramelized: soft and dark golden, 20-25 minutes.  Set aside.

In a small bowl, combine garlic, the remaining 3 Tbsp. oil, 1/2 tsp. pepper, and thyme.  When the zucchini is drained and patted dry, toss the squash with half of the oil mixture.  Spread the squash along the bottom of the 9x13 pan.  Arrange onions on top, then put tomatoes on in a single layer, overlapping if needed.  Drizzle the rest of the garlic oil on top.  Bake about 40-45 minutes, until tomatoes start to brown on the edges.  Increase oven to 450 degrees.  Make the topping, below, and bake 10 minutes or until topping is lightly browned.  Sprinkle with basil and let sit 10 minutes before serving.

Topping:
1 Tbsp. olive oil
1 slice white bread, shredded or crumbled (food processor or blender works well)
2 oz. shredded Parmesan cheese (1 cup)
2 shallots, minced (1/4 c.- or use a mild onion)
 
Stir together.

Picture
Cherry Tomato Salad

4 cups halved cherry tomatoes
1/2 tsp. salt
1 Tbsp. olive oil
1-3 Tbsp. balsamic or other vinegar
2 garlic cloves, minced (or 1/2 tsp. garlic powder)
1 Tbsp. chopped or torn fresh basil (or 1/2 tsp. dried)
1/2 c. shredded Asiago or Parmesan (or use a cubed mild cheese, up to 8 oz)
2 slices good-quality bread, cubed (optional to use, and best if stale)
1/2 c. halved olives

Sprinkle tomatoes with salt and put them in a colander or on some paper towels.  Let sit 30 minutes to drain juices.  Pour them off (great added to salad dressing, soup, or cornbread batter).  Toss all ingredients together, add salt and pepper to taste. 
To meld flavors and soften the bread, it's best if it sits a couple hours in the fridge; or serve immediately.

1 Comment

Carrots and Carrot Tops

9/6/2011

3 Comments

 
Picture
Yesterday as I dug carrots and enjoyed the slightly spicy aroma of the roots and greens, I started wondering if carrot tops are edible.  They smell so nice… not that scent is an indication of edibility.  Still, carrots are in the same family as parsley, dill, and fennel, and we eat those leaves.  On the other hand, a couple of other plants in the Apiaceae family are poisonous; Poison Hemlockand Water Hemlock are two that come to mind, though the whole plant is deadly with both, not just the leaves or root.  So what’s the case with carrot tops?

According to what I found from several sources online, the tops are edible.  I guess we don’t eat them much because we store carrots without their leaves, which are much more perishable.  As with almost any other food, keep in mind that you may personally be allergic to them; this may show up as photodermatitis (skin becomes red or irritated when exposed to light).  If you grow them yourself, you probably don’t have any pesticides to worry about eating; wash store-bought tops thoroughly.

One carrot farmer says he thinks the flavor and bitterness of the tops nicely balance the sweetness of the roots.

They’re said to be high in Vitamin K, as well as chlorophyll (obviously, since they’re green)

Vitamin K is a fat-soluble vitamin (you need to eat fat at the same meal- or with it- to access the vitamin) and is important in blood coagulation (forming scabs and avoiding hemorrhaging, including heavy menstrual bleeding) and bone growth and maintenance, as well as other helpful actions.

Chlorophyll appears to fight the growth of tumors, as well being as a good cleanser for lymph nodes, adrenal glands, and for purifying blood.

One article I found says a tea made of carrot tops is good for getting rid of intestinal worms or parasites, and juiced tops are antiseptic, good for mouthwash.  Mashed tops, or the carrots themselves, can be mixed with honey and applied to festering wounds.

To eat carrot tops, try them:
- as a substitute for parsley in any recipe
-added to a green salad
-chopped and cooked with other vegetables or rice dishes
-added to a ‘green drink’ or smoothie- though go easy on this
-as the base for a pesto (add some honey to balance the bitterness), or sautéed with bacon and garlic

Extra tidbits about carrots (the roots):

-The Dutch grew carrots specifically to feed to their dairy cows.  The country became famous for having the richest yellow butter as a result.
-Carrots have only been well-known in the USA since about the time of WWI.
-Carrots have the second-highest natural sugars of any vegetable, at 7% sugar.  Beets score #1.
-Carrots were included in puddings and cakes in the 1600-1800’s to sweeten them.
-Carrot tops were a fashionable hat decoration in the 1600’s, used as feathers were.  I love carrot greens and carrot flowers in arrangements in a vase, too.
-Many of the carrot’s minerals and nutrients are found in or just under the skin.  In other words, they’re more nutritious if you don’t peel them.

And that bit you’ve heard about the Vitamin A in carrots improving your eyesight?  My husband munches on carrots at work every day.  Last time he went to the optometrist, he discovered his eyesight had gone from 20/30 to 20/20.   Like everything else, though, don’t overdo it. Too much of anything can cause problems.

 
So, eat those carrots.  The tops, too!

For more information, see carrotmuseum.com,
http://www.carrotmuseum.co.uk/carrotops.html, 
wikipedia,
http://www.vegparadise.com/highestperch412.html 

To read more about alkaloids and toxins in 'normal' foods:
http://en.wikipedia.org/wiki/Alkaloid
Natural Food Toxins
Natural Toxins in Raw Food and How Cooking Affects Them


Picture
3 Comments

My book! The Chameleon Cook: Cooking Well with What You Have

9/1/2011

8 Comments

 
Picture
Just printed this week, a cookbook that may become your go-to source for  your cooking:

The Chameleon Cook:
Cooking Well With What You Have

140 pages of adaptable core recipes, frugal cooking information, rules-of-thumb, and guidelines for cooking everyday food with what you have on hand, including how to adapt to cooking without eggs, dairy, sugar (honey instead), or wheat.  It also includes an index.

  At 5½“x 8½“ it's intended to be easy to fit in any size kitchen.  Any level of cook will find it useful, from beginners to old-hat.  I recommend it especially for college students, missionaries, newlyweds, or anyone wanting to expand their understanding of how to make a recipe work. 

  It has a laminated cover for durability, full-color cardstock chapter dividers with photos, and your choice of plastic coil binding or plastic comb binding.
 
Cost is $14 if purchased through me, $14.95 if bought retail.  Copies may be purchased at John and Jennie's Bosch Kitchen Center, Not Just Copies, and the Sandy Bosch Store.  You can order by calling (801) 541-6999, leaving a comment on this page, or emailing me at [email protected]


Picture
Chapters include:
-Introduction and Tips
-Appetizers (Snacks!) and Beverages,
-Soups and Salads
-Vegetables and Side Dishes
-Main Dishes
-Breads
-Desserts
-Cookies and Candy
-This & That

Picture
Categories in Main Dishes include
-Beans (including cooking them from scratch, and how much is in a can)
-Eggs
-super-adaptable Red Sauce and White Sauce
(make your own Cream of Mushroom Soup and more)
-Meat, including how to make a cheap cut tender

Picture
Sections in This & That:
-Cooking Grains

-Miscellaneous
-Dairy Foods
-Dehydrated Foods (both making and using them in your regular recipes)
-Home Remedies
-Homemade Cleaners
-Seasonings, Jam, and Syrups


Some recipes in the sections include:
-Croutons
-Edible Playdough
-Fruit and Nut Energy Bars
-Granola, Granola Bars
-Homemade "Honey Bunches and Oats"
-Brown Bag Popcorn
-Cream Cheese Spreads
-Making simple fresh cheese and cottage cheese
-Snow Ice Cream
-Sweetened Condensed Milk
(two versions- one using powdered milk, one using evaporated milk, cream, or half-and-half)
-Culturing Yogurt
-Apple Cider Syrup
(Lower Sugar Syrup)
-Five-Minute Marmalade and a dozen ways to use it
-Honey Mustard
-Honeybutter
-Quick Strawberry Jam
-Seasoned Flour
-Seasoned Salt
-Simple Syrup
and variations
-Home Remedies- Coughs, Insect Stings, Lowering Fever, Natural Deodorant
-Homemade Cleaners- Floor Cleaner, Furniture Polish, Laundry Soap, Liquid Soap, Carpet Spot Cleaner, Stain Remover, using vinegar, Window Cleaner.

If you need one (or more) shipped, I charge only the actual shipping cost plus the price of a padded envelope.

Call or e-mail today!

-Rhonda
8 Comments
<<Previous

    Need a Search bar?
    One day I may upgrade my website-- but until then, use your web browser search bar. Type in my web address and what you're looking for, like this-- 
    www.theprovidenthomemaker.com  pumpkin --  and you should get results.


    Author

    I'm a disciple of Christ, a member of the Church of Jesus Christ of Latter-day Saints, a family-defending, homemaking, and homeschooling mom of eight children, two of whom sometimes can't have milk or wheat. Growing up on a farm in a high mountain valley, my parents taught me to 'make do', work hard, smile, and help others.  I love cooking, learning, growing food and flowers, picking tomatoes, and making gingerbread houses --which CAN be made allergy-friendly-- with my children.  I hope you find something to help you on my site!

    Archives

    April 2024
    July 2023
    April 2022
    September 2021
    March 2021
    December 2020
    April 2020
    March 2020
    February 2020
    January 2020
    December 2019
    November 2019
    October 2019
    September 2019
    August 2019
    July 2019
    June 2019
    May 2019
    April 2019
    January 2016
    November 2015
    October 2015
    September 2015
    March 2015
    February 2015
    November 2014
    October 2014
    September 2014
    August 2014
    July 2014
    June 2014
    May 2014
    April 2014
    March 2014
    February 2014
    January 2014
    December 2013
    November 2013
    October 2013
    September 2013
    August 2013
    July 2013
    June 2013
    May 2013
    April 2013
    March 2013
    February 2013
    January 2013
    December 2012
    November 2012
    October 2012
    September 2012
    August 2012
    July 2012
    June 2012
    May 2012
    April 2012
    March 2012
    February 2012
    January 2012
    December 2011
    November 2011
    October 2011
    September 2011
    August 2011
    July 2011
    June 2011
    May 2011
    April 2011
    March 2011
    February 2011
    January 2011
    December 2010
    November 2010
    October 2010
    September 2010

    Categories

    All
    Alcohol
    Alternate Cooking
    Appearances
    Apple
    Apricots
    April Fools
    Aprons
    Bananas
    Beans
    Beef
    Beets
    Bench
    Beverages
    Bonnet
    Bread
    Breakfast
    Budget
    Budgeting
    Cake
    Candy
    Canning
    Carrots
    Cheese
    Chicken
    Children
    Chocolate
    Christmas
    Cleaning
    Coconut
    Comfrey
    Common Core
    Constitution
    Cookbook
    Cookies
    Cooking Oil
    Crafts
    Dairy Substitutions
    Dehydrating
    Dessert
    Dried Fruit
    Earth Oven
    Earthquake
    Easter
    Edible Weeds
    Eggs
    Emergency Prep
    Essential Oils
    Faith
    Family Home Evening
    Fertilizing
    Food Storage
    Fourth Of July
    Freezer
    Frosting
    Fudge
    Garden
    Gardening
    Gingerbread
    Gluten
    Gluten Free
    Gold
    Government
    Grains
    Gratitude
    Hat
    Herbs
    Home Remedies
    Home Repairs
    Homeschool
    Home Storage
    Honey
    Hope
    Inflation
    Leftovers
    Legumes
    Lemon
    Main Dishes
    Mixes
    Mothers
    Noah
    Non Artificial Colors
    Non-artificial Colors
    Nuts
    Oats
    Oil
    Orange
    Paint
    Peaches
    Pear
    Pie
    Pizza
    Plums
    Poem
    Popcorn
    Pork
    Potatoes
    Powdered Milk
    Prayer
    Preparedness
    Projects
    Prophecy
    Pruning
    Pumpkin
    Quick Bread
    Rhubarb
    Rice
    Salad
    Salt
    Sauces
    Self Reliance
    Self-reliance
    Sewing
    Shelf Life
    Shelves
    Sky
    Smoothie
    Snacks
    Soup
    Spices Or Seasonings
    Squash
    Strawberries
    Substitutions
    Sugar
    Summer Fun
    Three Month Supply
    Time
    Tomatoes
    Trees
    Truffles
    T-shirts
    Tuna
    Ultra Gel
    Valentine\'s Day
    Vegetables
    Water
    Watermelon
    Wheat
    Work
    Year Supply
    Zucchini

    RSS Feed

Web Hosting by iPage