The Provident Homemaker
  • Recipes and Info
    • Making Bread
  • My Blog
  • Favorite Resources
  • Documents and Files
  • 52 Weeks of Building Storage

Refreshing Watermelon Salad

6/21/2014

0 Comments

 
Picture
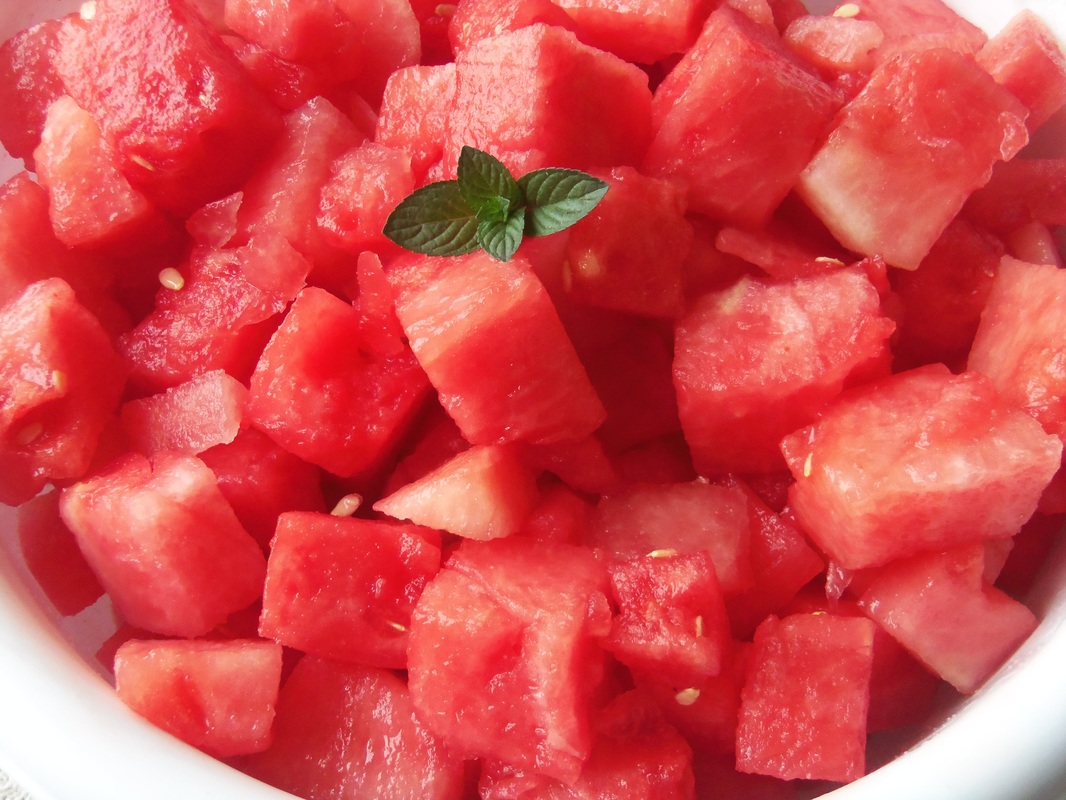
Sometimes you pick a perfect watermelon:  firm, juicy, sweetness dripping from every piece.  Sometimes the melon could use a little bit of help.  Or sometimes you just want a little variety in the flavor department.

Several years ago I found a recipe for a lemon-and-mint-infused syrup to pour over watermelon, or over a mixture of watermelon, cantaloupe, and honeydew.  It took a few hours to make the syrup, though.  Now that I have essential oils on hand, the flavor base takes almost no time at all!

Citrus-Mint Watermelon Salad
(enough syrup for 4-8 lbs melon while weighed with the rinds still on)

1/4 c. sugar (OR 3 Tbsp. honey)
2 Tbsp. lemon juice
1-3 drops mint essential oil (1 for subtle flavor, 3 for very noticeable)
6 drops any combination of citrus oils (lime, orange, lemon, grapefruit... I used 3 drops lime oil, 3 drops grapefruit oil)

Stir together the sugar and lemon juice; bring to a boil, stirring just until sugar is dissolved.  If using honey, there is no need to heat it; just stir the honey and lemon together.
Let the syrup cool slightly (if the sugar version), then add mint and citrus oils.

Pour over cut-up melon- plain watermelon or a combination of melons- and stir well to coat.

This would make a fun Fourth of July salad if you added some fresh blueberries to the watermelon.  

BONUS:  the juice left in the bottom is delicious plain (you might prefer it diluted with some water) or added to smoothies.
0 Comments

Elderberry Syrup

11/15/2013

0 Comments

 
Picture
Elderberry syrup is known as a wonderful immunity booster and antiviral- which means it'll help knock down the flu or any other virus-caused illness.  It's also really, really delicious on pancakes.  Or a splash added to desserts or fruit salads.  Or brushed on a spice cake.  Or mixed with chilled sparkling water.  Or... you get the idea.
 Now that there's a jar in my fridge, I may have to watch to be sure my children don't sneak in and use up all my 'medicine'.   Just for that reason, I wax-sealed the lids on the jars I plan to share with others.  

I've already used it.  My family has had a nasty cold or flu this week; we've had missed school days and work days from it.  Yesterday it hit me hard, and felt like it was on the verge of turning into bronchitis or pneumonia.  I've been taking either elderberry infusion (tea) or the syrup at least three times a day since feeling it come on a couple days ago, and today I feel much better.  I suppose that may or may not have anything to do with the elderberries... but I'm keeping the routine up until I'm better!  Yum.

I started with 2 pounds of berries, used a steam juicer, and the first 2-3 cups of juice were nice and dark; strong enough to use without boiling to condense it.  The longer the berries steamed, though, the lighter the juice got, so I boiled down the last three cups to yield about 1 1/2 cups.

You'll notice in the photos below that some of those berries don't look exactly the same as the others... I have a young hawthorn tree.  It produces berries, but not yet enough to make a batch of anything yet.  The haw berries are said to be good for reducing inflammation (as well as normalizing blood pressure and helping strengthen and regulate the heart)- so I threw them in with my elderberries.  Honey is used in this instead of sugar because of its soothing, anti-inflammatory, and healing properties.

If you want to make a wax seal, paraffin works great.  I had a small ball of red cheese wax I'd saved, and used that.

Elderberry Syrup
Start with 2-3 cups elderberry juice (depending on strength)- if not strong, boil to reduce to 2 cups.  To the warm, NOT hot juice (if you want to preserve the enzymes if using raw honey), stir in these ingredients:
2 cups honey
5 drops ginger essential oil
3 drops cinnamon essential oil
2 drops clove essential oil


Store in the refrigerator.  Probably best used within a couple months- though I've had syrups stay nice for a year, refrigerated.  You could store them longer if you seal them in sterilized jars. 

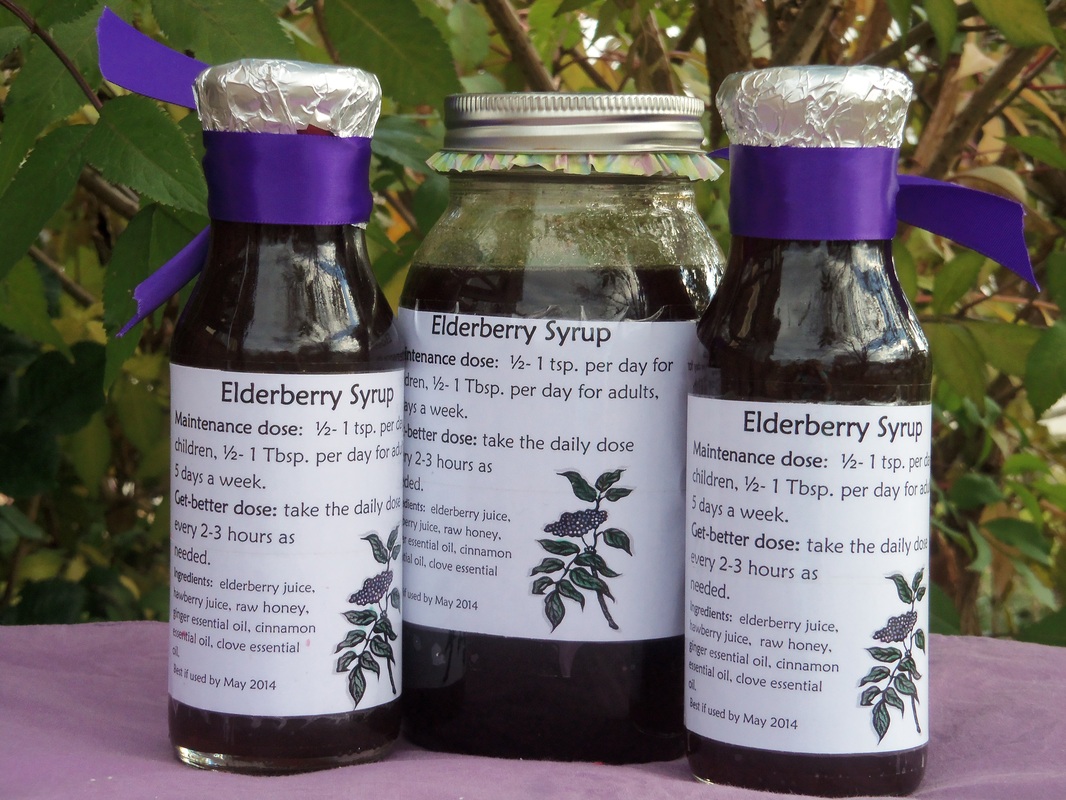
To use medicinally, take a tablespoon straight or mixed in 6-8 oz warm water, every 3 hours if you're sick and an adult, or take once a day as a general immunity booster.  See the label below for more details.  

If you want to start with berries but don't have a steam juicer, and want to use the spices themselves instead of essential oils, combine 4 oz (2/3 c.) berries in 3 ½ c. water, a thumb-sized piece of fresh ginger, 1 tsp. cinnamon, and ½ tsp. cloves; Simmer until water is reduced by almost half; strain, pressing on the berries.  Cool until just warm, stir in honey.

On a related note, you can use jelly to make gourmet pancake syrup:  see here.
0 Comments

Using Powdered Milk without having to drink the stuff!

1/26/2013

2 Comments

 
Actually, some of the newer "instant" powdered milks taste pretty good.  However, the non-instant dry powdered milk is generally less expensive.  It's just not so great for drinking straight.  There's more on that in the printable.

The first couple recipes are below and the next blog post will have the others.  You can get all of them without waiting, plus some extra stuff, in a two-page printable format right here.  For even more great powdered milk recipes, download the Bee Prepared Pantry Cookbook or the Wooden Spoon class booklet (see here for corrections & notes for the Wooden Spoon booklet.)
Picture
Lasagne using powdered milk?  You bet!  You can make homemade cottage cheese in 5-10 minutes.  There's even a recipe for a mock mozzarella that melts beautifully, in the Bee Prepared book.

All cost estimates are based on paying $1.89/lb for powdered milk, which is the 2013 price at the LDS Church's 'Family Home Storage Center'.

Homemade Cottage Cheese- makes about 16 oz., $ 1.00/batch

4 c. hot water                                                                          6 Tbsp. white vinegar
1 ½  c. non-instant dry milk powder                                           ½   tsp. salt, to taste

            Stir together water and powdered milk in a saucepan, heat until it starts to steam, stirring.  Drip vinegar around the edge of the pan and gently stir; it will immediately start to separate into curds and whey.  If it doesn’t, heat it up some more.  Let rest one minute.  Pour into a cheesecloth-lined colander over a bowl. Save whey, then rinse with hot water, then with cold water and break apart into the size curds you want.  Rinse for one minute or until all the whey is out. Add salt. To make it creamy, add 4-6 Tbsp. sour cream, yogurt, evaporated milk, or cream.

  The whey may be used in place of liquid (milk or water) in baking.  It has vitamins, minerals, some protein, no fat, and some milk sugar (lactose- very low on the glycemic scale.)  Since it has the acidity of the vinegar in it, you can add a little baking soda to neutralize and get extra leavening power- use 1 tsp. baking soda per 2-3 cups of acid whey; reduce any baking powder by three times the amount:  if using 1 tsp. baking soda, the baking powder is reduced by 3 tsp.

Picture
Yogurt – makes 2 quarts of plain yogurt at $ .57 per quart if using your own starter
1 ¾ c. regular nonfat dry milk, or 3 c. instant                         7 c. hot water (not over 120 degrees)
1/3 c. plain yogurt, with active cultures

Combine dry milk and 4 cups of the water.  Whisk or mix in a blender.  Add yogurt and whisk.  Add remaining water or divide the remaining water evenly between your containers; stir well after adding the milk mixture!  Pour into containers, cover, and incubate in a warm place for 4-8 hours or until set.  Tip a container after 4 hours to see if it has set.  If the yogurt is still liquid, wait 1-2 more hours.  It will set up a little more when chilled.  Store in fridge.  The ideal temperature range for culturing yogurt is 105-120 degrees.  The lower of these temperatures you begin culturing at, the sweeter the yogurt will be.  The higher, the more tart. Above 120 degrees will kill the bacteria you’re trying to grow.  Save 1/3 c. for culturing your next batch.

To flavor your yogurt after it’s made, add fruit, jam, juice concentrate, chocolate milk mix, etc., before eating.

To flavor it before culturing, use 6-8 Tbsp. of sugar per 2-qt batch,  or 4-6 Tbsp. honey (dissolve this in your water first, or it will sink to the bottom), or a 3-oz. box of flavored gelatin, or 1/3-1/2 c. jam, or 1 c. chopped or mashed sweetened fruit. The syrup from canned fruit can be used in place of part of the water.  If it’s not sweet enough, you can always add sugar when it’s done.  1-2 tsp. vanilla added to the batch is also a nice addition.  Make your own combinations- chopped cherries with some vanilla and a little almond extract, blueberries with cream cheese added, toasted coconut with caramel sauce swirled in… let your imagination run wild!

To make firm yogurt that doesn’t become thin after stirring, use 4-6 tsp. unflavored gelatin, or two envelopes, per two-quart batch.  Soften it in part of the recipe’s water, then heat gently on stove, in microwave, or over hot water, until the gelatin melts.  Add along with remaining water.

2 Comments

Homemade Electrolytes- sub for Pedialyte or Gatorade

12/11/2012

1 Comment

 
Picture
Do you ever use Pedialyte or sports drinks for sick children?  Below are some homemade, very inexpensive, and fully functional substitutes.

 We've had an impressive virus at our house lately; my 7-year-old ran a fever for an entire week (with an ear infection on top of it), and now the 4-year-old has the fever-causing virus.  Younger children get dehydrated so easily, so mine get a water bottle to keep with them at all times while sick- but it's "lemonade" water.  It really is lemonade, a little on the weak side and with salt.  I add a couple things to their water bottle, and it helps replenish the minerals and salts they lose while fevering. It tastes better to them than plain water, which helps, too.

I prefer the lemon- if you have fresh it's fantastic-, and lemon seems a little easier on upset tummies than the orange juice.  Lemon is also supposed to help alkalinize your body and cleanse the liver, both of which may help you recover faster.  The salt really is important*.  If you use unrefined coarse or sea salt, you'll also be adding critical trace minerals. (If you only have refined salt, I understand, it's OK, just not as good for our purposes here.)    For the sweetener, I use raw honey because that's what I have in my pantry.  Don't use honey if you're making this for a child under 1 year old because of possibility for botulism.  Sugar can be substituted, but doesn't have the trace minerals that honey does.  If your child likes the flavor of molasses, that's even more nutritious than honey.  My next batch will use blackstrap molasses- the amount of minerals in there are amazing!  And, after all, nutrition is the name of the game when someone's sick! This drink can also be frozen to make ice cubs or popsicles.
Note:  blackstrap molasses is not very sweet at all, and is somewhat of an acquired taste.  If I make some for myself, I tolerate the flavor, but for my children, I use no more than 1 Tbsp. blackstrap and 1 Tbsp. honey.  Using regular molasses is much more palatable to children, and even then I recommend using half molasses and half honey.

Lemon Electrolytes

16-oz  bottle of  water
3 Tbsp lemon juice or juice from 1 lemon (grapefruit juice works too)
1/8 tsp. unrefined salt
2 Tbsp. honey and/or molasses 

Pour about 1/2 cup of water out of the bottle (you're drinking it, not dumping it, right? :)  Add the lemon juice, salt, and honey or molasses. Put the lid on and shake hard.

If you want to mix up a bigger batch to keep in the fridge, use 1 quart of water, 1/2 c. lemon juice, 1/4- 12 tsp. unrefined salt, and 1-6 Tbsp. honey or molasses.  Makes a little more than a quart.

Orange Electrolytes

One 16-oz water bottle, half  full
1/8 tsp. unrefined salt
1 tsp to 1 Tbsp. honey or molasses
about 1 cup orange juice

Add salt and honey/molasses to the bottle, put the lid on and shake hard until mixed well.  Fill the bottle up the rest of the way with orange juice.

Bigger batch: 2 c. water, 2 c. orange juice, ¼- ½ tsp. unrefined salt, 1 Tbsp. honey or molasses.


*The recommended salt amount varies from 1/4 per quart to 1 tsp. per quart. Since I'm feeding this to children, I use the lower amount.  Recipe sources I looked at include the University of Connecticut Health Center, The Rehydration Project, Southern Utah University, LiveStrong.com, and http://www.cheekybumsblog.com/2012/04/living-naturally-homemade-electrolyte-drink-move-over-pedialyte/

Nutrition facts:
lemon juice: http://nutritiondata.self.com/facts/fruits-and-fruit-juices/1939/2 
orange juice: http://nutritiondata.self.com/facts/fruits-and-fruit-juices/1973/2
honey: http://nutritiondata.self.com/facts/sweets/5568/2
molasses: http://nutritiondata.self.com/facts/sweets/5573/2  
blackstrap molasses: http://www.whfoods.com/genpage.php?dbid=118&tname=foodspice


1 Comment

Pear-Mint Cooler

7/28/2012

0 Comments

 
Picture
No, this one doesn't have any wine in it; it's not THAT kind of cooler.   It just... makes you cooler.  Both ways.  (Right?)

This is great for using overripe fruit, which is what I happened to have sitting on my countertop.  The pear needed a couple bruises cut off, then it was ready to become part of a cold, refreshing, lightly sweet drink with a hint of mint.

1 pear
1 banana, the darker the better
one 4" sprig of fresh mint
1 tray of ice cubes
2 cups water
1-2 Tbsp. honey, optional

Put all in a blender, run on high until smooth.  Makes about 4 cups.
0 Comments

Convenient Fresh Lemon Juice

6/2/2012

0 Comments

 
Have you ever needed the juice of half a lemon, or just a couple teaspoons of it, only to 1) not have a lemon, or 2) not want to mess with it?

I have.  Lots. 

Besides that, sometimes lemons are cheap, and sometimes they're pricey, so I stock up only when they're cheap.  To take advantage of good prices and a free hour in the day, I make frozen lemon juice.  Or lime juice.  Or grapefruit.  Whatever.  I usually do this when I have 3-12 of whichever fruit I'm using.
Picture
If you want to use or save the zest, start by washing and drying the fruit.  Take the zest off with a microplane, a zester, or a vegetable peeler, and set it aside on a plate.  To see one way of storing it for later, see Homemade Orange Flavoring.  

Juice the fruit, then pour the juice into ice cube trays.  My trays take 1 cup to fill the whole thing, which means each of the 14 spots holds just under  1 Tbsp.   Yours may be different.   After they're frozen, pop them out and store in a ziptop bag.  Be sure to label it.

One medium lemon contains 2-3 tablespoons of juice, so 2-3 cubes will be the right amount.  One lime has about 1 1/2 - 2 Tbsp. of juice, so 2 cubes is about right for a whole one. 

When I want some warm lemon water, I heat a cupful of water, then drop a lemon juice cube into it and stir to melt. 

These are also good to toss into a pan sauce, especially for chicken or fish.

And if you add one to a fruit smoothie, it perks up the flavor.

You'll find a ton of ways to use these!  -what are your favorites?

0 Comments

Homemade Hot Cocoa

12/23/2010

0 Comments

 
Picture
Merry Christmas!

Here is a simple thing to make with your family- hot chocolate.  There are a few different ways to make it-  you can add chocolate syrup to milk, or you can melt a chocolate bar into milk, or you can make it the old-fashioned way, starting with unsweetened cocoa.  It’s really fast and easy.

May you have a wonderful Christmas, full of the spirit of love and of God.

-Rhonda

Homemade Hot Cocoa

1 Tbsp. unsweetened cocoa powder
1 Tbsp. sugar or honey
1 cup milk
Pinch of salt, ¼ tsp. vanilla, optional
 
Stir together the cocoa powder and sugar.  Stir in 2 Tbsp. milk, mix until smooth.  Bring to a boil, either on the stove or in a microwave.  This is to dissolve the sugar and bring out the flavor of the cocoa.   Stir in the remaining milk, the salt, and vanilla.  Heat to the temperature you like. Top with marshmallows or whipped cream if you have them.

This recipe can be sized up to whatever you like.  I usually make a 4-cup batch, using the microwave, and a canning jar for my cooking container.  

This makes a ‘milk chocolate’ flavor.  If you like it darker, use 1 1/2 – 2 Tbsp. cocoa.  If it’s bitter, add the same amount additional sugar.

 For mint chocolate, use whatever form of mint you have- mint extract, peppermint patties, or crushed candy canes.

For raspberry flavor, you can use 1 Tbsp. of raspberry Jello powder instead of the sugar.  Orange is another good flavor to make this way.

If you like richer cocoa, use whole milk, or a bit of cream, evaporated milk,  or half-and-half.   

To make it frothy, use a blender, or an immersion blender, to whip it.  This works especially well if you used powdered milk!
 
Picture
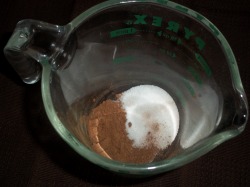
The cocoa and sugar, ready to be stirred.

Picture
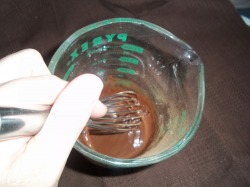
Add as much milk as you have of the sugar and cocoa- in this case, 2 Tbsp.  You want to make a smooth, pancake-batter-consistency slurry.

Picture
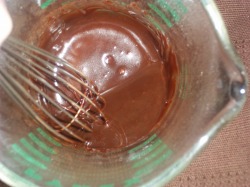
Bring it to a boil to dissolve the sugar and 'bloom' (bring out the flavor of) the cocoa.  Once it's at this point, add the rest of the milk, along with salt and vanilla if you want them.

0 Comments

    Need a Search bar?
    One day I may upgrade my website-- but until then, use your web browser search bar. Type in my web address and what you're looking for, like this-- 
    www.theprovidenthomemaker.com  pumpkin --  and you should get results.


    Author

    I'm a disciple of Christ, a member of the Church of Jesus Christ of Latter-day Saints, a family-defending, homemaking, and homeschooling mom of eight children, two of whom sometimes can't have milk or wheat. Growing up on a farm in a high mountain valley, my parents taught me to 'make do', work hard, smile, and help others.  I love cooking, learning, growing food and flowers, picking tomatoes, and making gingerbread houses --which CAN be made allergy-friendly-- with my children.  I hope you find something to help you on my site!

    Archives

    April 2024
    July 2023
    April 2022
    September 2021
    March 2021
    December 2020
    April 2020
    March 2020
    February 2020
    January 2020
    December 2019
    November 2019
    October 2019
    September 2019
    August 2019
    July 2019
    June 2019
    May 2019
    April 2019
    January 2016
    November 2015
    October 2015
    September 2015
    March 2015
    February 2015
    November 2014
    October 2014
    September 2014
    August 2014
    July 2014
    June 2014
    May 2014
    April 2014
    March 2014
    February 2014
    January 2014
    December 2013
    November 2013
    October 2013
    September 2013
    August 2013
    July 2013
    June 2013
    May 2013
    April 2013
    March 2013
    February 2013
    January 2013
    December 2012
    November 2012
    October 2012
    September 2012
    August 2012
    July 2012
    June 2012
    May 2012
    April 2012
    March 2012
    February 2012
    January 2012
    December 2011
    November 2011
    October 2011
    September 2011
    August 2011
    July 2011
    June 2011
    May 2011
    April 2011
    March 2011
    February 2011
    January 2011
    December 2010
    November 2010
    October 2010
    September 2010

    Categories

    All
    Alcohol
    Alternate Cooking
    Appearances
    Apple
    Apricots
    April Fools
    Aprons
    Bananas
    Beans
    Beef
    Beets
    Bench
    Beverages
    Bonnet
    Bread
    Breakfast
    Budget
    Budgeting
    Cake
    Candy
    Canning
    Carrots
    Cheese
    Chicken
    Children
    Chocolate
    Christmas
    Cleaning
    Coconut
    Comfrey
    Common Core
    Constitution
    Cookbook
    Cookies
    Cooking Oil
    Crafts
    Dairy Substitutions
    Dehydrating
    Dessert
    Dried Fruit
    Earth Oven
    Earthquake
    Easter
    Edible Weeds
    Eggs
    Emergency Prep
    Essential Oils
    Faith
    Family Home Evening
    Fertilizing
    Food Storage
    Fourth Of July
    Freezer
    Frosting
    Fudge
    Garden
    Gardening
    Gingerbread
    Gluten
    Gluten Free
    Gold
    Government
    Grains
    Gratitude
    Hat
    Herbs
    Home Remedies
    Home Repairs
    Homeschool
    Home Storage
    Honey
    Hope
    Inflation
    Leftovers
    Legumes
    Lemon
    Main Dishes
    Mixes
    Mothers
    Noah
    Non Artificial Colors
    Non-artificial Colors
    Nuts
    Oats
    Oil
    Orange
    Paint
    Peaches
    Pear
    Pie
    Pizza
    Plums
    Poem
    Popcorn
    Pork
    Potatoes
    Powdered Milk
    Prayer
    Preparedness
    Projects
    Prophecy
    Pruning
    Pumpkin
    Quick Bread
    Rhubarb
    Rice
    Salad
    Salt
    Sauces
    Self Reliance
    Self-reliance
    Sewing
    Shelf Life
    Shelves
    Sky
    Smoothie
    Snacks
    Soup
    Spices Or Seasonings
    Squash
    Strawberries
    Substitutions
    Sugar
    Summer Fun
    Three Month Supply
    Time
    Tomatoes
    Trees
    Truffles
    T-shirts
    Tuna
    Ultra Gel
    Valentine\'s Day
    Vegetables
    Water
    Watermelon
    Wheat
    Work
    Year Supply
    Zucchini

    RSS Feed

Web Hosting by iPage