The Provident Homemaker
  • Recipes and Info
    • Making Bread
  • My Blog
  • Favorite Resources
  • Documents and Files
  • 52 Weeks of Building Storage

Week 33- Using and Storing Oats

11/23/2019

0 Comments

 
Picture
To help with building your year's supply (this is Week 7 of 26 of building a year's supply), see this chart. 
 
About ten years ago, the Church had a pilot program called the Wooden Spoon Cooking School, designed to teach people how to use their basic food storage items.  The segment on oats has lots of great recipes, including Craisin Oatmeal Cookies, Oatmeal Bread, Oatmeal Spice Cake with a coconut-nut topping,  No-Bake Oatmeal Peanut Butter Cocoa Cookies, Oatmeal Pancake Mix, Granola Bars.  See here.   
 
Rolled oats, quick oats, oat groats, steel-cut oats, and oat flour are high in many vitamins and minerals, including zinc, vitamin E, beta-glucan, and B-vitamins.  They also contain soluble fiber, which is a prebiotic (=sets up conditions for probiotics to thrive), reduces cholesterol, and improves regularity.  They have a great balance of amino acids (proteins), including a good amount of lysine. 
 
Oat groats are the whole kernels
Steel-cut, or Irish, oats, are coarsely chopped groats. 
Rolled oats are regular oats are old-fashioned oats; they are groats that are steamed and flattened.  They take 5 minutes to cook, and hold their shape and texture better.  They are chewier in cookies.  Use either one in recipes.
Quick oat or minute oats are groats that have been flattened more, and take 1 minute to cook.
Instant oats have been precooked.  They have the least nutrients.
 
About 15 pounds of rolled or quick oats will fit in a 5-gallon bucket.  How long do they store well? As always, this depends on your storage conditions.  Overall, they store longer than flour, but much less than whole wheat kernels.  In my cool, dark basement, oats stored in 2.5- and 5-gallon buckets- with no treatment to remove oxygen- are still completely fresh after 3-5 years.  I’ve used some that were 10 years old; they’re distinctly less fresh, but are still usable.  (Lightly toasting them in a pan or oven helps remove some staleness.) And if they’re stored oxygen-free in a can or bottle, they can stay fresh for 30 years or more.
 
The classic use is, of course, oatmeal.  I’m sort of OK with oatmeal, but it’s not my favorite.  Once a week is about all I want to handle.  But—and this was a big thing for me—it turns out the texture makes all the difference.  I’m not a fan of thick and gluey, but do like soft and billowy.  The standard recipe says to use 1 part quick oats to 2 parts water, but that’s pretty thick.  I like it much better when cooked with a 1:3 ratio- 1 part oats to 3 parts water or milk. Or orange juice. Or a mixture of the two.

Of course, there’s also overnight oatmeal in lots of flavors.  Check out this list.

Substitute up to half of the flour in pancake, muffin, or quickbread recipes.  Use 2 cups of oats in place of each cup of flour.  (A recipe calling for 2 cups of flour could be changed to 1 cup flour and 2 cups of oats.)  See here for some options.

Since oats don’t have gluten, you can only replace up to ¼ of the flour with oats in yeast bread recipes.
 
Add a handful of oats to soup or stew to thicken it.
 
Use in meatloaf or meatballs to make them more moist.
 
You can even toast rolled oats and bake them in a pie—Use a pecan pie recipe, and replace the pecans with oats.  I’ve seen it called both “oatmeal pie” and “mock pecan pie.”
 
You can make your own granola or 'honey clusters of oats.' 
 
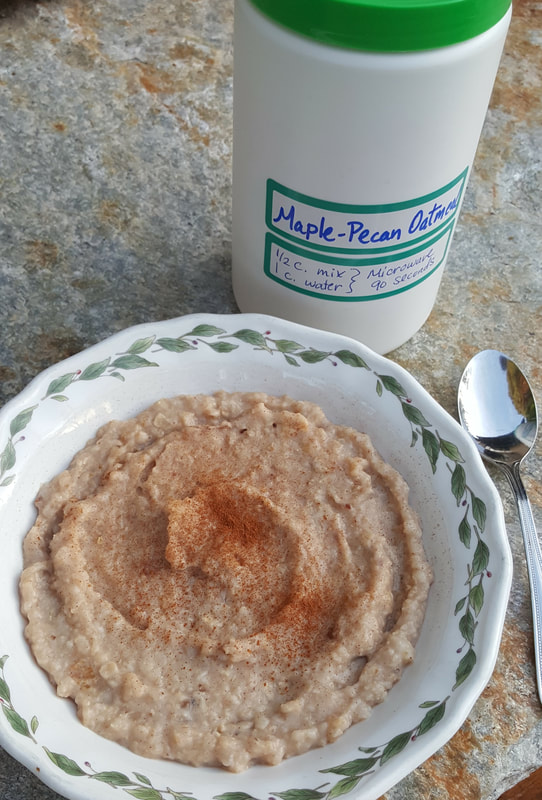
Make Instant Oat Packets.
 
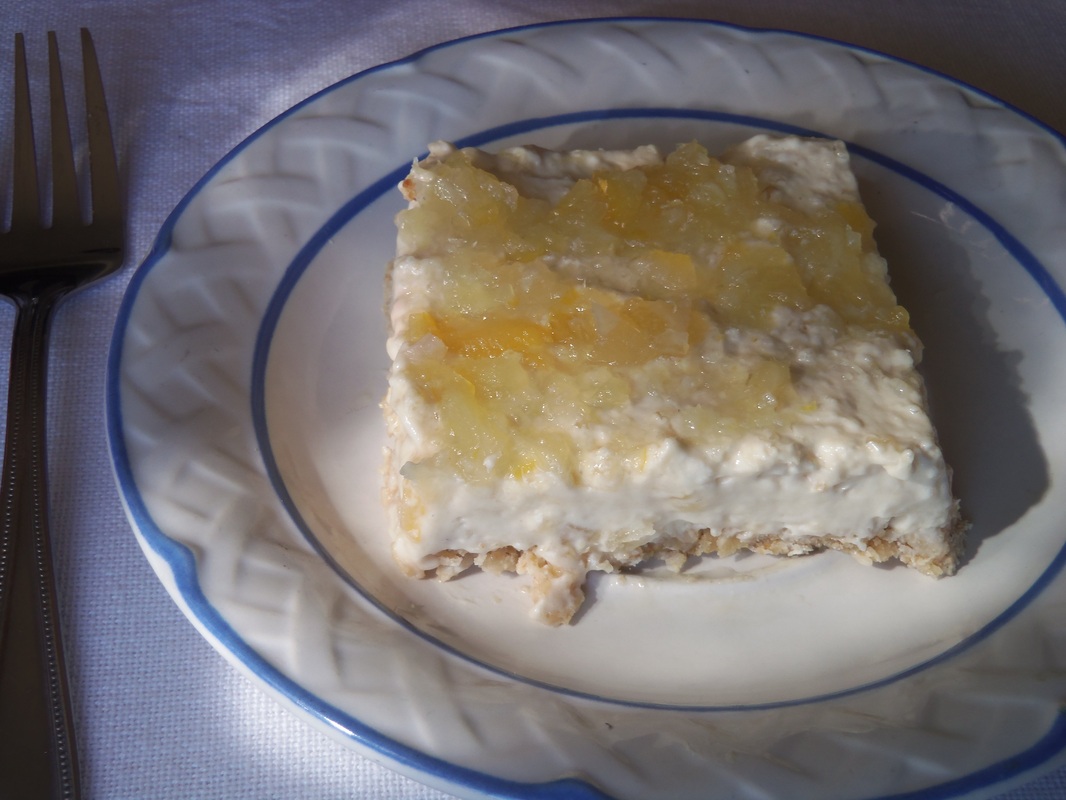
Use oats in a crust instead of graham cracker crumbs.

There’s a coconut-oat crust here: 
 
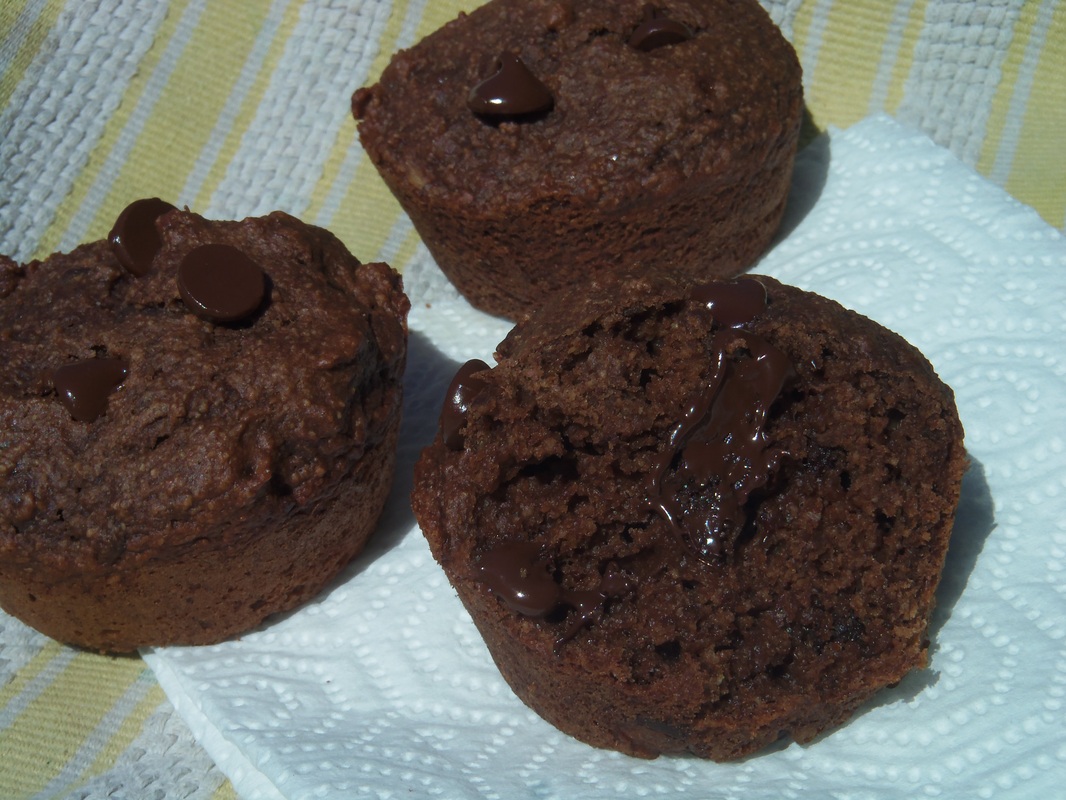
Use a blender to make oat flour; there are suggestions for using it in this post.  
 
One option is these gluten-free chocolate fudge banana muffins.
 
Stir into Healthy Peanut Butter Banana Bars.
 
Just-the-Best-Breakfast Cookies-- Two cookies are about the same nutritionally as one homemade, normal-sized muffin, and much better for you than commercially-made muffins.
 
Use in the topping for Apple Crisp.


What is your favorite way to use oats?
0 Comments

Week 29-  Where to Get Storage Buckets

10/25/2019

1 Comment

 
Picture

Now that you're getting food in bulk, do you know where to get buckets for storing all of it?  And how many will you need?

You can buy food-grade buckets new or used.  New ones typically cost $5 to $9  for the 5-gallon size; used ones are anywhere from free to $2.  If you buy them new, be aware that sometimes the posted price is for both the bucket and lid, while sometimes the bucket and lid are sold (and priced!) separately. 

I get all of my buckets from bakeries; usually it’s the bakery inside whichever grocery store I'm at. When I was in college, I got buckets from the cafeteria kitchen.

Bakeries get their frostings, fillings, and buttery spreads in buckets, then throw out or recycle the empty buckets afterwards. These things come in 2.5 gallon and/or 5 gallon buckets.  Some bakeries get both sizes; others prefer one size over the other.  Ask.  The people there are usually willing to collect buckets over a day or two for you to pick up later.  Be sure to ask them to save the lids with the buckets.

Some bakeries give them away; others charge $1 or $2. Either way, plan on giving them a wash with soapy water once you're home.

Sometimes people who collect them to resell will post an ad in the local classifieds.  I've seen them in quantity that way, for $2 apiece, clean and delivered if you want enough.

Locally, I've seen new food-grade buckets for sale at Smith and Edwards, Macey's, Kitchen Kneads, and the Bosch Kitchen Centers.​  
For those who aren't in Utah, that translates as a farm supply store, a grocery store (not a department store), and two kitchen specialty stores.
 
Whichever place you get your buckets from, be sure the buckets are clean and DRY before putting food in them.  Make sure the lid is securely on, and don’t store buckets on bare cement.  Moisture vapor will get into your bucket.  Put a layer of something down first—wood, a strip of old carpet or cardboard.  See more tips on protecting your buckets and other food storage here.   

HOW MUCH DOES A BUCKET HOLD?
 
A five-gallon bucket holds between 15 and 30 pounds, depending on what it is.
Oats are light; only 15 pounds will fit in.  A 25-pound bag of flour can be convinced to fit, with a lot of tapping the bucket on the floor to compact the flour. And if you have dense things like beans, wheat, rice, or sugar, 30 pounds will fit.
​
A 2.5-gallon bucket holds half as much. (BTW, you can fit 11 (10-11 oz) bags of chocolate chips in this size.)  I mostly prefer this smaller bucket for things I use less of, or things that come in smaller packages—like dried fruit or chocolate chips.  You get an extra layer of protection, with a container big enough to be useful, but small enough to not have to dig to the bottom.

Six-gallon buckets are a common size, too.  You can fit 40 pounds of wheat or other dense food in one.  


1 Comment

Week 5 assignment and DIY Instant Oatmeal Packets

5/11/2019

0 Comments

 
Picture
Your assignment this week is to look through the grocery ad for things on your inventory list that you need. With the budgeted amount of money you have (ballpark figure is $14 per week, per person) buy your three months' worth of however much you can on your list.

Do you like to use instant oatmeal?  You can save money (and know exactly what you're eating) by making your own. It's so quick and handy to have it all made up!
 
Homemade Instant Oatmeal 
4 cups quick oats (oatmeal), gluten-free if you need them
1-3 tsp. cinnamon
½ - 2/3 cup brown sugar*
½ - 1 tsp. salt
optional: 1/2 cup dry milk powder
optional: 1 c. chopped dried fruit or toasted nuts

Put 1 ½ c. of the oats in a blender; blend on high until almost powdery.  Dump this into a medium-sized mixing bowl; stir in cinnamon, brown sugar, salt, and milk powder and fruit/nuts if you’re using them.
 
After making it for the first time, see if it needs adjusted for your family’s tastes-- take 1/4 c. of this mix, combine in a bowl with ½ cup water, and microwave for 60 seconds. Taste it.
Is it great? Does it need more cinnamon? Sugar? Salt?  Add as needed, then cook another bowlful to see.  Take notes so you don’t have to do this next time.  😊 
 
Store in a canister, a quart-sized ziptop bag, or pre-portioned into snack-sized ziptop bags.
This batch can easily be doubled or tripled.
 
You can pre-portion these into snack-size baggies (then reuse baggies!), or just keep a measuring cup in the canister or bag. If you want individual servings measured out ahead of time, place either 1/2 c. or 1/3 c. mix in each baggie.

TO USE:
One large serving:  use ½ c. mix and 1 c. water.  Microwave 90 seconds; let stand. 
One small serving: use 1/3 c. mix and 2/3 c. water.  Microwave 60 seconds; let stand.
For four large servings (or 6-8 small ones), use four cups boiling water and add 2 to 2 ½  cups oatmeal mix.
Adjust water and/or mix to make it as thin or thick as you like.  

    
* For children who aren't yet accustomed to sugary oatmeal, use 1/2 cup brown sugar.  For those sugar-addicted husbands, you may need to add more. Regular sugar, evaporated cane juice, or an appropriate amount of stevia may be used. 
If your brown sugar is lumpy, it can be added to the blender with the 1 ½ c. of oats and blended with them.
 
Here are some flavor combinations; the sky's the limit!

Apple Cinnamon- Use the higher amount of cinnamon; you might even go up to 1 ½ to 2 Tbsp. Stir in 1 c. chopped dried apples.

Apricot Almond- Add 1 tsp. almond extract to the oats being blended.  At the end, stir in ½ c. finely chopped dried apricots and ½ c. chopped toasted almonds.

Banana Maple- Add ½ tsp. maple extract and ½ to 1 c. banana chips to the oats when they’re blended.

Chai Spice- Use 2 tsp. cinnamon, 1 tsp. ginger, ½ tsp. cardamom, and ¼ tsp. cloves. (If you like, you can also add ¼ tsp. ground black pepper and ½ tsp. allspice.)  For Vanilla Chai, add 1 Tbsp. vanilla to the oats when they're blended, or use vanilla powder.
 
Date Nut- Use the higher amount of cinnamon. At the end, stir in ½ c. finely chopped dates and ½ c. toasted chopped walnuts or other nut.  TIP- if you chop the dates and the nuts together, the dates won’t stick to your knife as badly.
 
Dinosaur- Use the higher amount of cinnamon. Stir in ¼ c. dinosaur-shaped sprinkles.
 
Maple Brown Sugar- Add ½ tsp. maple extract to the oats being blended. Use the higher amount of brown sugar (dark brown if you have it), and the lower amount of cinnamon.

Pumpkin Spice- Use 2 tsp. cinnamon, plus 2 tsp. ginger, 1 tsp. nutmeg, and 1/2 to 1 c. pumpkin powder. Best if you also use the 1/2 c. dry milk powder.

Raisin, Apple & Walnut- Use the higher amount of cinnamon.  At the very end, stir in ½ c. chopped raisins, ½ c. chopped dried apple, and ½ c. chopped toasted walnuts.

Strawberries and Cream- Use either ½ c. dry milk powder, or ½ c. powdered creamer. Stir in 1 c. chopped dried or freeze-dried strawberries. You can also make Raspberries and Cream, Blueberries and Cream, or Peaches and Cream this way.
 
Very Berry- Add 1 tsp. vanilla to the oats being blended. Use the lower amount of cinnamon.  Omit brown sugar, and use 1 c. of the berry drink mix from the Home Storage Center. Stir in 1 c. chopped dried cranberries or other dried berry.
0 Comments

No-bake cheesecake

5/23/2014

1 Comment

 
Picture
This is a refrigerator cheesecake; no baking needed!  It takes only about ten minutes until the filling is set enough to serve. This one has a rhubarb topping, but use whatever you like on the top!  The cheesecake can be made gluten-free, and this version is sweetened with honey.  It can even be dairy-free if you have a nondairy substitute for cream cheese; use any milk you prefer in place of the milk called for in this recipe.
This makes one 8x8 pan or one 8" pie pan.  Pick your shape.  :)

Crust:
3/4 c. quick-cooking oats (GF if needed)
1/4 c. oat flour (whirl oats in the blender until powdered)
2 Tbsp. coconut oil (melted) or butter
1 Tbsp. honey, liquid

Stir all four ingredients together, then press into the bottom of an 8x8 pan or up the sides then along the bottom of an 8" pie plate.  Put it in the freezer to firm up while you make the filling.

Filling:
6 oz. cream cheese, softened
3 Tbsp. honey
2 Tbsp. lemon juice (fresh is best)
pinch of salt
1 tsp. vanilla1/2 cup evaporated milk, half-and-half, or whipping cream (or coconut cream)
2 Tbsp. Ultra Gel

Beat the cream cheese until softened, then mix in the honey, lemon juice, salt, and vanilla; beat until smooth.  Gradually add the  milk/cream and Ultra Gel; beat until thick and fluffy.  Spread evenly over the chilled crust.  Let chill for at least 5-10 minutes away if you like. Store any leftovers in the refrigerator.

Lemon Topping:  1/4 c. lemon marmalade (use this recipe, substituting lemons for orange), thinned with just enough water to make it a sauce.

Rhubarb Topping:
1 c. chopped rhubarb (about 1 big stalk)
1/4 c. water
1 1/2 - 2 Tbsp. honey, to taste

Combine in a microwave-safe bowl.  Microwave for two minutes; stir.  Repeat until the rhubarb is soft.  Mash and taste to see if it's sweet/tart enough for you.  
Picture
1 Comment

Chocolate Fudge Banana Muffins

4/12/2014

0 Comments

 
Picture
Warm, chocolatey, just sweet enough, high fiber, and with little pockets of gooey melted chocolate chips!   My sister-in-law posted a similar recipe on Facebook.  It sounded delicious and had very little added sugar.  The original recipe called for applesauce instead of oil, but I'm a fan using healthy fats alongside carbohydrates so that my kids and I aren't hungry again an hour after breakfast!  It helps you process the fiber in these, too.

Chocolate Fudge Banana Muffins - makes 12
(can be gluten-free and dairy-free)

3 medium bananas, very ripe, mashed (about 1 cup)
2 eggs
1/4 brown sugar
1/4 c. oil or melted butter (I like coconut oil in these)
1/3 c. cocoa powder
1 tsp. vanilla
1 1/3 c. oat flour (or you can use all-purpose flour or whole wheat flour)
1/2 tsp. baking soda
1 1/2 tsp. baking powder
1/2 tsp. salt
chocolate chips, optional (1/4- 1/2 cup)

Preheat oven to 350 degrees.  Grease a 12-cup muffin tin.  
Whisk together eggs and brown sugar.  Mix in the oil, cocoa powder, and vanilla.  Mix the dry ingredients and add to the wet.  Stir in chocolate chips.

Divide between the muffin cups; bake about 17-23 minutes, or until the top of a muffin springs back lightly when gently pressed.
0 Comments

Gluten free, dairy free pumpkin cheesecake

11/9/2013

3 Comments

 
Picture
See the bottom of this post for photos on making the heart-swirl pattern.

A friend of mine has to avoid dairy, wheat, and oats- and we were going to be together at a potluck lunch on Thursday.  The pumpkin cheesecake last week (for a different group) was such a hit I decided to adapt it so she could enjoy it too.  But with a bit of chocolate.  Like pumpkin-chocolate chip cookies.

I wanted it to be relatively inexpensive- no quart of coconut yogurt! -that stuff's pricey. Coconut milk and coconut cream, sure.  I have that on hand.  
No recipes using those appeared to be online anywhere, though I found the chocolate-version crust here.  There were some cashew-puree based ones- but not only did I not have time to soak nuts, but wanted this to be a recipe even the nut-allergic could use. So I started with my tried-and-true 'normal' recipe, and adapted. And I was willing to buy one 6-oz cup of coconut yogurt to put in the (optional) topping. 
You won't taste the apple cider vinegar, but it adds both the tartness and savoriness you'd get from cream cheese. If you have 2 (14-oz) cans coconut milk and a 19-oz can of coconut cream, that will be exactly enough for the filling, the topping, and the ganache.

If you want to use honey in the filling instead of sugar, use just 1 cup honey plus 1 Tbsp.  Since this also adds about 1/4 cup of water, add about a tablespoon additional pumpkin powder OR a tablespoon oat or coconut flour so the cheesecake won't be too soft.

Gluten free, dairy free Pumpkin Cheesecake
Crust:
1 c. fine-shred coconut, toasted
1 Tbsp. coconut oil, melted
1 ½ Tbsp. honey
1 tsp. vanilla
1 ½ Tbsp. cocoa powder 

Stir together and press firmly onto the bottom of a 9” springform pan.  Set aside.  
For a fall-spice crust instead of chocolate, omit cocoa powder, and instead use                 ½ tsp. cinnamon + ¼ tsp. cloves + ½ tsp. ginger

Filling:
1 1/3 c. sugar
1 tsp. cinnamon
3/4  tsp. ginger
¼ tsp. nutmeg
¼ tsp. cloves
½ tsp. salt
6 Tbsp. (slightly heaped 1/3 c.) pumpkin powder
2 (14-oz) cans coconut milk
3 Tbsp. apple cider vinegar
1 Tbsp. vanilla
5 large eggs, room temperature
1 c. coconut cream

Mix all together, in order.  Don’t overmix or whip air into it, or it may crack while baking.  Bake at 350 F for  75-90 minutes in a water bath, until center jiggles like Jello and internal temperature is 145-150 F.  Cool in oven or on counter, then chill, covered, in fridge 4 hours or more.

Rum-flavor Topping:
1 cup coconut cream, well chilled
½ cup coconut yogurt
½ cup brown sugar
1/8 tsp. salt
1 ½ tsp. rum extract

Whip cream until just beginning to thicken; add all else and whip.  Spread over chilled cheesecake.

Chocolate Ganache drizzle:
¼ c. (1 ½ oz) dairy-free chocolate chips
3 Tbsp. coconut cream or coconut milk

Heat gently to melt chocolate chips; whisk until smooth.  Drizzle on cheesecake.
3 Comments

Healthy Peanut Butter-Chocolate Banana Bars

3/23/2013

1 Comment

 
Picture
These have fiber, protein, and are much lower in sugar than almost any baked treat!  And they really are good.  My family snarfed down this batch. 

Besides all that, they're also wheat-free and dairy-free.

Healthy Peanut Butter-Chocolate-Banana Bars

1 1/2 cups cooked white beans (one can, drained and rinsed)
2 eggs
2 ripe medium bananas
1/2 c. peanut butter
1/4 c. brown sugar or honey (or 1/2 c sugar, if you like things on the sweeter side)
2 tsp. vanilla
1 tsp. baking powder
1/2 tsp. salt
1/2 cup quick-cooking oats
1/3 c. chocolate chips (the darker the better)

Preheat oven to 350 F.  Put the beans, eggs, bananas, peanut butter, brown sugar, and vanilla in a food processor or high-powered blender.  Run until very smooth.  Stir in the baking powder, salt and oats.  Spread in a greased 8x8 pan then sprinkle with chocolate chips.  Bake 30 minutes or til test done with a toothpick.  Cool at least 15 minutes before cutting.  These are even better the next day.

For a variation on this, substitute pumpkin puree for the banana, increase sugar/honey to 1/2 c., replace almond or cashew butter for the peanut butter, then add 1-2 tsp. pumpkin pie spice.
1 Comment

Just-The-Best-Breakfast Cookies

1/18/2013

0 Comments

 
Picture
A few years ago, I opened up the Foods section of my local newspaper and spotted a recipe called "Just-the-Best Cookies".  The version there was intended to be a healthier one, having reduced the nuts, coconut, and switching to oil instead of butter.  Well, I've reduced the sugar and changed it to use honey, then added back the bigger amount of coconut and nuts, since we know now that healthy fats are, well, healthy!  In moderation. And I love the crunch and flavor of coconut and nuts.

We have two breakfast times at my house- one for my highschoolers and husband, who have to be out the door by 6:45, and one for the rest of us, because some of them leave at 8:00 for the elementary school and Jr-High.  These cookies make a fantastic, no-work breakfast for that earlier group- I make a batch, put them in a big ziplock bag after cooling, and pop them into the freezer. Then my early group can even grab and go, when needed.

These cookies are high in fiber as well, and lower in sugar than most.  Two cookies are about the same nutritionally as one homemade, normal-sized muffin, and much better for you than commercially-made muffins!  Two made without raisins contain 16 grams of sugar, which is less than you'd get in a bowl of cereal with milk. Especially if you count the size bowl my teenagers think is a serving.  (I keep hiding the bigger bowls...)

Enjoy!

Just-the-Best Breakfast Cookies
1/2 c. coconut oil or butter
1/2 c. honey
1/2 c. brown sugar
1 large egg
1 1/2 tsp. vanilla
1/4 c. water
2 c. whole wheat flour
2 c. quick-cooking oats
1 tsp. baking soda
1/2 tsp. salt
1 c. shredded sweetened coconut
1/2 c. chopped pecans or other nuts, optional
1/2 c. chopped raisins, optional

Preheat oven to 350 degrees. Lightly grease or spray two cookie sheets.  In a large bowl, beat together coconut oil and honey, then mix in egg, vanilla, and water.  Add the flour, oats, baking soda, and salt and mix well.  Stir in coconut, nuts, and raisins.
Roll into 1 1/2" balls, a little larger than a ping-pong ball.  Place on cookie sheet, flatten slightly, and bake for about 12 minutes.  Let the cookies cool 2 minutes on the cookie sheet before removing to a cooling rack. Makes about 36.

To make breakfast bars instead, spread all the dough onto one well-greased cookie sheet.  Bake at 350 for probably 25 minutes.  I don't know for sure because the idea popped into my head just now...    Cool and cut into whatever size bars you like.                                


0 Comments

Make your own oat flour

8/6/2012

0 Comments

 
Picture
I buy rolled oats by the 25- or 50-pound bag when they're on sale; they're MUCH cheaper that way, and yes, I do actually use that many.  Eventually. 

Last week I bought 50 pounds of oats for $24, which made them $ .48/lb. 

They got divided into food-storage buckets- a 5-gallon bucket will only fit about 15 pounds of oats, labeled, put in a cool & dark place in my house (under beds and in closets can be good).  Then I will refill a container in the kitchen whenever needed. 

They're great for cooking at breakfast, of course, and homemade granola (see recipe in the free "Starter Cookbook" or in The Chameleon Cook), in apple crisp topping (also in both books)... but what else?

Start with rolled oats or quick-cooking oats.  Put about 2 cups of these in a blender.  Cover and run on high for about a minute. 

Ta-da!  Oat flour.  This is great for either the gluten-free cook who can tolerate oats*, or for the rest of us who just like moist and tender baked goods.

Now, what can you do with it?

Use it in yeast bread- about 1/4 cup of this to replace the same amount of wheat flour per each loaf in the recipe.  Oats help make bread moist.  One really delicious version is to not only use the oats, but substitute orange juice for half of the water. 

Quick breads- including pancakes, waffles, biscuits, muffins, and more.  Oats don't have any gluten, so your finished food will be more tender, less tough.  Just don't substitute more than half of the total amount of flour.  For example, in a muffin recipe calling for 2 cups flour, you could use 1 cup of oat flour and one cup of regular flour, or 1/2 cup oat flour and 1 1/2 cups regular flour.  Adding the oat flour will make your regular flour act more like pastry flour.

Mix into cakes and cookies for the same reason as for quick breads, keep the same kind of ratios in mind for best results.  If you want to get the very best results, WEIGH out your flour; the oat flour is a little fluffier or less dense than wheat flour.  You would use just over 5 ounces oat flour for each cup of regular flour you're substituting for.

Use it for 'instant oatmeal' (scroll down to bottom of page) for breakfasts: the pieces are so small, they absorb the water super-fast! in Add it to soups or stews to thicken them.  You can do the same with quick oats, but the oat flour soaks in and disappears much faster!

*Most gluten-intolerant people can handle oats just fine, and others can't.  It seems to actually depend on the variety of oat- there's an excellent article on this at http://ultimateglutenfree.com/2011/06/getting-closer-to-gluten-free-oats/  Buying "Gluten-Free" oats gives you an extra layer of protection; I've seen, myself, batches of oats that had a few wheat kernals mixed in.  The processing machines can't tell the difference, and sometimes a little wheat grows- as a weed- in oat fields!

My sister, who has to cook gluten-free all the time, has a favorite easy, hearty-wholegrain flour blend: equal parts oat flour and lentil flour.  Lentils grind fairly easily in a blender, too.  See here for her post on the flours she uses most often.
0 Comments

    Need a Search bar?
    One day I may upgrade my website-- but until then, use your web browser search bar. Type in my web address and what you're looking for, like this-- 
    www.theprovidenthomemaker.com  pumpkin --  and you should get results.


    Author

    I'm a disciple of Christ, a member of the Church of Jesus Christ of Latter-day Saints, a family-defending, homemaking, and homeschooling mom of eight children, two of whom sometimes can't have milk or wheat. Growing up on a farm in a high mountain valley, my parents taught me to 'make do', work hard, smile, and help others.  I love cooking, learning, growing food and flowers, picking tomatoes, and making gingerbread houses --which CAN be made allergy-friendly-- with my children.  I hope you find something to help you on my site!

    Archives

    April 2024
    July 2023
    April 2022
    September 2021
    March 2021
    December 2020
    April 2020
    March 2020
    February 2020
    January 2020
    December 2019
    November 2019
    October 2019
    September 2019
    August 2019
    July 2019
    June 2019
    May 2019
    April 2019
    January 2016
    November 2015
    October 2015
    September 2015
    March 2015
    February 2015
    November 2014
    October 2014
    September 2014
    August 2014
    July 2014
    June 2014
    May 2014
    April 2014
    March 2014
    February 2014
    January 2014
    December 2013
    November 2013
    October 2013
    September 2013
    August 2013
    July 2013
    June 2013
    May 2013
    April 2013
    March 2013
    February 2013
    January 2013
    December 2012
    November 2012
    October 2012
    September 2012
    August 2012
    July 2012
    June 2012
    May 2012
    April 2012
    March 2012
    February 2012
    January 2012
    December 2011
    November 2011
    October 2011
    September 2011
    August 2011
    July 2011
    June 2011
    May 2011
    April 2011
    March 2011
    February 2011
    January 2011
    December 2010
    November 2010
    October 2010
    September 2010

    Categories

    All
    Alcohol
    Alternate Cooking
    Appearances
    Apple
    Apricots
    April Fools
    Aprons
    Bananas
    Beans
    Beef
    Beets
    Bench
    Beverages
    Bonnet
    Bread
    Breakfast
    Budget
    Budgeting
    Cake
    Candy
    Canning
    Carrots
    Cheese
    Chicken
    Children
    Chocolate
    Christmas
    Cleaning
    Coconut
    Comfrey
    Common Core
    Constitution
    Cookbook
    Cookies
    Cooking Oil
    Crafts
    Dairy Substitutions
    Dehydrating
    Dessert
    Dried Fruit
    Earth Oven
    Earthquake
    Easter
    Edible Weeds
    Eggs
    Emergency Prep
    Essential Oils
    Faith
    Family Home Evening
    Fertilizing
    Food Storage
    Fourth Of July
    Freezer
    Frosting
    Fudge
    Garden
    Gardening
    Gingerbread
    Gluten
    Gluten Free
    Gold
    Government
    Grains
    Gratitude
    Hat
    Herbs
    Home Remedies
    Home Repairs
    Homeschool
    Home Storage
    Honey
    Hope
    Inflation
    Leftovers
    Legumes
    Lemon
    Main Dishes
    Mixes
    Mothers
    Noah
    Non Artificial Colors
    Non-artificial Colors
    Nuts
    Oats
    Oil
    Orange
    Paint
    Peaches
    Pear
    Pie
    Pizza
    Plums
    Poem
    Popcorn
    Pork
    Potatoes
    Powdered Milk
    Prayer
    Preparedness
    Projects
    Prophecy
    Pruning
    Pumpkin
    Quick Bread
    Rhubarb
    Rice
    Salad
    Salt
    Sauces
    Self Reliance
    Self-reliance
    Sewing
    Shelf Life
    Shelves
    Sky
    Smoothie
    Snacks
    Soup
    Spices Or Seasonings
    Squash
    Strawberries
    Substitutions
    Sugar
    Summer Fun
    Three Month Supply
    Time
    Tomatoes
    Trees
    Truffles
    T-shirts
    Tuna
    Ultra Gel
    Valentine\'s Day
    Vegetables
    Water
    Watermelon
    Wheat
    Work
    Year Supply
    Zucchini

    RSS Feed

Web Hosting by iPage