The Provident Homemaker
  • Recipes and Info
    • Making Bread
  • My Blog
  • Favorite Resources
  • Documents and Files
  • 52 Weeks of Building Storage

Week 38 – Powdered Milk FAQs- What? Why? How? What if it gets old? – and storing dairy-free substitutes

1/5/2020

1 Comment

 
PicturePhoto: Marina Shemesh
To help with building your year's supply (this is Week 12 of 26), see this chart. 
 

What is powdered milk?. 
Why store it?. 
How much powdered milk is recommended? And how do I store it?. 
How do I use powdered milk?. 
What if it gets old?. 
What dairy-free substitutes can I store?. 


What is powdered milk? 
Milk begins with a very high water content—about 82%.  The water is removed in a couple of steps- a low-temperature evaporative boil is first. Doing this in a vacuum allows the boiling to happen at 135° F rather than the regular 212°. Then it’s sprayed from a very tall tower into very hot, swirling air. A tiny particle of powdered milk is all that’s left when it hits the bottom. (See this article for super-interesting details.)  This milk powder is made of very small, nearly dust-sized specks.

Since fat turns rancid quickly and drastically shortens shelf life, powdered milk for long-term storage is fat-free. It’s skim milk that goes through the drying process. That’s also why it tastes watery.  Adding a little extra powder when mixing up the milk will help with this. And adding a bit of vanilla helps give it some flavor.  Serving it chilled helps, too.
 
Full-fat powdered milk is available if you know where to look. The only brand I’ve seen widely available is Nido. It’s a whole milk powdered milk you can find sometimes in the Hispanic foods section at grocery stores. In the U.S. it’s mostly used in the food industry, but tons of it per year are shipped to third-world countries, where they have few dairies, little way to transport the milk, and no refrigerators to store it in anyway. If you buy whole-milk powder, use it within 6 to 9 months unless it’s in sealed cans and stored under 75°F.  And then use it up within, say, five to seven years.
I have some that’s older than that; I can report later this week on what it’s like, if I remember…

Instant powdered milk is made by making the tiny particles clump together to make a little bigger granules. There’s air between the particles, which allows water to better penetrate when you're reconstituting it. The air also makes the powder less dense. That’s why you’ll sometimes see recipes that specify which kind to use- ‘non-instant powdered milk’ or ‘instant powdered milk’. It takes a larger scoop of instant powdered milk to be equal to a smaller scoop of the regular.  (Of course, you can go by weight measurement and get it right every time!)
 
One pound of either instant or regular nonfat milk powder will make about one gallon of milk.


Picture
 Why store it?
There are at least four big reasons-
 
1-To have the minerals and other nutrition milk provides.
 
2-To have more options in your cooking. Many recipes use milk and products made from milk. Did you know that you can, in your very own kitchen, turn powdered milk into yogurt, cottage cheese, a mozzarella-type cheese, a cream cheese substitute, and much more?
 
3-No refrigeration is required, unlike fresh milk, which sours quickly at room temperature. This is helpful in emergency situations.
 
4-For its long shelf life. Fresh milk lasts less than a month in the fridge; canned evaporated milk is best within a couple of years; but nonfat milk powder, sealed along with oxygen absorbing packets, can last for a good 20 years when kept under 75° F.


How much powdered milk is recommended? And how do I store it?
Did you notice that in the list of why to store powdered milk, I didn’t say “so you can enjoy milk three times a day”?  That’s because you couldn’t, if you were storing the recommended amount.  While you would likely use some for drinking, that’s not its primary purpose. I don’t know about you, but I’d be making most of mine into cheese for recipes!

The recommended storage amount is 16 pounds per person.  You’d need to store almost 70 pounds per person to be able to have the equivalent of three glasses of milk per day.
 
I like variety in my storage, so I include evaporated milk and sweetened condensed milk—although you can make those with powdered milk, too.  5 cans of evaporated milk is equal to about one pound of milk powder, while it takes 8 cans of sweetened condensed milk to replace one pound of dry milk powder.
 
Keep long-term storage products at or below 75°F/24°C whenever possible. If storage temperatures are higher, rotate (eat!) the food more often.
 

How do I use powdered milk?
Go to http://everydayfoodstorage.net/training-cooking/powdered-milk for recipes for evaporated milk, Magic Mix, and Condensed Soups using Magic Mix. She has a great little chart you can print out and tape to the inside of your cupboard  so you know how much milk powder to use when you're baking with it:

The Wooden Spoon class handout has a TON of recipes info on powdered milk.  It's from some classes that the Church of Jesus Christ’s ‘Welfare Square’ was teaching for a little while. The collection is not copyrighted; the two ladies who compiled it just wanted to spread the information.

When I get a bunch of new recipes, usually most of them get ignored unless I'm already familiar with them.  So skim through the recipe booklet and look through my notes on the recipes.       
 
For the recipes that give you whey (this means any of the cheeses, including the yogurt cream cheese), save the whey.  It has vitamins, minerals, some protein, no fat, and some milk sugar (lactose- very low on the glycemic scale).  I use it in pancakes, muffins, bread, etc.  If your whey has vinegar in it (most of the cheeses in there do), you can add 1 tsp. baking soda for every 2-3 cups of whey.  This will neutralize most of the vinegar.  Yes, it will foam up, kind of like those volcanoes you made in 3rd grade…


What if it gets old? 

The answer to that has a lot to do with “How do I use it?”  If it’s not old, don’t let it all get there. 
 
If it’s already old, it may still be fine.  Recent food-storage testing at the BYU Foods lab showed that 20 years can be expected on sealed powdered milk stored under 75°F.  Here’s the chart of their findings for milk and other year-supply foods. 
                                              
If you’ve opened a can and it smells bad, don’t throw it in the trash.  It’s good as garden fertilizer! Tomatoes especially need calcium, in order to avoid blossom-end rot. And milk can help prevent the dreaded powdery mildew on plants, as well as to control aphids.  Here is an article on 8 ways to use milk in the garden.


What dairy-free substitutes can I store?There are several.  There’s powdered goat milk, powdered soy milk, powdered coconut milk.  If you’re good at rotating what you store, canned milks are options- canned coconut milk is the cheapest option.  Just know it doesn’t contain much calcium. Keep calcium supplements on hand, store lots of white beans in your 60 pounds of legumes, store blackstrap molasses, and/or plan on growing lots of dark green leafy vegetables.
You can make milk-like liquids for drinking or cooking, using rice, almonds, cashews, or oats as the base. Again, these won’t contain much calcium, so you’ll need to account for that.
 
What do I store for my dairy-free family members? 
-Canned coconut milk. I usually have a whole case on hand; I use it on a regular basis in recipes, so it gets rotated.  Ditto for coconut cream.  The best prices around for both of those was at a local Asian market.                            
-Coconut milk powder. Also from the Asian market. Check the label; some brands add casein to their powder. Since this is a milk protein, it’s unsuitable for the dairy-sensitive. Other brands don’t include casein.             
-Boxes of shelf-stable coconut milk, almond milk, and/or rice milk. These need rotated about as much as the canned ones do.                                      
-Almonds, rice, cashews, oats. Because we like and use them anyway.
 
What other questions do you have?


1 Comment

Week 26- storing winter vegetables, and weekly assignment

10/5/2019

0 Comments

 
Picture
This week, B for 3 of nonfood items. If you’re not sure what quantities you need, see the week 22 post.
This is the LAST week in the get-3-months'-supply program! Next week we'll begin the long-term-storage foods.

Did you know that many fresh vegetables can be stored for months at a time?  The USU Extension Office has multiple articles and helps.  This particular article addresses what to do at the end of the garden season for tomatoes, winter squash, onions, and potatoes

"With the first frost just around the corner, many people harvest and store their produce for later use. Many fruits and vegetables can be canned, pickled, dried or frozen. Another option is to store them fresh. Consider this information."  See here for the details. 
 
"...Other crops such as apples, pears, cabbage, celery, carrots and parsnips can be stored for an extended period of time. The following fact sheets can be accessed online, and both provide useful information. For a brief overview, visit http://www.ext.colostate.edu/Pubs/Garden/07601.html. For a more complete look at home food storage, see the USU bulletin at http://extension.usu.edu/files/publications/publication/FN_502.pdf"
0 Comments

Week 14- Preserving fruits and vegetables

7/13/2019

0 Comments

 
Picture
Your weekly assignment:  B for 3   Only 7 weeks to go! (How's your shelf looking?)

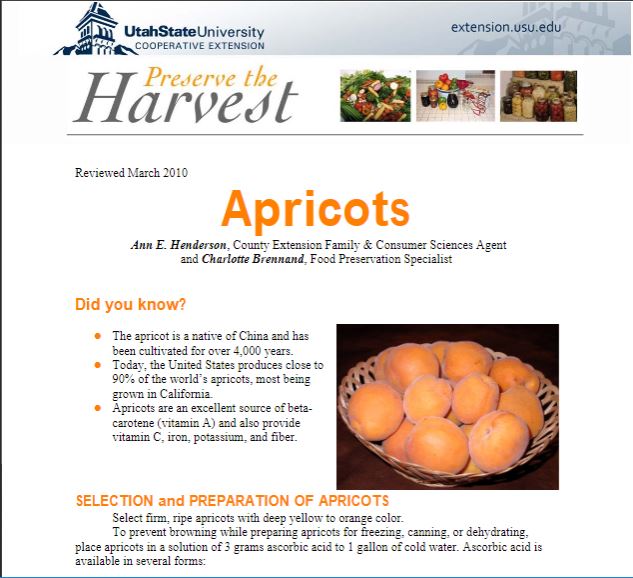
If you have a garden or fruit trees, or like to visit farmers’ markets, you’re likely starting to wonder about how to handle the food that so proliferous right now.  The Utah State University (USU) Extension has resources for you! It covers freezing, canning, dehydrating, and best varieties to use, from Apples to Zucchini.   After going to this link,  click on “Preserving the Harvest Fact Sheets”.

For example, in the Apricot “fact sheet”
the 'sheet' is 9 pages of information--

-How to select and prepare apricots

-Freezing to preserve them, in syrup, sweetened without syrup, plain, or as puree

-Canning them- how many pounds or bushels will fill how many jars, how to get them ready (in halves or as nectar), how to process them, for how long, for your altitude

-Making apricot jam, jelly preserves- with pectin, or without pectin

-Drying apricots- including preparing them, and drying them using a dehydrator, the sun, or an oven

-Nutrition information for apricots
​
-Storing them- fresh, canned, dried, or frozen

And all this, for so many other fruits and vegetables!
0 Comments

Storing Food through the Winter

11/27/2015

0 Comments

 
There are lots of fresh foods you can store without needing a freezer, canner, or fridge.  I haven't built a root cellar, but discovered that different places in my yard, garage, and house have the right conditions for several of these foods.
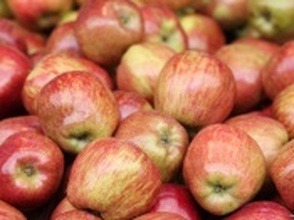
Potatoes are happy on my bare garage floor until late January. After January they have to be moved up 1-2 feet, onto the cement stairs, to avoid freezing. Same with onions. Apples are better in the garage on the workbench, which is a couple feet off the ground and a few degrees warmer (but still cold). Pumpkins are happy in the basement or in a dark closet, off the floor so they avoid moisture. Carrots and parsnips are fine to leave in the ground, covered with a pile of dead leaves or a thick layer of straw if I want any hope of digging them during the winter. Otherwise they can be dug in spring, after the winter cold has made them sweeter.The link below is a 5-page handout from the University of Wisconsin which lists types of foods, their ideal storing temperature and any necessary humidity, expected length of storage, and plans for creating your own root cellar.

http://nchfp.uga.edu/how/store/wisc_vegetables.pdf

What will you store this year?


Picture
0 Comments

Santa Rosa Plum Gelato

8/16/2014

1 Comment

 
Picture
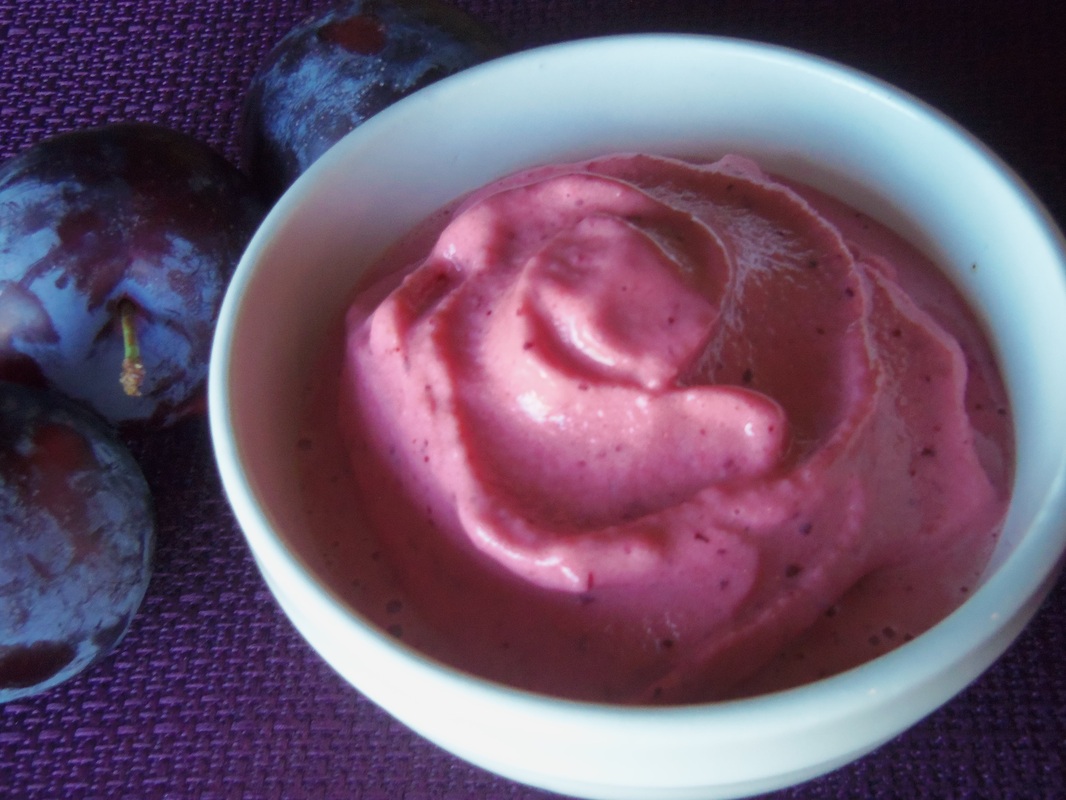
Santa Rosa plums are dark on the outside, often with a bluish hue that rubs off, ruby-colored inside, and explode with sweet juice when you bite into a fully ripe one.  They are apparently highly prized, which is nice for me, because my 3-in-1 plum tree is about half Santa Rosa.  They tend to ripen pretty much at once, which means we have only about a two-week window for eating them fresh, and need to be quick about canning, drying, making jam, or otherwise using them.  

Gelato usually uses milk instead of cream, and sometimes fewer egg yolks, as well.  If you use whipping cream in place of the milk, you'll have plum ice cream instead.  You can triple this batch if you really, really want to pull out your ice cream maker, but this smaller batch can be made using a high-speed blender. It's lightly sweet, with just enough brightness from the fruit, and full of flavor.  And yes, you may use other types of plums.  The color may or may not be the same, though, depending on the variety you use.  If you can't have eggs, you could thicken the milk with 1 Tbsp. cornstarch instead, but it won't be as creamy.

One pound of plums can mean anything from 4-10 plums, depending on their size.  If yours are small, ping-pong-ball sized, you'll need about ten.  If they're big ones, 2 1/2" across or so, you'll likely need only 4-5.  Either way, the goal is to end up with about 1 3/4 c. puree.

Santa Rosa Plum Gelato
Makes about one quart

1 lb. Santa Rosa plums
1/8 tsp. almond extract, optional but delicious!
1/2 tsp. vanilla extract
1 c. whole milk, divided (dairy-free options include almond milk, rice milk, or coconut milk)
2 egg yolks
pinch of salt
1/2 c. sugar

Wash plums and remove stems.  Remove pits; you'll to cut them out.  Drop the pitted plums into a high-speed blender, add almond and vanilla extracts, and blend until smooth.   Pour into two empty ice cube trays.  Pour 1/3 c. of the milk into the blender and swish it around to get more of the puree; pour this into the ice cube trays as well.  Put them in the freezer.

Combine the two egg yolks, salt, and the sugar in the unwashed blender.  Heat the remaining 2/3 cup milk in the microwave for 1 minute, until steaming.  Meanwhile, turn the blender on to beat the yolks and sugar.  With the motor running, pour the hot milk in a thin stream into the yolks.  Once it's all in, increase speed to high, and run about two minutes, until the custard thickens slightly.  It will begin to coat the blender sides with a slightly thicker, opaque coating, and the mixture will steam quite a lot.  

Pour the custard into a container with a lid; refrigerate. Wash the blender; there's not much more unpleasant to wash off than dried egg yolk!

3-4 hours later, pull both the now-frozen puree and the now-chilled custard out.  Pour the custard into the (washed!) blender, add the puree cubes, and blend, using the plunger handle to get them to mix.

The gelato will be a soft-serve consistency.  If you want to be able to form round scoops, pour in a container and return to the freezer for another 1-3 hours.

1 Comment

Plum Pudding

10/1/2013

0 Comments

 
Picture
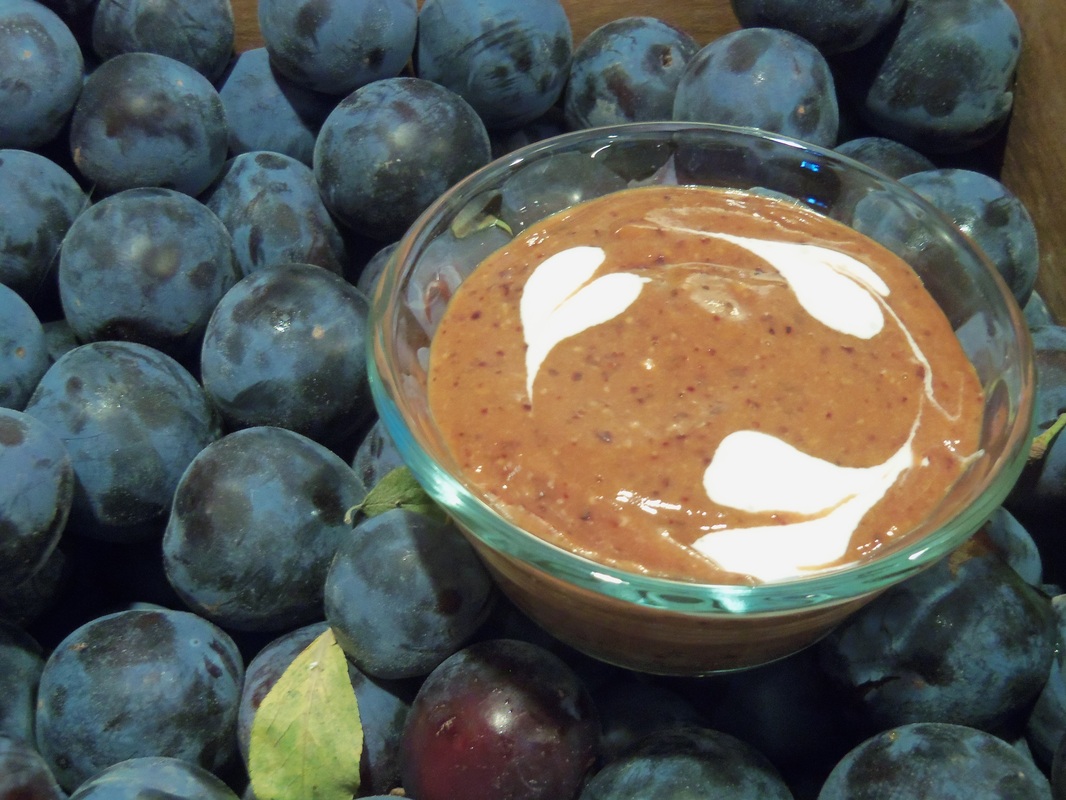
No, it's not that Plum Pudding from past centuries, the kind that has more in common with bread pudding.  

This is what we modern folks call pudding- a thickened, creamy, sweetened mixture.

As you can see, I have an abundance of plums right now.  This used up a bunch of them!

Plum Pudding

about 1 1/2 lbs plums
1/2 cup milk or cream
one 3.4-oz package instant pudding- vanilla, lemon, or butterscotch flavor (the size that calls for 2 cups of milk)
optional: 1/2 tsp. cinnamon, ginger, and/or cardamom

Wash plums and remove the pits.  Put them in a blender or food processor, run on high until smooth.  If you don't have three cups of puree, add a few more plums until you do; blend again.  Pour into a medium-sized bowl.  Pour 1/2 cup milk or cream into the blender or food processor bowl, swish around so the milk gets most of the puree off the sides.  Pour this into the bowl with puree.  Add the pudding powder and whisk for two minutes. Taste to see if it's sweet enough for your taste; some plums are sweeter than others!  If not sweet enough, stir in 1 Tbsp sugar and taste again.  Repeat as needed.  :)
Let rest for a few minutes to set up.  

Makes about 4 cups.

Garnish with a bit of sour cream if you like.
0 Comments

Summery Fish and Vegetable Bake

9/2/2013

0 Comments

 
Picture
Can you tell it's zucchini and tomato season?  I've wondered before why so many recipes combine those two vegetables.  I now suspect that it's partly because the plain zucchini excels at tasting like whatever you cook it with, and very few things can top a fresh garden tomato in the flavor department.  This recipe also uses any mellow white fish, probably for the same reason.  The other ingredients both perk up and round out the flavor.  This one's a keeper.

Baked Fish and Vegetables

4 Tbsp. butter, softened
3 garlic cloves, minced
1 Tbsp. lemon juice
1 tsp. grated lemon zest or 2-3 drops lemon essential oil
1 lb. zucchini or summer squash,sliced 1/4" thick
1 lb. tomatoes (3 medium), sliced thin, OR cherry tomatoes, halved
1/2 c. minced fresh basil or 1 drop basil oil
salt and pepper
1 1/2 lbs. mild white fish 
2 Tbsp. white balsamic vinegar*

Preheat oven to 450 F and move an oven rack to the lowest position.  Mix together the butter, minced garlic, lemon juice, and zest.  If using basil oil, add it to this mixture.  Rub a little of the butter mixture on the bottom of a 9x13 pan.

Put the zucchini slices in the bottom of the 9x13 pan; add the tomatoes in a second layer.  Sprinkle with salt and pepper and with half of the basil (unless you used basil oil).  Pat the fish dry with paper towels, then place the fish on top of the tomatoes.  Dot the butter over the top, add the rest of the basil, and drizzle with the vinegar*.  Cover tightly with foil; bake about 20 minutes, or until the fish flakes when you twist a fork in it.  Serve immediately.

Serve over rice to pasta to soak up the delicious sauce!

*The original recipe, from America's Test Kitchen, calls for 1/4 cup dry white wine.  I don't cook with wine, so the white balsamic is what I found in my pantry to add the savory flavor.  Since it's strong, I used only half as much (2 Tbsp. instead of 1/4 c.).  If you have neither, chicken broth and a splash of soy sauce would give a similar depth.
0 Comments

Lemon-Summer-Squash Bread

8/1/2013

0 Comments

 
Picture
Everyone knows you can make bread with zucchini- but what if you have a giant yellow summer squash hiding in the garden?

Both zucchini and yellow squash-- either straightneck or crookneck-- are summer squash, with a similar flavor and texture, and CAN be interchanged in recipes.

My family's favorite quickbread is Lemon Zucchini Bread- so today we got Lemon-SummerSquash Bread.  I no longer shred zucchini -or this squash- for recipes, but puree it instead.  No more strings.  As a bonus, if I'm freezing some for later use, the texture does not change when thawed, unlike shredded squash.  

AND, if you're pureeing it, you can have the blender (or food processor) mix all the wet ingredients for you.

This bread is great for breakfast.

The recipe is found over here, though the blender method is below. 
0 Comments

Baked Peaches with Raspberries

7/23/2013

0 Comments

 
Picture
There's nothing like fresh fruit in the summer, warm off a tree, juice dripping down your chin.  
However, if you want a little variety with summer's luscious bounty, here's something simple yet delicious.  It's best with fruit from the farmers' market or your own trees, but supermarket fruit will do in a pinch, though you'll want to add about 5 minutes to the baking time and maybe add an extra tablespoon of brown sugar.

Baked Peaches with Fresh Raspberries
4 ripe peaches or nectarines
1-2 Tbsp. brown sugar (1 Tbsp. for very sweet, ripe peaches)- or use 1 Tbsp. honey
1 Tbsp. sour cream, vanilla yogurt, or good-quality balsamic vinegar
a handful of fresh raspberries (about 1 1/2 ounces, or 1/4 cup)

Turn on oven to 400 degrees F.  Spend the next five minutes washing, drying, then halving and removing the pits from the peaches or nectarines.  Set the peach halves on a baking sheet, then sprinkle with brown sugar.  Pop them into the still-heating oven and set a timer for 15 minutes.  You want them to be warmed through, just starting to soften a little, and for the brown sugar to be melted.  Set the oven to broil, and put the peaches on the highest rack in the oven for ONE minute.   Remove from the oven.

Stir the sour cream or yogurt with just enough water to make it a drizzling consistency, or use the balsamic straight.  Drizzle over the top, then add raspberries.  Eat while warm, spooning the juices from the bottom of the baking dish over the topl
0 Comments

How to get that weeding done!

5/29/2013

0 Comments

 
Picture
Pull weeds while you’re talking on the phone- better yet, while you’re on hold.  Yesterday I managed to get the above bed completely weeded, plus another one (3x50) while waiting to speak to a real human on the phone.  

 Go for a walk or a run outside; when you’re, do your stretches next to something that needs weeded.  Hey, if you’ve gotta bend over anyway, you might as well make your hands useful!

Pinch little weeds out as soon as you can identify them.  This is a bit of a change from what I used to do, pulling them out as soon as they appeared.  Years ago a wise neighbor pointed out all the volunteer perennials in her flower beds… and changed forever how I weed.  Instead of indiscriminately pulling every seedling in the bed, now I only pull when I know what it is.  This isn’t as hard as it seems; 90% of the weeds in my yard are one of the same nine or ten plants.  Figure out what your common weeds are, and learn to identify them as small as possible.  If you don’t know what it is yet, let it grow until you do.  There are only a few plants that will spread horribly if you wait- and you’ll be able to identify those pretty quickly.  Generally speaking, most plants spread only once they’ve flowered and set seeds.  You’ll get a lot of pleasant surprises by weeding this way; right now close to 1/3 of the flowers in my yard are volunteers!  I’ve even had bushes and trees free this way.

Use weeding time as one-on-one time with a child. Let them tell you about their day, or their new project, or the book they've been reading, or whatever else.  I have great memories of fixing barb-wire fences on our farm because of this- it meant time to talk with my dad.

Spend time in your yard, in all parts of the yard.  You’ll better notice what needs done.  And you’ll enjoy it much more than from indoors!  Another neighbor told me to have a place to sit somewhere on each side of the house.  Sit and read, or watch the kids, watch the sky, watch the bugs, whatever brings you joy.  Gather a bunch of fresh flowers for a vase every couple days.  Enjoy those efforts!

0 Comments

Cooking with Watermelon Rind

8/14/2012

0 Comments

 
Picture
Crab Salad - with watermelon rind!
To go along with last week's post on cutting a watermelon, here's something to take it a little farther!

 Most everyone has seen recipes for watermelon rind pickles- but is the rind edible for anything else? 

YES!  And since it can make up 25-45% of the total melon weight, eating it makes your money go further.

You can even eat the green part, though it's tough.  I prefer removing it.  If you use it, at least make sure it's been washed.  It is, after all, the part that was sitting on the ground and then handled by everyone else. 

The lighter green part can be eaten fresh, or cooked.  It has a high water content, a good fiber content, and a little Vitamin C and Vitamin B-6.  It also has a compound that converts to the amino acid arginine, and current research indicates it may help relax blood vessels.   When fresh, it's somewhat like a really firm cucumber.  You can use it in place of cucumbers, chopped apples, fresh zucchini, or celery.  It doesn't have as much flavor, so if that matters, you might want to increase any flavorings or spices in the recipe.  For instant, if you use watermelon rind in place of celery, it would be tasty to add a little celery seed or celery salt.  If you use it in place of apple, you might want to add a little honey and lemon juice. 

When it's cooked, it resembles (cooked) zucchini or apples.  There's a recipe for a watermelon rind stir-fry at Allrecipes.  Or maybe try Watermelon Boats on the Grill (substitute a slab of rind for a half zucchini.) What else could you use it in?  Think about all the recipes you use zucchini or yellow summer squash, apples, celery, cucumber, or other bland vegetables.   There is actually an entire website devoted to watermelon rind recipes!  It's -what else?- WatermelonRind.com   A friend of mine made the Watermelon Rind KimChee and loved it.  (seehere for a follow-up post on it.)

Meanwhile, here's something from my house the other day- I didn't have celery for my pasta salad, so instead threw in some diced watermelon rind!  I weighed the melon and its parts: out of a 16-lb watermelon, 4.5 lbs of its weight was rind.  Just so you know.

Crab/Krab Salad

1 lb. seashell pasta
2-3 Tbsp. pickle juice or cider vinegar
2 Tbsp. vegetable oil (I prefer olive oil or coconut oil)
1 lb. crab or imitation, flaked
1/2 onion, chopped or pureed (for kids!)
1-2 c. grapes
1-2 c. chopped watermelon rind (OR use cucumbers or celery)
3/4 tsp. salt
pepper to taste


Cook and drain the pasta.  Add pickle juice or vinegar, along with the oil, to the hot pasta (it soaks in better, resulting in better flavor.)  Add crab, onion, grapes, watermelon rind, and salt.  Stir well, add pepper to taste, and add more salt if you want it.

Cover and chill.
0 Comments

Pruning forsythia or lilac bushes

4/9/2012

0 Comments

 
Picture
If you have a forsythia bush in your yard, you’ll need to prune it each year to keep it from turning into an overgrown tangle.  The best time to do this is right after it blooms.   You can prune it any time of year, but you’ll get fewer blossoms this way.  Blossoms form on ‘old’ wood, which is what gardeners call what was there during the previous summer and fall.  

If your bush is terribly overgrown already, you can cut the entire bush nearly to the ground.  About four inches is a good amount to leave behind; it will grow new, flexible branches during the summer and fall, and by the next year, it will be looking good again.  If the bush doesn’t need that much help, just cut the oldest branches off as close to the ground as you can.   Also cut out any broken or damaged branches, as well as any that cross and rub each other.  Ideally, you’ll remove about ¼ to 1/3 of the branches each year.

Lilacs can be treated the same way; these flowers also bloom on  one-year-old wood.  Cutting an old one nearly to the ground works to rejuvenate it in a hurry.  If you don’t much mind waiting a little longer, start by cutting out any branches thicker than 2”.  The ideal is to have 8-12 branches of different ages; you’ll get the most blooms that way. This also means you don’t need to prune much during its first few years.  Almost any shrub that blooms in spring, bloom on ‘old wood’.  Other shrubs that bloom on old wood, and so do best if pruned right after blooming, include big-leaf hydrangea, English holly, flowering quince, some clematis, some roses (old varieties), and most climbing roses.

Related posts:

Will Frost Damage Wipe Out My Tree Fruit?

How to Prune and Fertilize Fruit Trees, shrubs, and landscape trees

Selecting and Using Inorganic Fertilizers

Fertilizing Fruit Trees

Understanding Fertilizer, Knowing Your Backyard Weeds, and free cooking e-books

0 Comments

April Fools Day Cake- Sauerkraut Cake (really!)

3/22/2012

2 Comments

 
Picture
Apparently this was a popular cake for April Fools' Day back in the 1960's.   It tastes nothing like sauerkraut, and any bits you find in the cake resemble coconut.  (The white bits you see in this photo are hazelnuts I threw in.) The sauerkraut gives moisture to the cake, just like adding shredded carrots or zucchini would.   My mom is already planning to make this with just plain shredded cooked cabbage.

   I haven't tried the frosting recipe that comes with it; I was out of mayonnaise, and made a whipped ganache instead (8 oz. chocolate melted into 8 oz. whipping cream, cool to room temperature and whip it).  I imagine the mayo version tastes quite a lot like the chocolate-sour cream frosting I've had before- a little tangy and really delicious, only this recipe also calls for coconut and pecans....  mmm.


Chocolate Sauerkraut Cake

12 tablespoons (1 1/2 sticks) unsalted butter, softened
1 1/2 cups sugar
2 cups all-purpose flour
3/4 cup Dutch-processed cocoa powder
1 teaspoon baking powder
1 teaspoon baking soda
1/4 teaspoon salt
1 cup water
3 large eggs, room temperature
1 teaspoon vanilla extract
1 1/2 cups sauerkraut, rinsed and drained
1/2 cup chopped pecans or other nuts

Preheat oven to 350 degrees.  Grease and flour three 9" cake pans. Cream together the butter and sugar until fluffy.  In a separate bowl, combine the flour, cocoa powder, baking powder, baking soda, and salt.  Mix half of this into the sugar mixture.  Add 3/4 c. of the water, beat in, then beat in the rest of the dry ingredients.  Beat in the eggs and vanilla until well combined.  Fold in the sauerkraut and pecans, using a spoon or spatula.  Bake about 25-35 minutes, until a toothpick inserted in the center comes out clean.  Cool in the pans for 10 minutes, then remove from pans and cool completely on a rack.

Frosting

2 cups semisweet chocolate chips, melted (one 11-12 oz. bag)
2/3 cup mayonnaise
2/3 cup sweetened, shredded coconut
2/3 cup pecans, chopped

Whisk together the melted chocolate and the mayonnaise.  Set aside 2 cups of this.  Add 1/3 cup each of coconut and pecans to the remaining frosting to make the filling. 

Spread half of the filling on one cake layer, top with another cake layer, spread with the other half of filling, and put the last layer on top.  Frost the whole cake with the reserved 2 cups of frosting.  Press the last 1/3 cup each of coconut and pecans into the sides of the cake.  Refrigerate until time to serve. 

See here for another way to decorate and serve this cake!
2 Comments

Bring spring into your house!- forcing blooms

3/3/2012

0 Comments

 
Picture
Branches of some plants can be ‘forced’, or made to bloom indoors before they’d bloom outdoors.  Good ones for this include forsythia (pictured), pussy willow, quince, spirea, flowering crab apple, flowering cherry, lilac and dogwood.


-Cut the stems at a 45 degree angle to improve the stem’s ability to uptake water.  To help this even more, make some vertical splits on the bottom 1” of the stem; smashing that part with a hammer will do the same thing. 
-Put  the stems in a vase of water right away, trimming off any buds that would be below water level; they make the water spoil faster.
-Keep it out of direct sunlight, and change the water every 2-3 days so it doesn’t grow bacteria.  You could also use flower preservative (still changing the water at least once a week); a homemade version is below. 

The flowers should bloom in about three weeks, depending on how close to blooming they were when cut.  If you cut them about a week before normal bloom time, they’ll only take 2-3 days to bloom inside.

Picture
To learn when to prune a forsythia (or other spring bloomers), see the post from 04/09/12, Pruning Forsythia or Lilac Bushes.
0 Comments

Roasted Vegetable Gratin, Fresh Tomato Salad

9/7/2011

1 Comment

 
Picture
Do you have summer squash and tomatoes coming out your ears?  This is a delicious way to use quite a bit of that summertime produce- zucchini and yellow squash baked with caramelized onions and sweet roasted tomatoes.  You can use 2 lbs of any summer squash, but the green and yellow here are pretty together.

Normally a dish like this would be soupy, since these high-water-content vegetables lose moisture as they cook.  These are salted while raw; the salt draws out water.  This makes a big difference.

Two 6-8" long zucchini equal about one pound.

Vegetable Gratin
1 lb. zucchini, sliced 1/4" thick
1 lb.  yellow summer squash, sliced 1/4" thick
2 tsp. salt
1 1/2 lbs. ripe tomatoes (3-4 large ones), sliced 1/4" thick
2 medium onions, halved then sliced thin pole to pole
3/4 tsp. black pepper
5 Tbsp. olive oil
2 cloves garlic, minced (or 1/2 tsp. garlic powder)
1 Tbsp. fresh thyme leaves (1 tsp. dried)
1/4 c. chopped fresh basil

Toss zucchini with 1 tsp. of the salt; put them in a colander over a bowl.  Let stand 45 minutes or until at least 3 Tbsp. liquid drains off.   Put the tomato slices on paper towels or a dish towel, sprinkle with 1/2 tsp. salt; let stand for 30 minutes.  Put another towel or paper towels on top of the tomatoes to press them dry.  Pat squash dry with a dish towel or paper towel. While the vegetables are all draining, brush a 9x13 pan with 1 Tbsp. of the olive oil, set aside.  Heat oven to 400 degrees.  Heat 1 Tbsp. oil in a 12" skillet over medium heat.  Add onions, 1/2 tsp. salt, 1/4 tsp. pepper.  Cook, stirring once in a while, until onions are caramelized: soft and dark golden, 20-25 minutes.  Set aside.

In a small bowl, combine garlic, the remaining 3 Tbsp. oil, 1/2 tsp. pepper, and thyme.  When the zucchini is drained and patted dry, toss the squash with half of the oil mixture.  Spread the squash along the bottom of the 9x13 pan.  Arrange onions on top, then put tomatoes on in a single layer, overlapping if needed.  Drizzle the rest of the garlic oil on top.  Bake about 40-45 minutes, until tomatoes start to brown on the edges.  Increase oven to 450 degrees.  Make the topping, below, and bake 10 minutes or until topping is lightly browned.  Sprinkle with basil and let sit 10 minutes before serving.

Topping:
1 Tbsp. olive oil
1 slice white bread, shredded or crumbled (food processor or blender works well)
2 oz. shredded Parmesan cheese (1 cup)
2 shallots, minced (1/4 c.- or use a mild onion)
 
Stir together.

Picture
Cherry Tomato Salad

4 cups halved cherry tomatoes
1/2 tsp. salt
1 Tbsp. olive oil
1-3 Tbsp. balsamic or other vinegar
2 garlic cloves, minced (or 1/2 tsp. garlic powder)
1 Tbsp. chopped or torn fresh basil (or 1/2 tsp. dried)
1/2 c. shredded Asiago or Parmesan (or use a cubed mild cheese, up to 8 oz)
2 slices good-quality bread, cubed (optional to use, and best if stale)
1/2 c. halved olives

Sprinkle tomatoes with salt and put them in a colander or on some paper towels.  Let sit 30 minutes to drain juices.  Pour them off (great added to salad dressing, soup, or cornbread batter).  Toss all ingredients together, add salt and pepper to taste. 
To meld flavors and soften the bread, it's best if it sits a couple hours in the fridge; or serve immediately.

1 Comment

Carrots and Carrot Tops

9/6/2011

3 Comments

 
Picture
Yesterday as I dug carrots and enjoyed the slightly spicy aroma of the roots and greens, I started wondering if carrot tops are edible.  They smell so nice… not that scent is an indication of edibility.  Still, carrots are in the same family as parsley, dill, and fennel, and we eat those leaves.  On the other hand, a couple of other plants in the Apiaceae family are poisonous; Poison Hemlockand Water Hemlock are two that come to mind, though the whole plant is deadly with both, not just the leaves or root.  So what’s the case with carrot tops?

According to what I found from several sources online, the tops are edible.  I guess we don’t eat them much because we store carrots without their leaves, which are much more perishable.  As with almost any other food, keep in mind that you may personally be allergic to them; this may show up as photodermatitis (skin becomes red or irritated when exposed to light).  If you grow them yourself, you probably don’t have any pesticides to worry about eating; wash store-bought tops thoroughly.

One carrot farmer says he thinks the flavor and bitterness of the tops nicely balance the sweetness of the roots.

They’re said to be high in Vitamin K, as well as chlorophyll (obviously, since they’re green)

Vitamin K is a fat-soluble vitamin (you need to eat fat at the same meal- or with it- to access the vitamin) and is important in blood coagulation (forming scabs and avoiding hemorrhaging, including heavy menstrual bleeding) and bone growth and maintenance, as well as other helpful actions.

Chlorophyll appears to fight the growth of tumors, as well being as a good cleanser for lymph nodes, adrenal glands, and for purifying blood.

One article I found says a tea made of carrot tops is good for getting rid of intestinal worms or parasites, and juiced tops are antiseptic, good for mouthwash.  Mashed tops, or the carrots themselves, can be mixed with honey and applied to festering wounds.

To eat carrot tops, try them:
- as a substitute for parsley in any recipe
-added to a green salad
-chopped and cooked with other vegetables or rice dishes
-added to a ‘green drink’ or smoothie- though go easy on this
-as the base for a pesto (add some honey to balance the bitterness), or sautéed with bacon and garlic

Extra tidbits about carrots (the roots):

-The Dutch grew carrots specifically to feed to their dairy cows.  The country became famous for having the richest yellow butter as a result.
-Carrots have only been well-known in the USA since about the time of WWI.
-Carrots have the second-highest natural sugars of any vegetable, at 7% sugar.  Beets score #1.
-Carrots were included in puddings and cakes in the 1600-1800’s to sweeten them.
-Carrot tops were a fashionable hat decoration in the 1600’s, used as feathers were.  I love carrot greens and carrot flowers in arrangements in a vase, too.
-Many of the carrot’s minerals and nutrients are found in or just under the skin.  In other words, they’re more nutritious if you don’t peel them.

And that bit you’ve heard about the Vitamin A in carrots improving your eyesight?  My husband munches on carrots at work every day.  Last time he went to the optometrist, he discovered his eyesight had gone from 20/30 to 20/20.   Like everything else, though, don’t overdo it. Too much of anything can cause problems.

 
So, eat those carrots.  The tops, too!

For more information, see carrotmuseum.com,
http://www.carrotmuseum.co.uk/carrotops.html, 
wikipedia,
http://www.vegparadise.com/highestperch412.html 

To read more about alkaloids and toxins in 'normal' foods:
http://en.wikipedia.org/wiki/Alkaloid
Natural Food Toxins
Natural Toxins in Raw Food and How Cooking Affects Them


Picture
3 Comments

The One-Hour Bench

7/5/2011

0 Comments

 
Picture
Simple, quick, and a nice size to use almost anywhere.

An old gardening neighbor, years ago, told me, "Make sure you have a place to sit on every side of your house, to enjoy your yard and nature."  This is a cheap and quick way to help with that.

Last week there was a baby shower at my house.  In addition to my kitchen-table chairs, I have about four folding chairs, which clearly wasn't going to cut it for the 43 who were invited.  What to do? 
About a week before the party, I happened to be flipping through the January/February 2011 issue of Fine Gardening magazine. (Reviews here, cheapest here.)
The magazine had instructions and photos for a “one hour bench”.  It looked very simple, and I have a big pile of old boards sitting around, so I decided to build three.  We didn't have exactly the right size boards, but made do.  For instance, the top is supposed to be made of two 2x8's.  I had 2x4's and 2x10's, so I used one of each.  It was time my 13-y-o learned how to build something.  He pulled out the table saw, then measured and cut with me.  (In hindsight, a chopsaw or circular saw would have been simpler.) I put the first one together while he watched, then he built the other two.  Afterwards, he and a younger son painted on some stain/sealer.  The only thing I had to buy for the project was the screws.  Very nice.

So does the bench really only take one hour?  Well, that depends. The magazine gave a list of what wood you needed, cut to which lengths.  If you went to Lowe’s, and had them cut it for you (which they will), and your wood was already cut, then YES, even a newbie could have this together in under an hour.  You might even get the stain on in that time.


So how did having the benches work out?  Well, they look great, are sturdy, and have been sat on a couple  times, by my kids.  The weather didn’t allow for us to be outside last-minute.  I borrowed chairs from a neighbor to use indoors.  Oh well. 

Picture
Upside-down, so you can see how it's assembled.  The 2x2's are the white boards here, sitting flush inside against the legs.  Use two screws to connect the 2x2's to the legs.  Then use four screws to go through the bottom of the 2x2's into the seat boards. 
This way, you have no screws showing on top. 
The 1x6's are connected to the bench by screwing them to the sides of the legs, 2 screws each side of a leg.  This makes a huge difference in the stability of the bench.

For a similar bench, see here or here.  If this isn't what you want, try 'the mega-guide to free garden bench plans'.  Some of the links don't work anymore, but it still has a lot to offer.

Materials list:

1x6 boards, 2 each 4 feet long, ends cut at 45 degrees, for the side reinforcement

2x12’s, 2 each 16 inches long, for the legs

2x2’s, 2 each 11 ¼ inches long, for inside reinforcement

2x8’s, 2 each 4 feet long, for the seat

12  2 1/2 –inch galvanized decking screws, to go in the 2x2's

8    1 ¾ -inch galvanized decking screws, to go in the 1x6's

Stain or sealer, if you want.

0 Comments

Preparing For- and Handling- Trials; Strawberry Leather; Group Orders

5/28/2011

0 Comments

 
Picture


Have you found good deals on strawberries?  Or are your plants starting to produce them?  We love to make and eat strawberry leather, though I often mix strawberry puree with applesauce or any other mashed fruit, to make the strawberries go farther.  For a simple way to make fruit leather, see http://www.theprovidenthomemaker.com/1/post/2010/11/what-to-do-now-in-the-garden-fruit-leather.html

___________________________ 

If you’re in the Salt Lake valley, I just learned about a lady who puts together group orders every month; she lives just a mile down the road from me.  The prices are great, and the food is good quality.  It comes from a Utah/Idaho farmers’ co-op; most of the items are even organic.  Her website is http://www.organicemily.com 

____________________________

The following excerpts from an article are from Ezra Taft Benson, published in the Ensign magazine, January 1974, entitled “Prepare Ye”.  He repeats D&C 38:30 three times in it (“if ye are prepared, ye shall not fear”), and this talk has been extensively quoted.  It contains at least 12 segments I’ve quoted or heard quoted.  Read through the talk, and see how many pieces of it you’ve heard before.


Here are some excerpts:

“In Matthew, chapter 24, we learn of “famines, and pestilences, and earthquakes. …” (Matt. 24:7.) The Lord declared that these and other calamities shall occur. These particular prophecies seem not to be conditional. The Lord, with his foreknowledge, knows that they will happen. Some will come about through man’s manipulations; others through the forces of nature and nature’s God, but that they will come seems certain. Prophecy is but history in reverse—a divine disclosure of future events.

Yet, through all of this, the Lord Jesus Christ has said: “… if ye are prepared ye shall not fear.” (D&C 38:30.)

…At the April 1937 general conference of the Church [of Jesus Christ of Latter-Day Saints], President J. Reuben Clark, Jr., of the First Presidency, asked: “What may we as a people and as individuals do for ourselves to prepare to meet this oncoming disaster, which God in his wisdom may not turn aside from us?” President Clark then set forth these inspired basic principles of the Church welfare program:

“First, and above and beyond everything else, let us live righteously. … Let us avoid debt as we would avoid a plague; where we are now in debt, let us get out of debt; if not today, then tomorrow.  Let us straitly and strictly live within our incomes, and save a little.

“Let every head of every household see to it that he has on hand enough food and clothing, and, where possible, fuel also, for at least a year ahead. You of small means put your money in foodstuffs and wearing apparel, not in stocks and bonds; you of large means will think you know how to care for yourselves, but I may venture to suggest that you do not speculate. Let every head of every household aim to own his own home, free from mortgage. Let every man who has a garden spot, garden it; every man who owns a farm, farm it.” (Conference Report, April 1937, p. 26.)

…There are blessings in being close to the soil, in raising your own food, even if it is only a garden in your yard and/or a fruit tree or two. Man’s material wealth basically springs from the land and other natural resources. Combined with his human energy and multiplied by his tools, this wealth is assured and expanded through freedom and righteousness. Those families will be fortunate who, in the last days, have an adequate supply of each of these particulars.”

…  “Healthful foods, proper rest, adequate exercise, and a clean conscience can prepare us to tackle the trials that lie ahead.”

0 Comments

Understanding Fertilizer, Knowing Your Backyard Weeds, and free cooking e-books

5/13/2011

0 Comments

 
Picture
What is this weed? 

Learn from a free, full-color weed guidebook online.

Photo courtesy USU Extension

One of the secrets to good gardening is knowing what you're dealing with.  This applies to pests, soil, weeds, fertilizers, plants, growing seasons, and more.  This week I found two great resources to help you with a couple of these.  I'm especially excited about a guidebook, Common Weeds of the Yard and Garden, from the USU Extension office.  It's a FREE, 220-page guide with photos, plant descriptions, information on how to manage the weed, and any historical uses it has had, whether medicinal or edible.  If you want a hard copy, either print it out yourself, or contact the USU Extension Office.  Their information is included in the guidebook.

In case the link above deoesn't work, you can get it at http://extension.usu.edu/files/publications/publication/Horticulture_Weeds_2011-02pr.pdf

Understanding Fertilizer  is a quick-to-read, one-page article about the basics of fertilizers. 

And just for good measure, here is a l
ist of 50+ free cooking/baking e-books from
The Prepared Pantry
http://www.preparedpantry.com/Free-cooking-baking-recipe-e-books.htm 

Did you know the plant in the photo above?  It's Common Mallow.  My kids call the little round seeds "cheesies" and love to eat them.  Every part of this plant is edible, and the 'cheesies' can even be used to make meringue and marshmallows. (There are recipes for these in Edible Wild Plants, by John Kallas.  He also has a website, http://www.wildfoodadventures.com)

Have a happy day!

0 Comments

Will frost damage wipe out my tree fruit?

4/29/2011

1 Comment

 
Picture
photo credit: USU Extension
At this stage of bloom, 28 degrees will kill about 10% of your blossoms, 25 degrees will destroy about 90%.  Apples can still produce a full crop with only 10-15 % of the buds surviving.  Find out more, including how to protect your future fruit, below.

Do you have fruit trees in your yard?  Apple, pear, peach, nectarine, apricot, plum, or cherry?

Did you know that freezing temperatures won't necessarily knock out all possibility of getting a crop? 

And 32 degrees is not the death-knoll for apple blossoms.

The damaging temperature is different, too, if  your trees are almost ready to bloom versus being in full bloom.

The Utah State University Extension office recently published a chart with full-color photos of different bloom stages.  It tells what temperatures to watch out for.  It can be found here. 


So what can you do to protect your crop?  Farmers sometimes put out big propane heaters, but most homeowners don't have these on hand.

Two simpler suggestions: cover, or water.

They work on the same principle; to give some insulation to the blossoms. 

Way #1: If your tree is small, throw a sheet or blanket over it.  This should keep your tree maybe 5-10 degrees warmer than the surrounding air.

Way #2: - what my parents have always done-  turn on a sprinkler, set it so the water is hitting your tree.  Leave it on overnight.  The water will freeze, forming a layer over the blossoms.  The ice stays at 32 degrees, which means your blossoms stay at 32 degrees.  Niceice blanket.   No bloom kill.    Go easy on the water, though; you don't want to add so much (ice) weight that the branches start to break.

You can use this to extend your growing season in fall, too; protect your garden from an early freeze.

If you haven't planted your trees yet, consider putting them on a north slope.  The soil and air are cooler there, so the trees will bloom later.  When it's safer.
Just make sure they will get at least 6-8 hours of sunlight a day.  That's required for good fruit production.

1 Comment
<<Previous

    Need a Search bar?
    One day I may upgrade my website-- but until then, use your web browser search bar. Type in my web address and what you're looking for, like this-- 
    www.theprovidenthomemaker.com  pumpkin --  and you should get results.


    Author

    I'm a disciple of Christ, a member of the Church of Jesus Christ of Latter-day Saints, a family-defending, homemaking, and homeschooling mom of eight children, two of whom sometimes can't have milk or wheat. Growing up on a farm in a high mountain valley, my parents taught me to 'make do', work hard, smile, and help others.  I love cooking, learning, growing food and flowers, picking tomatoes, and making gingerbread houses --which CAN be made allergy-friendly-- with my children.  I hope you find something to help you on my site!

    Archives

    April 2024
    July 2023
    April 2022
    September 2021
    March 2021
    December 2020
    April 2020
    March 2020
    February 2020
    January 2020
    December 2019
    November 2019
    October 2019
    September 2019
    August 2019
    July 2019
    June 2019
    May 2019
    April 2019
    January 2016
    November 2015
    October 2015
    September 2015
    March 2015
    February 2015
    November 2014
    October 2014
    September 2014
    August 2014
    July 2014
    June 2014
    May 2014
    April 2014
    March 2014
    February 2014
    January 2014
    December 2013
    November 2013
    October 2013
    September 2013
    August 2013
    July 2013
    June 2013
    May 2013
    April 2013
    March 2013
    February 2013
    January 2013
    December 2012
    November 2012
    October 2012
    September 2012
    August 2012
    July 2012
    June 2012
    May 2012
    April 2012
    March 2012
    February 2012
    January 2012
    December 2011
    November 2011
    October 2011
    September 2011
    August 2011
    July 2011
    June 2011
    May 2011
    April 2011
    March 2011
    February 2011
    January 2011
    December 2010
    November 2010
    October 2010
    September 2010

    Categories

    All
    Alcohol
    Alternate Cooking
    Appearances
    Apple
    Apricots
    April Fools
    Aprons
    Bananas
    Beans
    Beef
    Beets
    Bench
    Beverages
    Bonnet
    Bread
    Breakfast
    Budget
    Budgeting
    Cake
    Candy
    Canning
    Carrots
    Cheese
    Chicken
    Children
    Chocolate
    Christmas
    Cleaning
    Coconut
    Comfrey
    Common Core
    Constitution
    Cookbook
    Cookies
    Cooking Oil
    Crafts
    Dairy Substitutions
    Dehydrating
    Dessert
    Dried Fruit
    Earth Oven
    Earthquake
    Easter
    Edible Weeds
    Eggs
    Emergency Prep
    Essential Oils
    Faith
    Family Home Evening
    Fertilizing
    Food Storage
    Fourth Of July
    Freezer
    Frosting
    Fudge
    Garden
    Gardening
    Gingerbread
    Gluten
    Gluten Free
    Gold
    Government
    Grains
    Gratitude
    Hat
    Herbs
    Home Remedies
    Home Repairs
    Homeschool
    Home Storage
    Honey
    Hope
    Inflation
    Leftovers
    Legumes
    Lemon
    Main Dishes
    Mixes
    Mothers
    Noah
    Non Artificial Colors
    Non-artificial Colors
    Nuts
    Oats
    Oil
    Orange
    Paint
    Peaches
    Pear
    Pie
    Pizza
    Plums
    Poem
    Popcorn
    Pork
    Potatoes
    Powdered Milk
    Prayer
    Preparedness
    Projects
    Prophecy
    Pruning
    Pumpkin
    Quick Bread
    Rhubarb
    Rice
    Salad
    Salt
    Sauces
    Self Reliance
    Self-reliance
    Sewing
    Shelf Life
    Shelves
    Sky
    Smoothie
    Snacks
    Soup
    Spices Or Seasonings
    Squash
    Strawberries
    Substitutions
    Sugar
    Summer Fun
    Three Month Supply
    Time
    Tomatoes
    Trees
    Truffles
    T-shirts
    Tuna
    Ultra Gel
    Valentine\'s Day
    Vegetables
    Water
    Watermelon
    Wheat
    Work
    Year Supply
    Zucchini

    RSS Feed

Web Hosting by iPage