The Provident Homemaker
  • Recipes and Info
    • Making Bread
  • My Blog
  • Favorite Resources
  • Documents and Files
  • 52 Weeks of Building Storage

Week 10- assignment, spreadable butter, and dairy-free 'butter'

6/15/2019

0 Comments

 
Your Week 10 assignment is another week of Buy for Three- within your weekly budget amount, look at your customized 3-month ingredient list, look through the grocery ads, and buy as many sale items as you need for that list.   

What do you have so far in your home? 

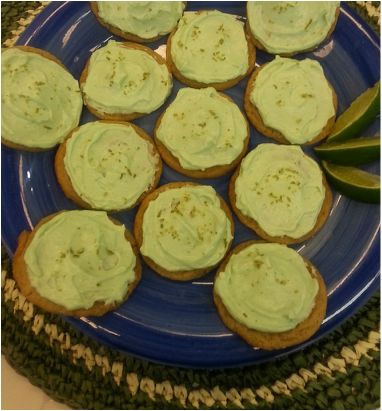
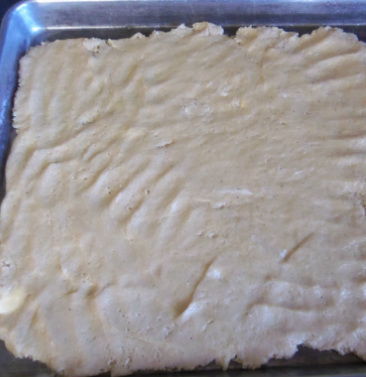
Here are a couple of budget-friendly recipes to help you free up more of your grocery money-

Spreadable butter
 
And for those of you who can’t have dairy, a recipe for dairy-free 'butter' that you can make at home! It’s spreadable, bakeable, and even makes good frosting. 
0 Comments

Creamy Lime Pie Cookies

9/18/2015

0 Comments

 
This is my new favorite cookie.  It is for this week, anyway.  My kids and I invented cookies for a bake-off at the state fair, and this is one of the results.  One of the others we made took first place, but this one is my personal favorite.    
Contests are funny things anyway:  you'd think the best-tasting item wins, but that's not necessarily the case.  First of all, "best taste" always depends on who's doing the tasting. Or the judging, in this case.  Secondly, cookies are given a score, and in this contest, only 40% of it is from how the cookie tastes.  30% is how attractive it ('and its surroundings) are, and 30% here was 'creativity', which, like taste, is very subjective.  

This cookie was dreamed up by a daughter who loves key lime pie, and wanted a cookie that tasted like it.  You'll have extra frosting; you can make a half batch, or it can be frozen, or used to frost cupcakes, or spread on graham crackers... or eaten on a spoon!
My friend who dislikes frosting, likes this  frosting.
Picture
Creamy Lime Pie Cookies 
Makes 2- 2 ½ dozen

Graham Cracker Sugar Cookie:

¾ c. granulated sugar 
½ c. butter or shortening or coconut oil
1 egg
1 tsp. vanilla
1 sleeve graham cracker, finely crushed (about 1 ½ c.)
½ tsp. salt
½ tsp. baking soda
1 c. flour
¼ c. limeade concentrate, thawed.

Heat oven to 375 degrees. Cream shortening and sugar, add egg and vanilla.  Add cracker crumbs, salt, and baking soda; beat well. Mix in flour. Drop by heaping spoonful on lightly greased cookie sheet.  Bake 7-8 minutes.  Let cookies cool two minutes, then brush with the limeade concentrate.  All of it should be gone once all cookies are brushed.  Cool completely before frosting generously with Creamy Lime Frosting.


Creamy Lime Frosting

1 cube butter
2 c. powdered sugar
1 ½ tsp. vanilla
1/16 tsp. salt
4 drops green food color, optional
¼ c. limeade concentrate, mostly thawed
8 oz. cream cheese, still cool, cut in 1” cubes

In a medium bowl, combine butter, powdered sugar, vanilla, salt, and green food color.  Beat until fluffy.  Add limeade concentrate and whip the mixture.  Add cream cheese, a couple cubes at a time, and beat until mixed thoroughly.  Beat on high until light and fluffy, but don’t overbeat or it will go runny.
Picture


0 Comments

Favorite Sugar Cookies

2/12/2015

0 Comments

 
Picture
To make cookie pops like the photo above, set the unbaked cookie on top of a craft stick before baking the cookies.  Be sure to cover at least 1 to 1 1/2 inches of the craft stick; press down gently on the dough.  

This recipe makes about two dozen, 3" round cookies.

Soft Sugar Cookies
1 stick butter (1/2 c.), softened
1 c. sugar
1 egg
1/3 c. buttermilk, kefir, OR sour milk (add 1 Tbsp. lemon juice to fresh milk to make 1/3 c.)
1 tsp. vanilla
1/2 tsp. baking soda
1 tsp. baking powder
1/2 tsp. salt
2 1/2 c. flour

Preheat oven to 375 degrees F.  Cream the butter with sugar; beat in the egg, buttermilk, and vanilla.  Combine baking soda, baking powder, salt, and flour; stir in to the other ingredients.  Grease or spray a cookie sheet.  

Put half the dough on a flour-sprinkled counter top.  Sprinkle a little flour on top to prevent your rolling pin from sticking, then roll about 3/8" thick.  Cut out with cookie cutters or canning jar rings.  (I used a ring from a regular-sized canning jar.)

 Bake for 7-10 minutes, depending on size and thickness, until  light golden brown on edges and underside.  Cool completely; frost with your favorite frosting if you like. 

This recipe also makes a great base for a Cookie Pizza.

Picture
To make the rose leaves, sprinkle some sugar on a flat surface, roll a gumdrop flat, a little bit at a time, flipping the gumdrop often so it stays coated with sugar as it flattens.  Trim with a knife or scissors.
0 Comments

Cookie Pizza

7/5/2014

0 Comments

 
Picture
The monthly envelope full of local ads and coupons arrived a couple days ago.  As I flipped through it, one summery dessert caught my eye:  a dessert pizza.  It was an advertisement for a local pizza buffet, "only" $5.99 for the buffet.  
Well, we have 7 people at home, so $6 x 7 is not something we're willing to spend very often.  :)  Instead, I could make this for under $4 with what I had on hand.  Frozen blueberries and strawberries are always in the freezer here; I get them at DollarTree in the frozen section.  Cream cheese stores way beyond its sell-by date, so I stock up when it's $1 for 8 ounces.  A local store recently had whipping cream at $.33, and it stores quite a bit past the sell-by date, plus it can be frozen.  And I stock up on butter when it's on sale, then keep it in the freezer.

What are some of your must-have-on-hand ingredients?

Cookie base
1 stick butter (1/2 c.), softened
1 c. sugar
1 egg
1/3 c. buttermilk, kefir, OR sour milk (add 1 Tbsp. lemon juice to fresh milk to make 1/3 c.)
1 tsp. vanilla
1/2 tsp. baking soda
1 tsp. baking powder
1/2 tsp. salt
2 1/2 c. flour

Preheat oven to 375 degrees F.  Cream the butter with sugar; beat in the egg, buttermilk, and vanilla.  Combine baking soda, baking powder, salt, and flour; stir in to the other ingredients.  Grease or spray a 10x17 rimmed cookie sheet or 14" or 15" round pizza pan.  Drop cookie dough on top and pat into an even layer; wet your fingers so the dough doesn't stick so much to you.  Bake for 14-20 minutes, until light golden brown on edges and underside.  Cool completely.  

Topping/Frosting 
3 oz cream cheese
1/4 c. sugar
1/2 cup whipping cream
1 tsp. vanilla

2-4 cups berries or other fruit (I used 1 cup frozen blueberries, about 1 1/2 c. frozen strawberries)

Spread the topping over cooled cookie, cut into squares, and then sprinkle or decorate with fruit.  Serve; cover and refrigerate any leftovers.
Picture
Picture
0 Comments

Coconut Cake- using coconut flour and agave

4/1/2014

0 Comments

 
Picture
This gluten-free cake is high in fiber, but you'd never know it when eating it.  It just tastes like a moist coconut cake.  It also has a delicious cream cheese frosting that you can sweeten using agave or honey, and a lemon-cream cheese filling between the layers.  This makes a small cake, 6" round if two layers, or a single 8" layer:  a much better size for most people!

Coconut Cake:

4 large eggs
1/2 c. melted coconut oil
1/2 c. agave nectar
1 Tbsp. vanilla
1 tsp. coconut extract
1/2 c. coconut flour
1 tsp. baking soda (this is too much, I can taste it and the cake overbrowned)
1/4 tsp. salt
1/8 tsp. xanthan gum
1/2 c. shredded coconut, either sweetened or unsweetened
Cream Cheese Agave Frosting (recipe below)
1 1/2 Tbsp. orange or lemon marmalade
1 cup sweetened shredded coconut 

Preheat oven to 350 degrees.  Grease sides and line bottom of a 6" round pan* with a circle of parchment paper.  Set aside.

Whisk eggs until light in color and a little foamy, about 2 minutes.  Add the coconut oil, agave, vanilla, and coconut extract; mix well.  Add coconut flour, then put the baking soda, salt, and xanthan gum on top of the coconut flour, and mix all together.  The batter will be very thin at first, but will thicken within minutes as the coconut flour begins absorbing liquid.  Stir in the 1/2 c. shredded coconut.

Pour into the prepared pan.  Bake until center no longer jiggles and toothpick inserted in center comes out clean, about 45 minutes.  Run a knife around the outside edge of the cake to loosen it.  Cool cake, in the pan, on a cooling rack for 10 minutes.  Remove from pan/s and cool completely.

When cool, split the 6" cake into two layers.  Frost the first half with lemon-cream cheese filling.  Place the other layer on top of the filling, then frost the entire cake.   Pat coconut onto the sides of the cake, then sprinkle it all over the top.
  
*If you don't have a 6" round, you may use either one 8" round (reduce baking time to about  30- 35 minutes), a 9x5 loaf pan (about the same baking time), 12-15 cupcakes (about 30-35 min. of baking), or four 4" round pans (reduce baking time to  18-20 minutes each).

Cream Cheese Agave Frosting:  use the recipe for Fluffy Honey-Cheesecake Frosting, except substitute agave for the honey.

To make the lemon-cream cheese filling (or orange-cream cheese filling), take  3/4 cup of the Cream Cheese Agave Frosting and put it in a small bowl.  Add 1 1/2 Tbsp. marmalade and stir.  
0 Comments

White Chocolate Buttercream Frosting

10/11/2013

0 Comments

 
Picture
This is seriously amazing frosting, one you'll want to take your time eating, to capture every nuance of the flavor.

Why is it so good?  

Well, look at the name.  White chocolate.  Butter.  Cream.  Need I say more?  
Yeah, it wouldn't be smart to eat it every day.  But- boy, is it delicious!  Even better, it's really easy.

I found this in a magazine when my now-16-year-old was a newborn.  Really newborn; a magazine at my hospital bedside.  There were several intriguing recipes in there; I wrote them on a slip of paper, then tucked them in my recipe binder once at home.  The paper is still there, and three of those recipes are now favorites of mine:  Lattice Pineapple Pie, Orange-Coconut Muffins, and this frosting.  

It's one to savor.  You can also refrigerate or freeze this and shape it into truffles. Roll in chopped almonds, powdered sugar, sprinkles, or fine cookie crumbs, or dip in melted white or milk chocolate.  

My favorite white chocolate for this recipe is Guittard white chocolate chips.  To me, the Nestle white chips have a overly-cooked-and-sweet flavor, so I avoid those.   Chips are cheaper than baking squares, and the good ones have a great dairy-and-vanilla taste.  And I almost always use evaporated milk in this recipe; since it's a pantry item, I always have some on hand, unlike fresh cream.

White Chocolate Buttercream Frosting (about 2 cups frosting)

1 cup (6 oz.) white chocolate, melted and cooled-  or 6-(1 oz) squares white chocolate
1/4 cup cream or evaporated milk, or regular milk if you must (not as rich- but passable)
1 cup cold butter, cut into 1" cubes
1 cup powdered sugar

Beat together the white chocolate and cream.  When smooth, with the mixer running, beat in 1 cube of butter at a time.  Add powdered sugar; beat about 2 minutes, until smooth and fluffy.

If you have essential oils, one drop of orange oil would add subtle dimension.


0 Comments

Light and Fluffy Natural Cherry Frosting

8/24/2013

0 Comments

 
Picture
Or try the Cherry Cheesecake Frosting version.

Yes, if you've noticed a common thread in the last few frosting recipes, I have a thing for cheesecake!

Once again, the basic recipe is the no-cook Ultra Gel frosting, though you can use cornstarch or flour if you're willing to cook the initial mixture.

The difference between this and the others I've tried is that the earlier ones all used pureed fruit or else jam as part of the ingredients.  This time I used concentrated fruit juice- in this case, a delicious cherry-pomegranate blend- the kind that comes frozen in 12-ounce cans. This opens up all KINDS of possibilities!  Use lemonade concentrate- or orange passionfruit mango- or whatever else is in your grocer's freezer.

In the photo above, after spreading the frosting on the cake top, I mixed 1/4 cup of jam with about 1- 1 1/2 Tbsp. water, dribbled in parallel diagonal lines, then ran a butter knife lightly through it, alternating directions every other time, to create the chevron pattern.  Then I added the border.

To protect the frosting from drying out overnight, since this one was made ahead of time, I stuck mini marshmallows on the ends of toothpicks, poked them into the cake, then rested plastic wrap on top of the now-blunt toothpicks.  Works great.

Cherry Cloud Frosting

2 sticks butter, cut into tablespoon-sized pieces, OR 1 stick of butter and 8 oz cream cheese
1 c. sugar
1/4- 1/2 c. Ultra Gel* (higher amount if yours is fluffy like powder snow, lesser if dense like baking soda is)
1/8 tsp. salt
1 c. (8 oz.) juice concentrate, thawed
1 tsp. vanilla or almond extract

Beat the butter until smooth, then add everything else at once: sugar, starch, salt, juice concentrate, and extract.  Beat on low for one minute, until combined, then beat on high 5-6 minutes, until fluffy.

*If you don't have Ultra Gel, you use cornstarch or flour. Substitute 1/4 cup cornstarch, or 1/2 cup flour.  Whichever you choose, mix it with the sugar in a small saucepan, then gradually stir in juice concentrate.  Bring to a boil, stirring often; cook and stir until thick, about 4-5 minutes. Cover and cool to room temperature, then add all other ingredients and beat until fluffy.

To make the 'cheesecake' version, use only 1 stick of butter, and one 8-oz block of cream cheese, softened.

0 Comments

Rose Cake

6/22/2013

0 Comments

 
Picture
Saw this on the web and my daughter wanted it for her birthday cake...

It's really simple- one frosting tip (2110), one color, and the roses are nothing more than spirals.

The frosting I used was Strawberry Cheesecake Frosting and is naturally colored: use the recipe for Blueberry Cheesecake Frosting except double the batch and substitute 12 oz. strawberries, pureed, for the two cups of blueberries.  It tastes divine!
0 Comments

Never-flat Whipped Cream 

4/26/2013

0 Comments

 
Picture
Do you love whipped cream but wished it would stay fluffy like whipped topping does?  
Cool-Whip, move over; your superior is here!  Airy, melt-in-your-mouth, delicately sweet, no hard-to-pronounce ingredients- what could be better?

Use this for topping pies, gelatin, cakes or cupcakes, or anything else you like!  Stir in a little caramel sauce and it's either an amazing dip for apples or an incredible cake filling.  Fold in some melted and cooled chocolate for a mousse-like topping.  White chocolate is delicious mixed in.

The version below that uses gelatin gives the most firmness.  I've kept it in the fridge for two weeks before, without the faintest hint
Yes, you can use this to decorate cakes!  (Just don't let it get too warm, it will melt if it gets above about 90 degrees F, just like butter does.)  This picture is my niece's wedding cake.

If you can't have dairy, use 8 ounces of chilled coconut cream to replace the dairy cream.  Not cream of coconut, that's different.  Coconut cream is the thick layer you find on top of canned coconut milk; Asian markets sell cans of straight coconut cream.

Stabilized whipped cream
½ pint whipping cream (8 oz)
½ tsp. vanilla
2 Tbsp. sugar or ¼ c. powdered sugar
1 Tbsp. Ultra Gel OR 1 tsp. unflavored gelatin*

If using Ultra Gel, stir it with the sugar, then add cream and vanilla and whip until stiff.  

If using gelatin, put it with a tablespoon of water, let it sit a minute to soften, then microwave for 12 seconds to dissolve it. You could heat gently on a stove, if needed.   Don't let it boil.  Whip cream, sugar, and vanilla until they start to thicken a little, then slowly pour gelatin in while still beating. Whip until stiff.  Chill it if you need it a little thicker.

Store any extra in the refrigerator.
__________________________________________________________
*Other ways to stabilize whipped cream:
(you can skip the Ultra Gel and gelatin if you use these)

-fold in 4-8 ounces melted and cooled chocolate (the more you use, the more truffle-like the frosting/mousse will be.  Also, the darker the chocolate, the less you need.)

-Beat in 2-4 ounces of cream cheese.

-Before whipping, sprinkle in half a package of instant pudding powder.  (This is really adding  Ultra Gel, which is part of the pudding mix.)

-Substitute 1 1/2 -2 Tbsp honey or corn syrup in place of the sugar, or 3 Tbsp. any flavor jam or jelly.  This will only lightly stabilize it, but works for things you'll eat in the next couple hours.
0 Comments

How to decorate pretty Valentine Cookies

2/6/2013

0 Comments

 
Picture
While standing in line at the supermarket one day before Christmas, I picked up a cooking magazine that had some gorgeous cookies on the cover.  As I studied the picture, the cashier noticed, laughed a little, and said, "they have nice pictures, but do YOUR cookies ever look like that?"

She was shocked when I answered, "Um, actually, yes."

You don't need to be a professional baker.  You don't even need fancy decorating equipment, though I really appreciate a good pastry bag and frosting tips.  (If you don't have these- you can buy a small set for under $10 at Walmart, ShopKo or hobby stores- a ziptop freezer bag with a corner snipped off will work.)   

The trick to making those beautiful, glossy cookies is to use two consistencies of frosting- one thin, one thick, and to give yourself enough time to let one layer dry a bit before adding the next.  The thin frosting becomes your canvas, the thicker one is used to make the details.  Make it easy on yourself by only mixing two or three colors.  Rather than using the liquid food color drops, try paste or gel food colors.  They are much easier to work with because a little goes a long way and they won't make your frosting runny. 
******
The thin frosting can be as simple as powdered sugar and water, or if you want the surface to be shiny when dry, make Royal Icing. A regular batch produces a thick icing; to get the thin frosting, mix in water a little at a time to get the right consistency. The recipe below is for the Royal Icing, which also dries very hard, making your cookies a little less likely to get damaged.  This is the same frosting I use on gingerbread houses.

Royal Icing  (thick frosting)
3 egg whites (use clean eggs with absolutely no cracks in them)
1 16-oz bag or box of powdered sugar (about 4 3/4 cups)
1/2 tsp. cream of tartar
1/8 tsp. salt
1 tsp. vanilla, lemon, or almond extract

Put everything in a large, absolutely grease-free mixing bowl.  Beat on high speed using an electric mixer until very stiff, about 7-10 minutes.  Use right away and keep the bowl covered at all times with a damp kitchen towel, to avoid drying it out.  Makes about 3 cups.  To color it, divide into smaller bowls and stir gel or paste food color into it.  For the cookies below, I divided into three bowls; one remained white, one was tinted pink, the last colored red.

Thin frosting
Put the amount of frosting you think you need, already colored, in a bowl.  Add water a little bit at a time, stirring until smooth.  The right consistency is when a little bit of frosting drizzled from a spoon takes from 5-10 seconds to disappear back into the rest.

Spread a thin layer of frosting on each cookie.  If adding sprinkles or edible glitter, add it while the frosting is wet so they'll stick.  Let the cookies sit until a crust starts to form over the frosting, then decorate using the thick frosting in a pastry bag.    

If you're new to frosting, tips, and pastry bags, Wilton has a great getting-started page
Picture
Picture
Start with white as the base, let dry. Next use pink with a basketweave tip like #47. Finish off with tip #3 grids and squiggle border.
Picture
Just like the previous one except simpler: white base, let dry, add tip #3 grids in pink, then a tip #3 red squiggle border.
Picture
Or how about that same white background, but using only red and tip #3?
Picture
White base, sprinkle with edible glitter, dry. Add tip #3 dots in white, then a red squiggle border also using tip #3.
0 Comments

Homemade Valentine ideas

1/29/2013

1 Comment

 
It's that time of year again!  

I started homeschooling one of my children just a couple weeks ago (taking a bite of the elephant at one time- this is also the reason I haven't been posting as often), so I'm looking forward to making some adorable things with her for Valentines' Day-  and not having the normal glut of candy (hurray!)  

My mom wasn't much for celebrating many things- but we always woke up Valentine morning to find a giant (to us kids) cookie with a pretty border and our name written in flourishes of pink frosting.  

Below are some of the ideas I love for this year, some are mine and some are from other sites.  There's also this post for more ideas, including how to make heart-shaped muffins with a regular muffin tin, some liners, and several marbles.
1 Comment

Frostings without powdered sugar

8/21/2012

0 Comments

 
Picture
A surprising amount of people think you can't make frosting without powdered sugar.    I shouldn't be too surprised; I used to think that, too!

Frostings made without it are usually exceptionally smooth; powdered sugar sometimes comes across as a little chalky.  This is because at least some brands add cornstarch to the powdered sugar.

Anyway, here are some creamy, fluffy, dense, or fudgy frostings you can make without using powdered sugar:  Enjoy!

Chocolate Blender Frosting- or caramel, coconut-chocolate, hazelnut-chocolate, and more!
   version made with milk chocolate chips

Cheesecake Cloud Frosting
Blueberry Cheesecake Cloud Frosting
Strawberry Cheesecake Frosting
Cherry Cheesecake Frosting

The frosting in the photo above is Apricot Cloud Frosting: use pureed apricots in place of the pureed blueberries, also add 1-2 tsp. almond extract.

Cooked Frosting (the no-Ultra-Gel version of Cloud Frosting)

Stabilized Whipped Cream Frosting (doesn't go runny)

Marshmallow Frosting

Ganache(may be whipped)

Seven-Minute Frosting-
includes variations for Peppermint Frosting, Seafoam Frosting, Strawberry Fluff Frosting, and Chocolate Fluff Frosting.
0 Comments

Milk Chocolate Blender Frosting

5/23/2012

2 Comments

 
Picture
This is a variation for a previous post, Creamy Chocolate Blender Frosting
which uses unsweetened chocolate instead.

Chocolate Blender Frosting
using milk chocolate chips

2 c. milk chocolate chips (1 bag, 11-12 oz.)
¾ c. evaporated milk
1 tsp. vanilla
⅓ c. sugar
4 Tbsp. butter (1/2 stick)

Chop chocolate, then put everything into a blender.  Blend on low until better chopped, then scrape down sides with a spatula. Blend on high until it becomes dark and smooth.  This may take about ten minutes, or only two minutes in a Vitamix or similar.   Makes 3 cups.

*TIP* to clean that last bit of frosting out of your blender, add about 3/4 cup of hot milk to it (depends on how much frosting is still in there), cover and blend.  The milk will clean the blender better, and will give you some very creamy hot chocolate!

For different flavors, try using a different extract than vanilla- maple, orange, rum, mint.  You could also add a teaspoon of frozen concentrated orange juice, a couple Tbsp. of maraschino cherry juice in place of the same amount evaporated milk (along with maybe a 1/2 tsp. almond extract).  Or 1/2 tsp. cinnamon for a nice winter flavor.

Any extra frosting may be used as a base for some hot chocolate: 2-4 Tbsp. per cup of milk, use a blender to mix. Add more plain cocoa powder if you like.  (Personally, I use up my extra by putting it on a spoon...)

Chocolate-hazelnut:
In the blender, combine 1-2 cups toasted hazelnuts (5-10 oz- depends on how nutty you want this) and  1 1/3 c. evaporated milk; blend nuts and milk together first.  Reduce milk chocolate chips to 1 cups, increase salt to 1/4- 1/2 tsp. salt, use 1/3 c. sugar and 4 T. butter.   Blend until smooth.  Taste, then add more sugar if you want this sweeter, up to 3/4 cup total.

Click here for more variations- caramel, coconut-chocolate, butterscotch, or peanut butter frostings.
2 Comments

Applesauce- or Pumpkin-Spice Cupcakes with Cream Cheese Cloud Frosting

10/26/2011

0 Comments

 
Picture
Hey, I know what this is starting to look like...  and no, I really don't make cupcakes ALL the time!
I had a quarterly lunchtime get-together with some friends, and we all brought food.  So that's my excuse this time around.  That said, everyone flipped over these cupcakes, and insisted that I share the recipe. 

True to form for me, there is no single-page recipe for this: I took a regular cake recipe, added applesauce and spices to it, filled it with something complimentary I had in the cupboard, and made my favorite frosting, using cream cheese in it this time.

If you have a copy of The Chameleon Cook, the plain (yellow) cake recipe is on page 74, and the frosting recipe is on pages 76 (Boiled Milk Frosting) and 78 (Cloud Frosting variation).  I made a half batch of frosting; it ran out on cupcake #19.  If you like a lot of frosting, especially when it's fluffy, creamy, and not too sweet, make the full batch.  If you like a strong cream cheese flavor, instead of using 2 sticks (8 oz.) butter and 8 oz. cream cheese, decrease the butter to 1 stick (4 oz.) and add an extra 4 oz. cream cheese (total 12 oz.) To make it even more rich, reduce milk to 1/2 cup, Ultra Gel or flour down to 2 Tbsp, and sugar down to 1/2 cup.  

For the cupcakes:
Take any white or yellow cake recipe, or a boxed mix
.
Use the same ingredients and instructions as the recipe or box says, except:

Add 1 cup applesauce or pumpkin puree to it, and reduce the liquid the recipe calls for by 1/2 cup (this means reduce the milk to 3/4 cup if you're using my recipe)
Applesauce or pumpkin puree, for cooking purposes, acts like about 50 % water.
Stir in any or all of these spices: using all of them gives a full, round flavor, but if you only have cinnamon, it'll still be good:
1 Tbsp. cinnamon
1 tsp. ground ginger
, or 1 Tbsp. grated fresh, or 1-2 Tbsp. chopped crystallized ginger :-)
3/4 tsp. cardamom
1/2 tsp. allspice
1/2 tsp. ground cloves
1/4 tsp. ground nutmeg

If you like, also add 1/2 c. chopped walnuts, pecans, or hazelnuts, and/or 1/2 c. raisins

Bake according to regular instructions. 

When cool, add filling if you like.  I used Dulce de Leche, thinned with enough water that the caramel didn't hold its shape anymore (maybe 2 Tbsp. water to 3/4 c. caramel).  But use whatever you have or can make, such as homemade or jarred caramel sauce, unwrapped caramels melted with milk or water (try 1 Tbsp. milk/water for each 10 caramels).  If you have a decorating bag with a tip, you can fill the bag with caramel, poke the tip down into the cupcake, and squeeze the bag until the cupcake swells with the filling.  I have a bag, but didn't want to mess with it this time.  The other way I fill cupcakes is by cutting out a cone-shaped section from the top of the cupcake.  Lift it up, put a spoonful of filling in the hole, and replace the top of the cupcake.  Frosting the cupcakes will hide those surgery marks.  See the photos below.
Picture
If you're making mini cupcakes, an easy, non-messy way to get batter in those little cups is with a small ice cream scoop.  Use a regular-sized scoop for regular-sized cupcakes.

Picture
To fill a cupcake, run a knife around the top, with the blade angled so the tip is in the center, about an inch down.

Picture
Lift up the top, and the cupcake is ready to fill!  How much you add is up to you.  Any less than 1/2 teaspoon just disappears into the cupcake, so use more than that.  Add too much and it will spill over the top...  so you'll figure out what you like pretty quickly.  That said, I used what fit on a regular spoon, about 1 1/2 teaspoons.  Put the top of the cupcake back on, then frost.

0 Comments

Fluffy Frostings That Are Not Too Sweet, non-artificial colors

6/23/2011

1 Comment

 
Picture
Do you have to go colorless when avoiding artificial colors?
 
The NYTimes recently ran an article called "Colorless Food?  We Blanch", claiming nobody would want to eat food anymore if manufacturers didn't use artificial colors.   It was a little ridiculous.   One response to it is found here.

Yesterday I needed to make a pink and purple unicorn cake for my daughter.  And one extra issue- use no artificial colors, or one son couldn’t have any of the cake.  At least not with any frosting.

Picture
My husband now has a new favorite frosting, as does a neighbour who stopped by:  Fluffy Blueberry Cheesecake Frosting, which was my answer to needing a purple mane, tail, and border. 

(If you just want the frosting recipe, go to the bottom of this post.  To read about making a non-artificial pink-and-purple unicorn, read on.)


To make the basic pony part, I greased a pony-shaped cake pan, mixed up 4 cups of liquid with enough gelatin, and let it set up in the fridge.  I use unflavored gelatin; Knox comes that way in packets, but I buy it in the bulk section of a local health food store.  To make the pony pink, I used fruit punch as 3 cups of the liquid, and 1 cup sour cream (or plain yogurt; I used kefir ‘cause that’s what was in the fridge!) to make it opaque pink instead of transparent red.  Use twice as much gelatin as you would normally; otherwise it will fall apart when you flip it out of the pan. (Mine did, thus the recommendation to double the gelatin!)  It might anyway, but at least you’ll be upping the chance for success.

I baked a rectangular cake big enough for the pony to fit on and frosted it with Fluffy Cheesecake Frosting.   I set the pony pan in a sink of hot water for just a couple seconds, then flipped the pan over the cake so the pony landed in the right place.  Then I decorated with the purple frosting, and carved a horn out of a stick of jicama.  (I was going to use the tip of an ice cream cone, but we were having jicama for dinner.)  Voile!  Everyone’s happy!

Fluffy Blueberry Cheesecake Frosting- makes about 2 1/2 cups
(See here for Strawberry Cheesecake Frosting)
1 cup fresh or frozen blueberries (or 6 oz. other berries)
½ c. sugar
1 Tbsp. Ultra Gel
8 oz. cream cheese, softened
4 oz butter, softened
½ tsp. vanilla 

Combine blueberries and sugar; either puree them in a blender until smooth, OR cook and stir until boiling; cool.   Beat cream cheese until smooth, add butter, sugar, blueberry mixture (cooled if you cooked it),  Ultra Gel, and vanilla.  Beat until smooth and fluffy.  Let stand 5 minutes. 

_____
Ultra Gel needs five minutes to fully absorb liquid; that’s why I’ve added the 5-minute wait time.  These frostings are easy to adjust- if too thick or pasty, add a little (1-2 tsp.) water, or as needed.  If too thin, sprinkle on another 1 tsp. Ultra Gel and beat it in. 


The cream cheese frosting recipe I tweaked to get this, above, as well as the white base layer:

No-cook “cooked”
Fluffy Cheesecake Frosting
½ c. sugar

1 Tbsp. Ultra Gel
8 oz. cream cheese
4 oz butter (1 stick), softened
¼ c. milk
½ tsp. vanilla

Stir together sugar and Ultra Gel, set aside.  Beat cream cheese until smooth, add butter, milk, vanilla, and sugar mixture.  Beat until smooth and fluffy, about 2 minutes.  Let stand 5 minutes.


Another variation I’ve come up with, in case you don't use table sugar at your house:

Fluffy Honey –Cheesecake Frosting

8 oz. cream cheese
4 oz. butter, softened
1/3 cup honey
3 T. water, milk, or cream
½ tsp. vanilla
2 Tbsp. Ultra Gel

Beat cream cheese until smooth; add butter, honey, water, and vanilla.  Sprinkle the Ultra Gel  on top, then beat all until smooth and fluffy, about 2 minutes.  Let stand 5 minutes.

1 Comment

Basic, Simple, Adaptable, FREE Cookbook

3/10/2011

0 Comments

 
Picture
My version of the finished cookbook.   What will yours look like?

Picture
Title page: this is as close as I get to scrapbooking!  The book also has a table of contents and an index. 

Picture
Each section has a tabbed divider stuck onto the page.  I just used the tabs you find in the office supply section of a store.

Picture
The first recipe of each new section gets a colored 'scrapbooking' paper behind it.

I’ve put together a cookbook of basic recipes and cooking concepts (like how to take a basic yellow cake recipe to make any number of variations). It was designed to be portable and highly useful.   I hope it is!   I had non-cooks, college students, and young missionaries in mind.    It’s typed in 3x5/4x6 card format, so you cut out the cards and slip them into the sleeves of a small photo album. This collection fits perfectly in a 72-sleeve album.  If you only find bigger ones, you can use the extra spaces for blank cards to write recipe notes on, or slip a photo of the food in the sleeve next to the recipe.  If you like the photo idea, I already have pictures of lots of them.  Email me if you want them, [email protected]

Rather than give a link to the whole cookbook, I’ll put an installment of it once or twice a week here on my website.  That way you have time to really look through the recipes, at a manageable pace.  The first one is below:


Cakes and Frostings page 1
Cakes and Frostings page 2

Note on printing these pages:  the links open to GoogleDocs.  To print, select GoogleDoc's print button, don't do Control-P or you'll print the browser page and only get half the recipes.
0 Comments

Fall Gardening checklist; Creamy Blender Frosting- Chocolate and more!

11/4/2010

0 Comments

 
Picture
Chocolate Blender Frosting on pumpkin cake.

Picture
Dump these in the blender, mix on high...

Picture
...until it looks like this.  Yum!

Hi everyone,  

Most of the garden is done right now, since the frost a couple weeks ago.  Here’s a section from one ‘Fall Gardening checklist’ online:  
“After you harvest, it's time to clean up your garden. Cut back perennials to a few inches above the ground -- they'll grow back next year -- and pull out annual and vegetable plants. Put healthy plants on the compost pile, said Toby Day, associate horticulture specialist at Montana State University Extension. "But if the plant material is diseased, throw it away instead of composting it. Most compost piles don't get hot enough to kill disease or insects." Also, throw away weeds so they don't go to seed in your compost.

Day recommended a few related cleanup jobs before the temperature drops: Remove soil from pots and bring them indoors so they won't freeze and crack. Bring in liquid fertilizers and other substances that shouldn't freeze. Blow out your irrigation lines. And clean, sharpen and oil garden implements so they don't rust.   Enrich your soil before you head indoors for the winter. Larry Sagers recommended shredding everything from corn stalks to woody branches and tilling the material into the ground. If you don't have a shredder, he suggested renting one for the day. "Compost costs around $30 to $50 per yard to buy," he said. "My take is I'll shred my own."

Read more:
http://www.ehow.com/feature_7293587_fall-gardening-checklist.html  
    

* * * * * *
    
This is a fabulously smooth frosting.  The consistency is closer to store-bought frosting than any other homemade I've found, but the flavor is WORLDS above the stuff from a can.  For a wonderful, rich hot fudge sauce, see below, There are pictures on my blog of how to make this, and lots of variations- milk chocolate, butterscotch, caramel, peanut-butter chocolate, 'Nutella' flavor- click on this link:   Creamy Blender Frosting
 

Creamy Chocolate Blender Frosting
(original, very dark version)

 6 blocks (6 oz.) unsweetened chocolate                   
1 ½ c. granulated sugar

1 c. evaporated milk, cream, or coconut cream         
6 Tbsp. butter (not margarine)

1 tsp. vanilla                                                                         
Pinch of salt, optional

Chop chocolate, then put everything into a blender.  Blend on low until better chopped, then scrape down sides with a spatula. Blend on high until it becomes dark and smooth.  This may take about ten minutes, or only two minutes in a Vitamix or similar.   Makes 3 cups.

  For different flavors, try using a different extract than vanilla- maple, orange, rum, mint.  You could also add a teaspoon of frozen concentrated orange juice, a couple Tbsp. of maraschino cherry juice in place of the same amount evaporated milk (along with maybe a 1/2 tsp. almond extract).  Or 1/2 tsp. cinnamon for a nice winter flavor.  You can reduce chocolate to 5 blocks, for slightly less intensity, and have it still work.

  If you have any extra frosting, use it as a base for hot chocolate: 2-3 Tbsp. per cup of milk, use a blender to mix.  (Personally, I use up my extra by putting it on a spoon...)    

Hot Fudge Sauce: Use the same ingredients, except reduce butter to 2 Tbsp.  Instead of mixing in a blender, bring to a boil in a small saucepan; let cook for 2 minutes, until sugar is dissolved.
0 Comments

    Need a Search bar?
    One day I may upgrade my website-- but until then, use your web browser search bar. Type in my web address and what you're looking for, like this-- 
    www.theprovidenthomemaker.com  pumpkin --  and you should get results.


    Author

    I'm a disciple of Christ, a member of the Church of Jesus Christ of Latter-day Saints, a family-defending, homemaking, and homeschooling mom of eight children, two of whom sometimes can't have milk or wheat. Growing up on a farm in a high mountain valley, my parents taught me to 'make do', work hard, smile, and help others.  I love cooking, learning, growing food and flowers, picking tomatoes, and making gingerbread houses --which CAN be made allergy-friendly-- with my children.  I hope you find something to help you on my site!

    Archives

    April 2024
    July 2023
    April 2022
    September 2021
    March 2021
    December 2020
    April 2020
    March 2020
    February 2020
    January 2020
    December 2019
    November 2019
    October 2019
    September 2019
    August 2019
    July 2019
    June 2019
    May 2019
    April 2019
    January 2016
    November 2015
    October 2015
    September 2015
    March 2015
    February 2015
    November 2014
    October 2014
    September 2014
    August 2014
    July 2014
    June 2014
    May 2014
    April 2014
    March 2014
    February 2014
    January 2014
    December 2013
    November 2013
    October 2013
    September 2013
    August 2013
    July 2013
    June 2013
    May 2013
    April 2013
    March 2013
    February 2013
    January 2013
    December 2012
    November 2012
    October 2012
    September 2012
    August 2012
    July 2012
    June 2012
    May 2012
    April 2012
    March 2012
    February 2012
    January 2012
    December 2011
    November 2011
    October 2011
    September 2011
    August 2011
    July 2011
    June 2011
    May 2011
    April 2011
    March 2011
    February 2011
    January 2011
    December 2010
    November 2010
    October 2010
    September 2010

    Categories

    All
    Alcohol
    Alternate Cooking
    Appearances
    Apple
    Apricots
    April Fools
    Aprons
    Bananas
    Beans
    Beef
    Beets
    Bench
    Beverages
    Bonnet
    Bread
    Breakfast
    Budget
    Budgeting
    Cake
    Candy
    Canning
    Carrots
    Cheese
    Chicken
    Children
    Chocolate
    Christmas
    Cleaning
    Coconut
    Comfrey
    Common Core
    Constitution
    Cookbook
    Cookies
    Cooking Oil
    Crafts
    Dairy Substitutions
    Dehydrating
    Dessert
    Dried Fruit
    Earth Oven
    Earthquake
    Easter
    Edible Weeds
    Eggs
    Emergency Prep
    Essential Oils
    Faith
    Family Home Evening
    Fertilizing
    Food Storage
    Fourth Of July
    Freezer
    Frosting
    Fudge
    Garden
    Gardening
    Gingerbread
    Gluten
    Gluten Free
    Gold
    Government
    Grains
    Gratitude
    Hat
    Herbs
    Home Remedies
    Home Repairs
    Homeschool
    Home Storage
    Honey
    Hope
    Inflation
    Leftovers
    Legumes
    Lemon
    Main Dishes
    Mixes
    Mothers
    Noah
    Non Artificial Colors
    Non-artificial Colors
    Nuts
    Oats
    Oil
    Orange
    Paint
    Peaches
    Pear
    Pie
    Pizza
    Plums
    Poem
    Popcorn
    Pork
    Potatoes
    Powdered Milk
    Prayer
    Preparedness
    Projects
    Prophecy
    Pruning
    Pumpkin
    Quick Bread
    Rhubarb
    Rice
    Salad
    Salt
    Sauces
    Self Reliance
    Self-reliance
    Sewing
    Shelf Life
    Shelves
    Sky
    Smoothie
    Snacks
    Soup
    Spices Or Seasonings
    Squash
    Strawberries
    Substitutions
    Sugar
    Summer Fun
    Three Month Supply
    Time
    Tomatoes
    Trees
    Truffles
    T-shirts
    Tuna
    Ultra Gel
    Valentine\'s Day
    Vegetables
    Water
    Watermelon
    Wheat
    Work
    Year Supply
    Zucchini

    RSS Feed

Web Hosting by iPage