The Provident Homemaker
  • Recipes and Info
    • Making Bread
  • My Blog
  • Favorite Resources
  • Documents and Files
  • 52 Weeks of Building Storage

Week 42—Cottage Cheese or Queso Fresco, and WWII rationing

2/2/2020

0 Comments

 
To help with building your year's supply (this is Week 16 of 26), see this chart. 
 
Last week I found myself browsing through World War II recipes.  It was a good reminder of which foods become more difficult to come by during hard times. Several foods were rationed during WWII, including meat, cheese, coffee, sugar, and some canned foods.  How well prepared would you be for similar shortages? 


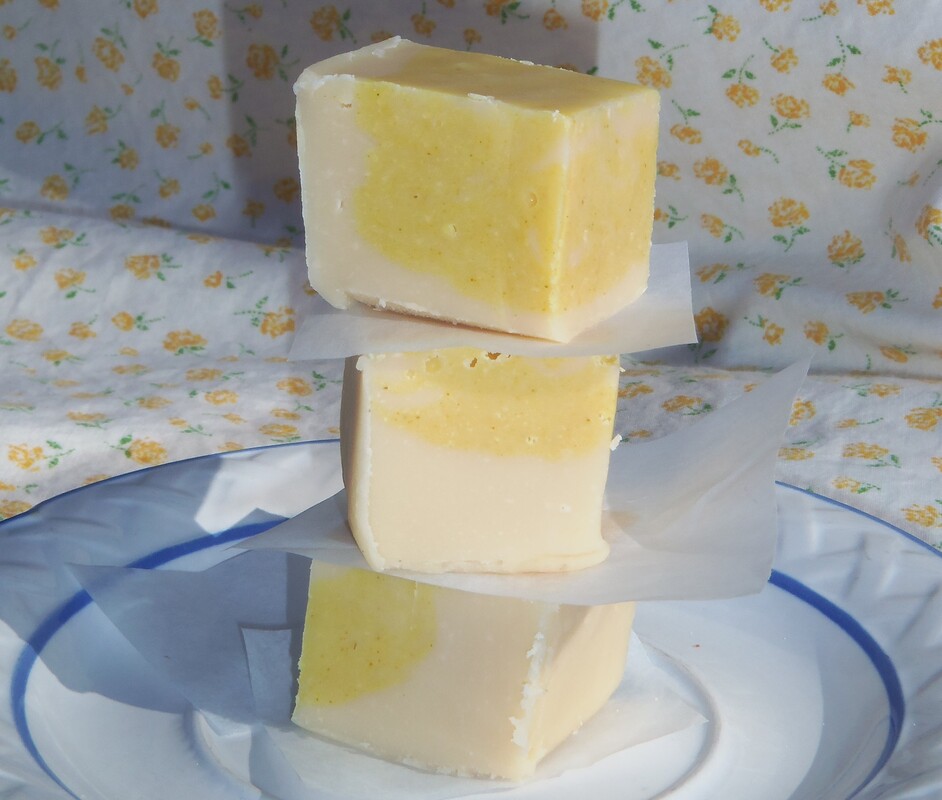
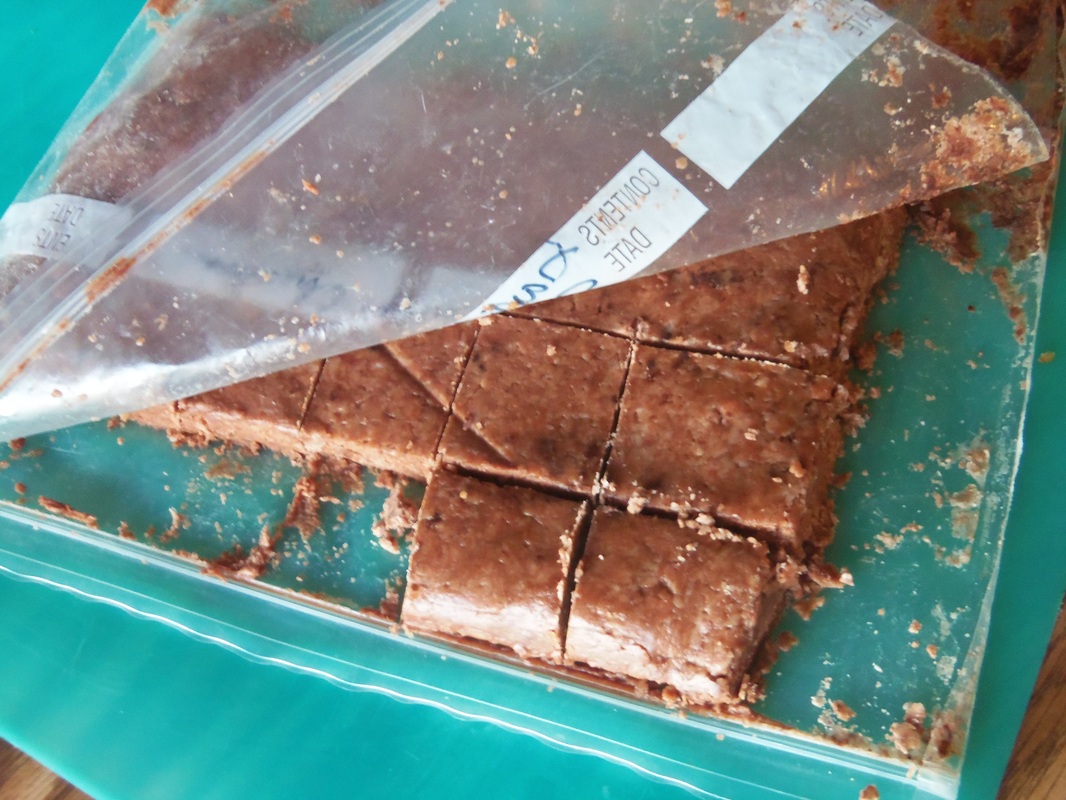
“Loaf foods” were common, and things like Walnut Roast were suddenly eaten more often. Eggless cakes with less sugar became a thing. I even have a recipe for “New Deal Fudge”, which, though it was from a decade earlier in the Depression, fit the bill nicely.

During that time, apparently cottage cheese also became more popular.  It was easy to make (I remember my grandma making it on the counter overnight), and since it’s high in protein, it was often used as a meat substitute in meals. People got creative with it, too.  (cottage cheese salad, anyone?)

You can make your own cottage cheese using powdered milk  Or use sour milk, ¼ c. vinegar per quart of sour milk.

Homemade Cottage Cheese


2 cups water
¾ cup non-instant dry milk powder
3 Tbsp. white vinegar
¼- ½ tsp. salt
 
Blend water and dry milk together and heat in a saucepan until it starts to steam, stirring constantly. Remove from heat.  (Heating this in a microwave is an option, too- heat until it foams and rises to the top of the bowl.)
 
DRIP vinegar around the edge of the pan (or bowl) and gently stir; milk will immediately start to curdle, separating into curds and whey.  Let rest 1 minute.
 
Pour into a colander. (the whey can be set aside as liquid for making bread.)  Rinse the curds with HOT water.  Rinse again with cold water to firm the curds; break apart into as small of curds as you want. This rinse should take about a minute under cold running water. The goal is to be sure all of the sour whey is rinsed away.  Sprinkle the curds with salt.

Makes about 1 ½ cups of curds. To make it creamy, like storebought, stir 1-4 Tbsp of sour cream or yogurt.
 
To make Queso Fresco, use four times the amount of powdered milk, triple the amount of vinegar and double the amount of water. (4 cups water, a little over ½ cup vinegar, 3 cups dry milk powder). Make it the same way, except drain it for a couple hours, then press the cheese firmly into a container to shape it. Use fresh within about a week, or freeze it.  
 
0 Comments

Week 40- Free Cookbooks for Using Food storage

1/19/2020

2 Comments

 
Picture
To help with building your year's supply (this is Week 14 of 26), see this chart. 
 
Do you have some food storage now, but need more recipes to use it? Check out these eleven FREE cookbooks, plus some extra resources like a book that teaches you how to can food, one on nutrition and one on REALLY frugal cooking and homemaking.
Picture
1. Bee Prepared Pantry Cookbook. 67 amazing pages.  

Picture
2. New Ideas for Cooking with Home Storage (also found here)--
​created to be used with the foods at the dry-pack canneries of the Church of Jesus Christ of Latter-day Saints.  You can no longer dry pack food there, but can still purchase products already packaged. 
 
​

Picture
3. A Guide to Food Storage for Emergencies—compiled by the USU Extension Office. 120 pages. 
 

Picture
4.The Wooden Spoon Cooking School collection- this was a pilot program by the Church of Jesus Christ of Latter-day Saints.  The same ladies who created the Bee Prepared Pantry Cookbook were commissioned to create the class materials, so this is basically an expanded version of Bee Prepared. There are individual sections on the following topics: 
Introduction (note that the ‘length of storage’ information is outdated, per BYU Food Studies)  
Intro- Commodities, Family Assessment, Family Plan, Skills & Equipment
Legumes
Oats, Honey, and Sugar
Wheat
Rice and Pasta
Powdered Milk
Seasonings
A Meal in a Bag- quick meals with everyday, three-month supply foods


Picture
5. All Is Safely Gathered In: Family Home Storage Basic Recipes—compiled by the Church of Jesus Christ of Latter-day Saints, and sent with food storage boxes/kits.  4 pages, 11 recipes. 

Picture
6. Shelf Stable Recipes-- family favorite pantry recipes submitted by readers of FoodStorageMadeEasy.net   
​58 pages.  Uses long-term storage foods as well as some shorter-term ones. 
​

Picture
7. Use it or Lose It— another “food storage cooking school,” compiled by the Utah State University Extension Office. 17 pages. About half of the pages have recipes, with a focus on wheat and dry milk powder; the rest is good information on how to obtain, store, and rotate your food.

Picture
8. Cooking with Dry Beans—compiled by the USU Extension Office. 13 pages.

Picture
9. Whole Kernel and Bulgur Wheat: Preparation and Usage—compiled by the USU Extension Office.  57 pages, so you know there’s a lot of variety. It doesn’t mention hard white wheat vs hard red wheat partly because white wheat had not quite hit the public scene in 1992. ​

Picture
Short term food storage rotation
​
10. 3x5 card/photo album cookbook—3x5-sized cards to cut out and fit inside a small photo album that holds 72 photos. ​

Picture
11. Crockpot Freezer Meals with Five Ingredients of Less, from TheFamilyFreezer.com.   25 main dish recipes to use your short-term (“regular food”) storage. Go to the main webpage, https://thefamilyfreezer.com/ for many more recipes. 


Other great resources:

Nutrition and Diet—includes charts on vitamins and their role in the body. Church of Jesus Christ of Latter-day Saints, 26 pages.

USDA Guide to Home Canning – a self-taught course in how to can. 
 
Frugal pioneer recipes- ten recipes, printed in the July 1972 Ensign magazine.

American Frugal Housewife, 1838. The twenty-second edition.(!)

“Dedicated to those who are not ashamed of economy” and “Economy is a poor man’s revenue; extravagance, a rich man’s ruin.”  The introduction begins, “The true economy of housekeeping is simply the art of gathering up all the fragments, so that nothing be lost.  I mean fragments of time, as well as materials…and whatever the size of a family, every member should be employed either in earning or saving money… The sooner children are taught to turn their faculties to some account, the better for them and for their parents.  In this country, we are apt to let children romp away their existence, till they get to be thirteen or fourteen.  This is not well. It is not well for the purses and patience of parents; and it has a still worse effect on the morals and habits of the children. Begin early is the great maxim for everything in education. A child of six years old can be made useful; and should be taught to consider every day lost in which some little thing has not been done to assist others.”
__________________________

If you like old cookbooks, this website has more than 75 of them, all waiting for you in digital format. 
 
Thanks to prepperssurvive.com for alerting me to the old cookbook digital collection!

2 Comments

Week 39- Yogurt-- Plain, Greek, and Flavored-- from Powdered Milk

1/12/2020

0 Comments

 
To help with building your year's supply (this is Week 13 of 26), see this chart. 

If you missed last week's FAQs on powdered milk, take a few minutes and see what's there. 
 
It seems like just about everyone has an “Instant Pot”—a computerized electric pressure cooker. It’s good for more than pressure cooking, too.  It can help you rotate your powdered milk!  (If you don’t have one, don’t worry- there are non-instant-pot directions down below.)
 
Many of these pots have a yogurt setting, which is a low temperature at which the milk can culture properly into yogurt.
 
Here’s a link to instructions, from a lady who has played around with the recipe to learn how to be consistently successful.  She uses  milk in the gallon jug. To use powdered milk, mix up a gallon (or 2 quarts for a half batch) and follow the directions. https://thisoldgal.com/instant-pot-greek-yogurt/
 
No Instant Pot?  No problem! 

 This recipe makes 2 quarts of plain yogrts at $. 78 per quart* if you're using your own starter. 
​

Yogurt 
1 ¾ c. regular nonfat dry milk, or 3 c. instant                        
7 c. hot water (not over 120 degrees F)
1/3 c. plain yogurt, with active cultures

Combine dry milk and 4 cups of the water.  Whisk or mix in a blender.  Add yogurt and whisk.  Add remaining water or divide the remaining water evenly between your containers; stir well after adding the milk mixture!  Pour into containers, cover, and incubate in a warm place for 4-8 hours or until set.  Tip a container after 4 hours to see if it has set.  If the yogurt is still liquid, wait 1-2 more hours.  It will set up a little more when chilled.  Store in fridge.  The ideal temperature range for culturing yogurt is 105-120 degrees.  The lower of these temperatures you begin culturing at, the sweeter the yogurt will be.  The higher, the more tart. Above 120 degrees will kill the bacteria you’re trying to grow.  Save 1/3 c. for culturing your next batch.

To flavor your yogurt after it’s made, add fruit, jam, juice concentrate, chocolate milk mix, etc., before eating.

To flavor it before culturing, use 6-8 Tbsp. of sugar per 2-qt batch,  or 4-6 Tbsp. honey (dissolve this in your water first, or it will sink to the bottom), or a 3-oz. box of flavored gelatin, or 1/3-1/2 c. jam, or 1 c. chopped or mashed sweetened fruit. The syrup from canned fruit can be used in place of part of the water.  If it’s not sweet enough, you can always add sugar when it’s done.  1-2 tsp. vanilla added to the batch is also a nice addition.  Make your own combinations- chopped cherries with some vanilla and a little almond extract, blueberries with cream cheese added, toasted coconut with caramel sauce swirled in… let your imagination run wild!

To make firm yogurt that doesn’t become thin after stirring, use 4-6 tsp. unflavored gelatin, or two envelopes, per two-quart batch.  Soften it in part of the recipe’s water, then heat gently on stove, in microwave, or over hot water, until the gelatin melts.  Add along with remaining water.
 
*the cost per quart is based on a powdered milk cost of $2.57/lb, which is the current price at the Home Storage Center.
0 Comments

Week 38 – Powdered Milk FAQs- What? Why? How? What if it gets old? – and storing dairy-free substitutes

1/5/2020

1 Comment

 
PicturePhoto: Marina Shemesh
To help with building your year's supply (this is Week 12 of 26), see this chart. 
 

What is powdered milk?. 
Why store it?. 
How much powdered milk is recommended? And how do I store it?. 
How do I use powdered milk?. 
What if it gets old?. 
What dairy-free substitutes can I store?. 


What is powdered milk? 
Milk begins with a very high water content—about 82%.  The water is removed in a couple of steps- a low-temperature evaporative boil is first. Doing this in a vacuum allows the boiling to happen at 135° F rather than the regular 212°. Then it’s sprayed from a very tall tower into very hot, swirling air. A tiny particle of powdered milk is all that’s left when it hits the bottom. (See this article for super-interesting details.)  This milk powder is made of very small, nearly dust-sized specks.

Since fat turns rancid quickly and drastically shortens shelf life, powdered milk for long-term storage is fat-free. It’s skim milk that goes through the drying process. That’s also why it tastes watery.  Adding a little extra powder when mixing up the milk will help with this. And adding a bit of vanilla helps give it some flavor.  Serving it chilled helps, too.
 
Full-fat powdered milk is available if you know where to look. The only brand I’ve seen widely available is Nido. It’s a whole milk powdered milk you can find sometimes in the Hispanic foods section at grocery stores. In the U.S. it’s mostly used in the food industry, but tons of it per year are shipped to third-world countries, where they have few dairies, little way to transport the milk, and no refrigerators to store it in anyway. If you buy whole-milk powder, use it within 6 to 9 months unless it’s in sealed cans and stored under 75°F.  And then use it up within, say, five to seven years.
I have some that’s older than that; I can report later this week on what it’s like, if I remember…

Instant powdered milk is made by making the tiny particles clump together to make a little bigger granules. There’s air between the particles, which allows water to better penetrate when you're reconstituting it. The air also makes the powder less dense. That’s why you’ll sometimes see recipes that specify which kind to use- ‘non-instant powdered milk’ or ‘instant powdered milk’. It takes a larger scoop of instant powdered milk to be equal to a smaller scoop of the regular.  (Of course, you can go by weight measurement and get it right every time!)
 
One pound of either instant or regular nonfat milk powder will make about one gallon of milk.


Picture
 Why store it?
There are at least four big reasons-
 
1-To have the minerals and other nutrition milk provides.
 
2-To have more options in your cooking. Many recipes use milk and products made from milk. Did you know that you can, in your very own kitchen, turn powdered milk into yogurt, cottage cheese, a mozzarella-type cheese, a cream cheese substitute, and much more?
 
3-No refrigeration is required, unlike fresh milk, which sours quickly at room temperature. This is helpful in emergency situations.
 
4-For its long shelf life. Fresh milk lasts less than a month in the fridge; canned evaporated milk is best within a couple of years; but nonfat milk powder, sealed along with oxygen absorbing packets, can last for a good 20 years when kept under 75° F.


How much powdered milk is recommended? And how do I store it?
Did you notice that in the list of why to store powdered milk, I didn’t say “so you can enjoy milk three times a day”?  That’s because you couldn’t, if you were storing the recommended amount.  While you would likely use some for drinking, that’s not its primary purpose. I don’t know about you, but I’d be making most of mine into cheese for recipes!

The recommended storage amount is 16 pounds per person.  You’d need to store almost 70 pounds per person to be able to have the equivalent of three glasses of milk per day.
 
I like variety in my storage, so I include evaporated milk and sweetened condensed milk—although you can make those with powdered milk, too.  5 cans of evaporated milk is equal to about one pound of milk powder, while it takes 8 cans of sweetened condensed milk to replace one pound of dry milk powder.
 
Keep long-term storage products at or below 75°F/24°C whenever possible. If storage temperatures are higher, rotate (eat!) the food more often.
 

How do I use powdered milk?
Go to http://everydayfoodstorage.net/training-cooking/powdered-milk for recipes for evaporated milk, Magic Mix, and Condensed Soups using Magic Mix. She has a great little chart you can print out and tape to the inside of your cupboard  so you know how much milk powder to use when you're baking with it:

The Wooden Spoon class handout has a TON of recipes info on powdered milk.  It's from some classes that the Church of Jesus Christ’s ‘Welfare Square’ was teaching for a little while. The collection is not copyrighted; the two ladies who compiled it just wanted to spread the information.

When I get a bunch of new recipes, usually most of them get ignored unless I'm already familiar with them.  So skim through the recipe booklet and look through my notes on the recipes.       
 
For the recipes that give you whey (this means any of the cheeses, including the yogurt cream cheese), save the whey.  It has vitamins, minerals, some protein, no fat, and some milk sugar (lactose- very low on the glycemic scale).  I use it in pancakes, muffins, bread, etc.  If your whey has vinegar in it (most of the cheeses in there do), you can add 1 tsp. baking soda for every 2-3 cups of whey.  This will neutralize most of the vinegar.  Yes, it will foam up, kind of like those volcanoes you made in 3rd grade…


What if it gets old? 

The answer to that has a lot to do with “How do I use it?”  If it’s not old, don’t let it all get there. 
 
If it’s already old, it may still be fine.  Recent food-storage testing at the BYU Foods lab showed that 20 years can be expected on sealed powdered milk stored under 75°F.  Here’s the chart of their findings for milk and other year-supply foods. 
                                              
If you’ve opened a can and it smells bad, don’t throw it in the trash.  It’s good as garden fertilizer! Tomatoes especially need calcium, in order to avoid blossom-end rot. And milk can help prevent the dreaded powdery mildew on plants, as well as to control aphids.  Here is an article on 8 ways to use milk in the garden.


What dairy-free substitutes can I store?There are several.  There’s powdered goat milk, powdered soy milk, powdered coconut milk.  If you’re good at rotating what you store, canned milks are options- canned coconut milk is the cheapest option.  Just know it doesn’t contain much calcium. Keep calcium supplements on hand, store lots of white beans in your 60 pounds of legumes, store blackstrap molasses, and/or plan on growing lots of dark green leafy vegetables.
You can make milk-like liquids for drinking or cooking, using rice, almonds, cashews, or oats as the base. Again, these won’t contain much calcium, so you’ll need to account for that.
 
What do I store for my dairy-free family members? 
-Canned coconut milk. I usually have a whole case on hand; I use it on a regular basis in recipes, so it gets rotated.  Ditto for coconut cream.  The best prices around for both of those was at a local Asian market.                            
-Coconut milk powder. Also from the Asian market. Check the label; some brands add casein to their powder. Since this is a milk protein, it’s unsuitable for the dairy-sensitive. Other brands don’t include casein.             
-Boxes of shelf-stable coconut milk, almond milk, and/or rice milk. These need rotated about as much as the canned ones do.                                      
-Almonds, rice, cashews, oats. Because we like and use them anyway.
 
What other questions do you have?


1 Comment

Week 36- Two Minute Fudge - and Make Your Own Sweetened Condensed Milk

12/21/2019

0 Comments

 
Picture
To help with building your year's supply (this is Week 10 of 26), see this chart. 

Have you ever been to a store that sells fudge?  They display pan after pan of luscious flavors.  Well, now you can make them in mere minutes!  This recipe includes not only the basic semisweet chocolate fudge, but eighteen other flavors. 

Fudge can be made in advance, kept airtight in the refrigerator for a month, or wrapped well and frozen for 2-3 months. This recipe is super simple, and can be turned into lots of flavors.  My family’s favorites are Orange Crème Fudge and Cookies and Cremesicle Fudge. (Yes, that’s not the normal spelling, but ‘creamsicle’- regular spelling- is trademarked.)  My favorites include Caramel Swirl Fudge- in either vanilla or chocolate- Strawberry-Truffle-Layer Fudge. With pecans, please.

See here for more classic candy recipes-- toffee, penuche, truffles, fondant, and more base fudge recipes.
Picture
When making a batch of fudge, if it’s too firm or too soft, it can be fixed.

If it’s too soft, there are at least two approaches.

1- you can refrigerate or freeze it and serve it cold.  Once it’s chilled, you can eat it plain in the traditional squares, or scoop into tablespoon-sized balls.  Roll in powdered sugar or unsweetened cocoa powder, and serve as truffles.
2- make it even softer and turn it into hot fudge sauce. To do this, scrape the fudge into a microwave-safe bowl, add ¼ cup milk, cream, or evaporated milk, and heat for a minute or two, until you can stir it.  Stir until smooth.  If it’s still too thick for sauce, add more milk or cream.
 
If the fudge is too firm, scrape the fudge into a microwave-safe bowl, add 1-2 Tbsp. milk, cream, or evaporated milk, and heat for a minute or two, until you can stir it.  Stir until smooth.  Pour into a newly buttered pan.
 
If you want a healthier version of fudge, try Clean Eating Fudge. It’s Paleo! -and even works for those who can’t have dairy.


The fudge below can be made with a regular can of sweetened condensed milk, a homemade version, or even with a homemade dairy-free version. If you don't have any of those 3 options available, you can boil 7 ounces of cream, evaporated milk or (naturally dairy-free) coconut cream with 1 cup of sugar. Stir to dissolve the sugar, and you have a great substitute for sweetened condensed milk.

Two-Minute Fudge* 

3 cups semisweet chocolate chips (1 ½ 12-oz bags)
1 (14 oz.) can sweetened condensed milk (make your own here)
1 tsp. vanilla, optional
pinch of salt, optional
1 c. toasted and chopped nuts, optional
 
*Approximately two minutes of cooking time. 
 
Line an 8x8 pan with aluminum foil, waxed paper, or plastic wrap.  Spray with nonstick spray, or butter it. Set aside.
Stir together chips and milk.  Heat in microwave for one minute. Stop and stir. Repeat until the mixture is melted, stirring every minute. Stir in vanilla and salt.
 
Pour into lined and buttered 8x8 pan. Chill until firm- this will take about 2 hours in the refrigerator or 20 minutes in the freezer.
 
Makes 2 lbs. without the nuts.
 
To cut the recipe in half, 7 oz. of sweetened condensed milk is just over 1 ¼ cups.
 

Milk Chocolate Fudge
Increase chocolate to 4 cups (2 12-oz. bags). Makes almost 2 ½ lbs. without nuts.

Peanut Butter or Butterscotch Fudge
Use 4 c. peanut butter chips or butterscotch chips.

Vanilla Fudge
Use white chocolate chips, increasing to 4 cups.

Cherry Vanilla Fudge
Stir in 1 c. quartered candied cherries, replace half the vanilla with
almond extract, use almonds for the nuts.


Cookies and Creme Fudge
Break each of 16 chocolate sandwich cookies into fourths; stir into Vanilla Fudge. (see below)

Cremesicle Fudge (Orange Creme Fudge)
Make a batch of vanilla fudge, pour 3/4 of it into prepared pan. To remaining fudge, add 3 drops yellow food color, 2 drops red, and 1 tsp. orange extract.
Drop by spoonfuls onto top, swirl in.


Caramel Swirl Fudge
Melt 4 oz (about 18 squares) of caramel with 1-2 tsp. of water, drop by spoonfuls onto top, then swirl.

Candy Bar Fudge
Melt 4 oz caramel with 1-2 tsp. water, stir in 3/4 c. peanuts. Drop on top and either swirl in or cover the top with 1 c. chocolate chips, melted.

Chocolate-Peanut Butter Fudge
Add 2 Tbsp. peanut butter to hot mixture, before powdered sugar is added. Top with chopped peanuts if you like, pressing them in slightly.

Mint Layer Fudge
Make chocolate fudge; spread in pan. Melt together 1 c. white chips, 2 Tbsp. milk, 1/4-1/2 tsp. mint extract, and 1/8 tsp. green food color. Mix well, spread on top.

Orange-Pecan Fudge
Make vanilla fudge, stir in 1 Tbsp. orange zest, finely chopped, and 1 c. pecans.

Peanut Butter Swirl Fudge
Make chocolate fudge, melt ½ c. peanut butter, drop on top of fudge; swirl.

Rocky Road Fudge
Use nuts, and stir 2 c. mini marshmallows into fudge before spreading into the pan.

S’mores Fudge
Leave out nuts, stir in 1 c. mini marshmallows and 4 whole grahams, broken.

Strawberry Fudge
Replace half the condensed milk with 1 1/4 c. strawberry jam. Swirl about 2
Tbsp. jam on top. Especially good with pecans or walnuts.


Strawberry ‘Truffle Layer’ Fudge
Spread regular fudge in pan, melt together 1 c. (6 oz.)semisweet chips with 2 Tbsp. butter. Stir in 1/4 c. strawberry jam. Spread on top.

Toasted Coconut Fudge
For either chocolate or white fudge, toast 1 c. coconut, stir in 3/4 c, along with 1 c. chopped toasted pecans. Sprinkle remaining 1/4 c. coconut on top, press in. If using a fudge recipe that calls for milk or evaporated milk, you may also substitute an equal amount of coconut milk.

Wonka Bar Fudge
substitute 4 whole graham crackers, broken into small chunks, for the nuts.


Picture
Cremesicle Fudge.  
0 Comments

Week 16, Anything-Goes Muffin recipe

7/27/2019

0 Comments

 
Picture
Your week 16 assignment:  Buy for Three.

Two houses, four wards, and almost ten years ago, a friend and I were on a quest to find two things--
the perfect pancake recipe,
and a perfectly adaptable muffin recipe. 

We measured, stirred, cooked, talked, shared and compared.  (I still think the ‘Foolproof Pancake’ recipe is tops.)  And after all that, Laura compiled what I learned about muffins with what she learned about muffins, and the “Anything Goes” Muffin recipe is the result. 

It’s a basic recipe that you can customize- whether sweet or savory, it will make good muffins.  Lemon-blueberry, bacon-cheese mufins, spiced applesauce muffins, oatmeal cinnamon muffins, chocolate raspberry or chocolate banana muffins, and much more.  Do you have a couple overripe bananas sitting on your counter?  This will help you use them up. How about a wrinkly apple that has gone mealy?  It will be delicious chopped or shredded into muffins.
After you've used this recipe-- or formula-- a few times, you'll get to where you don't even need the recipe to make any kind of muffin you can think of.

What will you make with this recipe? 

Or, what did you make?

Picture
Picture
Picture
0 Comments

Reducing Food Waste-- What to do with Sour Milk -- Make Cheese and More!

5/18/2019

0 Comments

 
Week 6 assignment-- Going off your  Inventory Shopping List and this week’s sales, buy the 3 months’ worth of as many different items as you can (= Buy For 3) as your new budget allows.    You'll do this through Week 21.
_______________

A big part of food management at home is reducing waste.  There are many ways to do this. 

Serve only what you’ll eat.  Refrigerate, freeze, or re-purpose leftovers. Or share with a neighbor.  A friend of mine regularly fixes a plate of leftovers immediately after dinner, and takes it across the street to an elderly widow.

You can use a lot of your food prep trim - lemon peels can be used to flavor things, clean kitchen disposals, make homemade lemon extract and lemon sugar. Shriveled lemons, orange, grapefruit, or limes are good for making marmalade. Tops and bottoms of celery can be frozen and saved to make broth or to add flavor when you cook dry beans. Broccoli stems can be trimmed and cooked along with florets, or chopped and added to salad for a nutritious crunch.  Things you can't re-purpose or eat can be fed to chickens, and many can be added to the compost pile.

If you wonder how much improvement you could make-- and how much money you could save on food!-- remember this:
“What’s measured gets managed.”

For one week, notice, measure, and take notes on what gets thrown out. 
 Aramark, a food service contractor, began doing this, and has reduced their food waste by nearly half (44%). For them, that was 479 tons of food saved from being sent to landfills. 

This is an interesting article on what some restaurants have done to reduce waste. Most of what they've tried works in homes, also.

You may have heard that in the US we waste 40% of our food-- 63 million tons of it per WEEK. But do you know where that waste is happening?

The largest share of it (43%) is happening in our homes-- 27.1 million tons of it per year. That's about 51 ounces per person, per week, or 3.17 pounds. If my family was average, that would mean the 8 of us currently at home would be throwing out 25 pounds of food every week. Shocking!
​
That would count food trimmings when I'm cooking, vegetables and fruits that went bad before getting used, whatever is wasted on a plate, leftovers that didn't get eaten in time, and anything that got burned too badly to eat. :)

We waste much less than average, though, and truthfully throw out very little. We belong to the "Clean Your Plate Club" that my grandma and mom talked about; all but the tiniest kids have learned to only serve up what they are willing to eat. We serve the 2- and 4-year-olds their food, and only in small amounts. If they want more, they get it after the other food on their plate is gone. Usable trimmings get saved for soup or broth. Unusable ones go to the chickens. Produce that went bad gets washed and trimmed; any good parts are used, bad parts go to the chickens. (We call these, "chicken treats"!) Bananas and apples that are getting mushy get put in smoothies or in baked goods. We understand what "expiration" dates mean on food, and so use our senses of smell, sight, and taste to know if they're still fine. (And they ARE, for much, much past those dates.)   When I miss a container of leftovers in the back of the fridge and find it after a week, that goes to the chickens too. Somehow we had THREE gallons of milk go sour this week, so they were turned into quick cheese; the whey went in muffins and bread. 

Let’s look at how to reduce waste with one item- MILK.

What can you do when milk goes sour?  This applies whether it happens before the ‘sell by’ date or after. Why does milk go sour? Does that mean it will make you sick?


Milk is high in lactose, which is the natural sugar found in milk.  When bacteria are introduced to the milk, they eat the sugars and convert them into lactic acid (=fermentation).   This means the milk has less sweetness, and more sourness.   This is the process used and controlled when making yogurt, cultured buttermilk, cottage cheese, and more.  

Some bacteria can make you sick, others are perfectly safe.  Because you don’t know which bacteria made your milk go sour, using uncooked sour milk has a possibility of making you sick.  Cooking with it, however, kills the bacteria, and is therefore safe.

Ways to use sour milk
 

-use it in place of buttermilk in pancakes, biscuits, chocolate cake, cornbread, wheat   bread, or any other recipe. 
-freeze it for using in recipes next time.

-pour a cup around your garden plants- it’s good fertilizer!  Milk is used to help grow     giant pumpkins, and helps prevent blossom end rot in tomatoes.  
- feed to chickens, pigs, or dogs (boil it first if you’re concerned for your dogs)
- make CHEESE! 


That’s right, you can take sour milk and turn it into cheese.  The fastest, easiest ones to make are cottage cheese and Queso Fresco, a mild fresh cheese. The method for both is the same until after the cheese curds are drained.

One gallon of milk will make about one pound of cheese.
 

Cheese from Sour Milk
You will need:

Sour milk
Salt
Vinegar or lemon juice—maybe.
 
Spray the inside bottom of a heavy saucepan with nonstick cooking spray.  Heat over low for about a minute to form a coating-- this helps the milk proteins NOT stick to the bottom of your pan.(You can skip the spray and still be fine.  Just stir more.)  Add your sour milk, and heat over medium-high until the milk starts to steam, stirring often.  If your milk is sour enough, it will start to curdle-- separating into curds and whey.  (Remember "Little Miss Muffet"?  Curds are the white clumps, whey is the yellowish liquid left behind.)  If your milk isn’t separating on its own, add up to ¼ c. of vinegar or lemon juice, a few DRIPS at a time, stirring after each addition.  The milk will immediately start to curdle.  Remove from heat and let it rest for one minute. 

Put a fine-mesh sieve over a large bowl and pour the curds and whey into the sieve.  Move the sieve to the sink, and rinse with hot water to get the acid out.  Rinse with cold water for about a minute, until no more whey is in it.  Add salt, ½ tsp. per cup of curds.

Cottage Cheese-
For each cup of curds, stir in 2-4 Tbsp. of yogurt or sour cream.  Cover and refrigerate.  This works great in recipes like lasagna.  I can make a batch of cottage cheese (using dry milk powder) faster than I can drive to the store and purchase it. (That’s saying something; the store is about a mile away.)
 
Queso Fresco-
After draining, rinsing, and salting the curds, put them in a couple layers of cheesecloth or on a flat (non-terrycloth!) dish towel.  Twist the top of the fabric closed, and tightly squeeze the cheese over the sink.  More liquid will come out.  Attach the twisted part of the towel (your ‘bag’) to a cupboard handle, and set a bowl under it to catch any more drips.  Let hang overnight.

If you want a nice flat, round shape, instead of hanging the bag, set it inside something round—a clean, empty 29 oz peach can, a food storage container, or whatever you have.  Set something on top of the cheese, and put something heavy on top of it to press it down.  Let that sit overnight. 
In the morning, wrap and refrigerate the cheese.  Use within a week or two; this one doesn’t have a long shelf life.  Here are ways to use it. https://www.thekitchn.com/queso-fresco-the-cheesemonger-91408
 
 ---------------------------------------
Now you have leftover whey - a yellowish, clear liquid that contains protein, carbs, calcium, phosphorus, and several B vitamins.
 
The resulting whey in this recipe is ‘acid whey’ (versus ‘sweet whey’) because it is a little acidic.  How to use it?  Very much as you would sour milk or buttermilk.  Use in most recipes that call for water or milk.  Use it as a tenderizing marinade for meat; add flavors and spices as you like.  Use it to make whey lemonade, feed it to animals (chickens love it!), or as a last resort, pour in your compost bin.  It’s also reportedly used as a great hair rinse, but I haven’t tried it yet.

What else have you done with sour milk, or with whey?
0 Comments

Week 5 assignment and DIY Instant Oatmeal Packets

5/11/2019

0 Comments

 
Picture
Your assignment this week is to look through the grocery ad for things on your inventory list that you need. With the budgeted amount of money you have (ballpark figure is $14 per week, per person) buy your three months' worth of however much you can on your list.

Do you like to use instant oatmeal?  You can save money (and know exactly what you're eating) by making your own. It's so quick and handy to have it all made up!
 
Homemade Instant Oatmeal 
4 cups quick oats (oatmeal), gluten-free if you need them
1-3 tsp. cinnamon
½ - 2/3 cup brown sugar*
½ - 1 tsp. salt
optional: 1/2 cup dry milk powder
optional: 1 c. chopped dried fruit or toasted nuts

Put 1 ½ c. of the oats in a blender; blend on high until almost powdery.  Dump this into a medium-sized mixing bowl; stir in cinnamon, brown sugar, salt, and milk powder and fruit/nuts if you’re using them.
 
After making it for the first time, see if it needs adjusted for your family’s tastes-- take 1/4 c. of this mix, combine in a bowl with ½ cup water, and microwave for 60 seconds. Taste it.
Is it great? Does it need more cinnamon? Sugar? Salt?  Add as needed, then cook another bowlful to see.  Take notes so you don’t have to do this next time.  😊 
 
Store in a canister, a quart-sized ziptop bag, or pre-portioned into snack-sized ziptop bags.
This batch can easily be doubled or tripled.
 
You can pre-portion these into snack-size baggies (then reuse baggies!), or just keep a measuring cup in the canister or bag. If you want individual servings measured out ahead of time, place either 1/2 c. or 1/3 c. mix in each baggie.

TO USE:
One large serving:  use ½ c. mix and 1 c. water.  Microwave 90 seconds; let stand. 
One small serving: use 1/3 c. mix and 2/3 c. water.  Microwave 60 seconds; let stand.
For four large servings (or 6-8 small ones), use four cups boiling water and add 2 to 2 ½  cups oatmeal mix.
Adjust water and/or mix to make it as thin or thick as you like.  

    
* For children who aren't yet accustomed to sugary oatmeal, use 1/2 cup brown sugar.  For those sugar-addicted husbands, you may need to add more. Regular sugar, evaporated cane juice, or an appropriate amount of stevia may be used. 
If your brown sugar is lumpy, it can be added to the blender with the 1 ½ c. of oats and blended with them.
 
Here are some flavor combinations; the sky's the limit!

Apple Cinnamon- Use the higher amount of cinnamon; you might even go up to 1 ½ to 2 Tbsp. Stir in 1 c. chopped dried apples.

Apricot Almond- Add 1 tsp. almond extract to the oats being blended.  At the end, stir in ½ c. finely chopped dried apricots and ½ c. chopped toasted almonds.

Banana Maple- Add ½ tsp. maple extract and ½ to 1 c. banana chips to the oats when they’re blended.

Chai Spice- Use 2 tsp. cinnamon, 1 tsp. ginger, ½ tsp. cardamom, and ¼ tsp. cloves. (If you like, you can also add ¼ tsp. ground black pepper and ½ tsp. allspice.)  For Vanilla Chai, add 1 Tbsp. vanilla to the oats when they're blended, or use vanilla powder.
 
Date Nut- Use the higher amount of cinnamon. At the end, stir in ½ c. finely chopped dates and ½ c. toasted chopped walnuts or other nut.  TIP- if you chop the dates and the nuts together, the dates won’t stick to your knife as badly.
 
Dinosaur- Use the higher amount of cinnamon. Stir in ¼ c. dinosaur-shaped sprinkles.
 
Maple Brown Sugar- Add ½ tsp. maple extract to the oats being blended. Use the higher amount of brown sugar (dark brown if you have it), and the lower amount of cinnamon.

Pumpkin Spice- Use 2 tsp. cinnamon, plus 2 tsp. ginger, 1 tsp. nutmeg, and 1/2 to 1 c. pumpkin powder. Best if you also use the 1/2 c. dry milk powder.

Raisin, Apple & Walnut- Use the higher amount of cinnamon.  At the very end, stir in ½ c. chopped raisins, ½ c. chopped dried apple, and ½ c. chopped toasted walnuts.

Strawberries and Cream- Use either ½ c. dry milk powder, or ½ c. powdered creamer. Stir in 1 c. chopped dried or freeze-dried strawberries. You can also make Raspberries and Cream, Blueberries and Cream, or Peaches and Cream this way.
 
Very Berry- Add 1 tsp. vanilla to the oats being blended. Use the lower amount of cinnamon.  Omit brown sugar, and use 1 c. of the berry drink mix from the Home Storage Center. Stir in 1 c. chopped dried cranberries or other dried berry.
0 Comments

Baggie Fudge 

3/22/2014

0 Comments

 
Picture
Bonus- this fudge can be made dairy-free and still have that creamy, melt-in-your mouth texture!

This week in Joyschool I taught the kids about the process of making chocolate.  I had a library book that had pictures of each step, from cacao tree to wrapped chocolate bars, and I brought hands-on things, as well.  They got to see, smell, and taste bits of roasted cocoa beans (didn't like them!- it's like eating unsweetened chocolate but crunchier.), see and smell cocoa powder, see, smell, and have cocoa butter rubbed into their skin, we melted and molded chocolates (cute little Easter shapes)... and then made this baggie fudge.  If you're making it yourself or have careful children, a single bag is fine, but for this group that includes a few 3-year-old boys, I double-bagged it. :)  This could be a fun Family Home Evening activity AND treat. 
Our batch was made using the coconut oil and coconut cream, since 3 of the kids can't have dairy.

I had brought walnuts in the shell to use in the fudge, but the kids had so much fun cracking the nuts first and eating the bits inside that they were all gone before the fudge was ready.  It's good fudge either way!

Baggie Fudge
1/2 c. coconut oil or butter, softened or melted
1/2 c.  cocoa powder
1/3 c. coconut cream, OR 1/4 c. water and  1/2 c. nonfat dry milk powder
a pinch of salt
1 tsp. vanilla 
1 lb. powdered sugar (about 4 cups unsifted)
1/2 c. chopped nuts (optional)

Put the ingredients in a gallon-sized ziptop bag.  Put this bag inside another bag if  it seems like a good idea.  Squish, knead, or pound the bag until everything is well mixed.  (Giving the kids 30 -second turns seemed to work the best- and gave them practice counting.)  

Once it's mixed, squish the mixture into a rectangular shape near the top, making the rectangle about an inch narrower on each side than the bag.  Put the bag on a cutting board or similar surface.  Cut down one side of the bag and across the bottom with scissors. Cut fudge into squares, or use small cookie cutters to make cute shapes.  Makes about 1 1/2 pounds.

If fudge is a little too soft, let it chill in the fridge or freezer for a few minutes to firm up.


0 Comments

Dulce de Leche balls (Ositos)

2/6/2014

0 Comments

 
Picture
I've been neighbors with a few Brazilians; they have been warm, kind people who have a strong affinity for desserts made with cooked sweetened condensed milk, or 'dulce de leche'.  There's a plum-caramel filling for cakes, another cake filling made with crushed pineapple and the caramel, and that's just the tip of the iceberg.  

One Christmas my Brazilian neighbor Celia brought over a plate of these creamy, sugar-coated dulce de leche balls.  When I next saw her, I asked for the recipe and what they were called.  She shrugged her shoulders, then said, "little bears, I guess".  This is a simplified version of hers, which contained strained egg yolks and 'crema media' (half-and-half), but the results are just as delicious.  Best of all, these are cooked and ready to shape within ten minutes of starting!

Ositos
1 (14 oz) can sweetened condensed milk
unsweetened cocoa powder
about 1/2 cup sugar, for rolling


Pour the sweetened condensed milk in an ungreased, very large microwave-safe bowl.  Cover the top with plastic wrap  to help avoid boilovers: this boils much higher than you would expect!, Microwave it for 2 minutes.  Stir.  Microwave for 2 more minutes.  Stir, scraping sides down.  Repeat in 2-minute intervals for a total of either 6 or 8 minutes, stirring every two minutes.  It should thicken and darken some. To see if it has cooked enough, drop a little in a cupful of icy water, then pull out after about five seconds.  However hard it gets is how hard it will be when completely cool.  It needs to be able to hold its shape.  Put the sugar in a cereal bowl and set aside.

With buttered hands, pinch off a bit and roll in a ball, about 3/4" across.To get the brown side, drop into unsweetened cocoa powder, then pick it up and drop it  into the sugar.  After you have a few in there, roll or toss to coat, then set on another dish.

Makes 30-36 balls, about 3/4" each.
0 Comments

More on using powdered milk

5/4/2013

0 Comments

 
Picture
Yogurt Cheese

This is 'strained yogurt', the same thing as authentic Greek yogurt;  use it like cream cheese in recipes, or eat it with a little jam or fruit.   Add a bit of salt if subbing this for cream cheese.  
Since the whey- which contains the lactose, or milk sugar- is drained off, you end up with a product that has twice as much protein and quite a bit less milk sugar.

All you do is pour plain yogurt into a cheesecloth-lined colander, set it over a bowl overnight, and check on it in the morning.  You can either leave it on the counter or do this in the fridge. The longer it drains, the thicker it gets.  It works best with homemade, unthickened yogurt, since added thickeners make it hard for the whey to separate away from the solids.  If you don't have cheesecloth, use something else that liquid can drain through but the solids won't, like the superstrong paper towels, or a clean flat-woven dish towel.
16 ounces of plain yogurt will yield about 8 ounces each of yogurt cheese and whey.  You can substitute whey in place of buttermilk in recipes.  I use it for part of the liquid when making bread.


Picture
Sweetened Condensed Milk- use it to make my favorite, Two-Minute Fudge recipe.  For the closest version to a 14-oz can, use

1/2 c. powdered milk*
1/2 c. water
1 c.  sugar
2 Tbsp. butter, optional
To read more about making it or how to use it, see here.
If you happen to need it, here's a recipe for dairy-free sweetened condensed milk 

*If you happen to have some old food storage powdered milk, and it's labeled 'instant,' check to see if the milk has larger particles.  If they're more the size of coarse sand, it's fluffier and you're need to increase the powdered milk in this recipe to about 3/4 cup.

Picture
Easy No-Bake Cheesecake  

Another great way to use sweetened condensed milk!

0 Comments

Using Powdered Milk without having to drink the stuff!

1/26/2013

2 Comments

 
Actually, some of the newer "instant" powdered milks taste pretty good.  However, the non-instant dry powdered milk is generally less expensive.  It's just not so great for drinking straight.  There's more on that in the printable.

The first couple recipes are below and the next blog post will have the others.  You can get all of them without waiting, plus some extra stuff, in a two-page printable format right here.  For even more great powdered milk recipes, download the Bee Prepared Pantry Cookbook or the Wooden Spoon class booklet (see here for corrections & notes for the Wooden Spoon booklet.)
Picture
Lasagne using powdered milk?  You bet!  You can make homemade cottage cheese in 5-10 minutes.  There's even a recipe for a mock mozzarella that melts beautifully, in the Bee Prepared book.

All cost estimates are based on paying $1.89/lb for powdered milk, which is the 2013 price at the LDS Church's 'Family Home Storage Center'.

Homemade Cottage Cheese- makes about 16 oz., $ 1.00/batch

4 c. hot water                                                                          6 Tbsp. white vinegar
1 ½  c. non-instant dry milk powder                                           ½   tsp. salt, to taste

            Stir together water and powdered milk in a saucepan, heat until it starts to steam, stirring.  Drip vinegar around the edge of the pan and gently stir; it will immediately start to separate into curds and whey.  If it doesn’t, heat it up some more.  Let rest one minute.  Pour into a cheesecloth-lined colander over a bowl. Save whey, then rinse with hot water, then with cold water and break apart into the size curds you want.  Rinse for one minute or until all the whey is out. Add salt. To make it creamy, add 4-6 Tbsp. sour cream, yogurt, evaporated milk, or cream.

  The whey may be used in place of liquid (milk or water) in baking.  It has vitamins, minerals, some protein, no fat, and some milk sugar (lactose- very low on the glycemic scale.)  Since it has the acidity of the vinegar in it, you can add a little baking soda to neutralize and get extra leavening power- use 1 tsp. baking soda per 2-3 cups of acid whey; reduce any baking powder by three times the amount:  if using 1 tsp. baking soda, the baking powder is reduced by 3 tsp.

Picture
Yogurt – makes 2 quarts of plain yogurt at $ .57 per quart if using your own starter
1 ¾ c. regular nonfat dry milk, or 3 c. instant                         7 c. hot water (not over 120 degrees)
1/3 c. plain yogurt, with active cultures

Combine dry milk and 4 cups of the water.  Whisk or mix in a blender.  Add yogurt and whisk.  Add remaining water or divide the remaining water evenly between your containers; stir well after adding the milk mixture!  Pour into containers, cover, and incubate in a warm place for 4-8 hours or until set.  Tip a container after 4 hours to see if it has set.  If the yogurt is still liquid, wait 1-2 more hours.  It will set up a little more when chilled.  Store in fridge.  The ideal temperature range for culturing yogurt is 105-120 degrees.  The lower of these temperatures you begin culturing at, the sweeter the yogurt will be.  The higher, the more tart. Above 120 degrees will kill the bacteria you’re trying to grow.  Save 1/3 c. for culturing your next batch.

To flavor your yogurt after it’s made, add fruit, jam, juice concentrate, chocolate milk mix, etc., before eating.

To flavor it before culturing, use 6-8 Tbsp. of sugar per 2-qt batch,  or 4-6 Tbsp. honey (dissolve this in your water first, or it will sink to the bottom), or a 3-oz. box of flavored gelatin, or 1/3-1/2 c. jam, or 1 c. chopped or mashed sweetened fruit. The syrup from canned fruit can be used in place of part of the water.  If it’s not sweet enough, you can always add sugar when it’s done.  1-2 tsp. vanilla added to the batch is also a nice addition.  Make your own combinations- chopped cherries with some vanilla and a little almond extract, blueberries with cream cheese added, toasted coconut with caramel sauce swirled in… let your imagination run wild!

To make firm yogurt that doesn’t become thin after stirring, use 4-6 tsp. unflavored gelatin, or two envelopes, per two-quart batch.  Soften it in part of the recipe’s water, then heat gently on stove, in microwave, or over hot water, until the gelatin melts.  Add along with remaining water.

2 Comments

Sweetened Condensed Milk and substitutes

11/4/2011

2 Comments

 
Picture
Most grocery stores start having 'baking sales' right about now.  I usually stock up for the coming year whle these baking ingredients are cheaper.  This year the sweetened condensed milk price hasn't been as low as usual. 

What can you use if you don't have sweetened condensed milk? (If you want one without dairy or table sugar, see here.)

While playing with it in recipes, I've learned a couple things about it.  One 14-ounce can is roughly the same as adding 1 cup of evaporated milk and 1 cup of granulated sugar (more accurate is 7 oz. evaporated milk and 7 oz- which is 1 cup- sugar).  You can also use half-and-half, whipping cream, coconut milk, coconut cream, or powdered milk mixed to double strength.  If you need it to be rich and are using powdered milk, add a couple tablespoons of butter.  Cream of coconut is a pretty good substitute; use the same amount.  Coconut cream is my favorite to use in this when cooking for dairy-sensitive people.  You can find it, and sometimes coconut milk powder (mix to double strength for coconut cream consistency), at Asian markets.    See photo at bottom of post.

Note-- Cream of coconut and coconut cream are NOT the same. Cream of coconut can be found with the drink mixers in any grocery store. It's made of coconut milk, sugar, and stabilizers.  Coconut cream is the thick liquid extracted by crushing or grinding coconut meat. -  I've found that this homemade "sweetened condensed coconut milk" does NOT set up in the no-bake cheesecake recipe.  The homemade stuff made with actual dairy does work.  I suspect it has something to do with dairy curdling- and coconut not- when mixed with citrus juice.

If your recipe is not going to be baked, as when you're making Two-Minute Fudge, stir together the milk and sugar, then bring it to a boil to dissolve the sugar crystals.  If the food you're making will be baked, the sugar will dissolve as the food cooks.

This substitute also works in reverse: when you have a recipe that calls for 1 cup milk/cream/half&half and 1 cup sugar, you can add a can of sweetened condensed milk!

To see how to make delicious thick apple-wedge-dipping caramel, see the instructions for Making Tres Leches Cake.  Just cook the sweetened condensed milk, don't add anything else to it.

Here's a recipe for sweetened condensed milk using powdered milk:

Sweetened Condensed Milk – for the closest version to a 14-oz can, use

1/2 c.  powdered milk*
1/2 c. water
1 c.  sugar
0-2 Tbsp. butter

 If you like to be precise, use 1 1/2 Tbsp. less than 1/2 c. water (this also gives a slightly thicker result, like the can), but the first way is very close (yields 14 3/4 oz)    Other recipes use more -or less- of any of those ingredients.  Really, they all work. That said, the 'closest' version costs $ .39 if you use no butter, and $ .53 if you use 2 Tbsp.  What a deal! One important thing to know- these recipes call for hot or boiling water so the sugar gets completely dissolved. Otherwise you get grainy condensed milk.  I usually put my sugar with the water, then microwave and stir until the sugar dissolves.  Then blend with the milk powder and butter.

For more recipes using powdered milk, see the post from 10/25/10

or the recipes from
The Wooden Spoon Cooking School.  For the class handouts for all the Wooden Spoon classes, see my Favorite Resources page.

*If you happen to have some old food storage powdered milk that is labeled 'instant,' check to see if the milk has larger particles.  If they're more the size of coarse sand than of dirt, the powdered milk is 'fluffier' in the measuring cup so you'll need to increase the powdered milk in this recipe to about 3/4 cup.
Picture
2 Comments

Updated Cost and Quantity for Year Supply

8/6/2011

3 Comments

 
Picture
Members of The Church of Jesus Christ of Latter-day Saints are counseled to have three months’ worth of everyday food on hand, and then store more, longer-term storage foods, where possible.  This has typically been defined as a “Year’s Supply”, at least in the last couple generations.  Having food on hand is an invaluable part of being self-reliant.  It’s insurance, if you will, for times of unexpected illness, disability, unemployment, power outages, or for when a neighbor down the street needs a meal.  It’s also handy for sharing with a local food bank.  (Hint, hint: right now their supplies are very low!)

Once you get three months’ worth, how much will a year’s supply of food cost you?  When you look at your monthly grocery bill, is it overwhelming to think of buying more?  I looked an emergency supply store’s catalog; they advertise a basic year’s supply of food for ‘just’ $1,299.99.  For one person.  They list options of up to $3800 per person per year.  Is it really that much money to get a year’s supply?

Adding up all the 7 essentials, purchasing them mostly at the Home Storage Center, a month’s worth of food for one person is $25.31. This provides about 2200 calories a day; the catalog’s has 2000.

A year’s worth for one adult is $303.86. 

(It was $194.76 in 2010.  That’s an increase of 56%.  How’s that compare to your 401(k)? I’m quite sure food will go up more.  It is a great investment!  Wouldn’t you like to eat at last year’s prices?)

Figure in that you’re getting your year’s supply after building your three-month supply; that knocks it down to getting nine months’worth;

$227.90 per adult

 
SO, if you really want to spend $1299.99 plus tax, you could buy a year’s supply for not just one person, but for FOUR adults.  Yes, it’s different food than the ‘gourmet’ version ($3800), but here’s the counsel we’ve been given:          "We encourage members world-wide to prepare for adversity in life by having a basic supply of food and water and some money in savings.” “For longer-term needs….gradually build a supply of food that will last a long time  and that you can use to stay alive” (from All is Safely Gathered In, First Presidency pamphlet)

 If you’re storing food for children, plan on 50% of the amount for age 3 and under, 70% for ages 3-6, 90% for ages 7-10, and 100% for ages 11 and up.  Or store as much as you would for an adult, and have enough to share. 

For great recipes using this stored food, see my Favorite Resources page, under "Cooking and Recipes". 
____________________________________
Here is the cost breakdown:

Grains, 300 lbs- if you get 100 lbs each of wheat , rice, and oats, at the Home Storage Centers they cost between $11.45 and $15.45 for 25 lbs. depending on if you get white or red wheat,  rice, quick- or regular- oats.  If you average this out, it will cost you $13.55  per person, per month.  $162.60 per year’s worth. This category doubled in price from early 2010.  Your daily allotted amount would be about 2 ½ cups of flour, or about the size of a loaf of bread.

Milk, 16 lbs is $1.89/lb at the cannery, which is $2.52 per month, $30.24 per year.  Daily amount is just under ¾ cup of reconstituted milk.  This is enough to cook with, not enough to drink very often.  For instance, making your loaf of bread would/could use up this entire amount.

Sugar, 60 lbs is $ .85/lb there, $4.23 per month, $50.76 per year.  Daily amount is just about 1/3 cup, but keep in mind you’ll probably want to use it to help bottle fruit or make jam, as well as for making your bread or breakfast oatmeal.

Oil, 10 qts –this isn’t sold at the cannery, but the last good sale price I found was $2.50 for 1 ½ quarts (48 oz.) At that price, after tax, it’s $1.43 per month, $17.17 per year.  It’s only $14.38 if you buy it at Sam’s Club ($6.98 + tax for 5 qts.)  .)  Daily amount: about 2 ½ teaspoons; will also be used in making bread. Fat is necessary to help you digest fiber, as well as to access the fat-soluble vitamins A, D, E, and K.

Salt, 8 lbs- 4# box at Costco or Sam’s Club is a dollar; $ .16 per month, $2 per year.  Daily amount: about 2 tsp. It never hurts to store extra salt; it is an excellent preservative for meats and more.

Legumes, 60 lbs– the cannery sells black beans, pinto, and white, from $16.00 to $18.55 for 25 lbs.  Averaging the prices, it’s  $3.42 a month, $41.09 per year.  Daily amount: about ½ cup dry, or 1 ½ cups cooked.

In addition to the above, storing some water is an essential part of your home storage.  Plan on 1 gallon per person per day, for 2 weeks (14 days).  This is enough to drink, and not much else. 
Water, 14/gal/person-   You can store this for free by using 2- and 3- liter pop bottles, or juice containers (not milk jugs- they break down).  Or use the 5-gallons square jugs or big blue barrels; they’ll run you about $1 per gallon of storage. 

Total daily food allotment: 1 loaf of bread, 1/3 c. sugar for cooking or preserving, 1 ½ cups of beans, 2 ½ tsp. oil, a little salt, ¾ c. of milk.  You won’t get fat on this, but it will keep you alive.  It also stores in a fairly small amount of space.


When you’re done storing these items, you might decide to add a few ‘gourmet’ items- spices, flavorings,  and unsweetened cocoa are high on my list here, as are non-hybrid garden seeds.  Practice growing them now; you can save seeds from what you grow, for next year’s crop.

Notice that the costs were just for food, not containers to store them in. Most of my storage containers cost nothing.   You CAN get buckets for free, with a little effort- most bakeries give them away; all their frostings and fillings come in those buckets.  Plan on washing them at home.  There are two main sizes; 5 gallon and 2 ½  gallon.  I keep packages of dried fruit in the smaller buckets, also cornmeal or other things that I don’t use as much.  They are a great size for a pantry, too.  Some of the buckets have gaskets, some don’t.  The ones that don’t seal well are still good for storing sugar.

If you want all your wheat, powdered milk, sugar, and legumes in #10 cans from the cannery, it will cost you $86 more to get a full year’s worth, $65 to do 9 months.

I don’t can my wheat, sugar, or beans because we go through large quantities; one batch of bread would use a whole can.  It’s pretty silly storage for me.  Besides, it’s easier for me to find space for 10 buckets than 60 #10 cans; they hold about the same amount of food.

3 Comments

Homemade Hot Cocoa

12/23/2010

0 Comments

 
Picture
Merry Christmas!

Here is a simple thing to make with your family- hot chocolate.  There are a few different ways to make it-  you can add chocolate syrup to milk, or you can melt a chocolate bar into milk, or you can make it the old-fashioned way, starting with unsweetened cocoa.  It’s really fast and easy.

May you have a wonderful Christmas, full of the spirit of love and of God.

-Rhonda

Homemade Hot Cocoa

1 Tbsp. unsweetened cocoa powder
1 Tbsp. sugar or honey
1 cup milk
Pinch of salt, ¼ tsp. vanilla, optional
 
Stir together the cocoa powder and sugar.  Stir in 2 Tbsp. milk, mix until smooth.  Bring to a boil, either on the stove or in a microwave.  This is to dissolve the sugar and bring out the flavor of the cocoa.   Stir in the remaining milk, the salt, and vanilla.  Heat to the temperature you like. Top with marshmallows or whipped cream if you have them.

This recipe can be sized up to whatever you like.  I usually make a 4-cup batch, using the microwave, and a canning jar for my cooking container.  

This makes a ‘milk chocolate’ flavor.  If you like it darker, use 1 1/2 – 2 Tbsp. cocoa.  If it’s bitter, add the same amount additional sugar.

 For mint chocolate, use whatever form of mint you have- mint extract, peppermint patties, or crushed candy canes.

For raspberry flavor, you can use 1 Tbsp. of raspberry Jello powder instead of the sugar.  Orange is another good flavor to make this way.

If you like richer cocoa, use whole milk, or a bit of cream, evaporated milk,  or half-and-half.   

To make it frothy, use a blender, or an immersion blender, to whip it.  This works especially well if you used powdered milk!
 
Picture
The cocoa and sugar, ready to be stirred.

Picture
Add as much milk as you have of the sugar and cocoa- in this case, 2 Tbsp.  You want to make a smooth, pancake-batter-consistency slurry.

Picture
Bring it to a boil to dissolve the sugar and 'bloom' (bring out the flavor of) the cocoa.  Once it's at this point, add the rest of the milk, along with salt and vanilla if you want them.

0 Comments

Making Tres Leches Cake

11/8/2010

1 Comment

 
Picture
If you've never had a Tres Leches cake, you're in for a treat!  It's very moist, with a Dulce de Leche flavor throughout.  It's soaked with a mixture of 'three milks'- whole milk, evaporated milk, and cream, normally.  I tend to use whatever's on hand, though.  If you don't have cream, replace with an equal amount of evaporated milk.  You can even whip evaporated milk, if it's very cold.  30 minutes in the freezer usually does the trick.

Picture
This is how you get the Dulce de Leche flavor- caramelize a can of sweetened condensed milk.  It takes two hours if you let the unopened can boil, ALWAYS completely covered by water (or it could explode). Or if you open up the can and pour it in a bowl,  it takes 7-15 minutes in the microwave.  It really boils up, though, so use the biggest microwave-safe bowl you own!  And cover it with plastic wrap.  The condensed milk on the left is caramelized; the condensed milk on the right is what it looks like beforehand.

Picture
The baked cake, a sturdy hot-milk sponge cake.  Let it cool for ten minutes, then poke holes all over, using a skewer or similar.  (My 'skewer' is the bottom of an instant-read thermometer.)

Picture
While the cake is still hot, but the 'milks' mixture is cool-ish, pour all over the cake.  It will start soaking in.  Refrigerate for at least 3 hours, to let the liquid totally soak in and start to set up a bit.

Picture
You know how food blogs make it look like everything is always perfect?


Well... 
 a doubled recipe + the same size bowl = scrubbing!

For an easy-to print version, click on one of these, below.
Tres Leches Cake recipe
, or Gluten-free, Dairy-free, Egg-free version here.

To get the milk mixture to soak in properly, the cake should be hot and the milks room temperature: make the milk  mixture first so it can cool during cake baking time. This was modified from the Cook’s Country recipe.  I live at 3500 ft. elevation, and their version kept falling in the center.  If you live around sea level, you might need to increase the sugar back up to 2 cups, and the baking powder to 2 tsp.  

Tres Leches cake

Milk Mixture:
1 (14 oz) can sweetened condensed milk (or use the powdered-milk version)
1 (12 oz) can evaporated milk
1 c. heavy cream (sometimes I just add 1 c. more evap. milk instead)
1 tsp. vanilla
           Caramelize the sweetened condensed milk by either boiling the can (covered at ALL TIMES by water) for two hours OR in the microwave:  pour into a large microwave-safe bowl, cover with plastic wrap, and microwave for 7-15 minutes, until slightly darkened and thickened.  Stir every couple minutes, especially at the end.  This takes 7 ½ minutes in my microwave.  If it looks a little burned, it’s still OK.  Stir in about half of  the evaporated milk, then set aside 3 Tbsp. for the top of the cake. Whisk in the remaining evaporated milk, cream, and  vanilla.  Set aside.

Cake:
½ c. unsalted butter (if using regular butter, reduce salt by ¼ tsp.)
1 c. milk
4 large eggs, room temperature
1 ¾ c. sugar
2 tsp. vanilla
2 c. flour
1 ½ tsp. baking powder
1 tsp. salt
1/2 tsp. cinnamon, optional (I prefer the cake without)
           Preheat oven to 350 degrees. Heat together the butter and milk until the butter melts; set aside.  Beat the eggs for about 30 seconds, then slowly add the sugar while beating.  Beat on med-high for 5-7 minutes, until they become very thick and glossy.  Mix in vanilla and hot milk/butter.  Add flour, baking powder, and salt  (I dump them on in that order, then mix them with my fingers a bit before beating them into the batter.)  Pour into a greased and floured 9x13 pan.  Bake for about 30 minutes, until cake tests done with a toothpick.  Let sit on a cooling rack for 10 minutes.  Poke holes every half inch all over the cake with a skewer; pour milk mixture over top.  Let sit for 15 minutes, then refrigerate for at least 3 hours and up to 24.  Frost right before serving.

Frosting:
1 c. whipping cream
3 Tbsp. reserved cooked sweetened condensed milk
1 Tbsp. sugar
1 tsp. vanilla
           Beat all together until whipped and thick enough to spread.
1 Comment

Family Home Storage: a new message; Homemade Paints for Crafts

11/3/2010

0 Comments

 
(originally from 7/29/10)
At the beginning of the year we had the ‘three month challenge’.  Where are you now in your home storage program?  Which step are you ready for?  I know some of you are done with all of them, congratulations!  The more self-reliant you are, the more of service you can be.  Here’s the four-step program the Church has published.


1. Gradually build a small supply of food that is part of your normal, daily diet until it is sufficient for three months.

2. Store drinking water.

3. Establish a financial reserve by setting aside a little money each week, and gradually increase it to a reasonable amount.

4. Once families have achieved the first three objectives, they are counseled to expand their efforts, as circumstances allow, into a supply of long-term basic foods such as grains, legumes, and other staples.

Of the new guidelines, Presiding Bishop H. David Burton says, “Our objective was to establish a simple, inexpensive, and achievable program that would help people become self-reliant. We are confident that by introducing these few, simple steps we can, over time, have more success.”  

I know that following this will bless you and your family temporally, spiritually, and physically.  For more information, see “Family Home Storage: a new message”, March 2009 Ensign, or the “All Is Safely Gathered In: Family Home Storage” pamphlet. 

* * * * * * *
Need something to keep your kids entertained?  There’s nothing more fun than watching paint dry….   Well, maybe not actually watching it dry, just looking at the crystals after the paint HAS dried (see Crystal Paint, below.)   The following paints were found at http://bluebonnetvillage.com/recipes.htm    They have other ‘kid craft’ recipes as well, including several versions of ‘play-dough’ , edible dough, finger paints, poster paints, …..


Monet’s Water Color Paints

Ingredients:
1 tablespoon white vinegar
2 teaspoon baking soda
1 tablespoon cornstarch
1/4 teaspoon glycerine
food coloring


Do like the famous impressionist painters did and bring your watercolors outside to paint.
To make your own watercolors, first mix vinegar and baking soda.
Next slowly add cornstarch and glycerine to the mixture. Pour into small paper cups to let dry.
Add food coloring. The color is not as intense when it is dry so remember to add a lot of food coloring.
When dry peel away the paper cups.


Shiny, Glossy and Shimmery Paints

Moooo Paint 
1 cup condensed milk (or make your own with powdered milk)
Food coloring


Mix one cup condensed milk with a few drops of food coloring. This makes a very bright, glossy colored paint, great for fingerpainting.

Egg Yolk Paint
1 egg yolk
1/4 tsp. water
Food coloring


Mix egg yolk with water and lots of food coloring. Use a paint brush to paint on baked cookies. Return cookies to oven until egg has solidified.


Non-edible paints:

Artist Quality "Oil" Paint 
Tempera paint
Liquid dish washing soap


This paint has a smooth, glossy effect and holds color well. Mix together tempera paint and soap. Store in glass jars.


Crystal Paint
1/4 cup hot tap water
3 teaspoon epsom salts


Sparkle and Shine! Mix hot tap water and epsom salts. Brush the mixture onto a dark colored paper. When dry the salt will form crystals that shine in the light.  Photos are at http://unplugyourkids.com/2008/10/05/salt-crystal-paint/
0 Comments

How much does a year’s supply cost? and Best Drop Biscuits

10/26/2010

0 Comments

 
Picture
Once the dough is mixed, if you use a greased/sprayed 1/4 measuring cup to scoop the dough, you'll get a more traditionally-shaped biscuit.

Picture
Yum.  Tender and light on the inside, crunchy on the outside.  This batch was made with 1 cup whole wheat flour.

How much will your year’s supply cost you?  I just got an emergency supply store’s catalog in the mail; they advertised a year’s supply of food for ‘just’ $3649.95.  For one person.  Is it really that much money to get a year’s supply?

Adding up all the essentials, a month’s worth of food for one person is $16.23

                            A year’s worth for one person is  $194.76

Figure in that you’re getting your year’s supply after building your three-month supply; that knocks it down to getting nine months’worth;

                                                            $146.07 per adult.   

You CAN afford to get your home storage! 

If you really want to spend $3649.95 plus tax, you could buy a year’s supply for not just one person, but for NINETEEN people.  Yes, basic storage is different food than that ‘gourmet’ version, but here’s the counsel we’ve been given:          
"We encourage members world-wide to prepare for adversity in life by having a basic supply of food and water and some money in savings.” “For longer-term needs….gradually build a supply of food that will last a long time  and that you can use to stay alive” (fromAll is Safely Gathered In, First Presidency pamphlet)


Here is the cost breakdown:


Grains, 300 lbs- if you get just wheat and oats, at the cannery they cost between $5.80 and $8.15 for 25 lbs. depending on if you get white or red wheat, quick or regular oats.  If you average this out, it will cost you $6.98 per person, per month.  $83.70 per year’s worth.

Milk, 16 lbs is $1.40/lb at the cannery, which is $1.87 per month, $22.40 per year.

Sugar, 60 lbs is $ .56/lb there, $2.80 per month, $33.60 per year.

Oil, 10 qts –this isn’t sold at the cannery, but the price at Macey’s last week was $2.50 for 1 ½ quarts (48 oz.) At that price, after tax, it’s $1.43 per month, $17.17 per year.  It’s only $14.38 if you buy it at Sam’s Club ($6.98 + tax for 5 qts.)

Salt, 8 lbs- 4# box at Costco or Sam’s Club is a dollar; $ .16 per month, $2 per year.

Legumes, 60 lbs– the cannery sells black beans, pinto, and white, from $14.10 to $16.30 for 25 lbs.  Averaging the prices, it’s  $2.99 a month, $35.92 per year.

Water, 14/gal/person-   You can store this for free by using 2- and 3- liter pop bottles, or juice containers (not milk jugs- they break down).  Or use the 5-gallons square jugs or big blue barrels; they’ll run you about $1 per gallon of storage. 

When you’re done storing these items, you might decide to add a few ‘gourmet’ items- but that’s just extra stuff.

Notice that the costs were just for food, not containers to store them in. Most of my storage containers cost nothing.   You CAN get buckets for free, with a little effort- most bakeries give them away; all their frostings and fillings come in those buckets.  Plan on washing them at home.  There are two main sizes; 5 gallon and 2 1/2  gallon.  I keep packages of dried fruit in the smaller buckets, also cornmeal or other things that I don’t use as much.  They are a great size for a pantry, too.  Some of the buckets have gaskets, some don’t.  The ones that don’t seal well are still good for storing sugar. 

If you want all your wheat, powdered milk, sugar, and legumes in #10 cans from the cannery, it will cost you $85.83 more to get a full year’s worth, $65 to do 9 months' worth.

Here’s the year’s worth breakdown and quantities:    51 cans of wheat $137.80, 11 cans of beans $48.95, 10 cans of sugar $46.50, 4 cans of powdered milk $28.20.

 I don’t can my wheat, sugar, or beans because we go through large quantities; one batch of bread would use a whole can.  Pretty silly storage for me.  Besides, it’s easier for me to find space for 10 buckets than 60 #10 cans; they hold about  the same amount of food.


Best Drop Biscuits
 adapted from Cooks Country
Makes 12

 1 cube butter, melted and cooled a few minutes- set aside 1 Tbsp. of this.
1 cup cold buttermilk or sour milk  (1-2 Tbsp. vinegar in 1 cup regular milk)
2 c. flour
2 tsp. baking powder
½ tsp. baking soda
½  tsp. salt  (3/4 tsp. if you used unsalted butter)
1 tsp. sugar

 Heat oven to 475 degrees, no, that’s not a typo.  Mix together the butter (except reserved) and buttermilk; stir until the butter forms clumps.  (This is a faster way of getting the same results as ‘cutting in’ the butter.)  Mix all the dry ingredients together, then pour in buttermilk mixture.  Stir until just mixed in and dough pulls from side of bowl.   Drop onto  greased or parchment-lined cookie sheet.  A greased  ¼ c. measuring cup makes the perfect size scoop.    Brush with reserved butter.  Bake until tops are crisp and golden, about 12-14 minutes.    Serve warm.  These also reheat well the next day (10 minutes at 300 degrees) and freeze well, too.

You can use powdered milk in this: mix in 3 Tbsp dry milk powder when you’re stirring together the dry ingredients.  Use ice water  and 1-2 Tbsp. vinegar to make 1 cup, stir with the melted butter.

 
0 Comments

Year's Supply quantities, Roast Chicken Dinner with rice, and apple crisp

10/26/2010

0 Comments

 
Hi,

Remember  this?

"We encourage members world-wide to prepare for adversity in life by having a basic supply of food and water and some money in savings.” “For longer-term needs….gradually build a supply of food that will last a long time  and that you can use to stay alive” (from All is Safely Gathered In, First Presidency pamphlet)

Here is what a basic supply of food includes:  it will provide about 2200 calories a day, which means you’ll probably get 1800 and your husband will get 2600.  This is less than most people are used to, especially if you're suddenly living a 'more active' lifestyle, but it will keep you alive!

300 lbs grains- includes Wheat, Rice, Rolled Oats, Dried Corn, Popcorn, Flour, Pasta Products, Dried Potatoes.  Some lists say 400 lbs per person, but the current Church site says 300.  Take your pick, according to what you can handle.  Storage-wise or hunger-wise; that extra 100 lbs provides an extra 435 calories per day.

16 lbs. powdered milk- this is just enough for cooking, about ¾ cup per day.  You can store instant, regular powder, and canned milk.  It takes about 5 (12-oz) cans to equal one pound of powdered milk

60 lbs sugar- this includes white sugar, brown sugar, powdered sugar, honey, molasses, jam/jelly, corn syrup, fruit drink mix, gelatin.  If you have honey that crystallizes, set the bottle in the sun on a warm day, or put it in a pan of water on lowest heat overnight.  It will become liquid again.  You will want more sugar than 60 lbs. if you can your own fruit.

10 quarts cooking oil (2 ½ gallons)- yes, YOU NEED FAT.  Your brain is made mostly of fat.  Guess what happens if you don’t get any fat in your diet?  Plus, it’s a lot of calories for very little storage space.  The darker & cooler you keep it, the longer it lasts.  Fats include shortening, cooking oil, butter/margarine, mayonnaise, peanut butter.

8 lbs salt per person-  this is the cheapest of them all!   In addition to the round canisters, you can buy salt in 4-lb rectangular boxes; these stack together more efficiently.  At Sams’ Club, these boxes are just under $1.  Woo-hoo!  Two bucks and you have your personal salt for the year!

60 lbs. legumes, dried- includes soybeans, pinto beans, white beans, kidney beans, lima beans, anything that ends with ‘bean’ (unless it begins with ‘jelly’), black-eyed peas, split peas, and lentils.  These are a great, inexpensive source of protein.  Store the same as wheat- dry, clean, dark and cool  if possible. It takes 4 ½ (15 oz) cans to equal one pound of dry beans.

14 gallons water per person.  This is just 2 weeks’ supply, for drinking and a tiny bit for washing; the minimum our church leaders have counseled.  You may also want a way to purify water for longer-term use.  To purify, you can boil water for 2 minutes, or use chlorine bleach (plain only, not scented!)  If the water is clear, use ½ tsp. per 5 gallons of water.  If the water is cloudy, use double; 1 tsp. per 5 gallons of water.

Children do not need a full adult’s portion.  For them, figure age 3 and under= 50%, ages 4-6= 70%, ages 7-10= 90%, ages 11 and up= 100%.

Obviously, kids' ages are always changing, so when I calculate what to have on hand ( I inventory every Conference), I project out six months to a year. For instance, if someone is 6 years old, I count that child as 7 years. That way I'm not always slightly behind when it's time to replenish.

 * * * * *

Recipes today are for a whole meal….

Roast Chicken               From Living On a Dime, Jan 2010.  
Here is a very basic but yummy recipe. You can also put this in a crock pot to slow cook all day.


1 (3 lb.) whole chicken
Salt and pepper to taste
1 Tsp. onion powder
1/4 cup butter or margarine 
1 stalk celery, leaves removed

Season the whole chicken inside and out with salt, pepper and onion powder. Place breast side down in pan placing margarine and celery into cavity. Bake at 350° for 1 hour and 15 minutes or until internal temperature is 180° (82° C). You can baste with juices or melted margarine once or twice. Remove from oven and cover with foil for 30 minutes and let it rest before cutting.

You can easily adapt this recipe to your own likes and dislikes. For example, you might use garlic powder instead of the onion powder, you could slide slices of lemons or garlic cloves or even onion slices under the skin. Try other seasonings, too.

The main thing that makes this recipe great is cooking it breast side down, which makes it extra juicy.

Cheesy Peas and Rice

2 1/4 cups rice, cooked                                              
1 (10 oz.) pkg. frozen peas, thawed

1 (6 oz.) can of mushrooms, drained                          
6 oz. Velveeta, cubed*


Combine all the ingredients in a greased 1 1/2 qt. baking dish. Cover and bake at 350° for 20 minutes.

I didn't used to buy Velveeta because it was more expensive than other cheeses, but since it is the same price or less than cheddar now, I buy it more often.


Apple Butterscotch Crisp

This recipe is good served with ice cream or, for something different, try a slice of cheese or a dollop of sour cream.

 5 large (7 small) apples, sliced and peeled               
1 tsp. cinnamon

1 cup brown sugar, depending on your apples           
1/2 cup flour

1/2 cup quick cooking oatmeal                                      
1/2 cup butter or margarine, cold                                     

1 pkg. (3.5 oz.) cook and serve  
          
butterscotch pudding


Place apples in a greased 9x13 pan. Mix everything else in a bowl, cutting in* the butter until it resembles coarse crumbs. Sprinkle over apples. Bake at 350° for 40-45 minutes or until apples are tender.

You can leave out the butterscotch pudding; it won't throw off the recipe. It will still be delicious. 

*Whenever a recipe says to cut in something, that means to take a pastry cutter and mix the butter, margarine or shortening in with the dry ingredients until the mix gets crumbly looking. (I just use my fingers. It is easier for me to wash them than a pastry cutter.)

Roast Chicken Leftovers:

Chicken Spaghetti Bake-  Make your favorite spaghetti, mixing noodles and sauce. Instead of adding hamburger to it or leaving it without meat, add some cubed leftover chicken. Put it in a 9x13 greased pan sprinkle with mozzarella cheese and grated Parmesan cheese. Bake at 350° until heated through and cheese is melted.

Make Chicken Soup with leftovers- see the recipe for turkey soup.  Use ¼ the amount of water and spices for chicken because it’s so much smaller!

Leftover Leftovers- If you have any of this soup left, thicken it with a little cornstarch or flour mixed in water. Make a batch of biscuits or use any leftover biscuits you have and pour the thickened soup (now like gravy) over it.
0 Comments

Water Storage, Powdered Milk recipes & notes

10/25/2010

0 Comments

 
Picture
Powdered Milk from the Home Storage Center, $1.40/lb.  The bowl holds yogurt.  You can make plain yogurt as cheap as $ .42/quart, or $ .10/serving.

If you don’t have your water storage yet, what is a good price for water drums? Prices vary, but generally figure $1 per gallon of storage capacity.  The 55-gallon drums, then, will probably be $55 or less.  Once in a while they go on sale; I've found them at Macey's (our grocery store) for $40.  They're even cheaper if you can find them in the classifieds.  Only use food-grade drums. Empty pop bottles or juice bottles work great, but milk jugs break down fairly quickly and will leak.  If you are using  chlorinated city water,  you do NOT have to drain and refill these every year.  The First Presidency has asked us to store at least 14 gallons per person.  This is one gallon per person per day for 2 weeks. 
Attached are the recipes from yesterday's class on powdered milk.  Here's a list of what is there, and a few notes on them.  Sorry, it's a scanned-in document, so I couldn't go through and type in my notes.

Anyplace I've put cost of a recipe, it's based on the following: $1.40/lb for powdered milk, $13 for 25 lbs of sugar, $2 for a pound of butter, $8 for 25 lbs. flour.

For the recipes that give you whey (any of the cheeses, including the yogurt cream cheese), save the whey.  It has vitamins, minerals, some protein, no fat, and some milk sugar (lactose- very low on the glycemic scale).  I use it in pancakes, muffins, bread, etc.  If  your whey has vinegar in it (most of the cheeses use this), you can add 1 tsp. baking soda for every 2-3 cups of whey.  This will neutralize most of the vinegar.  Yes, it will foam up, kinda like those volcanoes you made in 3rd grade…

Go to http://everydayfoodstorage.net/training-cooking/powdered-milk  for  recipes for evaporated milk, Magic Mix, and Condensed Soups using Magic Mix. And she has a great little chart you can print out and tape to the inside of your cupboard  so you know how much milk powder to use when you're baking with it:

http://www.everydayfoodstorage.net/handouts/milk-conversion-charts.pdf

The Wooden Spoon class handout has a TON of info on powdered milk.  It is from some classes that the LDS Church's Welfare Square was teaching for a little while. The collection is not copyrighted; the two ladies who compiled it just wanted to spread the information.
   
When I get a bunch of new recipes, usually most of them get ignored unless I'm already familiar with them.  So let me familiarize you with all these possibilities....                        


 The first couple pages include:

what the difference is between regular and instant dry milk

storage times-  which are completely off!  Ignore what it says;  a BYU study shows that canned dry milk has been found to last 20+ years when kept at room temperature and below.

Mixing and drinking it- how to make it taste the best

Cooking with powdered milk

How much to store per person

How to determine if milk is past its prime shelf life

What to do with it if it's too old

Reconstituting chart

 
Now the recipes-

'whole milk' (powdered milk is powdered SKIM milk)

Buttermilk substitute

Evaporated milk- everydayfoodstorage link above gives quantities for a 12-oz can.  This costs $ .25.

Sweetened Condensed Milk – for the closest version to a 14-oz can, use

1/2 c. (non-instant) powdered milk
1/2 c. water
1 c.  sugar

0-2 Tbsp. butter

 If you like to be precise, use 1 1/2 Tbsp. less than 1/2 c. water (this also gives a slightly thicker result, like the can), but the first way is very close (yields 14 3/4 oz)    Other recipes use more -or less- of any of those ingredients.  Really, they all work. That said, the 'closest' version costs $ .39 if you use no butter, and $ .53 if you use 2 Tbsp.  What a deal! One important thing to know- these recipes call for hot or boiling water so the sugar gets completely dissolved. Otherwise you get grainy condensed milk.  I usually put my sugar with the water, then microwave and stir until the sugar dissolves.  Then blend with the milk powder and butter.


Hot Cinnamon Milk Mix- from an old 'Friend' magazine

Hot Caramel Milk Mix- like hot chocolate, only not!

Hot Chocolate Mix- one of many options out there, this one you just add water to.

Strawberry Shake- with a touch of orange to pep it up.  yummy.

Creamsicle Drink Mix- uses 3 Cannery products.  And it is really good.

Orange Julius- uses the church cannery orange drink powder.  You could use Tang if that's all you have.

Presoaked Wheat Blender Pancakes or Crepes- blender pancakes that are a little easier on your blender.  You just have to plan ahead with these.

Whole Wheat Pancake Mix

Fruit Syrup- no powdered milk here- just a really handy way to make a fruity topping for your pancakes.  The handwritten note says "Can use peaches canned in syrup and you just add cornstarch and cook"  Use 1-2 tsp. cornstarch per cup of syrup/juice.

Basic White Sauce

Cheese Sauce Mix- uses powdered cheese, pdr. milk and pdr. butter.  And onion powder.  (Remember my method of making onion powder?)

Low-Fat Cream Soup Mix -replaces 9 cans of condensed creamed soup, at $ .30 per can!

Potato Soup Mix-   very very easy.  (Well, they all are..)

Broccoli Soup- using all fresh ingredients except for the milk

Biscuit Mix- "Bisquick" where you add only water.  Use for any Bisquick recipes.  This makes as much as 2  40-oz boxes, at about $2.75/box

Honey Dinner Rolls

Whole Wheat Muffins

Weiner Schnitzel- not what you think, it's the old German dish.  Uses noodles, cheese, hotdogs.

Macaroni and Cheese- using the little 5-oz jar of cheese sauce.  This is a 'bag' recipe; everything can be put in a bag ahead of time and kept on a shelf (or given to a friend)

Microwave Caramels- mmmm

Whipped Topping- A little explanation here...  Evaporated milk will whip like cream if it is ICY-cold when you whip it.  This is glorified whipped evaporated milk, starting with the powder.  They add a few things for flavor, some oil for richness, and gelatin to keep it from going flat.  I think the gelatin gives it a strange consistency.  Next time I'll use a couple teaspoons of Instant Clear Jel.  Or cook some cornstarch with the water.  Or forget stabilizing it, and just eat it fast- maybe just whip evaporated milk and add sugar and vanilla to taste.

Fudgsicles-  don't these sound good?

Dry Milk Ice Cream- Bad name, but it uses sweetened condensed milk, which makes it really good.  The recipe claims to make a gallon, but it's really more like 2 quarts.

Peanut Butter Chews- similar to Bit-O'Honey if you use the honey instead of corn syrup.

Vanilla Pudding Mix- fat free, and has variations for chocolate and caramel pudding. When you make it, you add a tiny bit of butter and an egg, so it’s still lowfat, just not fat free.  If you cannot have wheat, substitute half as much cornstarch as the flour called for.

Plain Yogurt- really, this IS easy.  The recipe says it makes 2 quarts, but part of the water got left off the ingredients list.  Use 7 cups instead.  If you use your hottest tap water, this will be about right to start incubating.  You need the yogurt to start out between 105 and 120 degrees.  The lower end gives sweeter yogurt, the higher end makes it more tart. Wrapping the jars in a towel help keep it warm. Some warm areas to incubate it are- on top of a heating pad (cover with a  towel), an insulated cooler (I put in a jar of almost-boiling water to warm it up in there), a water-filled crockpot, a warm oven (an oven thermometer is helpful!  Hotter than 130 degrees will kill those friendly bacteria.).  Or get creative.  This costs only $ .42  per quart if you are using your own starter. 

Vanilla Yogurt- has gelatin in it, like most of the store-bought versions. This keeps it firm, even after stirring.  (Yogurt with no gelatin will become drinkable after stirring.)  If you want to use sugar instead of honey, use from 1 to 1 ½ cups.  And dissolve (boil) it in some of the water first, or it will settle to the bottom. You could use a package of flavored Jello- a 3 oz box is just under ½ c. of sugar, and  as much gelatin as one packet of unflavored.   Or use juice/syrup from canned fruit as part of your water.  Stir in fruit after the yogurt sets up.

Almond Crunch Granola- also no powdered milk, unless you count what you pour on top when eating this!

Strawberry Banana Smoothie- uses the yogurt you just made…

Yogurt-Fruit Smoothie- Banana-orange; uses yogurt as well as powdered milk

Yogurt Breakfast Waffles- yogurt makes them extra moist.  They also have a hint of orange and cinnamon in them.  I love these using the lemon yogurt.

Yogurt Dill-Veggie Dip- close to Ranch Dip

Yogurt, Berries, and Pecans on Crispbread- self-explanatory

Ranch Salad Dressing-  do you have any idea how much better fresh made is?

Fruit Yogurt Salad- uses vanilla yogurt and whatever fruit you have

Yogurt Parmesan Chicken- uses yogurt instead of mayonnaise or eggs to get the coating to stick.  Very good.

Granola, Yogurt, Berry Parfait- kinda like those little ones at McDonald’s, only you sweeten plain yogurt with honey.  You taste the fruit better this way.

Mock Mozzarella Cheese- about $1.50 per pound.  It only takes 10 minutes to make!  And it melts wonderfully.  Do use a blender to mix everything, otherwise the oil won’t mix in with the cheese curds and you’ll end up with a layer of oil on top of the whey.  (Make bread!)  NOTE- the recipe doesn’t tell you about salt.  Unsalted cheese is not very tasty.  I use 1 tsp. salt for this; I mix it in after rinsing the curds.   Even wrapping in cheesecloth, and pressing (under whatever heavy thing I can find) overnight, this hasn’t ever been cohesive enough for me to grate.  It crumbles, though. When I aged this for a couple months, it became very creamy and softer.  If you don’t have cheesecloth, you can use a piece of cotton fabric- something that will let the liquid drip out.  Cheesecloth can be found in some grocery stores in the kitchen tools section, or in fabric stores and Walmart over with the notions.

Parmesan Cheese- this is in already-crumbled form.  Best flavor after aging in fridge for 3 months, but still good used right away. 

Yogurt Cream Cheese, Yogurt Sour Cream- which one you make only depends on how long you let the yogurt drain.  16 ounces of yogurt will make just over 8 oz. of cream cheese, so it costs about $ .21  per 8 oz block.

Easy Homemade Cheese Ball- a cream cheese based cheese ball.  Use your yogurt cream cheese.

Mock Ricotta Cheese- about $ .84 for the batch, using your homemade yogurt.  ‘Real’ ricotta uses whey instead of milk, but normally you don’t have easy access to whey.  If you do (from making mozzarella?), use ¼ c. vinegar in 2 quarts whey, heat to simmering, then let sit for several hours for the curds to form.  Then strain through cheesecloth, salt,  and press.

Jalapeno Cheese- variation on the ricotta. 

Queso Blanco- this one does not melt; it holds its shape through cooking.

Homemade Cottage Cheese-  this makes the curds.  To make the creamy liquid the curds sit in, use a little yogurt, sour cream, or evaporated milk to the curds.  I like it with ¼ tsp. salt.  Add more if you like. The recipe makes about 8 oz. of curds and costs $ .36 

Cottage Cheese Scramble- a form of scrambled eggs, only mostly cottage cheese, with chives.  

Cheese-Stuffed Jumbo Shells- like Manicotti.  For those of you unfamiliar with it, this is similar in flavor to lasagna, only you use shaped pasta and stuff them, instead of doing layers.  The recipe calls for ricotta, cottage cheese, mozzarella, and Parmesan cheeses… but use what you have.  When I made it for the class, I used only cottage cheese, with mozzarella just on the top.  And only about a cup of spaghetti sauce.

Happy cooking!  

-Rhonda


0 Comments

    Need a Search bar?
    One day I may upgrade my website-- but until then, use your web browser search bar. Type in my web address and what you're looking for, like this-- 
    www.theprovidenthomemaker.com  pumpkin --  and you should get results.


    Author

    I'm a disciple of Christ, a member of the Church of Jesus Christ of Latter-day Saints, a family-defending, homemaking, and homeschooling mom of eight children, two of whom sometimes can't have milk or wheat. Growing up on a farm in a high mountain valley, my parents taught me to 'make do', work hard, smile, and help others.  I love cooking, learning, growing food and flowers, picking tomatoes, and making gingerbread houses --which CAN be made allergy-friendly-- with my children.  I hope you find something to help you on my site!

    Archives

    April 2024
    July 2023
    April 2022
    September 2021
    March 2021
    December 2020
    April 2020
    March 2020
    February 2020
    January 2020
    December 2019
    November 2019
    October 2019
    September 2019
    August 2019
    July 2019
    June 2019
    May 2019
    April 2019
    January 2016
    November 2015
    October 2015
    September 2015
    March 2015
    February 2015
    November 2014
    October 2014
    September 2014
    August 2014
    July 2014
    June 2014
    May 2014
    April 2014
    March 2014
    February 2014
    January 2014
    December 2013
    November 2013
    October 2013
    September 2013
    August 2013
    July 2013
    June 2013
    May 2013
    April 2013
    March 2013
    February 2013
    January 2013
    December 2012
    November 2012
    October 2012
    September 2012
    August 2012
    July 2012
    June 2012
    May 2012
    April 2012
    March 2012
    February 2012
    January 2012
    December 2011
    November 2011
    October 2011
    September 2011
    August 2011
    July 2011
    June 2011
    May 2011
    April 2011
    March 2011
    February 2011
    January 2011
    December 2010
    November 2010
    October 2010
    September 2010

    Categories

    All
    Alcohol
    Alternate Cooking
    Appearances
    Apple
    Apricots
    April Fools
    Aprons
    Bananas
    Beans
    Beef
    Beets
    Bench
    Beverages
    Bonnet
    Bread
    Breakfast
    Budget
    Budgeting
    Cake
    Candy
    Canning
    Carrots
    Cheese
    Chicken
    Children
    Chocolate
    Christmas
    Cleaning
    Coconut
    Comfrey
    Common Core
    Constitution
    Cookbook
    Cookies
    Cooking Oil
    Crafts
    Dairy Substitutions
    Dehydrating
    Dessert
    Dried Fruit
    Earth Oven
    Earthquake
    Easter
    Edible Weeds
    Eggs
    Emergency Prep
    Essential Oils
    Faith
    Family Home Evening
    Fertilizing
    Food Storage
    Fourth Of July
    Freezer
    Frosting
    Fudge
    Garden
    Gardening
    Gingerbread
    Gluten
    Gluten Free
    Gold
    Government
    Grains
    Gratitude
    Hat
    Herbs
    Home Remedies
    Home Repairs
    Homeschool
    Home Storage
    Honey
    Hope
    Inflation
    Leftovers
    Legumes
    Lemon
    Main Dishes
    Mixes
    Mothers
    Noah
    Non Artificial Colors
    Non-artificial Colors
    Nuts
    Oats
    Oil
    Orange
    Paint
    Peaches
    Pear
    Pie
    Pizza
    Plums
    Poem
    Popcorn
    Pork
    Potatoes
    Powdered Milk
    Prayer
    Preparedness
    Projects
    Prophecy
    Pruning
    Pumpkin
    Quick Bread
    Rhubarb
    Rice
    Salad
    Salt
    Sauces
    Self Reliance
    Self-reliance
    Sewing
    Shelf Life
    Shelves
    Sky
    Smoothie
    Snacks
    Soup
    Spices Or Seasonings
    Squash
    Strawberries
    Substitutions
    Sugar
    Summer Fun
    Three Month Supply
    Time
    Tomatoes
    Trees
    Truffles
    T-shirts
    Tuna
    Ultra Gel
    Valentine\'s Day
    Vegetables
    Water
    Watermelon
    Wheat
    Work
    Year Supply
    Zucchini

    RSS Feed

Web Hosting by iPage