The Provident Homemaker
  • Recipes and Info
    • Making Bread
  • My Blog
  • Favorite Resources
  • Documents and Files
  • 52 Weeks of Building Storage

The Early Garden; Sweet Onion Poppyseed Dressing

4/15/2011

0 Comments

 
Picture
Self-sown baby leaf lettuce. 

I'm really looking forward to eating them in a couple weeks!

Picture
Cabbage seedling.  The tiny green plants around the right side are volunteer flax. 

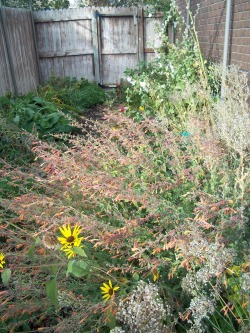
Right now, in USDA Zone 5, we are still having regular frosts.  The weather alternates between November-like grey skies with snow, and May-like days of bright green grass and leafing trees.  Still, some vegetables will grow happily in these conditions.
Plants that are growing in my garden now are onion, peas, kohlrabi, cabbage, beets, leaf lettuce, carrots, Swiss chard, parsley, rhubarb, horseradish.  There are lots more that will grow now; see Gardening 101 for more of them.  My garden has been pretty neglected this spring so far; the only reason the items above are growing is that 1) I let them self-seed, or 2) they overwintered. 

If you're new to gardening, start with 2-4 kinds of plants.  A great resource for both new and veteran gardeners is the "In The Garden" series  from the USU Extension Office.  This series covers 55 different garden vegetables, herbs, and fruits: from Artichoke and Asparagus, to Wasabi, Watercress, and Watermelon. (You thought I'd say Zucchini last, didn't you!  It's listed under "Summer and Winter Squash".) Each one has 1-2 pages of information on what type of soil the plant prefers, how much sun it needs, what nutrients it needs to thrive, and more.

If you wanted to start tomatoes or other plants indoors, you still can.  Remember that some things can be planted directly in the garden as seeds now (see above).  If you can avoid transplanting, it saves the plants some stress.  One of my favorite garden helpers is called a Wall-O-Water.  Frost-sensitive plants, like tomatoes, peppers, and watermelon, can go outside even now, if they're protected by them.  Most garden centers sell them, three to a package, for around $10.  Use them year after year, too.

If you're still looking for indoor seed-starting information, here's a quick summary:

Simple version of instructions for starting seeds indoors

Use any clean container with good drainage.  You can use commercial planting trays or pots, or poke holes in the bottom of yogurt containers, paper cups, eggshell halves, or whatever you have.  You can even use cardstock or a couple layers of newspaper to form little boxes or pots. Or cut 1 ½-2” lengths of toilet paper tubes to fill with dirt and plant in. Use a cookie sheet or plastic bin’s lid underneath your planting pots, to protect surfaces below. Plant the seeds in a lightweight mix, not garden soil.  Keep moist and dark, and covered, until they sprout.  Putting them on top of a freezer or furnace will warm the soil and help them germinate.

After sprouts appear, for best results, use a fluorescent shop light suspended 4-6” above the plants.  14-18 hours a day is ideal.  Plants will be tall and scraggly when they don’t have enough light.  They sometimes will fall over, damage the stem that way, and die.   Water them only after the top of the soil has dried out. If you’re not sure how often to water, poke your finger down ½” below the soil’s surface.  If it feels cool there, it is still moist. Overwatering leads to fungus and diseases.  Use a little fertilizer in the water every day. 

They can be transplanted after their second set of true leaves appear.   They’ll only be a couple inches tall if they’ve had enough light.  If the garden’s not ready for them, you can transplant them into larger pots so the roots can keep growing.  You may use plastic containers (yogurt cups, cottage cheese containers) with holes punched in the bottom.

 
For more information, see:


Starting vegetable seed indoors:
http://extension.usu.edu/saltlake/files/uploads/pdf/Starting%20Seed%20Indoors.pdf 

http://extension.usu.edu/htm/news-multimedia/articleID=12035

 
Space requirements for vegetables: 
http://extension.usu.edu/htm/publications/by=category/category=

__________________________________

Sweet Onion Poppyseed Dressing
1  Tbsp. poppyseed
1 Tbsp. prepared mustard
1 c. light olive oil (or other oil)
½  c. vinegar (I prefer apple cider vinegar here)
½  c. sugar*
1 tsp. salt
1 small onion, or a piece the size of a small egg 

Mix everything in a blender until smooth.

*If you want to reduce the sugar, cook a whole medium or large onion in 1 Tbsp. of the oil until tender.  Cover and cook on low another 10 minutes, until caramelized.  This makes it sweeter.  Mix the dressing as above.  Add 1-2 teaspoons of sugar for best flavor.  Use immediately or store in fridge. 

This recipe came from a neighbor ten years ago; (it's been modified a bit by me) and was from her grandmother.  The salad she poured it on was made with spinach, lettuce, sliced onion, crumbled bacon, sliced mushrooms, peas, Swiss cheese, and cashews.  One of my favorite salads.  Ever.

0 Comments

More of the cookbook, more seeds from your kitchen

3/15/2011

0 Comments

 
Picture
courtesy photos8.com

Today you get the cookie recipes.  Lest you think the whole cookbook is for treats-- because last week was cakes & frostings-- I'm also giving you the table of contents and index.  (The truth of the matter is that the categories are in alphabetical order.)

Cookies card 1
Cookies card 2
Table of contents and index

A post last week had a short list of seeds you may not need to buy because you have them already.  Here's a longer list of them.  It includes ones I've mentioned before, to put the info in one place.
There are lots of seeds that you may already have at home, that you can plant outside. For instance:

-dry beans  (i.e. pinto beans, Great Northern, kidney, black-eyed peas, garbanzo, Lima, etc.)
-seeds inside a tomato (may or may not be hybrid- look it  up online if it matters to you.  What it grows into will NOT be a hybrid, though!)
-seeds from melons or any winter squash (some are hybrids)
-wheat kernels (good for sprouts, wheat grass, or let it grow to maturity)
-amaranth (good for greens, as well as the seeds)  or quinoa

-flax seed (gives you beautiful blue flowers, more seeds, and fiber if you're interested in spinning...)
-coriander (whole, not ground!) the plant it grows is cilantro; harvest the seeds for more coriander
-mustard seed- the greens are good eating, plus more seeds..
-fennel seed
-celery seed (actually is not celery, you grow this one for the celery-flavored seed)
-aniseed (anise seed)
-other whole spices or herb seeds
-raw unsalted sunflower seeds
-raw unsalted pumpkin seeds
-raw unsalted peanuts

And roots you can plant:

-carrots or parsnips (you'll get ferny foliage and lacy white flowers, followed by lots of seed for next year)
-other root vegetables- beets, turnips, radishes, etc- will give you seeds this season
-onions, garlic, or shallots that are starting to sprout (or not).  You'll get ball-shaped flowerheads, then seeds from them this year, too.
-potatoes that are shrivelling or sprouting- turn that one into several!  -don't throw them away!
-horseradish (a chunk of root from the grocery store will grow)- this is the 2011 Herb of the Year
-ginger root
-Jerusalem artichokes ('sunchokes')

And if you want a tree:

-raw tree nuts- walnut, pecan, hazelnut, almond, etc.
-avocado pits
-seeds from any citrus
-cherry, apricot, pear, plum, peach pits or seeds.  NOTE: these are almost always hybrids.  The fruit it grows will most likely not be the same as you ate.  But it's something, and it's food, and if you don't like it, you can always use it as rootstock for a graft from a neighbor's good tree.  Or firewood.   :D

It's helpful to look online to find the plant's ideal growing conditions and how many days until harvest. 

0 Comments

Cheap solar cooker; Oven Fried Potatoes

11/6/2010

0 Comments

 
Picture
The BYU Solar Cooker- designed to work well with whatever materials you have on hand to build with.  This one uses cardboard, foil, and a box to support it, though a bucket or some rocks would work too.

(Originally from 7/01/10)

I'm excited right now because this idea works!  Last week I cooked some carrot cake in a really
cheap and simple solar cooker. I got a windowshade at D.I. for $1.50, used a canning jar spray-painted black for a cooking pot, and fastened the edges of the shade with  metal brads (like you use in kids’ projects).  I set it outside, angled it so my shade fell right into from in front, and left it for an hour.  Yummy!   Not only that, but my 'carrot cake' was just my simple muffin recipe with cinnamon, raisins, and a handful of dried (not reconstituted, either) carrots from the Family Home Storage Center. 


So how did I make it?  Mine looked like these two solar cookers- the first uses that car windowshade, and the second just uses cardboard and aluminum foil.  Both designs are VERY similar, they just use different materials.  Use what you have; if you didn’t have aluminum foil but had one of those Mylar emergency blankets, you could use that.  Solar cooking works best from March through October, though you can still use your solar cooker in the cooler months.  It helps to put the cooker against a south-facing wall, to get more reflected energy, during the ‘off’ months.  Here’s the first link:  http://www.solarcooking.org/plans/windshield-cooker.htm .  The other version (from Dr. Steven Jones @ BYU) is made with cardboard and aluminum foil; the website has great info on why, how, and what to cook, including cooking times.  You can even make ICE with a solar cooker.  No kidding. It's at  http://solarcooking.org/plans/funnel.htm  This link also has cooking times for different types of food.


To cook a meal for a family, one way to cook a bigger amount is just use a bigger container.   Maybe layer multiple containers? Or layer food in one container. Usually not every part of a meal needs cooked, anyway.  I have pans that stack together, to cook things simultaneously.  You could also use a gallon-sized glass jar painted black; I got a couple from a store that makes chocolates.  They got the jars when full of maraschino cherries, and sold them to me (empty) for $1.  But any container that is dark (black or dark blue) can be cooked in.  Maybe use a Dutch Oven or enameled cooking pot.

And if you wonder why the instructions for the foil/cardboard solar cooker say to put a wooden block under the jar/pan before cooking, I found out why-  it's to keep heat from escaping out from underneath.  The first time I cooked with this, my carrot cake was a little underdone on the bottom.  Apparently that's why.  

 
I have also baked cookies in my van window.  I was told that it has to be at least 95 degrees outside for that to work, it gets to about 250 degrees in the window that way.  I tried it on  a slightly cooler day (93?) and it worked, barely.  Now if you put the food next to the glass, and put a sunshade BEHIND the food, on the dashboard, that might give you a much warmer (and bigger) cooking spot. Hopefully it doesn't bake your dashboard!  The glass IS tempered, though, so that part should be OK. 


You can also use a vehicle for dehydrating food because it gets so hot. Just be sure to open windows a bit for airflow. ( I haven't tried that one yet, though.)  You can use clean window screens or an old screen door for a drying tray.  Cookie sheets work, too, but drying will take a little longer because the bottom can’t get air.

 * * * * * * *
Those of you who planted potatoes this year probably now have those delicious, creamy ‘new potatoes’ ready.  (Or just use whatever kind from the store….)  Maybe try cooking these in your solar oven!
 
Oven-Fried Potatoes 

2-10  potatoes- however many you want   
1-2   Tbsp.   vegetable oil   
Seasoned salt, dry ranch dressing mix, or Parmesan cheese   

Heat oven to 450 degrees.  Wash potatoes well, then cut into strips or wedges about 1/4-1/2-inch thick , unless they're 'new potatoes'; leave those whole or cut into bite-sized pieces.  Put them all in a bowl, drizzle the oil over them, and then sprinkle a good amount of seasoned salt, dressing mix, or Parmesan cheese over the top.  Stir well and add more salt or cheese if it looks like they need it.  Spread potatoes out on an ungreased cookie sheet.  Bake for about 15-30 minutes or until lightly browned and tender when you poke the thickest one with a fork.  

 
0 Comments

Tomatoes in the garden; edible playdough, and PB Fingers

11/6/2010

0 Comments

 
Picture
from photos8.com

(originally 7/08/10)

Here in the Salt Lake Valley, we still have a couple months of the growing season left; it’s not too late to plant some things.  Beans, beets, carrots, and turnips are good ones to put in right now.  You can even grow cool-season crops like peas, lettuce, spinach, chard, and cabbage, if you wait a couple more weeks for temperatures to drop a bit.

Here are a few quick tips for growing tomatoes- 

*fertilize with 1 Tbsp. nitrogen (34-0-0) at four and eight weeks after transplanting.  For me, that’s right about now. Put the fertilizer on the ground, to the side of the plant.  Gardeners call this “side dressing”.

*Give them 1-2 inches of water per week, water deeply and infrequently.  To know how often to water, dig a 4” deep hole, feel the soil at the bottom.  If it feels cool and moist, you don’t need water yet.  Wait until the top four inches dry out, then water again.  Mulch around them to keep moisture in and to reduce weeds.  *It will take about 25-35 days for a flower to become a ripe tomato.  It seems to speed up ripening if you break off a few little branches.  This tells the plant it had better hurry up and produce seeds before something happens to it.


for more info on tomatoes, including what causes blossom end rot: http://extension.usu.edu/files/publications/factsheet/HG_2004-05.pdf

info on planting beans:

http://extension.usu.edu/files/publications/factsheet/pub__7948214.htm

and information on growing about any fruit, vegetable, or herb: 

https://extension.usu.edu/yardandgarden/htm/vegetables-fruits-herbs    

Here are a couple great quotes I ran across recently:

"Self-reliance is a product of our work and under-girds all other welfare practices. It is an essential element in our spiritual as well as our temporal well-being. Regarding this principle, President Marion G. Romney has said: “Let us work for what we need. Let us be self-reliant and independent. Salvation can be obtained on no other principle. Salvation is an individual matter, and we must work out our own salvation in temporal as well as in spiritual things.” - (In Welfare Services Meeting Report, 2 Oct. 1976, p. 13.), quoted in “In the Lord’s Own Way” Elder Russell M. Nelson, Ensign, May 1986

"There is more salvation and security in wheat than in all the political schemes of the world". - Orson Hyde, Journal of Discourses, 2:207  Or in whatever food you end up storing.

Now for the recipes:

The two below are almost the same thing:  the first is stiff because of the large amount of milk powder and powdered sugar, the second starts with the same ratio of PB and honey, but thickens it up with cereal/oats and just a little milk powder.  Just goes to show you can do your own variations if you like.  On those days that we’re out of bread and don’t know what to do for lunch, we’ll whip up a batch of these Peanut Butter Fingers (though we usually shape them in balls) and eat those.  It’s our peanut-butter-sandwich, fun-sized.  If you go by what the PB jar says is a serving (2 Tbsp.), the PB Fingers recipes only feeds 3 people. 


 Edible Playdough  - makes about 2 cups’ worth, 1 ¼ lbs.

1   cup   peanut butter   
1   cup   dry milk powder   
1   cup   powdered sugar   
1/2   cup   honey   

Mix peanut butter and honey together until smooth.  Stir in milk powder, then add powdered sugar.  Stir as much as you can, then dump out on counter and knead with your hands until it all sticks together.

 
           Peanut Butter Fingers  (small batch)

Yield: about 20  (2”) "fingers"

1/3   cup   peanut butter   
3   Tbsp.   honey   
1/2   cup   corn flakes   
1/2   cup   quick-cooking rolled oats   
1/4   cup   dry milk powder   
1/4   cup   raisins or dried fruit bits    
Sesame seed, if you like   

In a medium mixing bowl stir together the peanut butter and honey until smooth.  Put corn flakes in a plastic sandwich bag.  Close the open end.  With your fist, crush the corn flakes into small pieces.  Add corn flakes, oats, milk powder, and raisins to the peanut butter mixture in the bowl.  With your hands, mix well.  If mixture is too dry to hold together, mix in a few drops of water. 

       Using a well-rounded teaspoonful for each, shape into logs 2 inches long and 1/2 inch wide, or about the size of your finger.     Spread the sesame seed (if you're using it) in a pie plate.  Roll peanut butter fingers in the sesame seed.      Store in the refrigerator in an airtight container.  If they don’t disappear first.

 
0 Comments

The Celestial Nature of Self-Reliance, Lemon-Zucchini Bread

10/28/2010

0 Comments

 
Picture
(originally from 8/5/10)
Do you have garden produce yet?  Or are you seeing it at farmers' markets?  We got the first yellow summer squash of the year yesterday.  This is exciting!  Unfortunately, we don’t have zucchini at all because one of my little people stepped on the plants just as they were coming up.  I replanted, but didn’t water well enough that first week…


Fortunately, I still have frozen zucchini from last year.  I used to shred it and freeze it in quart bags, which was the proper amount for a double batch of my zucchini bread, but didn’t like how it thawed.  It separated into water and strings of fiber.  That’s kind of baffling to cook with.  There’s a much better way-  puree it! Chop the zucchini into chunks small enough to fit down your blender, and buzz until smooth.  A bonus is that the texture of your baked goods will be smoother. 

Our favorite recipe to use it is Lemon Zucchini Bread.  It has a little more flavor if you use fresh lemons, but is still good using bottled lemon juice and dried lemon zest.  Or use your lemon-zest-sugar, (find it in the archives under 'homemade orange seasoning', in the Spices or Seasonings category, right. And FYI, Zucchini bread, since it’s a ‘quick bread’, is simply a variation on the muffin recipe.   To see for yourself, go look at the 'Anything-Goes' Muffin recipe.                                          

 *  *  *  *  * 
Now, for the thought of the week- a First Presidency message from 1984, reprinted in the Ensign last year as one of the ‘classics’- “The Celestial Nature of Self-Reliance”.  Or, ‘what does self-reliance have to do with eternal life’? Think about it: Is food/money/water storage a suggestion or a commandment?  This article has something for any of us to work on- whether you haven’t started, are a little ways into it, making a lot of progress, or have built up all your reserves.  I HIGHLY recommend re-reading the whole article, below is a condensed piece of it:

 “Since the beginning of time man has been counseled to earn his own way, thereby becoming self-reliant. It is easy to understand the reason the Lord places so much emphasis on this principle when we come to understand that it is tied very closely to freedom itself.

Now, I wish to speak of a very important truth: self-reliance is not the end, but a means to an end.

Doctrine and Covenants 29:34–35 tells us there is no such thing as a temporal commandment, that all commandments are spiritual. It also tells us that man is to be “an agent unto himself.” Man cannot be an agent unto himself if he is not self-reliant. Herein we see that independence and self-reliance are critical keys to our spiritual growth.  Whenever we get into a situation which threatens our self-reliance, we will find our freedom threatened as well.  If we increase our dependence, we will find an immediate decrease in our freedom to act.

The key to making self-reliance spiritual is in using the freedom to comply with God’s commandments.”

For the whole article, which I know can bless everyone’s life,  go to The Celestial Nature of Self-Reliance at lds.org.

If using fresh lemons for this recipe, you'll need two. 

Lemon-Zucchini Bread


1 lb. zucchini or other summer squash (4 c. loosely packed, or 2 cups pureed)
¼ c. lemon juice*
2 Tbsp. fresh lemon zest, OR ½ tsp. lemon extract, OR 1/8 tsp (16 drops)    lemon essential oil
2 c. sugar
½ c. oil
3 eggs
3 c. flour
1 Tbsp. baking powder
1 c. chopped walnuts, optional

Place lemon juice, zest, sugar, and oil in a bowl and beat.  Add eggs, one at a time, beating well after each.  Stir in flour and baking powder, then add zucchini and nuts.  Pour into two greased and floured 9x5 loaf pans.   Or use three 8x4 pans.  Bake at 375 degrees about 50 minutes (40 for 8x4 pans) or until a toothpick inserted near center comes out clean.  Let cool in pans for 10 minutes, then turn out onto a cooling rack. Wrap or bag when completely cool. The flavor is even better the next day.


See the blender-mixing-method here.  

 *An acceptable substitute for lemon juice in this recipe is 1/4 cup vinegar (apple cider vinegar is better but not necessary) and a little bit extra lemon zest, extract, or essential oil.

 
0 Comments

link to "Top 10 Reasons for not starting food storage"; Curried Zucchini Bisque

10/27/2010

0 Comments

 
 How about another zucchini recipe?  Any summer squash can be used in the recipe.  Since I don’t have zucchini this year, (the seedlings were stepped on...) I’ve been making my lemon-zucchini bread with yellow summer squash, too. “Bisque” usually means a thick, creamy soup thickened by pureeing it, instead of by adding flour.  We made some yesterday using an immature Hubbard squash (picked by an enthusiastic child…), and it was delicious. The recipe came from the Ukraine; my sister ate it- and loved it- there on her mission.   In the bisque, the curry powder is great, but you can also  try other spices you like-   using basil or ground coriander  to taste, or a half packet of ranch dressing mix powder (Remember dressing mix is salty, so leave out the salt in the recipe).  The soup really shines when served with “Best Drop Biscuits” (archived under Quick Breads) or homemade French bread; something with some crunch to contrast with the silkiness of the soup. 

Here’s a video on YouTube about food storage, a lady from Arizona… this segment is “top 10 reasons for not starting food storage”: here if the link didn't work.  The sound doesn't work really well, but it's still worth watching!   http://www.youtube.com/watch?v=HhGaTlwYs-s      I thought it was pretty funny, but it makes you think.  Just remember that when she says ‘year’s supply’, that you don’t worry about that part until you reach Step 4 from the All Is Safely Gathered In booklet on providentliving.org. How much you store, on that step, is up to you to study and pray about.  Here are the four:

1. Gradually build a small supply of food that is part of your normal, daily diet until it is sufficient for three months.

2. Store drinking water.

3. Establish a financial reserve by setting aside a little money each week, and gradually increase it to a reasonable amount.

 4. Once families have achieved the first three objectives, they are counseled to expand their efforts, as circumstances allow, into a supply of long-term basic foods such as grains, legumes, and other staples.

 Happy storing! 
-Rhonda

 
Curried Zucchini Bisque
2 Tbsp. butter
2-4 tsp. curry powder- or use other spices you like
1 medium onion, chopped
¼ tsp. black pepper
3 c. chicken broth, or 3 c. water and 1 ½ tsp. chicken bouillon
1 (7-8 oz.) potato, cut in ½” cubes
1-1 ½ lbs. zucchini, trimmed and cubed
½ tsp. salt
1 ½ c. cream or evaporated milk (12 oz. can)  or a 12-oz. can of coconut milk

            Combine butter, curry powder, onion, and pepper in a medium saucepan.  Cook, stirring, for 2-3 minutes on medium-high heat.  Add broth, potato, zucchini, and salt.  Simmer 20 minutes or until potato is tender.  Add cream and puree the soup until smooth.         Serve garnished with croutons if you like.  Cubed chicken is also good in this. 

 
0 Comments

Summer squash and pumpkin powder, Foolproof Pancakes

10/27/2010

4 Comments

 
Picture
I love these powders!  Left to right: tomato powder, pumpkin powder, yellow summer squash powder, dried crumbled greens to put in soups in the winter.  (These greens are pigweed leaves- one of the wild edible weeds in my yard.)

Picture
Hot, fresh pancakes are simple to make. 

What else can you do with all that summer squash you have?  Make it into leather!  Yes, I know your children won’t think that’s the best snack around, but it’s not for them.  At least not by itself.  Better yet, turn it into powder.

The idea behind this is that pureed squash can be added to soups and breads (as in Zucchini Bread), and it takes a LOT less storage space when it’s dried.  There are at least two ways to get dried pureed squash:

(1)  Puree it, pour it on food dehydrator sheets, dry, and roll up, and

(2)  Slice the squash (1/4” wide is good), dry it like that, then run it through your blender when it’s crispy-dry.   This vegetable powder takes up even less storage space than the leather, plus it reconstitutes faster. If you're doing this with pumpkin, steam it before slicing; it will dry quite a bit faster and not have that raw taste.

(3)  Store it in something fairly airtight, in a dark area.  Canning jars are great, especially if you seal them by using a new lid, the ring, and an oxygen packet. (see Dry Canning.)

Now, how do you use it in recipes?  And how much do you use?  Remember thinking in school that you’d NEVER use  math in ‘real life’?  Ha!  It’s incredibly useful in the kitchen, especially when you start doing your own thing.

Measure and write down the quantity you start with, then measure and write down what you end up with.  Write it on your storage container, trust me, you’ll forget otherwise.   For instance, I started with 2 ½ lbs of yellow squash, which is 5 cups of puree.  I ran it through the blender, poured it on my (SPRAYED) dehydrating sheets, and turned on the dehydrator until it was dry and curling up on the edges and thin spots.  My sheets can fit two cups of puree each, which is one pound, so each roll of ‘leather’ is worth that much in a recipe.  To use it in a recipe, tear it up in pieces and soak it in just under 2 cups of hot water, for probably 30 minutes or so.   Then use it just like fresh puree, in whatever recipe you have.  There are photos and more detailed information on the Zucchini Powder post.

For making the powdered squash: the latest batch, 5 cups of puree, became just 10 tablespoons after drying and powdering.  That means to make one cup of puree, use 2 Tbsp. powder along with just under 1 cup hot water.   Isn’t that amazing? Think of the space that saves!  Five cups, which would have taken up freezer space, now stores in the space of about 2/3 of a cup.  The pumpkin I dried requires 3 Tbsp. plus water to make a cup.  This pumpkin powder bakes up beautifully in pies and breads.

 
When I make vegetable powder, it usually sticks to itself in a big lump after storing a little while.  Normally I just whack it a couple times to break off what I need, or chop around in the jar with a butter knife.  This time something new occurred to me- sometimes a little cornstarch is added to powdered sugar to keep it from lumping.  It’s a good moisture absorber, so my most recent batch has a little cornstarch added to it.  So far, so good.  We’ll see in six months how it really works.  Just in case that quantity messes with my recipes, I wrote how much cornstarch is there, on the jar of powder.  In this case, it’s 1 Tbsp. cornstarch per 2 cups reconstituted puree.  It looks like maybe more than necessary, but so far nothing is sticking!


You can powder about anything- think what you ever use in a pureed form, and make that into vegetable powder.  Tomato powder is great, it can be used to replace tomato paste, tomato sauce,  or tomato juice, depending on how much powder you use with how much water.  Mushroom powder is nice for cream-of-mushroom soup, or for extra flavor in soups and stews, onion powder goes almost without saying, carrot powder is good, too, and beet powder is sneaky but awesome. Throw it in almost anything.  I mostly use it to color frosting, though, since one of my boys can’t have artificial colors without his eczema flaring. It’s also great way to use beets that stayed in the garden a little too long and became a bit woody.  Try this out, and see what you think!


           Foolproof Pancakes -for my size family, we triple this
Makes 10 3" pancakes        (You can also turn this recipe into Pumpkin Pancake mix.)

1   cup   flour   (white or whole wheat)
1   cup   buttermilk or sour milk   
1   tsp.   sugar   
1/2  tsp.   baking soda   
1/2  tsp.   salt   
1   egg   
2   Tbsp.   butter, melted, optional

Combine all and whisk lightly.  Cook on a greased or non-stick skillet,  on medium-high, using 1/4 cup batter per pancake.  Cook until bubbles form around outside edges, then flip and cook until other side is browned.

The original recipe called for 3/4 cup buttermilk and 1/4 cup whole milk, but what I've got above works great.
For blueberry pancakes, stir 3/4 cup of blueberries into batter. 
For banana pancakes, slice one banana into batter. 
Picture
Cook pancakes on high heat, either on a greased or nonstick surface.  When the bubbles around the edges stay 'popped' and the edges are not runny, flip the pancake.

Picture
Cook until the other side is golden as well.  The pancake will puff up when you first flip it, and then it will stop rising.  If you're not sure if it's done, poke one in the center.  It shouldn't be runny.  If you flip the pancakes a second time, they will deflate and be more dense and flat.

4 Comments

Gladness and Cheer, Just-Fruit-and-Nut Bars

10/27/2010

0 Comments

 
Picture
Picture
Picture
(Originally 9/2/10)

I love this time of year!  The temperatures have dropped enough that the roses are reblooming, the grass is having an easier time, and the mornings and  late evenings have the smell of earth and coolness.  The garden is in full swing, tomatoes are fragrant and sweet,  most of the lumps that come out of my garden are potatoes instead of rocks, and I get to be creative using squash again.  What a fulfilling time, enjoying the fruits of our labors (or others’ labors, if you prefer the farmers’ market or grocery store).  It brings to mind   D&C 59:18-19 “Yea, all things which come of the earth, in the season thereof, are made for the benefit and the use of man, both to please the eye and to gladden the heart;

   Yea, for food and for raiment, for taste and for smell, to strengthen the body and to enliven the soul.”

I’m grateful for the beauties of the earth that the Lord has given us, for the wonderful things he’s put here for us to wisely enjoy.  The recipe at the end of the email uses nothing but some of these things that grow for us. Enjoy!


Here is a bit from Elder Maxwell, from a talk he called “Be Of Good Cheer”- both sobering and encouraging. 


“We are living in a time in which we shall see things both wonderful and awful. There is no way that we can be a part of the last days and have it otherwise. Even so, we are instructed by our Lord and Exemplar, Jesus Christ, to “be of good cheer.” (D&C 61:36; D&C 78:18.)

Jesus has given that same instruction to others before, when the stressful circumstances in which they found themselves were anything but cheerful.

“In the world ye shall have tribulation: but be of good cheer; I have overcome the world.” (John 16:33; italics added.)

What precious perspective we obtain from the gospel of Jesus Christ concerning things that really matter—against which we measure the disappointments of the day!

Jesus calls upon us to have a deliberate trust in God’s unfolding purposes, not only for all humankind but for us individually. And we are to be of good cheer in the unfolding process. The Lord has made no secret of the fact that He intends to try the faith and the patience of His Saints. (See Mosiah 23:21.) We mortals are so quick to forget the Lord: “And thus we see that except the Lord doth chasten his people with many afflictions … they will not remember him.” (Hel. 12:3.)

Given the aforementioned grand and overarching reasons to rejoice, can we not “be of good cheer” in spite of stress and circumstance?

President Brigham Young said of a geographical destination, “This is the place.” Of God’s plan of salvation, with its developmental destination, it can be said, “This is the process”!   

(from “Be of Good Cheer” by Neal A. Maxwell,  Oct. 1982 Conference) http://lds.org/ldsorg/v/index.jsp?hideNav=1&locale=0&sourceId=1ca9c5e8b4b6b010VgnVCM1000004d82620a____&vgnextoid=2354fccf2b7db010VgnVCM1000004d82620aRCRD
If you can make the time, please read the whole thing, it’s wonderful!


Now for the recipe: these fruit/nut bars are basically the same as the old-old recipe for ‘fruit balls’ or ‘dried fruit candy’, if you’ve run across those before.  The dates are there both for sweetness and stickiness to hold the whole thing together.  

Just-Fruit-and-Nut Bars (the original 'energy bar') and naturally gluten-free!

1/3 cup chopped pecans - toasting the nuts will increase the flavor
1/3 cup chopped dates
1/3 cup chopped dried apples 

 Put the pecans in a food processor (or blender?) and chop until finely ground.  Remove and do the same with dates and apples.  Add the nuts back in, add a pinch of cinnamon, and process until it holds together.  Divide into 6 pieces, mold each one into a bar, and wrap tightly in plastic wrap, waxed paper, or parchment.  81 calories each, if you care.   (I’m thinking these things ought to be double-sized- plus I’ll make my batch with 1 cup of each ingredient.)

If you can’t have nuts: the nuts are there to give body and fat for shaping, digestibility and energy, so try a combination of chopped-up rolled oats and coconut oil (or butter)

Variations:

Apricot-Almond: use equal amounts dried apricots, dates, and almonds

Cherry Tart:  equal parts dried cherries, dates, and walnuts or almonds

Peanut Cookie: use peanuts and only dates (2/3 cup).  Add a pinch of salt and a bit of vanilla.

Cashew Cookie: same as Peanut Cookie, except use cashews.

How about using dates, dried pineapple, macadamias, then rolling in coconut?

Or use any nut and dried fruit you have, or whatever else sounds good…..

 
0 Comments

Garden Seeds, homemade orange flavoring and EASY marmalade

10/26/2010

0 Comments

 
Picture
Make your own citrus flavoring by saving the peels, drying,  and powdering them with some sugar.  The marmalade recipe, below, is even faster.

Picture
From left to right:  wet-canned candied orange peel, dried-first and then canned candied orange peel, orange marmalade.    Baby food jars are a great size to fill and give away with a loaf of bread.  I dress up the lid with a square of fabric, and secure with a ribbon or rubber band.


How is your 3-month supply coming?  I know some of you are past that; another post lists quantities for a year’s supply.  Once you have 3 months, remember it counts towards your full year, and long-term storage foods are the cheapest you can eat.  It will cost you less to get that remaining 9 months than it did to get the 3 months’ worth.

Now for this week’s information, the recipe is for something simple  to do with all those wonderful oranges that are in season right now.

President Benson said, “There are blessings in being close to the soil, in raising your own food even if it is only a garden in your yard and a fruit tree or two.  Those families will be fortunate who, in the last days, have an adequate supply of food because of their foresight and ability to produce their own.” –October 1980 General Conference

Between fall harvest and early spring is a perfect time to plan your garden.  A lot of stores already have their seeds in stock by February, and many seed companies have discount coupons to their sites online. 

I suggest starting small.  If you’ve never grown anything, start with just 1-4 types of vegetables your first year.  Some easy ones include lettuce, peas, radishes, beets, green beans, tomatoes, and pumpkins.   If you don’t have a garden spot, try growing them in a flower bed.  Or just tear out some grass.   You’ll water the same amount, but get food out of the deal.

The best resource around for Utah is the USU Extension office.  Their website is http://extension.usu.edu/  

For which varieties are known to produce well here, look at "Recommended Vegetable Varieties",  http://extension.usu.edu/files/publications/factsheet/pub__5657148.pdf

For more gardening info, go to the Horticulture Fact Sheets (shortcut is http://extension.usu.edu/htm/publications/by=category/category=43 )There is all the other info you'd want on growing any particular vegetable- when to plant, how much to fertilize, how much food you can expect from each plant, etc. 

For when to put your seeds in the ground, here's "Suggested Vegetable Planting Dates for the Wasatch Front", http://extension.usu.edu/files/publications/publication/Horticulture_Garden_2009-01pr.pdf   Nothing goes in the ground yet, unless you have a greenhouse.

I highly recommend testing your soil.  Last I checked, it was $15 per sample, going through the Extension Office. The linked article was from 1990, that's why it says the test is $10.  They suggest testing yearly, but one year’s  test will at least tell you what your soil needs to start with.  This will save you headaches, using the wrong fertilizer, or too much/not enough fertilizer.  Definitely worth it.  You'll earn the cost of the test back in fertilizer!   The article on this link is Testing Your Soil:  http://extension.usu.edu/files/publications/factsheet/HG_H_05.pdf   Typically I do 3-4 samples in my yard- front, back, side, and garden location.  Yes, there have ALWAYS been significant differences.

One more good article to read before you start; "Preparing and Improving Garden Soil" http://extension.usu.edu/files/publications/factsheet/pub__8066784.pdf 

For when to put your seeds in the ground, here's "Suggested Vegetable Planting Dates for the Wasatch Front", http://extension.usu.edu/files/publications/publication/Horticulture_Garden_2009-01pr.pdf

Hopefully this wasn't too big of a load to dump on you- just read what you can get to.  The above is good, basic, start-from-scratch information.   Do you have more specific questions?  The USU extension site will probably have an answer...

Good seed sources:  http://miniag.com/?page_id=316 (family business in Colorado, most seeds are $1 per packet, which is very good) http://www.seedstrust.com (specializing in non-hybrid, high-elevation- short season-, and heirloom seeds- with the best selection of tomatoes I’ve ever seen!), http://gurneys.com (they also have a coupon for $25 off a $50 order.  Most of my fruit trees have come from there), most grocery stores, Walmart, Lowe’s, Home Depot, local nurseries. IFA in Riverton (1926 W 12600 S) has bulk seeds- peas, corn, green beans.  I got a half pound of peas for the same price as a less-than-one-ounce packet.   

  It turns out that orange (or any citrus) peel is full of nutrition.  According to Answers.com, “One may be surprised to find that there is 2,000% of the daily recommended value of vitamin C, 100% of the daily recommended value of Calcium, and 90% of the daily recommended value of vitamin A in any type of orange peel.”     I certainly was surprised!  The pith (white part, bitter) is also very high in pectin, which is why marmalade thickens so well.  Pectin is a great fiber for your body and is a prebiotic.  Prebiotics help the probiotics live happily inside you. Compounds in citrus peel has shown in studies to be as effective as statin drugs for lowering LDL cholesterol.  Who knew?  All this means that if you’ve been saving and storing your orange peel (dried and ground up, or otherwise), you’ve been stashing away a multivitamin!

Homemade Orange Flavoring- preserving orange zest; this works for any citrus as well. 

Wash and dry 3-4 oranges.  (or as many as you like)

Use a vegetable peeler to peel all the orange off the outside. (eat the oranges!) Spread the peels on a plate, and let dry out for a couple days, until they’re thoroughly dry.  Drop them in a blender or food processor, add 1 Tbsp sugar for each orange you had, and run on high until peel is very finely chopped.  Store in an old spice jar, baby food jar, or a small jelly jar.  Label it.  2 Tablespoons gives you the zest of one orange, enough to flavor a batch of about anything; muffins, cakes, cookies, pancakes, whatever.  Use it in place of part of the recipe’s sugar. Also good as part of a spice rub for meats.

You don’t really need to add sugar, but it seems to help the zest hold its flavor longer, and makes it easier to have enough in the blender for it to chop well. If you’re not using sugar, 1 Tbsp. is the zest of one orange.


Another way to preserve oranges is


Easy Orange Marmalade

1 orange, washed well
Sugar or honey

Cut the orange into quarters, and put it, peel and all, in a blender or food processor.  Turn on and let it chop as fine or coarse as you like your marmalade. Look at how much puree you have, and use that same amount of sugar or honey.  Put the puree and sugar  in a saucepan and heat on high until it boils.  Simmer for 5 minutes, until everything is translucent.  You’re done.  Makes 1- 1 ½ cups, depending on your orange.  Or make a big batch, this will take more like 10 minutes of simmering.  Pour into jars, seal if you want to store it for a year or more.  I’ve kept it in unsealed jars in the refrigerator for 9-10 months before. They might have lasted longer, but we ate them first. 

Do you ever have oranges start to shrivel and dry out?  Turn them into marmalade, even if the peels are hard as leather.  It’s also delicious to make lemon or lime marmalade, or a mixture.  The lemon is my favorite, especially using just a bit of salt and vanilla – 1/8 tsp. salt, ¼ tsp. vanilla per cup of puree.

You can use marmalade as the sweetener in recipes; a cup of it has about ¾ c. sugar.  I love it in muffins.

Candied Orange Peels (short version instructions): save peels from 5-8 oranges, boil them in 3 changes of water, drain, cut in strips with scissors, simmer til translucent in 2 c. sugar and ½ water.  Roll in extra sugar while still warm. 

I usually keep these in a container in the fridge, but I've sealed them in jars (10 minutes in a boiling-water bath) when still hot, and also dry-sealed them after letting them thoroughly dry out on top of the cupboards for a week or two.
0 Comments

Cooking and storing pumpkins, root cellaring

10/16/2010

0 Comments

 
Picture
You can even store summer squash alongside your pumpkins, if the summer squash is very mature, with a hard rind.

Picture
A bowl of thick, tasty Pumpkin Chili.  Don't tell your kids, and they'll never know....
Want to know what nutrients you're getting with that pumpkin?  A whole cup of it has only 49 calories, but is loaded with fiber, Vitamin C, riboflavin, potassium, and lots and lots of Vitamin A.  For the numbers, see nutrition for cooked pumpkin puree.
For the facts on its seeds, which are a great source of protein, Omega-6's, magnesium, potassium, zinc, copper, and manganese, see nutrition for pumpkin seeds.

Hi everyone,

This week we had a pumpkin class at my house.  It was fun, and I think everyone learned at least one new thing.  I have two different ‘handouts’; one is the Pumpkin class handout, two pages from the class; the other is a big collection of recipes I started in college, The Great Pumpkin Cookbook  (If it won't load, get it in two parts, here: The Great Pumpkin Cookbook part 1 and The Great Pumpkin Cookbook part 2).  I had asked a roommate if I could have her jack-o-lantern after Halloween.  When I told her I was going to make pie out of it, she incredulously responded with, “You can do that?  How?”  So I started by typing up instructions, and one thing lead to another…    

The Great Pumpkin Cookbook includes information on cooking pumpkin, canning, dehydrating, freezing, and ‘root cellar’ing it, plus things like Pumpkin Cheesecake, Pumpkin Shake, and Pumpkin Pancakes.  

If you want to learn more about storing vegetables through the winter, with or without a ‘real’ root cellar, click on Storing Vegetables At Home, which is a chart and information from the Wisconsin Extension Office.  
 

Here’s something to chew on, from the LDS Family Home Storage pamphlet; italics are mine:

Dear Brothers and Sisters:

Our Heavenly Father created this beautiful earth, with all its abundance,
for our benefit and use. His purpose is to provide for our needs
as we walk in faith and obedience. He has lovingly commanded us to
“prepare every needful thing” (see D&C 109:8) so that, should adversity
come, we may care for ourselves and our neighbors and support bishops
as they care for others.
We encourage Church members worldwide to prepare for adversity
in life by having a basic supply of food and water and some money in savings.  

 
And another, related, quote:

“Can we see how critical self-reliance becomes when looked upon as the prerequisite to service, when we also know service is what godhood is all about? Without self-reliance one cannot exercise these innate desires to serve. How can we give if there is nothing there? Food for the hungry cannot come from empty shelves. Money to assist the needy cannot come from an empty purse. Support and understanding cannot come from the emotionally starved. Teaching cannot come from the unlearned. And most important of all, spiritual guidance cannot come from the spiritually weak.  President Heber J. Grant declared, “Nothing destroys the individuality of a man, a woman, or a child as much as the failure to be self-reliant.”  -The Celestial Nature of Self-Reliance, Marion G. Romney

 
I challenge you to expand your home storage efforts, to find some part of it to learn more about, to try for the first time (or try better for the second-- or tenth-- time), to do something that will help you become a little bit more self-reliant. The Lord doesn’t ask us to do everything, all at once, but he does ask us to be diligent.  (See Mosiah 4: 27)  I know our capacity and freedom will increase as we do this.

-Rhonda

Here's some great information I found at http://www.americanpreppersnetwork.net/viewtopic.php?f=122&t=2166
"Only fresh and sound produce should be root-cellared. The food should be free from cuts, cracks, bruises, insects and mechanical damage. When I prepare produce for winter storage, I inspect it carefully. Items with any damage are either eaten quickly or canned or frozen. Apples and pears can be made into sauce, squash roasted and frozen, and beets pickled.

Quantities for a family of four:

Apples: 5 bushels
Carrots: 40 to 60 pounds
Cabbage: green, 20 heads; red, 10 heads
Beets: 20 pounds
Celeriac: (celery root, use instead of celery) 10 to 20 heads
Leeks: 40 plants
Potatoes: 100 pounds or more
Jerusalem artichoke: 10 pounds
Onions: 40 pounds
Garlic: 10 to 20 pounds
Winter radish: 10
Parsnip: 20 pounds
Squash: 40 ‘Delicata’ and 30 pounds butternut
Pumpkin: 5 to 10
Turnip and rutabaga: 10 or more"
0 Comments

Our divinely inspired Constitution, easy homemade pizza

9/17/2010

0 Comments

 
 Happy Constitution Day!   It was signed on September 17 in 1787. For a wonderful article on it, see “The Divinely Inspired Constitution”, Dallin H. Oaks, at http://lds.org/ldsorg/v/index.jsp?locale=0&sourceId=729d94bf3938b010VgnVCM1000004d82620a____&vgnextoid=2354fccf2b7db010VgnVCM1000004d82620aRCRD     It has three main sections: its amazing creation and ratification, inspiration (what parts in it are divinely inspired?), and citizen responsibilities.  You’ll finish it with a renewed sense of appreciation and wonder.

 Shifting over to food now, are you finding enough things to do with all the wonderful produce right now?  I had to laugh when I saw a big, abandoned zucchini right in the middle of the road last week.  All those urban legends came to mind about people’s desperation to get rid of the squash.  (Freeze it!  Dry it!  Slice it and pretend it’s pasta in recipes!)

 I have two main recipes I make when I need to use up odds and ends:  soup, and pizza.  You can make pizza just about as fast as running down to Little Caesar’s, and it’s much better.  I make a batch of bread every week (the six-loaf batch holds us, and fills the oven), and as often as not, bread-baking day is Pizza Day.  This way I already have the dough, so it’s a no-brainer for dinner.  If you make the dough in the morning, you can keep a chunk in the fridge until almost dinner time.  If you’re making the dough that afternoon, you can let it rise, punch it down, let it rise, punch it down,….repeat until you’re ready for it!  Or even just use it without letting it rise first.   One loaf’s worth of dough (1 to 1 ½ lbs) is a good amount to fill a 12x18 cookie sheet.  To keep it from sticking to the pan, either grease or oil it, or sprinkle it with cornmeal or Cream of Wheat (coarsely ground wheat).  If you like a crispy crust, preheat the cookie sheet with 2-3 Tbsp. olive oil on it.  Or bake it on a  pizza stone.  Roll the dough out, and bake it at 425 degrees (really, any temperature between 325 and 450) until it’s just set (no longer doughy), then add toppings and bake or broil until the cheese is melted.  You can even bake some crusts ahead of time; bake for 5-10 minutes at 425, cool, wrap, and freeze.  The Basic Bread recipe is also posted on this site.
 

My basic pizza sauce is:  

one (8 oz) can tomato sauce

garlic powder (1/2 tsp.) or minced garlic (1-2 cloves)

a couple shakes of black pepper

spices: total of around 1 tsp. of whatever sounds good- oregano, basil, thyme, fennel seeds (great but go LIGHT on this one), rosemary

 
But what it really looks like, when I cook, is: open one can of tomato sauce, and to the top of the can add a couple shakes each of garlic powder and black pepper (if I feel like it), and then a few shakes each of 2-3 kinds of my ‘green spices’ (the ones listed, above).  Stir it, kind of, then spread it on the baked crust.  Sometimes I have part of a jar of spaghetti sauce sitting in the fridge.  That makes a good pizza sauce, too. So does barbecue sauce.  Or Alfredo.  Whatever you have that needs used.

 
If you have a bunch of tomatoes, you can use a bunch of them on the pizza, sliced or diced,  and skip the sauce.  You already know the standard toppings; other topping ideas are:

-       Shredded zucchini (yes, really.  Especially if it’s hidden under the cheese)

-       Shredded carrots (hides  especially well under Cheddar)

-       Chopped up spinach or chard leaves

-       Onions or green onions,  bell peppers

-       Leftover bits of meat  (whatever lonely thing is sitting around gets added to our pizzas)- ham, deli meat, bacon, summer sausage from last Christmas (those things last forever!), crumbled hamburger patties, chicken, etc.

 
And of course you can always look at your favorite pizza chain’s menu to get more topping ideas.

                                               
You can also make breadsticks or dessert sticks/pizza out of the dough.   To make simple breadsticks, roll out the dough, cut into strips with your pizza cutter.  Bake, then brush with melted butter, sprinkle with Parmesan and garlic powder.  Dip in spaghetti sauce or pizza sauce.  For dessert sticks, roll and cut them the same, but roll in melted butter and then in a mix of cinnamon and sugar.  Then bake.  Dip in applesauce or drizzle with glaze (1 cup powdered sugar, 1 tsp. vanilla, and 1-2 Tbsp. milk or water)


m

Sep
0 Comments
Forward>>

    Need a Search bar?
    One day I may upgrade my website-- but until then, use your web browser search bar. Type in my web address and what you're looking for, like this-- 
    www.theprovidenthomemaker.com  pumpkin --  and you should get results.


    Author

    I'm a disciple of Christ, a member of the Church of Jesus Christ of Latter-day Saints, a family-defending, homemaking, and homeschooling mom of eight children, two of whom sometimes can't have milk or wheat. Growing up on a farm in a high mountain valley, my parents taught me to 'make do', work hard, smile, and help others.  I love cooking, learning, growing food and flowers, picking tomatoes, and making gingerbread houses --which CAN be made allergy-friendly-- with my children.  I hope you find something to help you on my site!

    Archives

    April 2024
    July 2023
    April 2022
    September 2021
    March 2021
    December 2020
    April 2020
    March 2020
    February 2020
    January 2020
    December 2019
    November 2019
    October 2019
    September 2019
    August 2019
    July 2019
    June 2019
    May 2019
    April 2019
    January 2016
    November 2015
    October 2015
    September 2015
    March 2015
    February 2015
    November 2014
    October 2014
    September 2014
    August 2014
    July 2014
    June 2014
    May 2014
    April 2014
    March 2014
    February 2014
    January 2014
    December 2013
    November 2013
    October 2013
    September 2013
    August 2013
    July 2013
    June 2013
    May 2013
    April 2013
    March 2013
    February 2013
    January 2013
    December 2012
    November 2012
    October 2012
    September 2012
    August 2012
    July 2012
    June 2012
    May 2012
    April 2012
    March 2012
    February 2012
    January 2012
    December 2011
    November 2011
    October 2011
    September 2011
    August 2011
    July 2011
    June 2011
    May 2011
    April 2011
    March 2011
    February 2011
    January 2011
    December 2010
    November 2010
    October 2010
    September 2010

    Categories

    All
    Alcohol
    Alternate Cooking
    Appearances
    Apple
    Apricots
    April Fools
    Aprons
    Bananas
    Beans
    Beef
    Beets
    Bench
    Beverages
    Bonnet
    Bread
    Breakfast
    Budget
    Budgeting
    Cake
    Candy
    Canning
    Carrots
    Cheese
    Chicken
    Children
    Chocolate
    Christmas
    Cleaning
    Coconut
    Comfrey
    Common Core
    Constitution
    Cookbook
    Cookies
    Cooking Oil
    Crafts
    Dairy Substitutions
    Dehydrating
    Dessert
    Dried Fruit
    Earth Oven
    Earthquake
    Easter
    Edible Weeds
    Eggs
    Emergency Prep
    Essential Oils
    Faith
    Family Home Evening
    Fertilizing
    Food Storage
    Fourth Of July
    Freezer
    Frosting
    Fudge
    Garden
    Gardening
    Gingerbread
    Gluten
    Gluten Free
    Gold
    Government
    Grains
    Gratitude
    Hat
    Herbs
    Home Remedies
    Home Repairs
    Homeschool
    Home Storage
    Honey
    Hope
    Inflation
    Leftovers
    Legumes
    Lemon
    Main Dishes
    Mixes
    Mothers
    Noah
    Non Artificial Colors
    Non-artificial Colors
    Nuts
    Oats
    Oil
    Orange
    Paint
    Peaches
    Pear
    Pie
    Pizza
    Plums
    Poem
    Popcorn
    Pork
    Potatoes
    Powdered Milk
    Prayer
    Preparedness
    Projects
    Prophecy
    Pruning
    Pumpkin
    Quick Bread
    Rhubarb
    Rice
    Salad
    Salt
    Sauces
    Self Reliance
    Self-reliance
    Sewing
    Shelf Life
    Shelves
    Sky
    Smoothie
    Snacks
    Soup
    Spices Or Seasonings
    Squash
    Strawberries
    Substitutions
    Sugar
    Summer Fun
    Three Month Supply
    Time
    Tomatoes
    Trees
    Truffles
    T-shirts
    Tuna
    Ultra Gel
    Valentine\'s Day
    Vegetables
    Water
    Watermelon
    Wheat
    Work
    Year Supply
    Zucchini

    RSS Feed

Web Hosting by iPage